
CNN入门,用MNIST训练模型,并识别自己手写数字
大家一般入门的时候,都会跑这个代码,但是很少有人拿来识别自己的手写体,今天我试了下,效果还挺好的。
原理不懂的,可以看看这个3D的可视化视频。
一、构建CNN模型
from keras import layersfrom keras import modelsmodel = models.Sequential()model.add(layers.Conv2D(32, (3, 3),activation='relu',input_shape=(28, 28, 1)))model.add(layers.MaxPooling2D((2, 2)))model.add(layers.Conv2D(64, (3, 3), activation='relu'))model.add(layers.MaxPooling2D((2, 2)))model.add(layers.Conv2D(64, (3, 3), activation='relu'))model.add(layers.Flatten())model.add(layers.Dropout(0.25))model.add(layers.Dense(64, activation='relu'))model.add(layers.Dense(10, activation='softmax'))
卷积神经网络接收形状为(image_height, image_width, image_channels)的输入张量(不包括批量维度)。本例中设置卷积神经网络处理大小为(28, 28, 1) 的输入张量,这正是MNIST 图像的格式。我们向第一层传入参数input_shape=(28, 28, 1) 来完成此设置。我们来看一下目前卷积神经网络的架构。
model.summary()Model: "sequential"_________________________________________________________________Layer (type) Output Shape Param #=================================================================conv2d (Conv2D) (None, 26, 26, 32) 320_________________________________________________________________max_pooling2d (MaxPooling2D) (None, 13, 13, 32) 0_________________________________________________________________conv2d_1 (Conv2D) (None, 11, 11, 64) 18496_________________________________________________________________max_pooling2d_1 (MaxPooling2 (None, 5, 5, 64) 0_________________________________________________________________conv2d_2 (Conv2D) (None, 3, 3, 64) 36928_________________________________________________________________flatten (Flatten) (None, 576) 0_________________________________________________________________dropout (Dropout) (None, 576) 0_________________________________________________________________dense (Dense) (None, 64) 36928_________________________________________________________________dense_1 (Dense) (None, 10) 650=================================================================Total params: 93,322Trainable params: 93,322Non-trainable params: 0_________________________________________________________________
二、图片下载与查看
from keras.datasets import mnistfrom keras.utils import to_categoricalfrom keras import datasets(train_images,train_labels), (test_images,test_labels) = mnist.load_data()dir(datasets)#可以看看内置的所有数据集
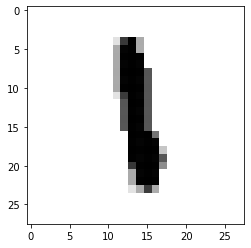
查看图片
import matplotlib.pyplot as pltplt.imshow(train_images[200] , cmap=plt.cm.binary)plt.show()
三、模型训练&准确率评估
train_images = train_images.reshape((60000, 28, 28, 1))train_images = train_images.astype('float32') / 255train_labels = to_categorical(train_labels)test_images = test_images.reshape((10000, 28, 28, 1))test_images = test_images.astype('float32') / 255test_labels = to_categorical(test_labels)model.compile(optimizer='rmsprop',loss='categorical_crossentropy',metrics=['accuracy'])model.fit(train_images, train_labels, epochs=5, batch_size=64)test_loss, test_acc = model.evaluate(test_images, test_labels)test_acc0.9914000034332275
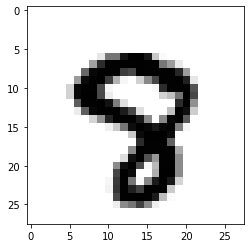
#看看预测的到底准不准呢
y_pred = model.predict(test_images)import numpy as nppred = np.argmax(y_pred, axis=1)import matplotlib.pyplot as plt#看看第2990个数字是啥,我们预测的是8,看看图片也是8,挺准的steps = 2990print('pred: ',pred[steps])pred: 8plt.imshow(test_images[steps] , cmap=plt.cm.binary)plt.show()
四、预测自己的手写数字
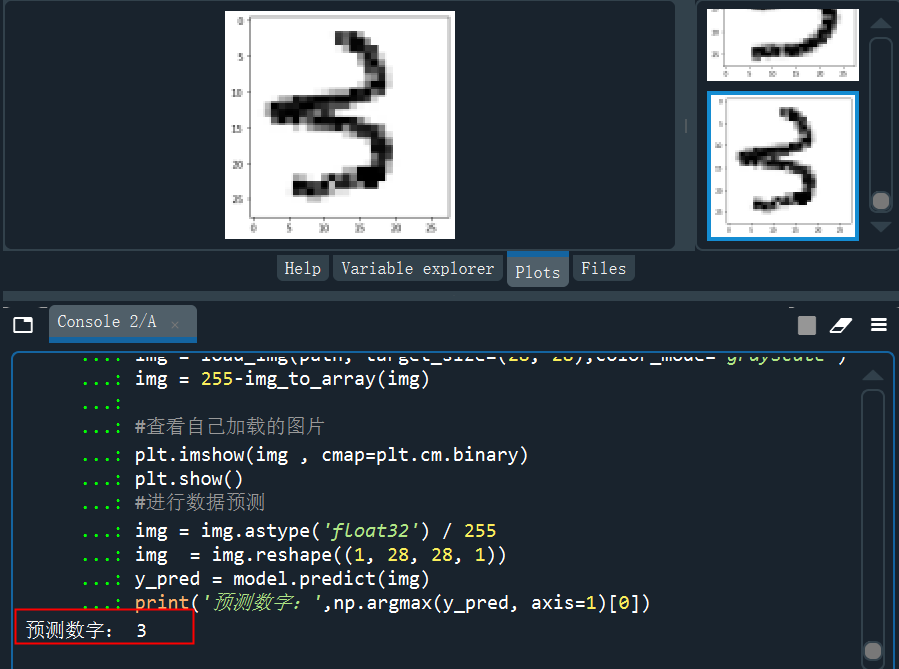
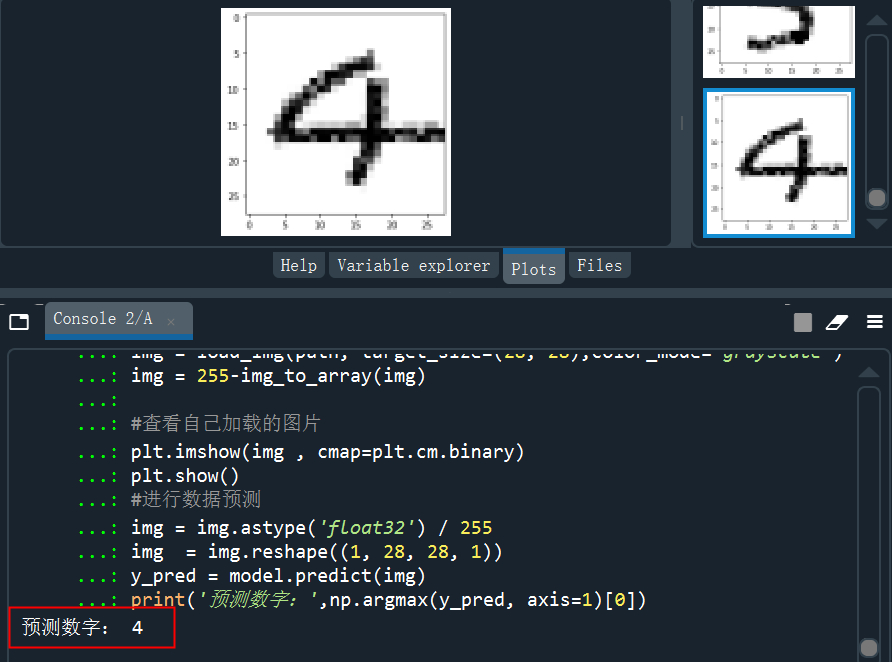
模型训练好了,准确率挺高,但是实际有没有用,还需要用自己的数据进行测试,打开自己在画图板里面随便写几个数字,然后单个截图保存后进行预测。
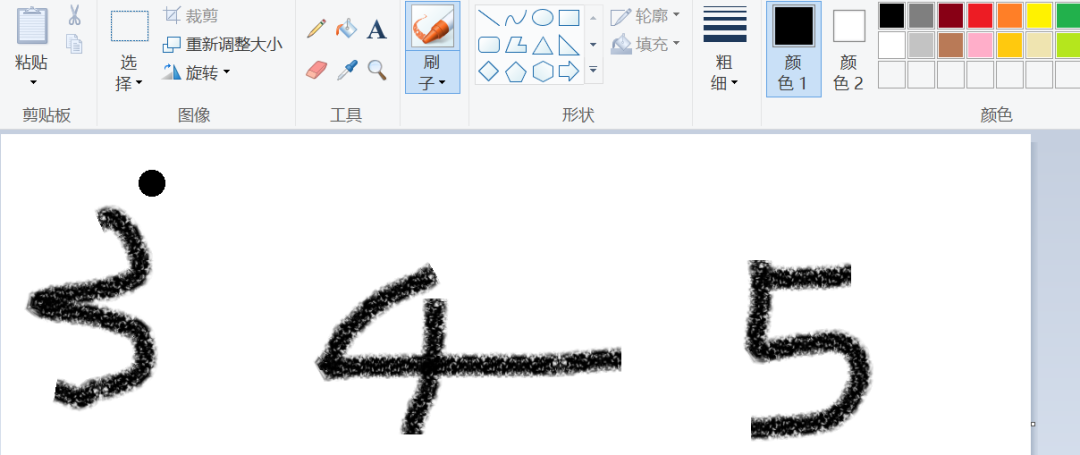
分别截图后保存成img3、img4、img5......,下面进行预处理,处理成和模型训练一样的数据才能预测。
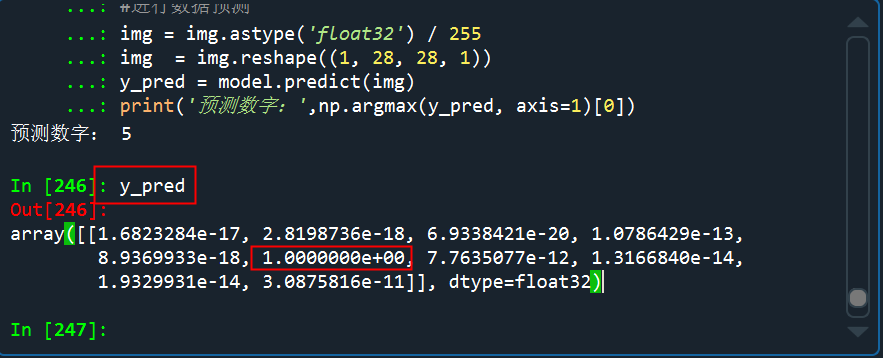
from keras.preprocessing.image import load_img,img_to_arrayimport matplotlib.pyplot as pltimport numpy as nppath = 'C:/Users/伍正祥/Desktop/img5.jpg'#读取图片、调整图片大小,转换成灰度 help(load_img)img = load_img(path, target_size=(28, 28),color_mode="grayscale")#255-为了调成白底,系统灰度转换自动给处理成黑底了img = 255-img_to_array(img)#查看自己加载的图片plt.imshow(img , cmap=plt.cm.binary)plt.show()#进行数据预测img = img.astype('float32')/255img = img.reshape((1, 28, 28, 1))y_pred = model.predict(img)print('预测数字:',np.argmax(y_pred, axis=1)[0]
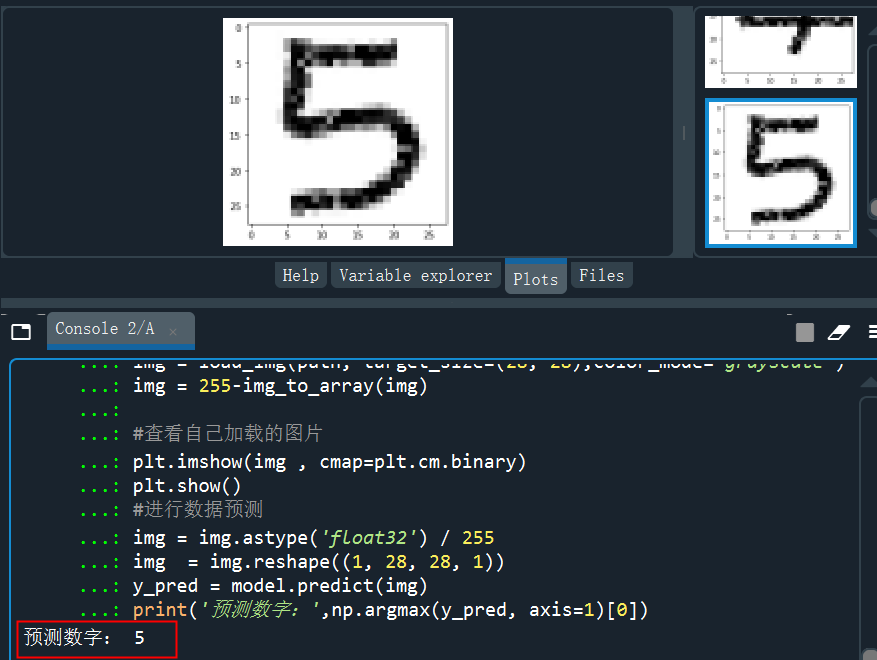
看看预测的概率分布,是5的概率几乎接近于1
从测试的结果来看,预测效果还是非常不错的,多试几次,也有预测错的,但是错的概率比较小。
很多作业检查的APP,其中也是用到了手写体的识别,基本上原理估计也和这种差不多,只是对于作业的检查,还需要进行目标检测。
推荐阅读:
长按加群,学习交流
↓扫描关注本号↓
评论