【CV】使用 OpenCV 进行图像中的性别预测和年龄检测

照片中的面部分析引起了人们的广泛关注,因为它可以帮助我们解决各种问题,包括更好的客户广告定位、更好的内容推荐系统、安全监控和其他领域。
年龄和性别是面部特征的重要方面,确定它们是此类活动的先决条件。许多企业出于各种原因使用这些技术,包括更轻松地与客户合作、更好地适应他们的需求以及提供良好的体验。人们的性别和年龄使得识别和预测他们的需求变得更加容易。
即使对我们人类来说,从图像中检测性别和年龄也很困难,因为它完全基于外表,有时很难预测,同龄人的外表可能与我们预期的截然不同。
在监控计算机视觉中,经常使用年龄和性别预测。计算机视觉的进步使这一预测变得更加实用,更容易为公众所接受。由于其在智能现实世界应用中的实用性,该研究课题取得了重大进展。
一个人的身份、年龄、性别、情绪和种族都是由他们脸上的特征决定的。年龄和性别分类是其中的两个特征,在各种实际应用中特别有用,包括
安全和视频监控
人机交互
生物识别技术
娱乐
还有很多。
现在让我们学习如何使用 Python 中的 OpenCV 库通过相机或图片输入来确定年龄和性别。
使用的框架是 Caffe,用于使用原型文件创建模型。
让我们开始吧,如果我们还没有安装 OpenCV,请确保已经安装了它。
pip install opencv-python numpy第 1 步:导入库
# Import required modulesimport cv2 as cvimport mathimport timefrom google.colab.patches import cv2_imshow
第 2 步:在框架中查找边界框坐标
使用下面的用户定义函数,我们可以获得边界框的坐标,也可以说人脸在图像中的位置。
def getFaceBox(net, frame, conf_threshold=0.7):frameOpencvDnn = frame.copy()frameHeight = frameOpencvDnn.shape[0]frameWidth = frameOpencvDnn.shape[1]blob = cv.dnn.blobFromImage(frameOpencvDnn, 1.0, (300, 300), [104, 117, 123], True, False) net.setInput(blob)detections = net.forward()bboxes = []for i in range(detections.shape[2]):confidence = detections[0, 0, i, 2]if confidence > conf_threshold:x1 = int(detections[0, 0, i, 3] * frameWidth)y1 = int(detections[0, 0, i, 4] * frameHeight)x2 = int(detections[0, 0, i, 5] * frameWidth)y2 = int(detections[0, 0, i, 6] * frameHeight)y1, x2, y2])(x1, y1), (x2, y2), (0, 255, 0), int(round(frameHeight/150)), 8)return frameOpencvDnn, bboxes
第 3 步:加载模型和权重文件
项目目录中必须包含以下文件:
gender_net.caffemodel:用于性别检测的预训练模型权重。
deploy_gender.prototxt:性别检测模型的模型架构。
age_net.caffemodel:用于年龄检测的预训练模型权重。
deploy_age.prototxt:年龄检测模型的模型架构。
res10_300x300_ssd_iter_140000_fp16.caffemodel:用于人脸检测的预训练模型权重。
deploy.prototxt.txt:人脸检测模型的模型架构。
我们有一个用于人脸检测的 .pb 文件,它是一个 protobuf 文件(协议缓冲区),其中包含模型的图形定义和训练权重。这就是我们将用来执行经过训练模型的内容。虽然.pb 文件包含二进制格式的 protobuf,但.pbtxt 文件包含文本格式的 protobuf。包含 TensorFlow 文件。.prototxt 文件提供了年龄和性别的网络配置,而 .caffemodel 文件定义了图层参数的内部状态。
然后,对于人脸、年龄和性别检测模型,定义权重和结构变量。
faceProto = "/content/opencv_face_detector.pbtxt"faceModel = "/content/opencv_face_detector_uint8.pb"ageProto = "/content/age_deploy.prototxt"ageModel = "/content/age_net.caffemodel"genderProto = "/content/gender_deploy.prototxt"genderModel = "/content/gender_net.caffemodel"
第 4 步:年龄和性别类别列表
设置模型的平均值以及要从中进行分类的年龄组和性别列表。
MODEL_MEAN_VALUES = (78.4263377603, 87.7689143744, 114.895847746)ageList = ['(0-2)', '(4-6)', '(8-12)', '(15-20)', '(25-32)', '(38-43)', '(48-53)', '(60-100)']genderList = ['Male', 'Female']
第 5 步:加载网络
要加载网络,请使用 readNet() 方法。第一个参数用于存储训练权重,第二个参数用于保存网络配置。
# Load networkageNet = cv.dnn.readNet(ageModel, ageProto)genderNet = cv.dnn.readNet(genderModel, genderProto)faceNet = cv.dnn.readNet(faceModel, faceProto)
第 6 步:预测性别和年龄的函数
下面的用户定义函数是 pipline 或者我们可以说是主要工作流程的实现,在该工作流程中,图像进入函数以获取位置,并进一步预测年龄范围和性别。
def age_gender_detector(frame):# Read framet = time.time()frameFace, bboxes = getFaceBox(faceNet, frame)for bbox in bboxes:# print(bbox)face = frame[max(0,bbox[1]-padding):min(bbox[3]+padding,frame.shape[0]-1),max(0,bbox[0]-padding):min(bbox[2]+padding, frame.shape[1]-1)]blob = cv.dnn.blobFromImage(face, 1.0, (227, 227), MODEL_MEAN_VALUES, swapRB=False)genderNet.setInput(blob)genderPreds = genderNet.forward()gender = genderList[genderPreds[0].argmax()]# print("Gender Output : {}".format(genderPreds))print("Gender : {}, conf = {:.3f}".format(gender, genderPreds[0].max()))ageNet.setInput(blob)agePreds = ageNet.forward()age = ageList[agePreds[0].argmax()]print("Age Output : {}".format(agePreds))print("Age : {}, conf = {:.3f}".format(age, agePreds[0].max()))label = "{},{}".format(gender, age)cv.putText(frameFace, label, (bbox[0], bbox[1]-10), cv.FONT_HERSHEY_SIMPLEX, 0.8, (0, 255, 255), 2, cv.LINE_AA)return frameFace
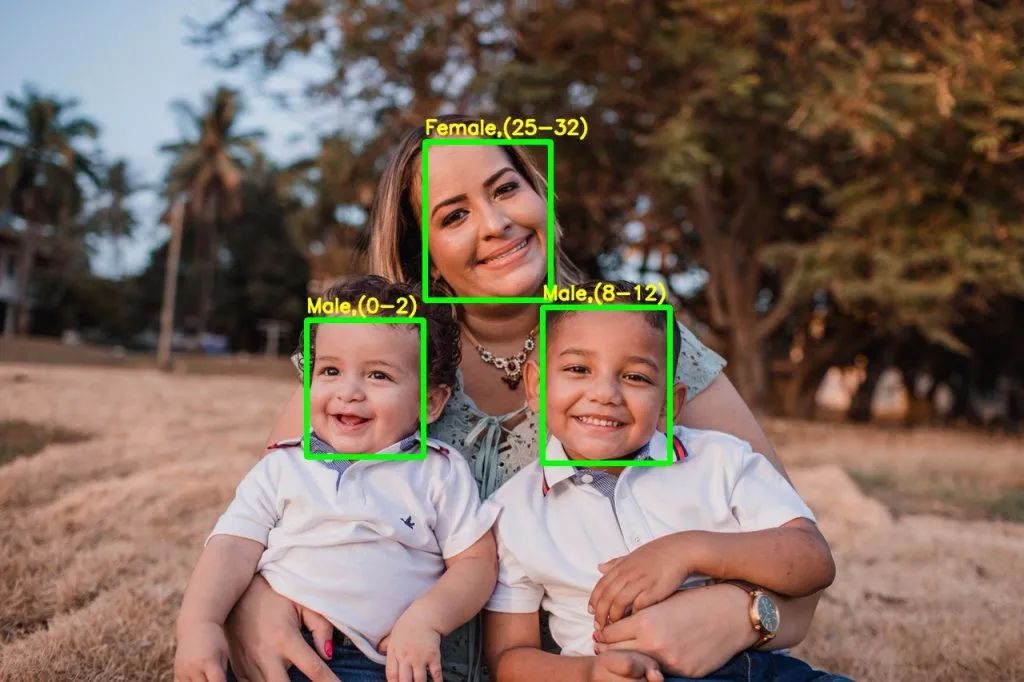
第 7 步:预测
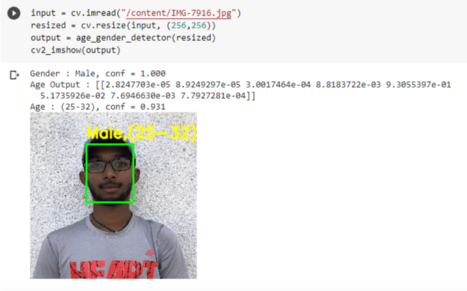
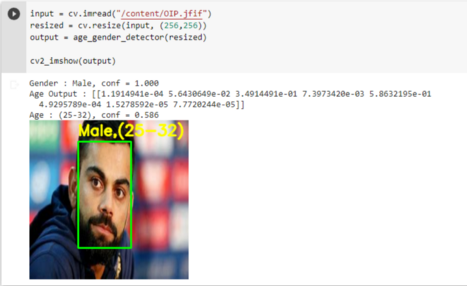
from google.colab import filesuploaded = files.upload()input = cv.imread("2.jpg")output = age_gender_detector(input)cv2_imshow(output)

在这里,我们可以看到性别预测的置信度为 1(100%),而年龄预测的置信度则要低一些,因为它很难确准。

往期精彩回顾 本站qq群955171419,加入微信群请扫码:
