使用Python+OpenCV+dlib为人脸生成口罩
点击上方“小白学视觉”,选择加"星标"或“置顶”
重磅干货,第一时间送达
推荐阅读
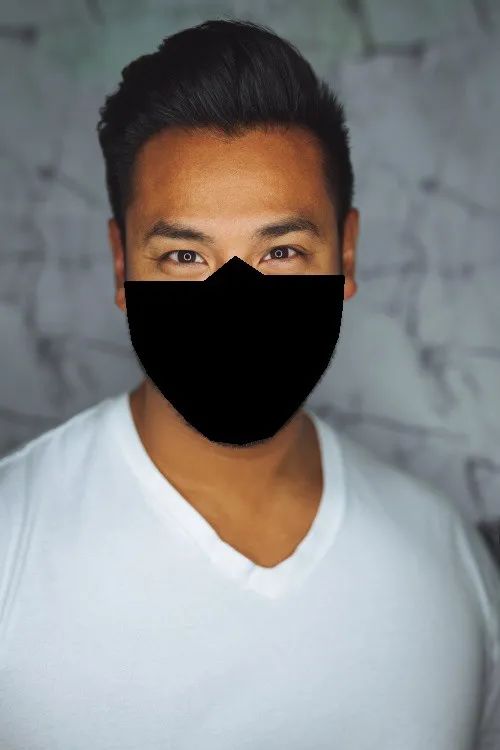
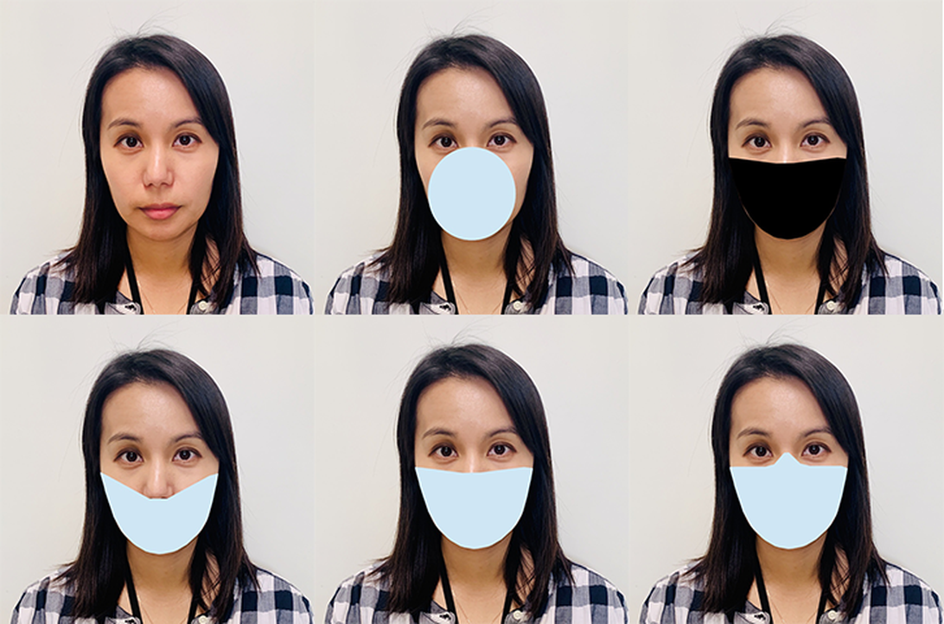
安装所需的软件包
    #requirements_facemask.txt
numpy == 1.18.5
pip == 20.2.2
imutils == 0.5.3
python >=3.7
dlib == 19.21.0
cmake == 3.18.0
opencv-python == 4.4.0
导入库
    # 必要的导入
import cv2
import dlib
import numpy as np
import os
import imutils
    # 设置目录
os.chdir('PATH_TO_DIR')
path = 'IMAGE_PATH'

# 初始化颜色 [color_type] = (Blue, Green, Red)
color_blue = (239,207,137)
color_cyan = (255,200,0)
color_black = (0, 0, 0)
图像预处理
    # 加载图像并调整大小,将其转换为灰度
img= cv2.imread('image_path')
img = imutils.resize(img, width = 500)
gray=cv2.cvtColor(img, cv2.COLOR_BGR2GRAY)
使用dlib、OpenCV和Python检测和提取人脸关键点
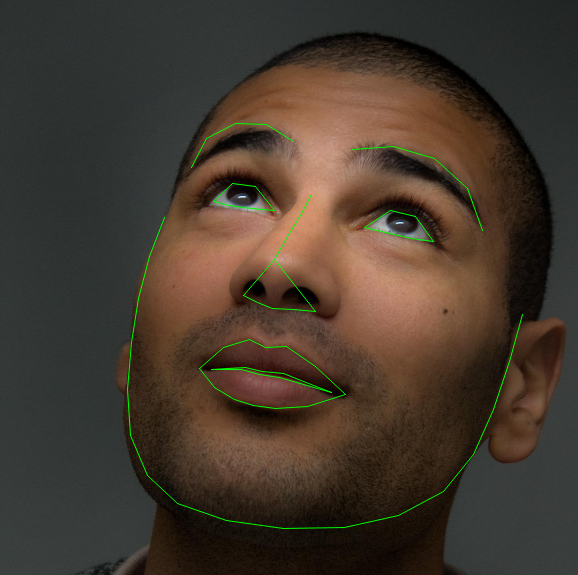
人脸关键点检测被定义为检测脸上的关键标志点并跟踪它们(对由于头部运动和面部表情而导致的刚性和非刚性面部变形具有鲁棒性)[来源]
什么是人脸关键点?
-
定位图像中检测到的人脸。 -
面部关键点的检测
-
鼻子 -
下颚线 -
左眼和右眼 -
左右眉 -
嘴
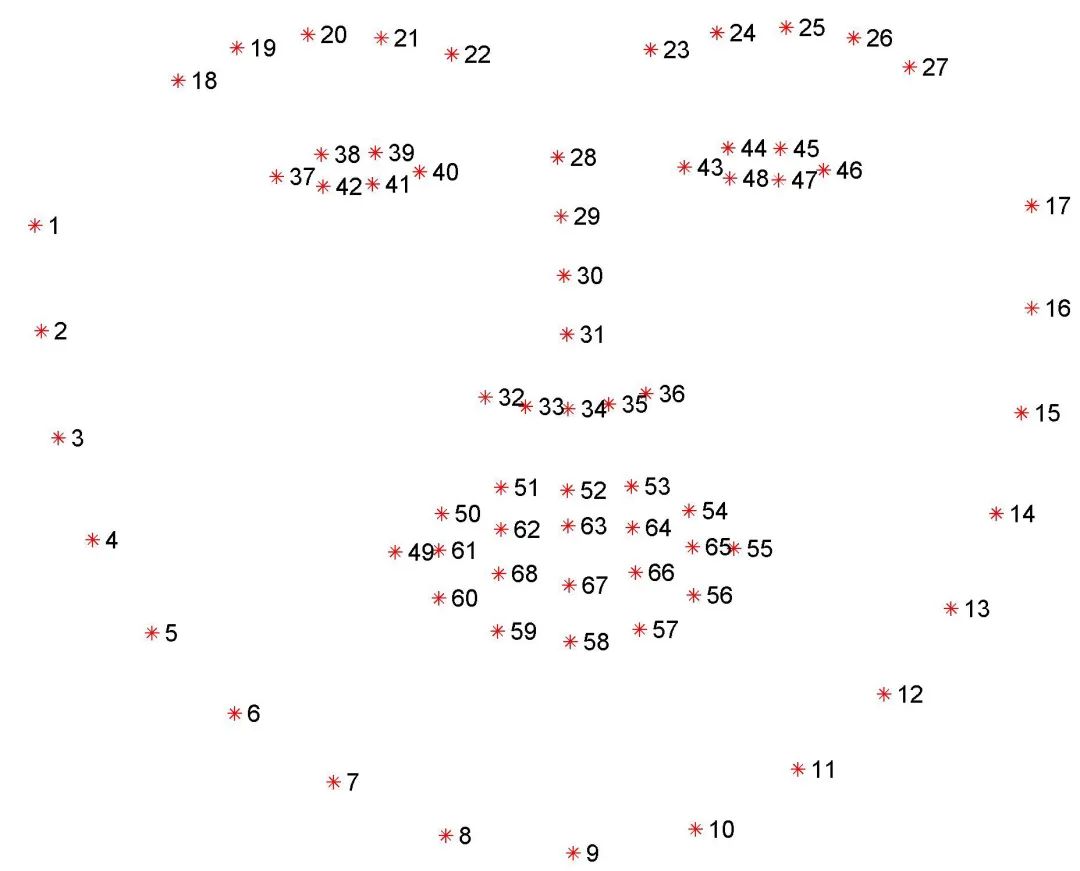
-
左眼:点[42,47] -
嘴:点[48,67] -
左眉:点[22,26] -
鼻子:点[27,34] -
右眉:点[17,21] -
右眼:点[36,41] -
下颚线:点[0,16]
人脸检测与人脸关键点检测
    # 初始化dlib的人脸检测器
detector = dlib.get_frontal_face_detector()

"""
在灰度图像中检测人脸并创建一个对象-存储边界矩形的坐标列表
第二个参数中的“1”表示应该向上采样图像1次。
这会使图像变得更大,并允许我们检测更多的面孔
"""

faces = detector(gray, 1)

# 打印边界矩形的坐标
print(faces)
print("Number of faces detected: ", len(faces))

"""
# 使用for循环来提取特定坐标(x1,x2,y1,y2)
for face in faces:
  x1 = face.left()
  y1 = face.top()
  x2 = face.right()
  y2 = face.bottom()
  # 在检测到的脸部周围画一个矩形
  cv2.rectangle(img, (x1,y1), (x2,y2),(0,255,0),3)
cv2.imshow("image", img)
cv2.waitKey(0)
cv2.destroyAllWindows()
"""
    # 文件路径
p = "shape_predictor_68_face_landmarks.dat"
# 初始化dlib的预测器
predictor = dlib.shape_predictor(p)

# 使用预测器获取外形

for face in faces:
    landmarks = predictor(gray, face)

    # for n in range(0,68):
    #     x = landmarks.part(n).x
    #     y = landmarks.part(n).y
    #     img_landmark = cv2.circle(img, (x, y), 4, (0, 0, 255), -1)
Dlib口罩方法
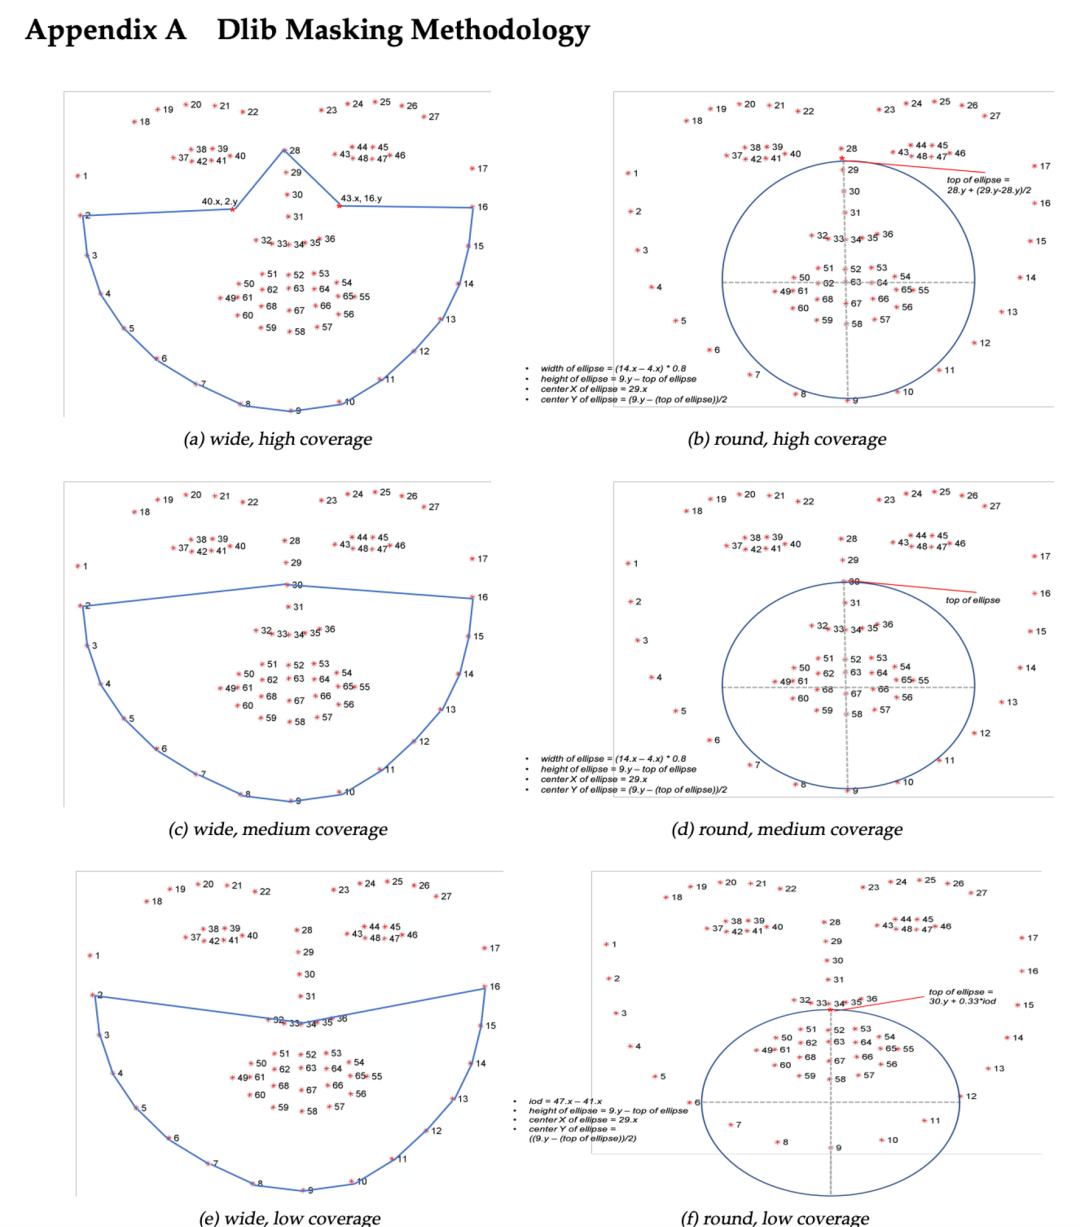
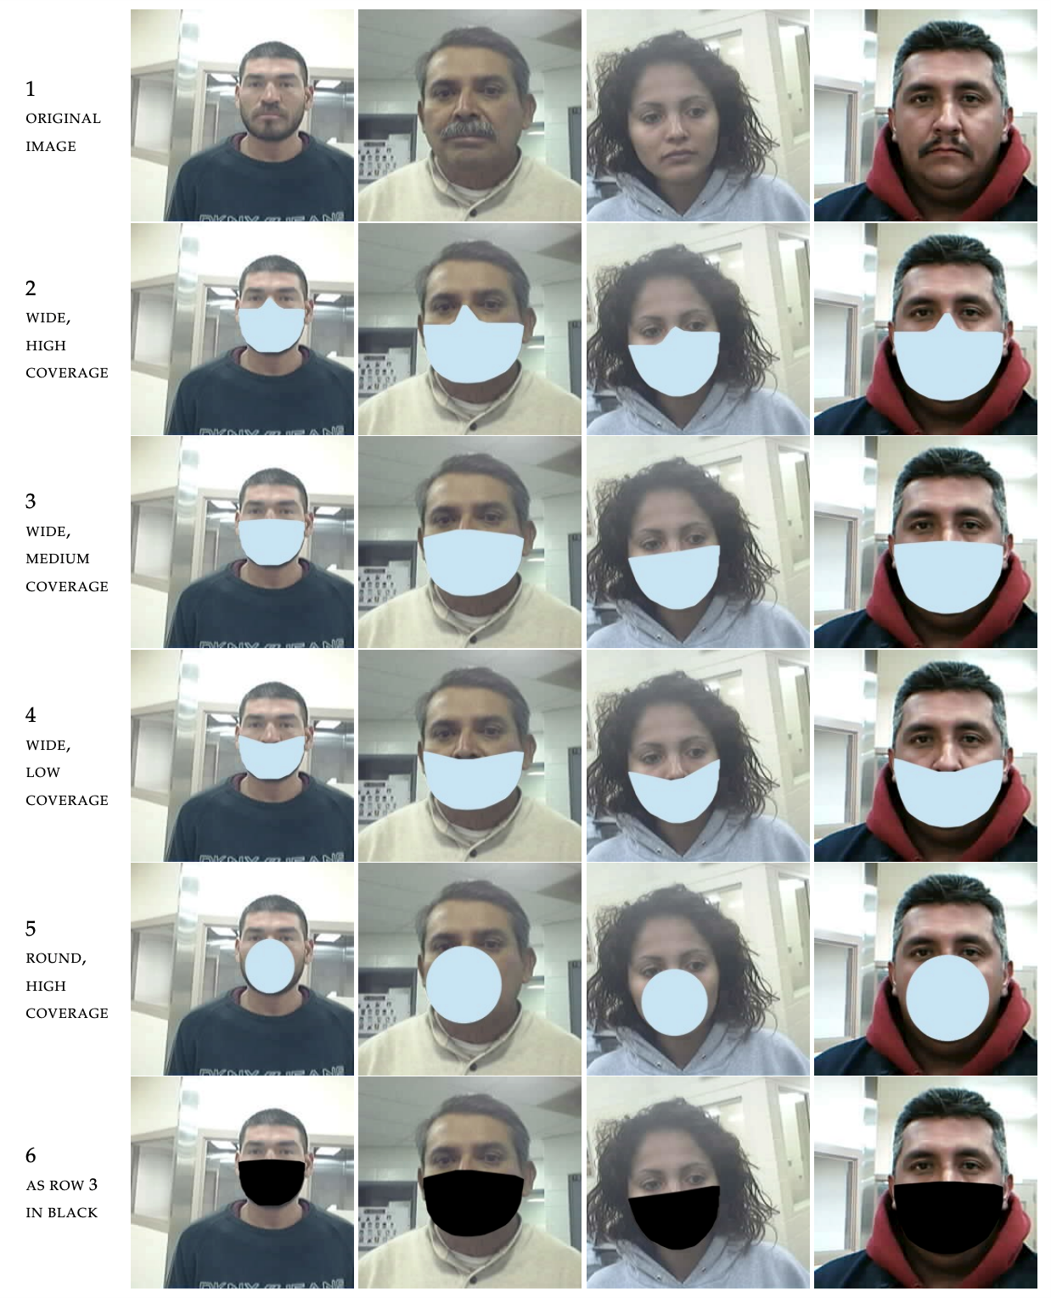
    points = []
    for i in range(1, 16):
        point = [landmarks.part(i).x, landmarks.part(i).y]
        points.append(point)
    # print(points)

    # 宽,高覆盖口罩
    mask_a = [((landmarks.part(42).x), (landmarks.part(15).y)),
              ((landmarks.part(27).x), (landmarks.part(27).y)),
              ((landmarks.part(39).x), (landmarks.part(1).y))]

    # 宽,中覆盖口罩
    mask_c = [((landmarks.part(29).x), (landmarks.part(29).y))]

    # 宽、低覆盖口罩
    mask_e = [((landmarks.part(35).x), (landmarks.part(35).y)),
              ((landmarks.part(34).x), (landmarks.part(34).y)),
              ((landmarks.part(33).x), (landmarks.part(33).y)),
              ((landmarks.part(32).x), (landmarks.part(32).y)),
              ((landmarks.part(31).x), (landmarks.part(31).y))]

    fmask_a = points + mask_a
    fmask_c = points + mask_c
    fmask_e = points + mask_e

    # mask_type = {1: fmask_a, 2: fmask_c, 3: fmask_e}
    # mask_type[choice2]


    # 使用Python OpenCV - cv2.polylines()方法为[mask_type]绘制口罩轮廓:
    # fmask_a = wide, high coverage mask,
    # fmask_c = wide, medium coverage mask,
    # fmask_e  = wide, low coverage mask

    fmask_a = np.array(fmask_a, dtype=np.int32)
    fmask_c = np.array(fmask_c, dtype=np.int32)
    fmask_e = np.array(fmask_e, dtype=np.int32)

    mask_type = {1: fmask_a, 2: fmask_c, 3: fmask_e}
    mask_type[choice2]


    # 更改参数[mask_type]和color_type用于各种组合
    img2 = cv2.polylines(img, [mask_type[choice2]], True, choice1, thickness=2, lineType=cv2.LINE_8)

    # 使用Python OpenCV - cv2.fillPoly()方法填充口罩
    # 更改参数[mask_type]和color_type用于各种组合
    img3 = cv2.fillPoly(img2, [mask_type[choice2]], choice1, lineType=cv2.LINE_AA)

# cv2.imshow("image with mask outline", img2)
cv2.imshow("image with mask", img3)

# 为测试保存输出文件
outputNameofImage = "output/imagetest.jpg"
print("Saving output image to", outputNameofImage)
cv2.imwrite(outputNameofImage, img3)
        points = []
    for i in range(1, 16):
        point = [landmarks.part(i).x, landmarks.part(i).y]
        points.append(point)
    # print(points)

    # 椭圆参数为高,圆形是覆盖口罩
    top_ellipse = landmarks.part(27).y + (landmarks.part(28).y - landmarks.part(27).y) / 2
    centre_x = landmarks.part(28).x
    centre_y = landmarks.part(8).y - ((landmarks.part(8).y - (top_ellipse)) / 2)
    # 椭圆高度
    axis_major = (landmarks.part(8).y - top_ellipse) / 2
    # 椭圆宽度
    axis_minor = ((landmarks.part(13).x - landmarks.part(3).x) * 0.8) / 2

    centre_x = int(round(centre_x))
    centre_y = int(round(centre_y))
    axis_major = int(round(axis_major))
    axis_minor = int(round(axis_minor))

    centre = (centre_x, centre_y)
    axes = (axis_major, axis_minor)

    # 使用Python OpenCV - cv2.ellipse()方法绘制口罩轮廓
    # 更改最后一个参数- line thickness和color_type为各种组合
    img_2 = cv2.ellipse(img, centre, axes, 0, 0, 360, color_type, thickness=2)


    # 使用Python OpenCV - cv2.ellipse()方法绘制口罩轮廓
    # 更改最后一个参数-line thickness为负数用于填充,color_type用于各种组合
    img_3 = cv2.ellipse(img, centre, axes, 0, 0, 360, color_type, thickness=-1)

# cv2.imshow("image with mask outline", img_2)
cv2.imshow("image with mask", img_3)
    # 使用input()函数根据用户需求获取口罩类型和口罩颜色
choice1 = input("Please select the choice of mask color\nEnter 1 for blue\nEnter 2 for black:\n")
choice1 = int(choice1)

if choice1 == 1:
    choice1 = color_blue
    print('You selected mask color = blue')
elif choice1 == 2:
    choice1 = color_black
    print('You selected mask color = black')
else:
    print("invalid selection, please select again.")
    input("Please select the choice of mask color\nEnter 1 for blue\nEnter 2 for black :\n")


choice2 = input("Please enter choice of mask type coverage \nEnter 1 for high \nEnter 2 for medium \nEnter 3 for low :\n")
choice2 = int(choice2)

if choice2 == 1:
    # choice2 = fmask_a
    print(f'You chosen wide, high coverage mask')
elif choice2 == 2:
    # choice2 = fmask_c
    print(f'You chosen wide, medium coverage mask')
elif choice2 == 3:
    # choice2 = fmask_e
    print(f'You chosen wide, low coverage mask')
else:
    print("invalid selection, please select again.")
    input("Please enter choice of mask type coverage \nEnter 1 for high \nEnter 2 for medium \nEnter 3 for low :\n")

# print(choice2)
结果

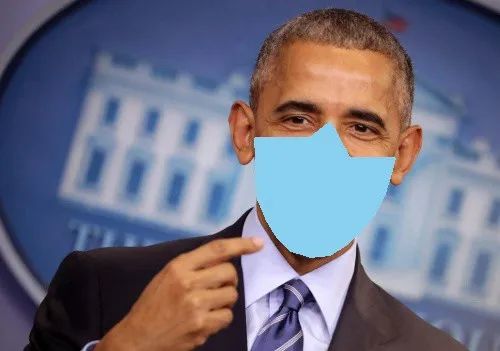
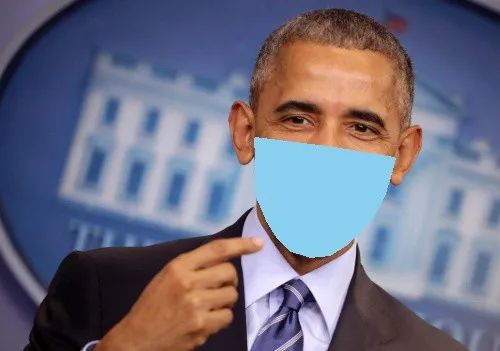


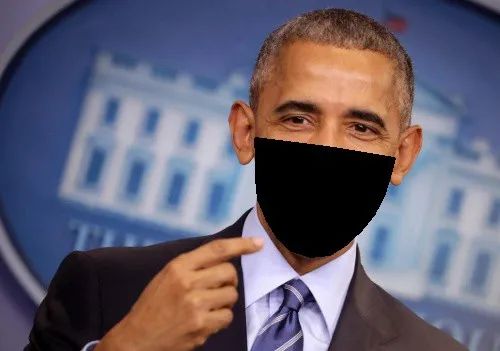


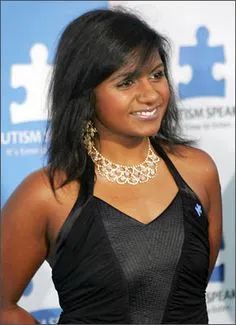
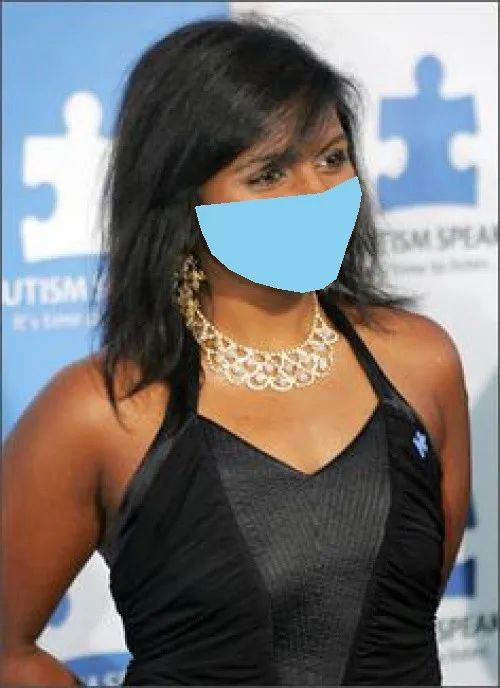
结论
参考文献:
-
Facial landmarks with dlib, OpenCV, and Python(https://www.pyimagesearch.com/2017/04/03/facial-landmarks-dlib-opencv-python/) -
Facial point annotations(https://ibug.doc.ic.ac.uk/resources/facial-point-annotations/) -
Real-Time Face Pose Estimation(http://blog.dlib.net/2014/08/real-time-face-pose-estimation.html) -
Drawing Functions in OpenCV(https://docs.opencv.org/master/dc/da5/tutorial_py_drawing_functions.html) -
Sources of images — open source and https://www.kaggle.com/dansbecker/5-celebrity-faces-dataset
交流群
欢迎加入公众号读者群一起和同行交流,目前有SLAM、三维视觉、传感器、自动驾驶、计算摄影、检测、分割、识别、医学影像、GAN、算法竞赛等微信群(以后会逐渐细分),请扫描下面微信号加群,备注:”昵称+学校/公司+研究方向“,例如:”张三 + 上海交大 + 视觉SLAM“。请按照格式备注,否则不予通过。添加成功后会根据研究方向邀请进入相关微信群。请勿在群内发送广告,否则会请出群,谢谢理解~
评论


