OpenCV中导向滤波介绍与应用
点击上方“小白学视觉”,选择加"星标"或“置顶”
重磅干货,第一时间送达
导向滤波介绍
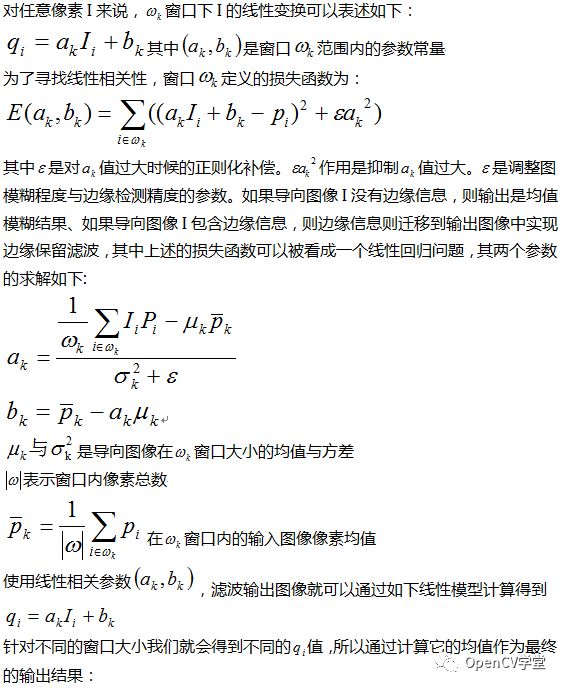
导向滤波是使用导向图像作为滤波内容图像,在导向图像上实现局部线性函数表达,实现各种不同的线性变换,输出变形之后的导向滤波图像。根据需要,导向图像可以跟输入图像不同或者一致。假设I是导向图像、p是输入图像、q是导向滤波输出图像,导向滤波是作为局部线性模型描述导向图像I与输出图像q之间的关系。


导向滤波算法实现的一般步骤为:
读取导向图像I与输入图像P
输入参数 与 其中 表示窗口半径大小,单位是像素, 表示模糊程度
积分图计算I的均值与方差、输入图像的均值以及I与P的乘积IP
计算线性相关因子a与b
a=(IP-meanImeanP)/(Var_I+ )
b=meanP-ameanI
计算a与b的均值
使用均值得到导向滤波结果Q=meana*I+meanb
导向滤波最常用四个功能是:
边缘保留滤波
图像去噪声
图像边缘羽化
图像增强(对比度)
OpenCV中导向滤波函数
由于导向滤波计算均值与方差可以通过积分图查找快速得到,因此导向滤波的速度会很快,作为边缘保留滤波它比双线性滤波有明显的速度优势,OpenCV中在扩展模块ximgproc中实现了图像的导向滤波函数,相关API函数与参数解释如下:
void cv::ximgproc::guidedFilter (
InputArray guide,// 导向图像
InputArray src,// 输入下
OutputArray dst,//导向滤波输出
int radius,//窗口半径大小
double eps,// 模糊程度
int dDepth = -1// 输出图像深度
)
eps值越大图像模糊程度越大、半径radius值越大图像模糊程度越高。
代码演示
通过代码演示了导向滤波根据输入的导向图像不一样分别实现了图像滤波的边缘保留、去噪声、羽化、对比度提升功能。完整的演示代码如下:
#include
#include
#include
using namespace cv;
using namespace cv::ximgproc;
using namespace std;
void guide_demo(Mat &guide, Mat &input, int r, double e);
void enhance_demo(Mat &guide, Mat &input, int r, double e);
int main(int argc, char** argv) {
Mat src = imread("D:/vcprojects/images/guide.png");
if (src.empty()) {
printf("could not load image...\n");
return -1;
}
namedWindow("input", CV_WINDOW_AUTOSIZE);
imshow("input", src);
namedWindow("output", CV_WINDOW_AUTOSIZE);
int r = 2;
double eps = 0.1;
int type = 0;
while (true) {
char c = waitKey(50);
printf("input digit : %d\n", c);
if (c == 49) { // 边缘保留
type = 1;
}
else if (c == 50) {
type = 2;
}
else if (c == 51) {
type = 3;
}
else if (c == 52) { // 去噪
type = 4;
}
else if (c == 53) { // 羽化
type = 5;
}
else if (c == 54) { // 提升
type = 6;
}
else if (c == 27) {
break;
}
if (type == 0 || type == 1 || type == 2 || type == 3) {
guide_demo(src, src, pow(r, type), eps*eps * pow(r, type));
}
else if(type == 4){
Mat guide = imread("D:/vcprojects/images/gf_guide.png");
Mat input = imread("D:/vcprojects/images/gf_noise.png");
imshow("input", input);
guide_demo(guide, input, 8, 0.02*0.02);
}
else if (type == 5) {
Mat guide = imread("D:/vcprojects/images/twocat.png");
Mat input = imread("D:/vcprojects/images/twocat_mask.png", IMREAD_GRAYSCALE);
imshow("input", input);
guide_demo(guide, input, 60, 10e-6);
}
else {
Mat input = cv::imread("D:/vcprojects/images/demo.png");
input.convertTo(input, CV_32F, 1.0 / 255.0);
imshow("input", input);
int r = 16;
double eps = 0.1 * 0.1;
enhance_demo(input, input, r, eps);
}
}
waitKey(0);
return 0;
}
void guide_demo(Mat &guide, Mat &input, int r, double e) {
double eps = e * 255 * 255;
Mat dst;
guidedFilter(guide, input, dst, r, eps, -1);
imshow("output", dst);
}
void enhance_demo(Mat &guide, Mat &input, int r, double e) {
Mat dst;
guidedFilter(guide, input, dst, r, e, -1);
Mat result = (guide - dst) * 5 + dst;
imshow("output", result);
}
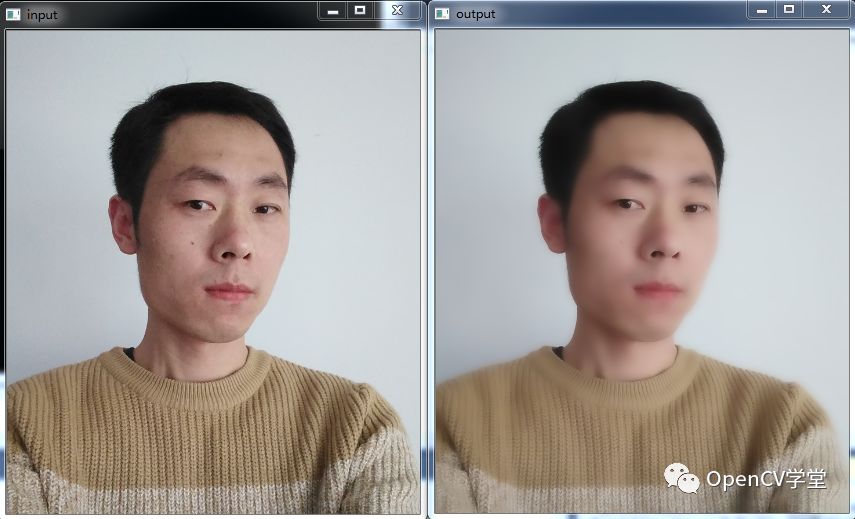
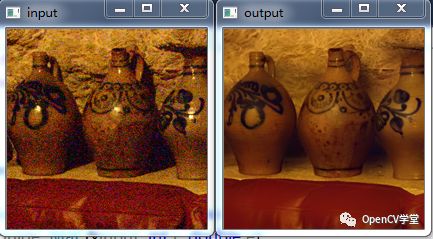
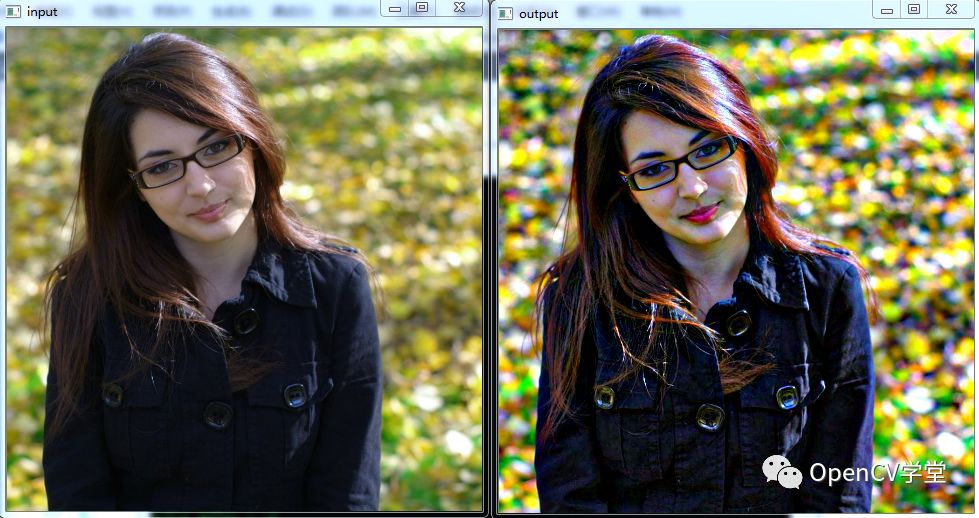
运行截图如下:
边缘保留

去噪声

边缘羽化

对比度提升

交流群
欢迎加入公众号读者群一起和同行交流,目前有SLAM、三维视觉、传感器、自动驾驶、计算摄影、检测、分割、识别、医学影像、GAN、算法竞赛等微信群(以后会逐渐细分),请扫描下面微信号加群,备注:”昵称+学校/公司+研究方向“,例如:”张三 + 上海交大 + 视觉SLAM“。请按照格式备注,否则不予通过。添加成功后会根据研究方向邀请进入相关微信群。请勿在群内发送广告,否则会请出群,谢谢理解~

