5 分钟带你入门 kivy
大家好,欢迎来到 Crossin的编程教室 !
pip3 install kivy
from kivy.app import App

class MyApp(App):
    def build(self):
        """
        实现父类的build()方法
        :return:
        """
        pass
from kivy.uix.label import Label

def build(self):
    """
    把build()方法实现为返回一个控件实例(这个控件的实例也就是你整个应用的根控件)
    :return:
    """

    # 在这个方法里面使用了Label控件
    return Label(text="Hello World!")

# 运行 Hello World
MyApp().run()

创建一个子类继承于 App 类
重写 build() 方法,返回一个容器控件或者自定义的控件,这个应用作为整个应用的根控件。
编写自定义控件的 UI 布局及业务逻辑
创建自定义子类的实例,调用 run() 方法
# 1.使用 kivy 定义的容器控件
BoxLayout:

# 2.使用自定义的容器控件
:
TextInput:
     id:id_input_password
     padding: [20, 20, 20, 20]
     text_size: 500, None
     hint_text:'请输入密码'
     halign:'center'
     valign: 'middle'
# 定义点击事件,传入参数
on_press: root.login(id_input_username.text,id_input_password.text) 意的是,利用 adb shell am 命令打开应用的方式适用于部分不兼容自动化框架的 App。默认布局属性中包含中文会显示乱码。
针对 PC 端,只需要把中文字体文件放到同级目录下,利用 font_name 属性指定字体即可显示正常。
如果是 App 端,需要利用 adb 命令,进入到 /system/fonts/ 下,寻找能显示中文的字体,然后利用 font_name 属性指定对应的字体,就能显示正常。
# 手机端 Miui-Bold.ttf 字体能显示中文正常
font_name:'/system/fonts/Miui-Bold.ttf'
6、能不能来一个实例
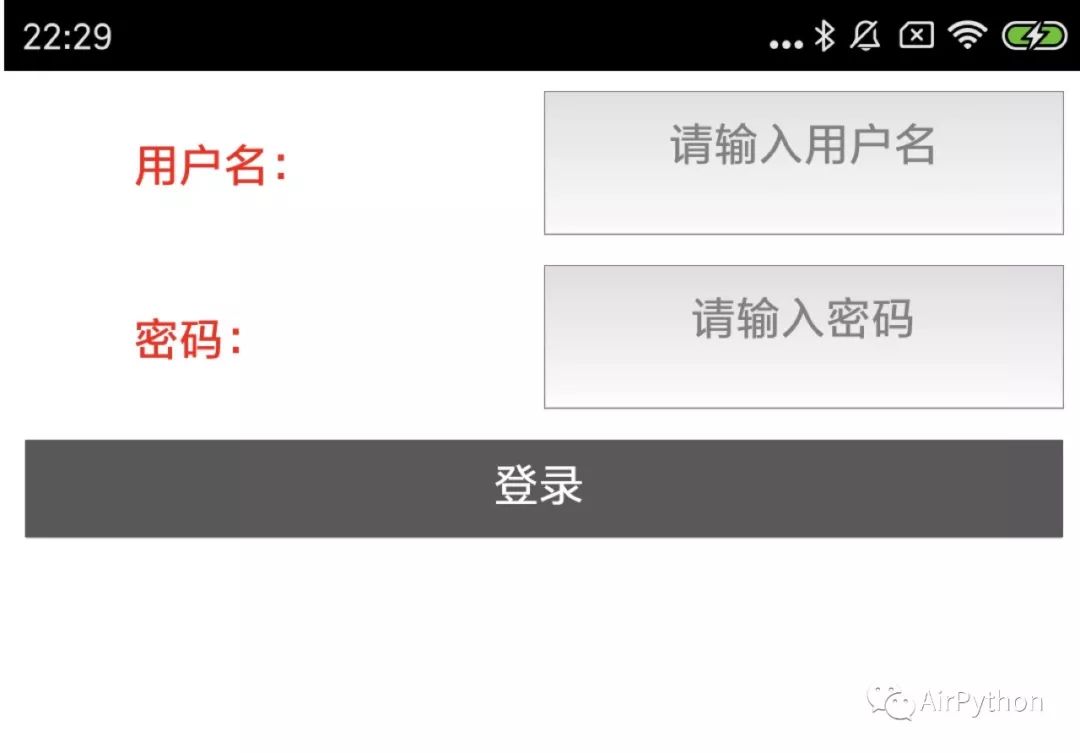
下面以创建一个 登录界面 来说。
登录界面包含两个输入框,包含用户名和密码、一个登录按钮。
首先,我们创建一个类继承自 App,重写 build() 方法,返回一个自定义的控件。
然后编写自定义控件的布局。
Builder.load_string('''
:
    orientation:'vertical'
    spacing:30
    padding:20
    canvas:
        Color:
            rgba: (1, 1, 1, 1)
        Rectangle:
            size: self.size
            pos: self.pos
    BoxLayout:
        size_hint_y: None
        height: '48dp'
        orientation:'horizontal'
        canvas:
            Color:
                rgba: (1, 1, 1, .5)
            Rectangle:
                size: self.size
                pos: self.pos
        Label:
            text_size: 300, None
            text:'用户名:'
            font_size:"15sp"
            font_name:'/system/fonts/Miui-Bold.ttf'
            color: 1,0,0,1
        TextInput:
            text_size: 500, None
            border: 10, 10, 10, 10
            id:id_input_username
            hint_text:'请输入用户名'
            font_name:'/system/fonts/Miui-Bold.ttf'
            padding: [20, 20, 20, 20]
            halign:'center'
    BoxLayout:
        size_hint_y: None
        height: '48dp'
        orientation:'horizontal'
        canvas:
            Color:
                rgba: (1, 1, 1, .5)
            Rectangle:
                size: self.size
                pos: self.pos
        Label:
            text_size: 300, None
            text:'密码:'
            font_name:'/system/fonts/Miui-Bold.ttf'
            color: 1,0,0,1
        TextInput:
            id:id_input_password
            padding: [20, 20, 20, 20]
            text_size: 500, None
            hint_text:'请输入密码'
            font_name:'/system/fonts/Miui-Bold.ttf'
            halign:'center'
            valign: 'middle'
    Button:
        id:id_btn_login
        size_hint_y: None
        text_size: 100, 50
        border: (16, 16, 16, 16)
        font_name:'/system/fonts/Miui-Bold.ttf'
        text:'登录'
        margin:100
        on_press: root.login(id_input_username.text,id_input_password.text)

    Label:
        id:id_label_resut
        color: 1,0,0,1
''')
接着编写登录按钮的回调方法,拿到输入的用户名和密码,就能编写业务逻辑。
def login(self, username, pwd):

    if not username or not pwd:
        print('用户名和密码不能为空!')
        popup = Popup(title='Warning', content=Label(text='用户名和密码不能为空',font_name='/system/fonts/Miui-Bold.ttf'),
                          size_hint=(None, None),size=(600, 500),auto_dismiss=True)
        popup.open()
    else:
        resp = requests.get('https://www.baidu.com')

        # 登录成功
        if resp.status_code == 200:
             result = 'Login Success!'
        else:
             result = 'Login Failed!'

        self.tv_result.text = result
最后,将文件 push 到手机的 /sdcard/kv 目录下,重新运行 airport 就能展示一个登录页面。

7、了解更多
更多复杂的功能可以参考官方 API:
https://kivy.org/doc/stable/api-kivy.html
后台回复「 kivy 」可获取一份完整 kivy 中文编程指南文档。
作者:星安果
来源:AirPython
_往期文章推荐_
评论
