
小白也能掌握的Python部署应用技术
点击关注“Python数据分析实例”
设为“置顶或星标”,送达干货不错过!

前言
如何将你写的Python程序发布给其他人用呢?
今天分享一下非常简单可行的方式发布 Python 应用程序,发布后只需要通过计算机管理后台启停你的应用程序,熟悉后可在其基础上进行功能拓展改进,是小白快速开发一个可用落地应用的最佳选择。本文将详细介绍两种方法将Python程序部署成windows服务。Python web应用服务器部署不在此次讨论之中。
一、Python脚本部署成windows定时任务
1) Outline_analysis.py脚本准备
主要实现数据在线定时反馈功能,函数执行流主要分为3部分,tick1()函数实现数据提取生产,tick2()函数实现发送报警邮件,end_program()函数实现关闭后台python解释器释放资源,确保程序持续稳定运行。
from datetime import datetime
import time
from tools.sender_mail import Sender_mail
from tools.Wrapper_timer import time_logger
now_time = datetime.now().date()

#业务数据生产过程
def tick1():
    time.sleep(4)
    print('Tick!The time is:%s' % datetime.now())

#预警信息发送
def tick2():
    #发送邮件
    Sender_mail.sender_mail()
    print('发送完成')


# def get_pid(name):
#     '''
#      作用:根据进程名获取进程pid
#     '''
#     import psutil
#     pids = psutil.process_iter()
#     print("[" + name + "]'s pid is:")
#     for Pid in pids:
#         if(Pid.name() == name):
#             P=Pid.pid
#     return P

#关闭解释器
def end_program():
    # pr_name = get_pid(name="pythonw.exe")
    # os.system('%s%s' % ("taskkill /F /PID ",pr_name))
    #os.system('%s%s' % ("taskkill /F /IM pythonw.exe"))

    import subprocess
    CREATE_NO_WINDOW = 0x08000000
    subprocess.call('taskkill /F /IM pythonw.exe', creationflags=CREATE_NO_WINDOW)

#业务流程
@time_logger
def tick():
    tick1()
    tick2()
    end_program()

if __name__ =='__main__':
    tick()
注:
1、业务数据生产过程--tick1()函数
该函数用休眠模拟数据处理耗时,实际应用中连接生产数据库,经过一系列处理流程,本地开发数据库Mysql,数据库连接主机名写的是localhost;如果项目部署到远程服务器上,其数据库和项目部署在不同机器上,数据库连接的主机名就需要修改成数据库所部署的那台机器的公网ip或者域名,通过ipconfig查看。
2、关闭python解释器--end_program()函数
调用taskkill命令,关闭指定的进程
详细参数用法可网上搜索查看;常见用法:TASKKILL [/S system [/U username [/P [password]]]] { [/FI filter] [/PID processid | /IM imagename] } [/F] [/T]
窗口隐藏不显示
将脚本解析程序python.exe改为pythonw.exe.将不会弹出控制台窗口。
使用系统os.system()关闭解释器程序将屏闪退出,建议使用python调用cmd命令隐藏窗口方法subprocess.call(),将解决这个问题,详细可参考--
https://stackoverflow.com/questions/7006238/how-do-i-hide-the-console-when-i-use-os-system-or-subprocess-call
3、数据管道流按顺序执行
该处可利用多线程队列实现数据流按顺序执行
def tick():
    print('job thread_id-{0}, process_id-{1}'.format(threading.get_ident(), os.getpid()))
    w = WorkerThread()
    w.start()
    w.send(tick1())
    w.send(tick2())
    w.run()
    w.send(end_program())
    w.run()
    w.close()
# 使用 队列一般可以简化多线程的程序。例如,可以使用共享队列将线程连接在一起,而不必依赖锁的保护。
# 在这种模型下,工作者线程一般充当数据的消费者。
from threading import Thread
from queue import Queue
import time,os,threading
class WorkerThread(Thread):
def __init__(self,*args,**kwargs):
Thread.__init__(self,*args,**kwargs)
self.input_queue=Queue()
def send(self,item):
self.input_queue.put(item)
def close(self):
self.input_queue.put(None)
self.input_queue.join()
def run(self):
while True:
item=self.input_queue.get()
if item is None:
break
#实际开发中,此处应该使用有用的工作代替
print(item)
self.input_queue.task_done()
#完成,指示收到和返回哨兵
self.input_queue.task_done()
return4、后期优化细节
tools文件夹下存放Sender_mail、time_logger等拓展模块。每个执行任务函数都可能失败,因此可用加入装饰器拓展函数功能,增加计时、日志记录等,比如一个任务不确定什么时间完成,可设置超时时间,如果超时仍然未完成可用通过控制超时重新运行,也可以设置重试次数,超过一定次数报错退出。
import functools
import logging
import time
from datetime import datetime

log_format = "%(asctime)s %(message)s"
logging.basicConfig(format=log_format,
                    level=logging.INFO,
                    datefmt=" %Y-%m-%d %H:%M:%S",  # 时间格式
                    filename="log1.log",
                    filemode="a")


# 装饰器会被任何函数使用。其中的func(*args, **kwargs)中的func就是目标函数,args、kwargs是这个函数调用的参数
def time_logger(func):
  @functools.wraps(func)
  def wrapper_timer(*args, **kwargs):
    logging.info(f"BeginFunction {func.__name__!r}, args={args}, kwargs={kwargs}")
    start_time = time.perf_counter()  # 1
    value = func(*args, **kwargs)
    end_time = time.perf_counter()  # 2
    run_time = end_time - start_time  # 3

    logging.info(f"EndFunction {func.__name__!r} in {run_time:.4f} secs")
    return value,run_time

  return wrapper_timer
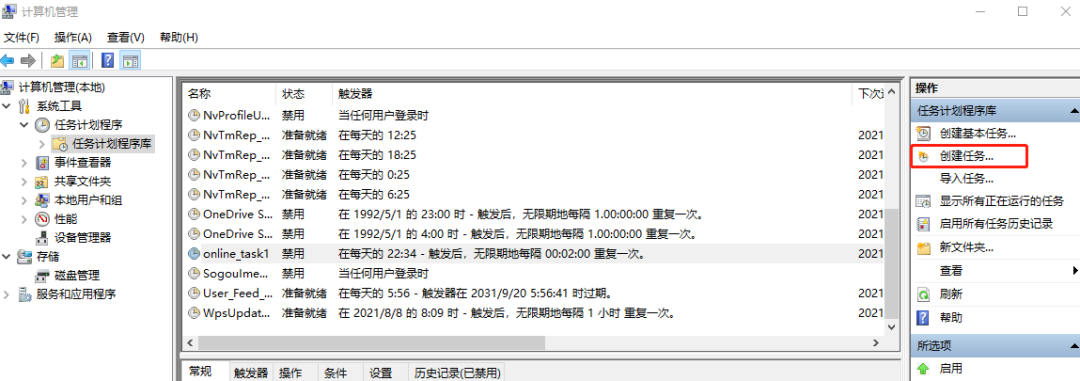
2)将脚本设置成windows定时任务
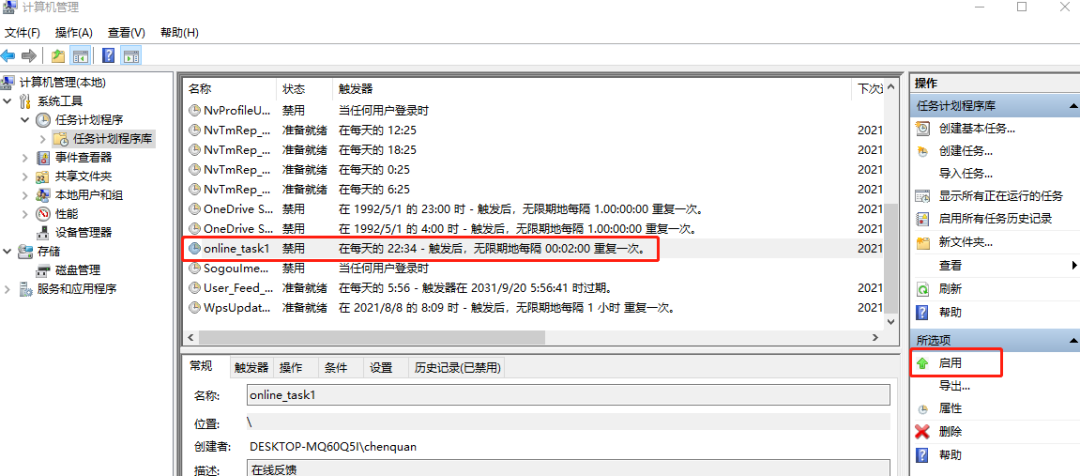
首先搜索框-计算机管理-点击任务计划程序库-可查看已有的定时计划任务
点击创建任务进入按提示设置即可
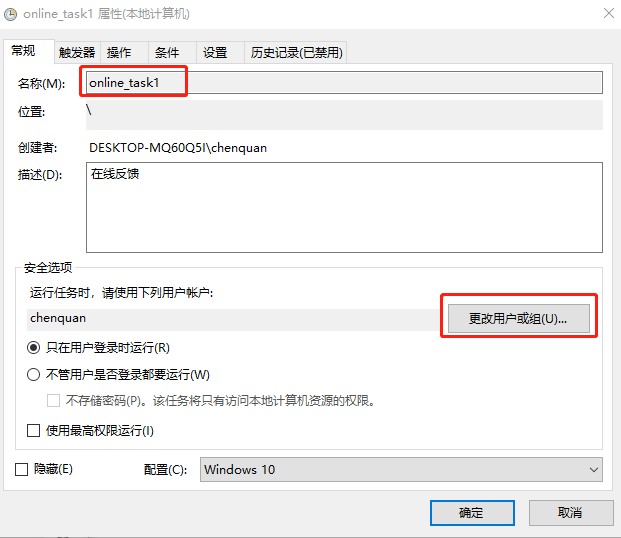
常规设置,名称、用户设置,更改用户或组注意用户权限设置
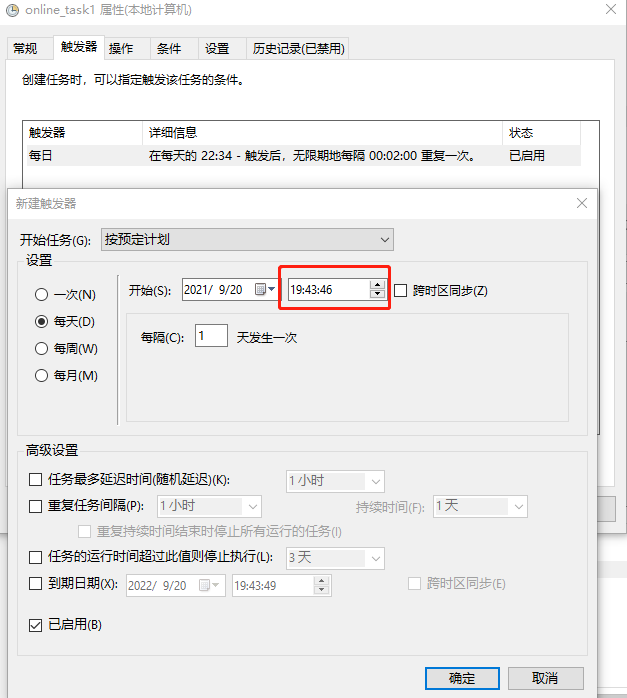
接下来,设置触发器,定时任务开始运行触发条件,根据需要设置
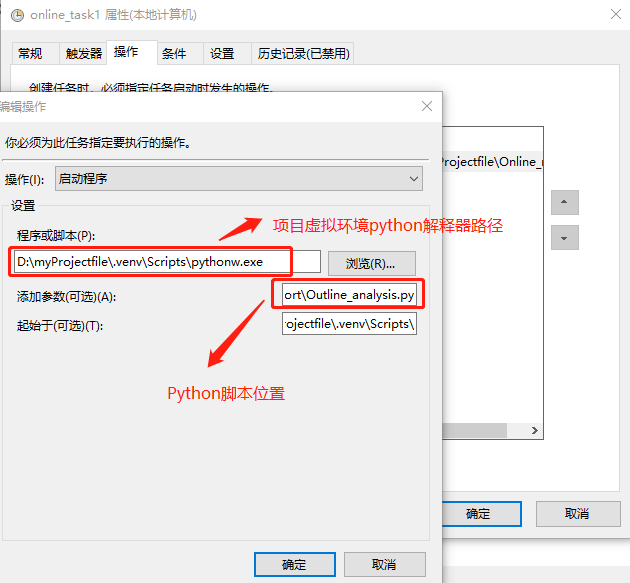
最关键的一步,设置python解释器位置及执行脚本路径
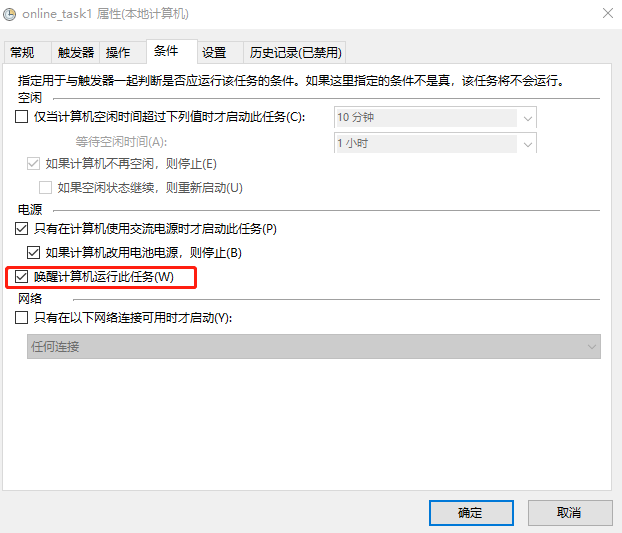
电脑休眠状态定时任务不会执行,需要勾选唤醒计算机执行该任务
最后,启用该定时任务,确保单个实例执行
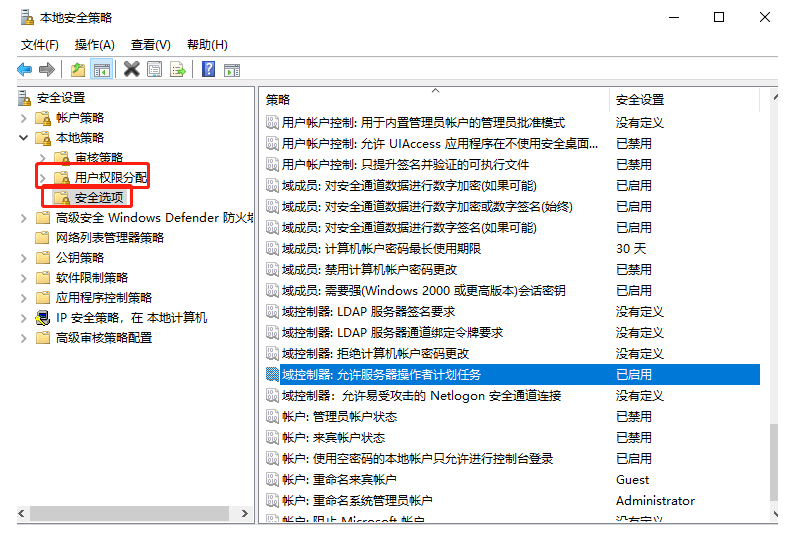
Windows 10定时任务运行报错:操作员或系统管理员拒绝了请求的解决方法
解决办法:首先确保python解释器在进程列表中退出,打开控制面板->管理工具->本地安全策略,选择安全设置->本地策略->安全选项,在右边列表中找到域控制器:允许服务器操作者计划任务,将状态改为已启用。其次,用户权限分配设置问题及环境变量配置。
二、Python的exe执行文件部署成windows服务
1)Outline_analysis.exe脚本准备
from datetime import datetime
import time,os,threading
from tools.Wrapper_timer import time_logger
from apscheduler.schedulers.blocking import BlockingScheduler
from apscheduler.executors.pool import ThreadPoolExecutor
from tools.Queue_thread import WorkerThread
import logging

now_time = datetime.now().date()
# 业务数据生产过程
@time_logger
def tick1():
    print('job1 thread_id-{0}, process_id-{1}'.format(threading.get_ident(), os.getpid()))
    time.sleep(1)
    print('Tick!The time is:%s' % datetime.now())


# 预警信息发送
@time_logger
def tick2():
    print('job2 thread_id-{0}, process_id-{1}'.format(threading.get_ident(), os.getpid()))
    # 发送邮件
    time.sleep(1)
    print('邮件发送完成 %s'% datetime.now())

#数据存储
@time_logger
def tick3():
    print('job3 thread_id-{0}, process_id-{1}'.format(threading.get_ident(), os.getpid()))
    # 数据存储
    time.sleep(1)
    print('存储完成 %s'% datetime.now())


def tick():
    print('job thread_id-{0}, process_id-{1}'.format(threading.get_ident(), os.getpid()))
    w = WorkerThread()
    w.start()
    w.send(tick1())
    w.send(tick2())
    w.run()
    w.send(tick3())
    w.run()
    w.close()

if __name__ == '__main__':
    executors = {
        'default': ThreadPoolExecutor(10)
    }
    scheduler = BlockingScheduler(executors=executors,)
    # scheduler.add_job(tick,max_instances=5,trigger='interval', seconds=10,id='interval_task')
    #注意装饰器@time_logger不能放在tick前面,否则会出现阻塞,程序无法继续运行
    scheduler.add_job(tick,max_instances=5,trigger='interval', seconds=10)
    # run_time=tick1()[1]
    # print("完成时间",run_time)
    # scheduler._logger=logging
    try:
        scheduler.start()
    except (KeyboardInterrupt,SystemExit):
        pass
exe部署与py脚本部署不同:py脚本运行不需要在代码中设置时间控制逻辑,在定时任务设置运行时间计划,而exe部署需要将定时运行代码写入脚本后打包。当然,你也可以在编辑器中运行程序,确保程序不会被关闭或者设置定时任务控制服务的开启关闭。
bug解决:max_instances默认值为1,它表示id相同的任务实例数;通过设置max_instances参数。装饰器不要放在主线程tick()上面即可。
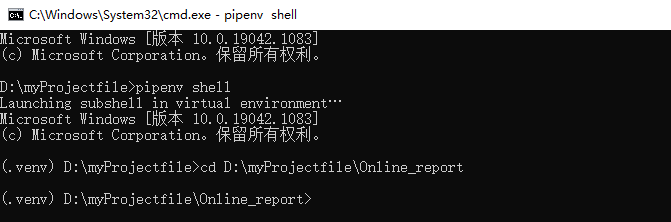
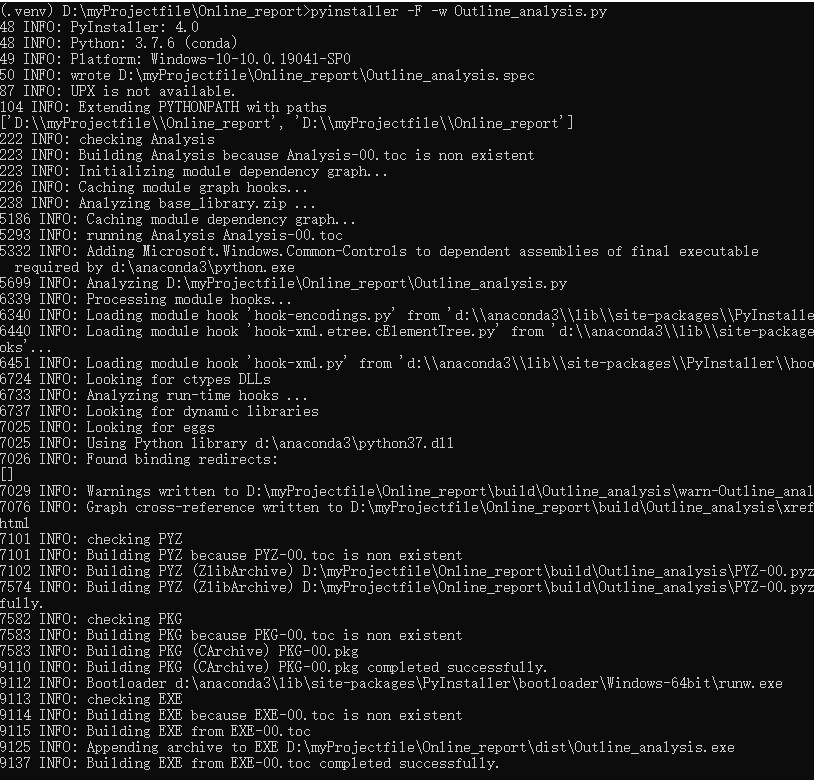
打包:进入项目目录,激活虚拟环境,切换到python基本所在文件夹位置,输入:“pyinstaller -F -w *.py” 就可以制作出exe。生成的文件放在同目录dist下。-F(注意大写)是所有库文件打包成一个exe,-w是不出控制台窗口。
打包错误问题定位-cmd路径下执行Outline_analysis.exe,通过查看运行输出代码运行print信息:比如python使用pyinstaller打包成exe报Faild to execute script 解决,这个问题出现的原因是,有些模块是隐藏导入的,但是pyinstaller打包时并未指定,所以执行时找不到此模块。其他错误可按提示百度、谷歌、GitHub 和 StackOverflow四件套解决。
2)将exe执行文件部署成windows服务
使用windows自带的命令sc 使用sc create 方法创建。
这种方法不一定能成功,如果你的exe不符合服务的规范,可能会启动失败
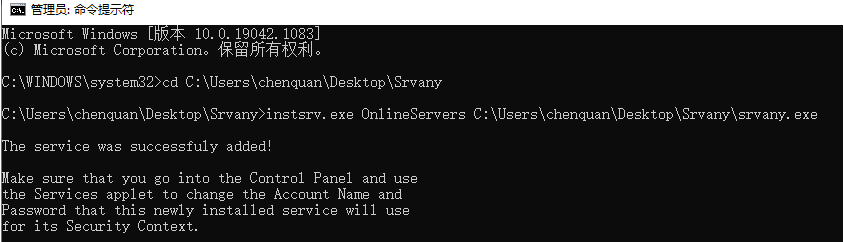
在第一种方法失败的情况下,我们可以在官网下载instsrv.exe 和 srvany.exe 两个小工具注册服务。
1、下载后放入C盘下创建的一个文件夹。以管理员的身份运行命令行,首先进入工具所在的文件夹。具体操作如下:
执行命令 instsrv.exe 你的服务名称 srvany.exe文件路径
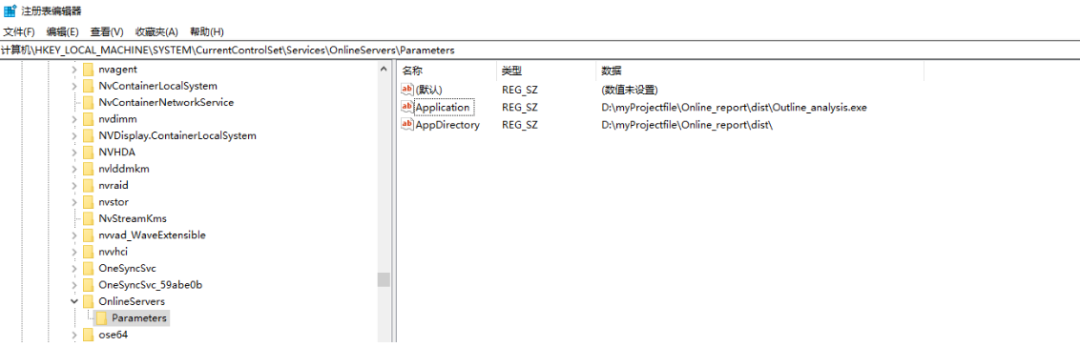
2、启动注册表:win+r——regedit,打开注册表路径:HKEY_LOCAL_MACHINE\SYSTEM\CurrentControlSet\Services\OnlineServer
3、找到刚注册的服务名称
新建项:Parameters
在Parameters下新建字符串值:
名称为:Application 值: exe 所在的全路径 包含exe名称为:Application 值: exe 所在的全路径 包含exe在Parameters下新建字符串值:名称为:AppDirectory 值: exe 所在的路径
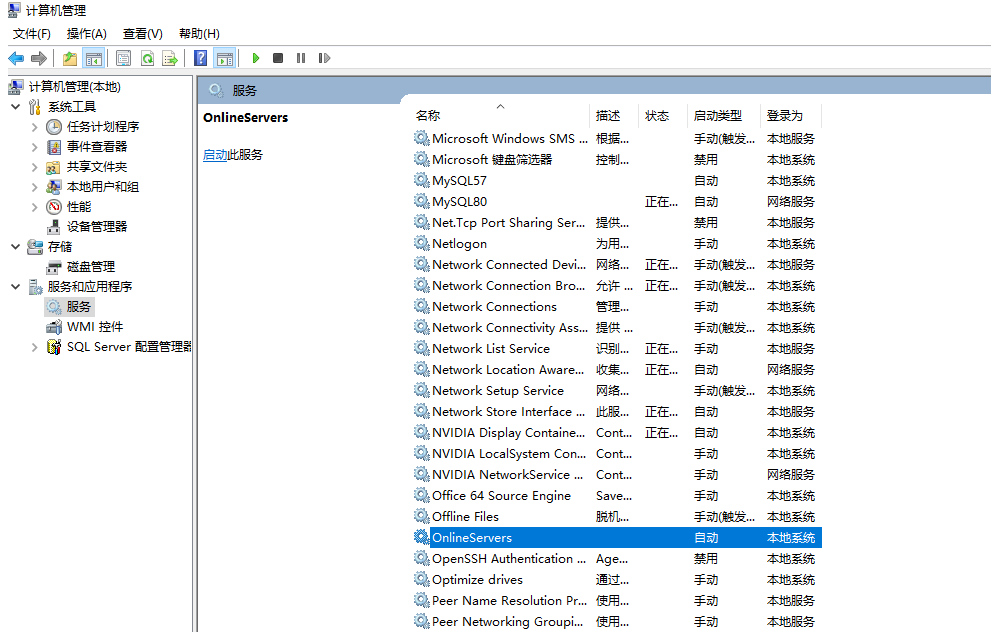
4、打开服务,找到刚才所创建的服务名称,配置属性,点击启动
5、删除服务,先将服务停止cd 到instsrv.exe 所在目录 然后执行instsrv.exe OnlineServer remove
补救措施
如果加入定时任务模块apscheduler打包失败的话,可以通过以下方式实现服务定时启动。
1、创建bat快捷方式,然后右键快捷方式-->properties-->advanced-->Run as administrator。
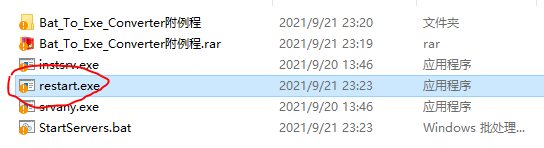
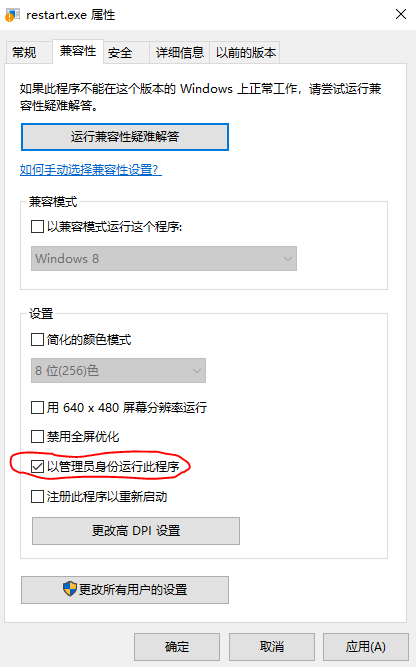
2、下载bat转成exe工具,将bat转成exe,然后右键exe-->properties-->Compatibility-->Run as administrator。
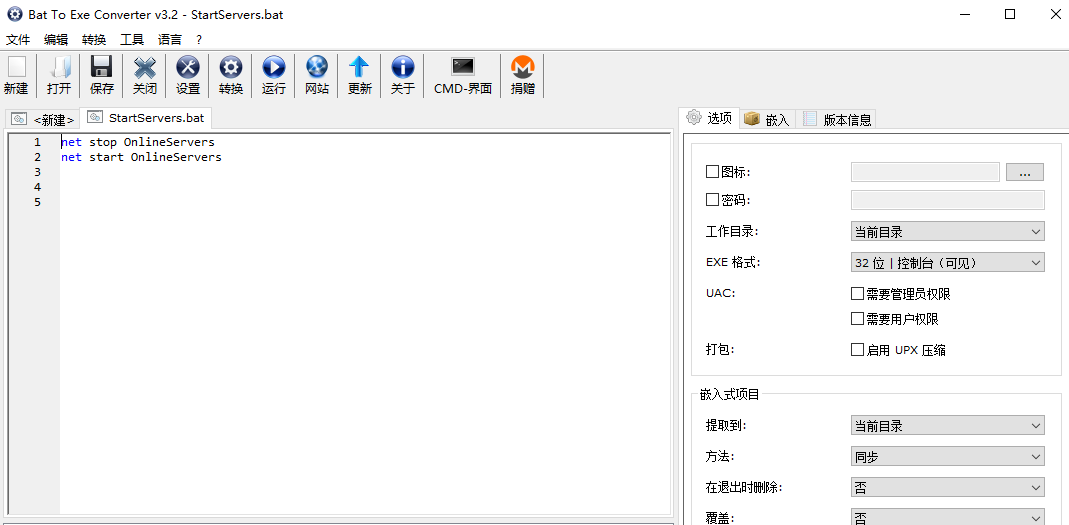
给大家分享一个windows的批处理文件(.bat文件)转exe可执行文件的工具。使用非常简单,输入需要转换的脚本语句,点击转换即可。
StartServers.bat文件
net stop OnlineServers 停止服务
net start OnlineServers 重启服务
以上工具获取见文末
将生成的restart设置成定时任务,设置方法见上文。
通过以上流程设置,一个简单可用的脚本程序部署完毕,静静的在后台运行为你服务。当然,简单的应用可以通过以上方式简单部署,复杂的大型项目还是得上部署框架啦!
Python 项目开发部署与发布一般流程如下:
1、环境配置
(1)开发环境Python 版本、anaconda环境、 pip 安装 Python 依赖等
(2)虚拟环境搭建,用 pipenv 安装 项目的Python 依赖
(3)安装IDE如Pycharm编辑器
(4)数据库的部署等
2、测试环境测试
3、配置服务,部署到生产环境,并发布应用
赶快上手部署一波,给你小伙伴每日邮箱轰炸、定时关心!哈哈

后台回复【注册服务小工具】获取