
Pytest之重运行及生成测试报告
VOL 156

09
2020-09
今天距2021年113天
这是ITester软件测试小栈第156次推文

点击上方蓝字“ITester软件测试小栈“关注我,每周一、三、五早上 08:30准时推送,每月不定期赠送技术书籍。
微信公众号后台回复“资源”、“测试工具包”领取测试资源,回复“微信群”一起进群打怪。
本文2124字,阅读约需6分钟
在上一篇Pytest系列文章:Pytest之参数化,主要介绍pytest参数化讲解及实战。
以下主要介绍Pytest的重运行及生成测试报告。
一
重运行
在做UI自动化,如Selenuim或者Appium时,遇到某些元素未能及时显示,导致点击失败,如果加上重跑,那么将有效提高报告的准确性。
在Pytest中,可以使用pytest-rerunfailures用来失败用例重跑。
1
安装pytest-rerunfailures
安装命令:
pip install pytest-rerunfailures
2
使用说明
@pytest.mark.flaky(reruns=重试次数, reruns_delay=次数之间的延时设置(单位:秒))
3
举个栗子
重试次数
test_demo.py
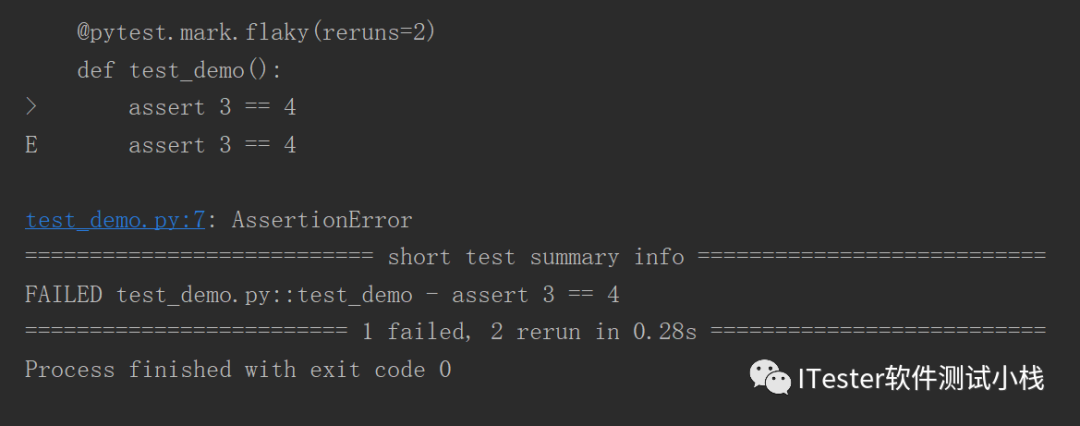
import pytest
@pytest.mark.flaky(reruns=2)
def test_demo():
    assert 3 == 4
运行结果为:
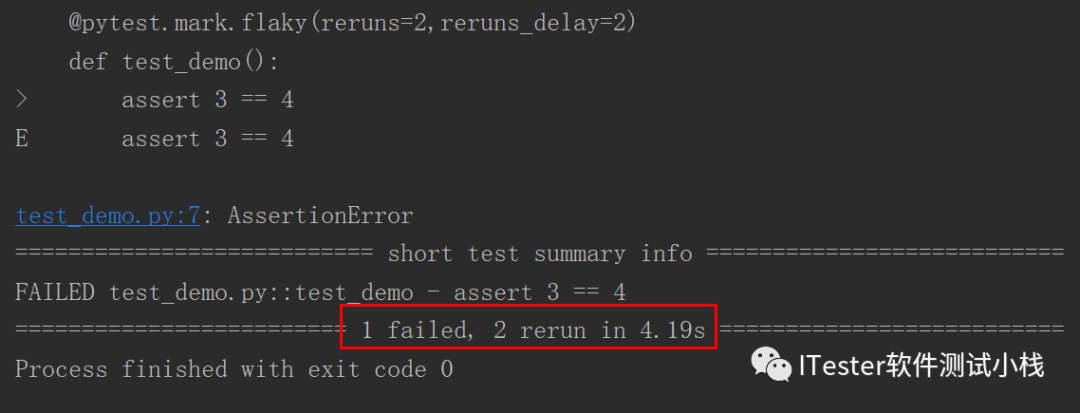
指定重运行等待时间:
import pytest
@pytest.mark.flaky(reruns=2,reruns_delay=2)
def test_demo():
    assert 3 == 4
运行结果为:
二
生成测试报告
1
pytest-html生成报告
pytest使用pytest-html插件生成测试报告。
① 安装pytest-html
安装命令:
pip install pytest-html
② 举个栗子
现有用例如下:
test_demo.py
import pytest

@pytest.mark.flaky(reruns=2,reruns_delay=2)
def test_demo():
    assert 3 == 4
test_demo1.py
class TestDemo:
    def test_demo01(self):
        print("这是test_demo01")
    def test_demo02(self):
        print("这是test_demo02")
命令行输入:pytest --html=report.html
运行之后,会生成report.html,用浏览器打开report.html,如下:

2
allure生成报告
用pytest-html生成的报告稍微简单和丑了一点,我们可以使用更强大的工具allure,allure测试报告框架帮助你轻松实现"高大上"报告展示。
01 安装allure
①从github上下载allure,下载传送门为:
https://github.com/allure-framework/allure2/releases
如下所示,选择”Download“下载即可:

② 下载完后,解压到项目根目录下。

③ 安装allure插件
安装命令:
pip install allure-pytest
④ 添加环境变量:将allure-2.13.5\bin的目录路径添加到环境变量。
02 举个栗子
① 现有用例如下:
test_demo.py
import pytest

@pytest.mark.flaky(reruns=2,reruns_delay=2)
def test_demo():
    assert 3 == 4
test_demo1.py
class TestDemo:
    def test_demo01(self):
        print("这是test_demo01")
    def test_demo02(self):
        print("这是test_demo02")
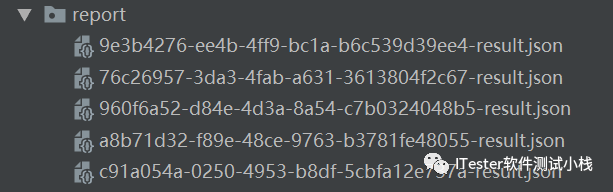
② 在项目根目录下新建目录report。

③ 在命令行输入:pytest -s -q --alluredir ./report,在report目录下会生成一些json格式的。
④ 在report目录下,新建目录html,用于存放html报告。
⑤ 命令行输入allure generate ./report -o ./report/html,生成了最终的html报告。
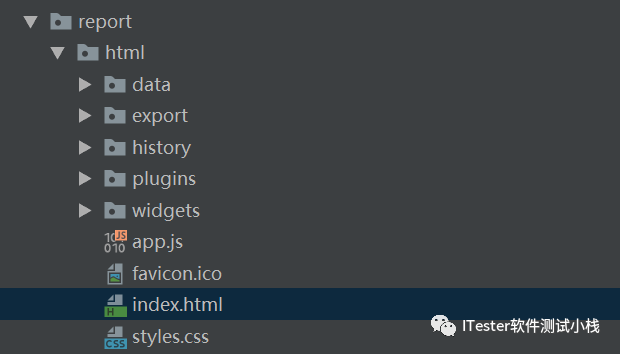
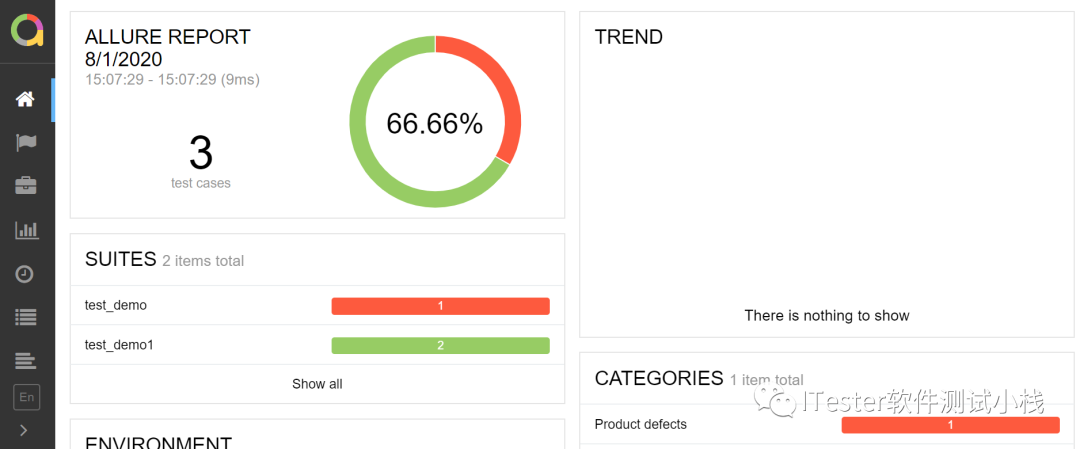
⑥用浏览器打开index.html文件,效果如下:
以上
That‘s all
更多系列文章
敬请期待
ITester软件测试小栈
往期内容宠幸

想获取更多最新干货内容
快来星标 置顶 关注我
每周一、三、五 08:30见

后台
回复"微信群"一起打怪升级
个人微信:Cc2015123
添加请注明来意 :)
真爱三连,BiuBiuBiu~
