
【图文并茂,点赞收藏哦!】重学巩固你的Vuejs知识体系(下)
前沿
置身世外只为暗中观察!!!Hello大家好,我是魔王哪吒!重学巩固你的Vuejs知识体系,如果有哪些知识点遗漏,还望在评论中说明,让我可以及时更新本篇内容知识体系。欢迎点赞收藏!
生命周期
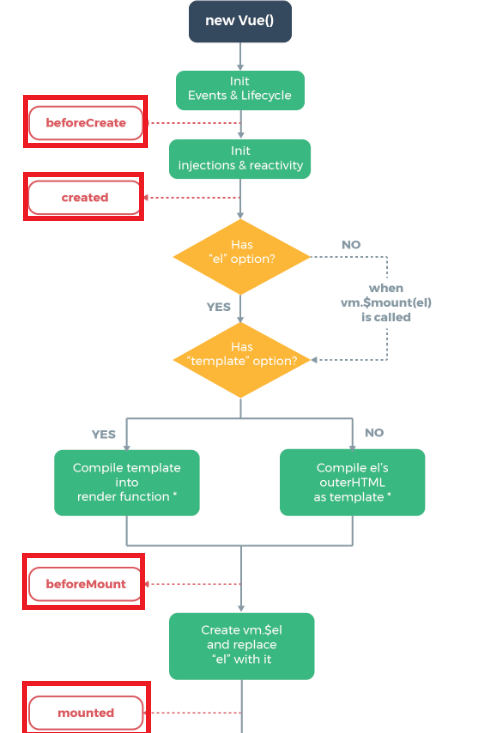
首先:new Vue(),new一个Vue的实例,Observe data数据查看,init Events绑定事件,created执行created方法,判断是否有el属性,如果没有,vm.$mount(el)表示处于未挂载状态,可以手动调用这个方法来挂载。判断是否有template属性。
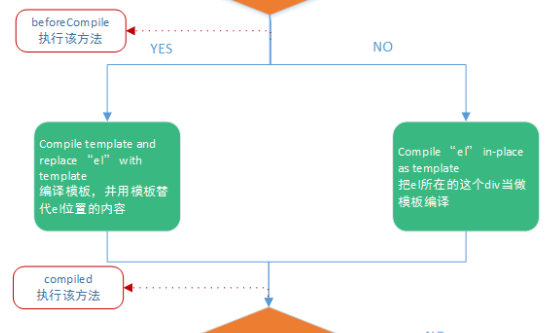
如果有el属性,判断是否有template属性。
实例化期和加载期
创建期间的生命周期函数:beforeCreate 和 created,beforeMount 和 mounted。
beforeCreate在实例初始化后,数据观测data observer和event/watcher事件配置之前被调用。
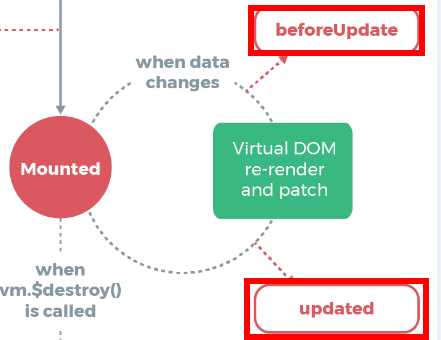
更新期
运行期间的生命周期函数:beforeUpdate 和 updated
created实例已经创建完成后被调用。
实例已完成以下的配置:数据观测data observer,属性和方法的运算,watch/event事件回调。
挂载阶段还没开始,$el属性目前不可见。
beforeMount在挂载开始之前被调用,相关的render函数首次被调用。mounted,vm.$el已经挂载在文档内,对已有dom节点的操作可以在期间进行。beforeUpdate数据更新时调用,发生在虚拟dmo重新渲染和打补丁之前。updated当这个钩子被调用时,组件dom已经更新,所以你现在可以执行依赖于dom的操作。activated,deactivated,beforeDestroy,destroyed。实例销毁之前调用,vue实例销毁后调用。
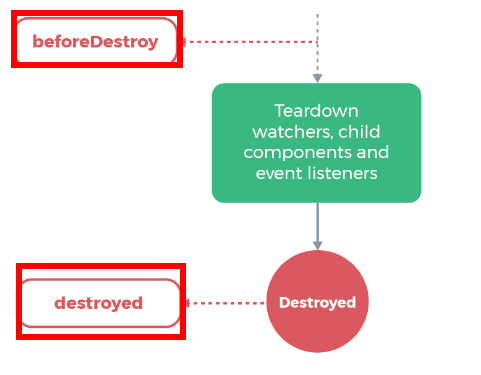
卸载期
销毁期间的生命周期函数:beforeDestroy 和 destroyed
实例生命周期钩子
每个vue实例在被创建时都要经过一系列的初始化过程,需要设置数据监听,编译模板,将实例挂载到dom并在数据变化时更新dom等,同时在这个过程中也会运行一些叫做生命周期钩子的函数。
用于给用户在不同阶段添加自己代码的机会。
beforeCreate,此时的data是不可见的
data() {
    return {
        a: 1
    }
},
beforeCreate() {
    // red
    console.log(this.a); // 看不见
}
created实例已经创建完成后被调用,这个时候你看不见你页面的内容,实例已完成表示:数据观测data observer,属性和方法的运算,watch/event事件回调。
这个时候挂载阶段还没开始,$el属性目前不可见。
export default {
    data() {
        return {
            a: 1
        }
    },
    beforeCreate() {
        console.log(this.a);
    },
    created() {
        // red
        console.log(this.a);
        console.log(this.$el);
        // 此时data数据里面的a可见,this.$el不可见
    }
}
beforeMount在挂载开始之前被调用,相关的render函数首次被调用。
export default{
    data() {
        return {
            a: 1
        }
    },
    beforeCreate() {
        console.log(this.a); // 不可见
    },
    created() {
        console.log(this.a);
        console.log(this.$el); // 不可见
    },
    beforeMount() {
        console.log(this.$el); // 不可见
    }
}
mounted:
export default {
    data() {
        return {
            a: 1
        }
    },
    mounted() {
        console.log(this.$el); // 此时$el 可见
    }
}
beforeUpdate钩子,dom更新之前调用:
beforeUpdate() {
    console.log(this.a);
}

// document.getElementById("web").innerHTML
updated钩子,dom更新之后调用:
updated() {
    console.log(this.a);
}

// document.getElementById("web").innerHTML
activated和deactivated(组件)
activated() {
    console.log("组件使用了");
},

deactivated() {
    console.log("组件停用了");
Data to Drag},
keep-alive是vue的内置组件,能在组件切换过程中将状态保留在内存中,防止重复渲染dom。
DOM元素,也不会出现在父组件链中。
当组件在activated和deactivated这两个生命周期钩子函数将会被对应指定。
它的使用是因为我们不希望组件被重新渲染而影响使用体验,或者是性能,避免多次渲染降低性能。缓存下来,维持当前得状态。
场景:
商品列表页点击商品跳转到商品详情,返回后仍显示原有信息 订单列表跳转到订单详情,返回,等等场景。
keep-alive生命周期:
初次进入时:created > mounted > activated;退出后触发 deactivated;再次进入:会触发activated;事件挂载的方法等,只执行一次的放在mounted中;组件每次进去执行的方法放在 activated 中。
app.vue父组件:
  "myBtn"> myBtn

   "isShow">
beforeDestroy和destroyed
beeforeDestroy类型为function,详细:实例销毁之前调用,在这一步,实例仍然完全可用。
该钩子在服务器端渲染期间不被调用。
destroyed类型为function,详细:vue实例销毁后调用,调用后,vue实例指示的所有东西都会解绑定,所有的事件监听器会被移除,所有的子实例也会被销毁。
该钩子在服务器端渲染期间不被调用。
beforeRouteEnter和beforeRouteLeave
beforeRouteEnter() {
    console.log('beforeRouteEnter')
},

beforeRouteLeave() {
    console.log('beforeRouteLeave')
}
vue路由使用的,路由进去和路由离开的时候添加的。
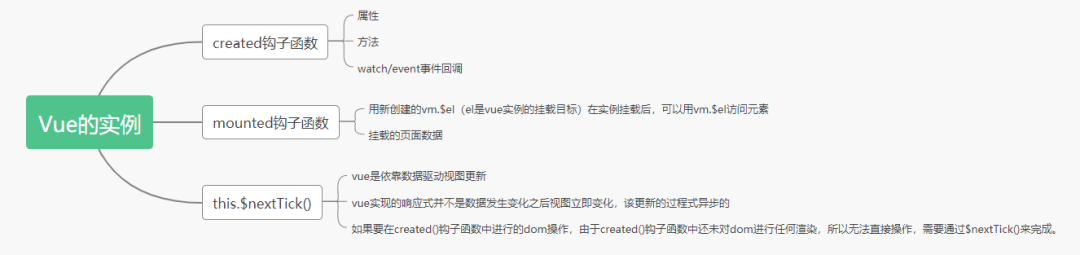
created() {
    console.log('开始执行created钩子函数')
    // 获取data数据
    console.log('获取created属性'+this.value)
    // 获取页面元素
    console.log(this.$refs['example'])
    this.$nextTick(()=>{
        console.log('执行created创建的this.$nextTick()函数')
    })
},

mounted() {
    console.log('开始执行mounted钩子函数')
    // 获取挂载数据
    console.log('获取挂载数据--'+this.$refs['example'].innerText)
    this.$nextTick(()=>{
        console.log('执行mounted创建的this.$nextTick()函数')
    })
},

methods: {
    // 更新数据
    updateDate(){

    },
    get(){
        this.value='更新data内的value属性值'
        // 获取页面元素数据
        console.log(this.$refs['example').innerText)
        this.$nextTick(()=>{
          console.log(this.$refs['example'].innerText)
        })
    }
}
var vm=new Vue({})表示开始创建一个Vue的实例对象,init events&liftcycle表示刚初始化了一个vue空的实例对象,这个时候,对象身上,只有默认的一些生命周期函数和默认事件,其他东西都没有创建,beforeCreate生命周期函数执行的时候,data和methods中的数据都没有初始化。在created中,data和methods都已经被初始化好了,如果要调用methods中的方法,或者操作data中的数据,只能在created中操作。然后vue开始编辑模板,把vue代码中的那些指令进行执行,最终在内存中生成一个编译好的最终模板字符串,渲染为内存中的dom,此时只是在内存中,渲染好了模板,并没有把模板挂载到真正的页面中去。beforeMount函数执行的时候,模板已经在内存中编译好了,但是尚未挂载到页面中去。create vm.$el and replace 'el' with it这一步是将内存中编译好的模板,真实的替换到浏览器的页面中去。mounted,只要执行完了mounted,就表示整个vue实例已经初始化完了。此时,组件从创建阶段进入到了运行阶段。
beforeUpdate执行的时候,页面中显示的数据还旧的,而data数据是最新的,页面尚未和最新的数据保持同步。updated事件执行的时候,页面和data数据已经保持同步了,都是新的。virtual dom re-render and patch执行,先根据data中最新的数据,在内存中,重新渲染出一份最新的内存dom树,当最新的内存dom树被更新之后,会把最新的内存dom树,重新渲染到真实的页面中,完成数据从data到view的跟新。
beforeDestroy钩子函数执行时,vue实例就从运行阶段,进入到了销毁阶段。此时的实例还是可用的阶段,没有真正执行销毁过程。destroyed函数执行时,组件已经被完全销毁了,都不可用了。
vue面试题
谈一谈你对mvvm的理解
双向绑定的过程
视图view,路由-控制器Controller,数据Model
view->dom,viewModel,Model数据
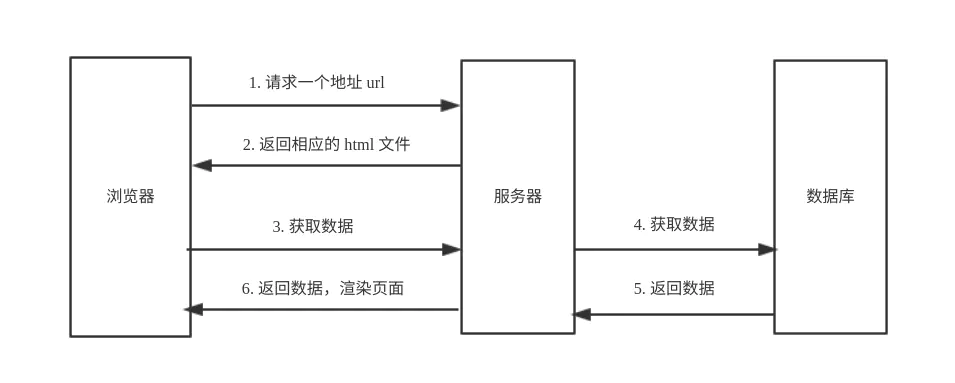
传统的mvc指用户操作会请求服务器端路由,路由会调用对应的控制器来处理,控制器会获取数据,将结果返回给前端,让页面重新渲染。
mvvm,对于传统的前端会将数据手动渲染到页面上,mvvm模式不需要用户收到操作dom元素,将数据绑定到viewModel层上,会自动将数据渲染到页面中,视图变化会通知viewModel层更新数据。
Vue响应式原理
vue内部是如何监听message数据的改变当数据发生改变, vue是如何知道要通知哪些人,界面发生刷新
核心:
Object.defineProperty,监听对象属性的改变发布订阅者模式
代码:
Object.keys(obj).forEach(key => {
 let value = obj[key]

 Object.defineProperty(obj, key, {
    set(newValue) {
        // 监听改变
        value = newValue
    },
    get() {
        return value
    }
 })
})

obj.name = 'web'
发布者订阅者
class Dep {
    constructor() {
        this.subs = []
    }
}

class Watcher {
    constructor(name) {
        this.name = name;
    }
}

对象的Object.defindeProperty中的访问器属性中的get和set方法
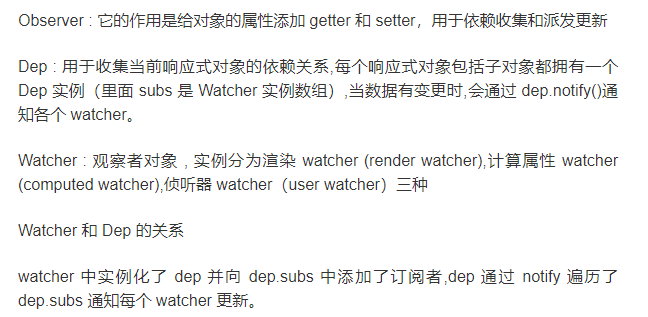
把数据转化为 getter和setter,建立watcher并收集依赖。
说明:
watcher通过回调函数更新view;observer观测data数据,通过get通知dep收集watcher,dep通过notify()通知watcher数据更新,watcher通过addDep()收集依赖。
Observer:用于监听劫持所有data属性,dep,watcher,view,Compile解析el模板中的指令。
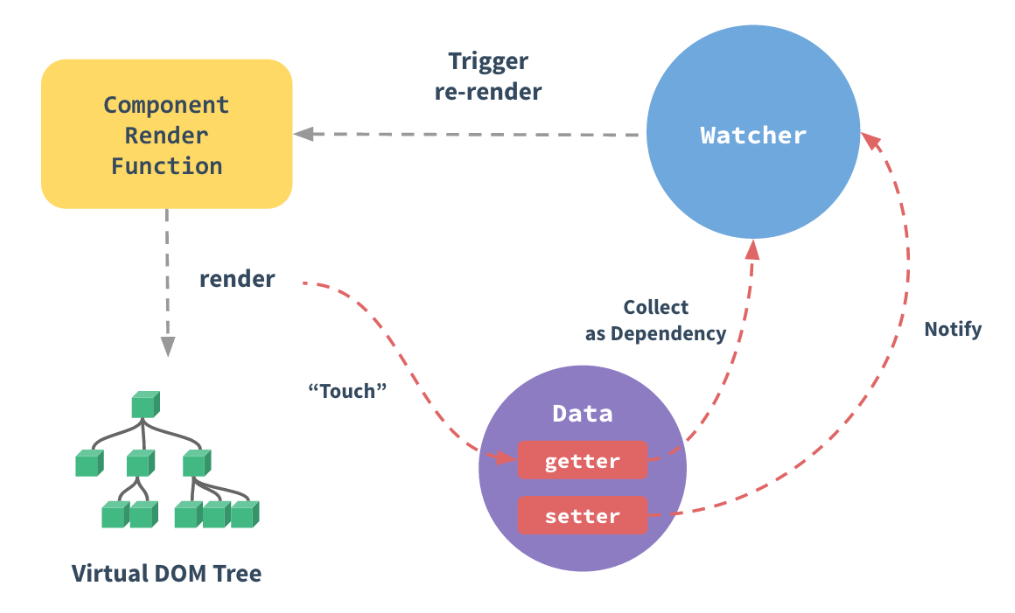
依照下图(参考《深入浅出vue.js》)
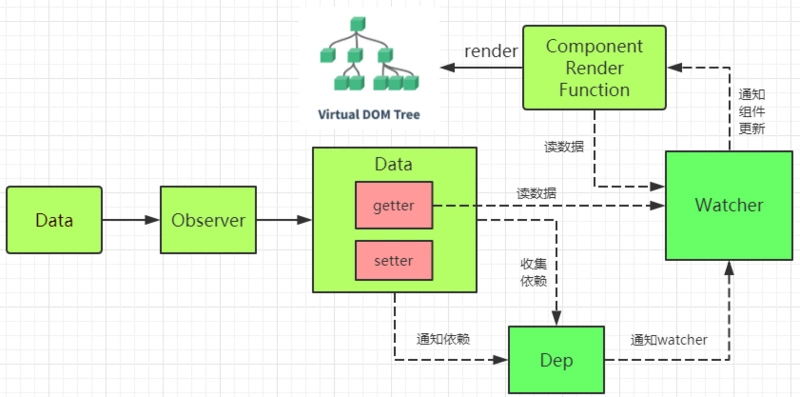
首先从初始化data数据开始,使用Observer监听数据,个体每个数据属性添加Dep,并且在Data,有两个getter,setter。在它的getter过程添加收集依赖操作,在setter过程添加通知依赖的操作。
在解析指令或者给vue实例设置watch选项或者调用$watch时,生成对应的watcher并收集依赖。
Data通过Observer转换成了getter/setter的形式,来对数据追踪变化。
修改对象的值的时候,会触发对应的setter,setter通知之前依赖收集得到的 Dep 中的每一个Watcher,告诉它们值改变了,需要重新渲染视图。
数据双向绑定原理
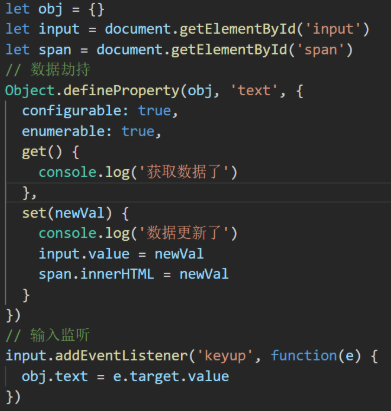
什么是响应式的原理
核心: Object.defineProperty默认 vue在初始化数据时,会给data中的属性使用Object.defineProperty重新定义所有属性,当页面取到对应属性时,会进行依赖收集,如果属性发生变化会通知相关依赖进行更新操作。
initData初始化用户传入的data数据,new Observer将数据进行观测,this.walk(value)进行对象的处理,defineReactive循环对象属性定义响应式变化,Object.defineProperty,使用Object.defineProperty重新定义数据。
使用使用Object.defineProperty重新定义数据的每一项。
Object.defineProperty(obj,key,{
 enumerable: true,
 configurable: true,
 get: function reactiveGetter(){
     const value=getter?getter.call(obj):val
     if(Dep.target){
         dep.depend()
         if(childOb){
             childOb.dep.depend()
             if(Array.isArray(value)){
                 dependArray(value)
             }
         }
     }
     return value
 },
 set: function reactiveSetter(newVal) {
     const value=getter?getter.call(obj).val
     if(newVal === value || (newVal !== newVal && value !==value)){
         return
     }
     if(process.env.NODE_ENV !== 'production' && customSetter){
         customSetter()
     }
     val = newVal
     childOb = !shallow && observe(newVal)
     dep.notify()
 }
})
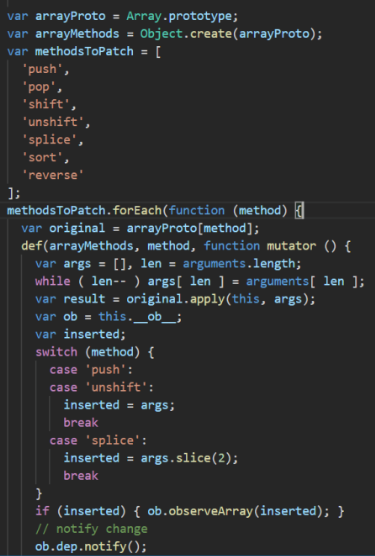
vue中式如何检测数组变化
使用函数劫持的方式,重写了数组的方法,vue将data中的数组进行了原型链的重写,指向了自己定义的数组原型方法,这样当调用数组api时,可以通知依赖跟新,如果数组中包含着引用类型,会对数组中的引用类型再次进行监控。
initData初始化用户传入的data数据,new Observer将数据进行观测,protoAugment(value,arrayMethods)将数据的原型方法指向重写的原型。
对数组的原型方法进行重写 observerArray深度观察数组中的每一项
代码:
if(Array.isArray(value)){
    // 判断数组
    if(hasProto){
        protoAugment(value, arrayMethods)// 改写数组原型方法
    }else{
        copyAugment(value,arrayMethods,arrayKeys)
    }
    this.observeArray(value)
    //深度观察数组中的每一项
}else{
    this.walk(value)
    // 重新定义对象类型数据
}

function protoAugment(target, src: Object){
    target.__proto__ = src
}

export const arrayMethods = Object.create(arrayProto)
const methodsToPatch=[
 'push',
 'pop',
 'shift',
 'unshift',
 'splice',
 'sort',
 'reverse'
]

methodsToPatch.forEach(function (method){
    const original = arrayProto[method]
    def(arrayMethods, method, function mutator(...args){
        const result = original.apply(this.args)
        const ob = this.__ob__
        let inserted
        switch(method) {
            case 'push':
            case 'unshift':
            inserted = args
            break
            case 'splice':
            inserted = args.slice(2)
            break
        }
        if(inserted) ob.observerArray(inserted)
        // 对插入的数据再次进行观测
        ob.dep.notify()
        // 通知视图更新
        return result
    }
}

observeArray(items: Array) {
    for(let i=0, l = items.length; i<1; i++) {
        observe(item[i])
        // 观测数组中的每一项
    }
}
为什么vue采用异步渲染
如果不采用异步更新,每次更新数据都会对当前组件进行重新渲染,为了性能考虑。
dep.notify()通知watcher进行更新操作,subs[i].update()依次调用watcher的update,queueWatcher将watcher去重放到队列中,nextTick(flushSchedulerQueue)异步清空watcher队列。
nextTick实现原理
微任务高于宏任务先执行
nextTick方法主要使用了宏任务和微任务,定义了一个异步方法,多次调用了nextTick会将方法存入到队列中,通过这个异步方法清空当前队列。
nextTick方法是异步方法。
原理:nextTick(cb)调用nextTick传入cb,callbacks.push(cb)将回调存入数组中,timerFunc()调用timerFunc,返回promise支持promise的写法。
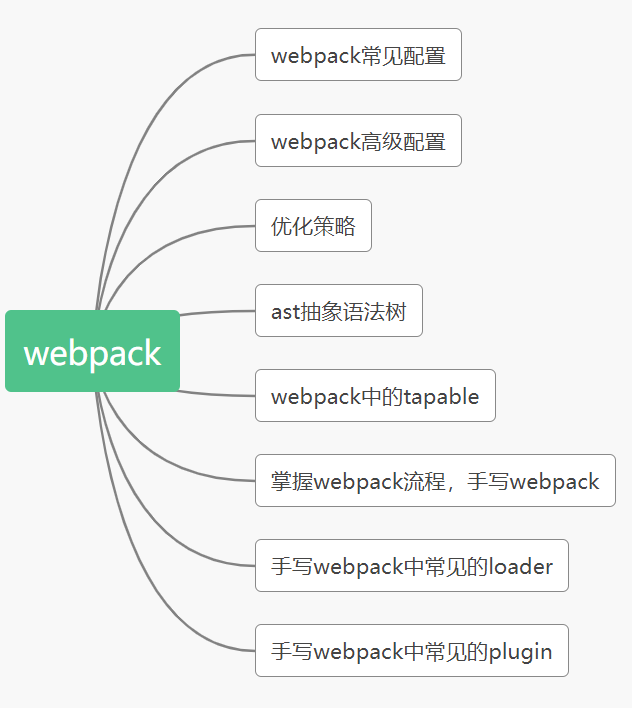
webpack
什么是webpack,webpack是一个现代的JavaScript应用的静态模块打包工具。
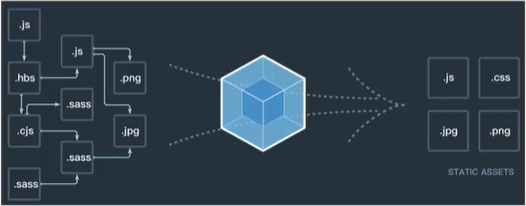
webpack是前端模块化打包工具
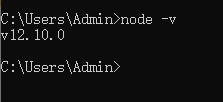
安装webpack需要安装node.js,node.js自带有软件包管理工具npm
全局安装
npm install webpack@3.6.0 -g
局部安装
npm install webpack@3.6.0 --save-dev
webpack.config.js固定名文件:
const path = require("path")
module.exports = {
    entry: './src/main.js',
    output: {
        patch: './dist',
        filename: ''
    },
}
package.json
{
    "name": 'meetwebpack',
    "version": "1.0.0",
    "description": "",
    "main": "index.js",
    "scripts": {
        "test": "echo ..."
    },
    "author": "",
    "license": "ISC"
}
什么是loader
loader是webpack中一个非常核心的概念
loader使用过程:
通过 npm安装需要使用的loader在 webpack.config.js中的moudules关键字下进行配置
package.json中定义启动
{
    "name": "meetwebpack",
    "version": "1.0.0",
    "description": "",
    "main": "index.js",
    "scripts": {
        "build": "webpack"
    },
    "author": "",
    "license": "ISC",
    "devDependencies": {
        "webpack": "^3.6.0"
    }
}
webpack的介绍
webpack可以看做是模块打包机,它可以分析你的项目结构,找到JavaScript模块以及其它的一些浏览器不能直接运行的拓展语言,将其打包为合适的格式以供浏览器使用。
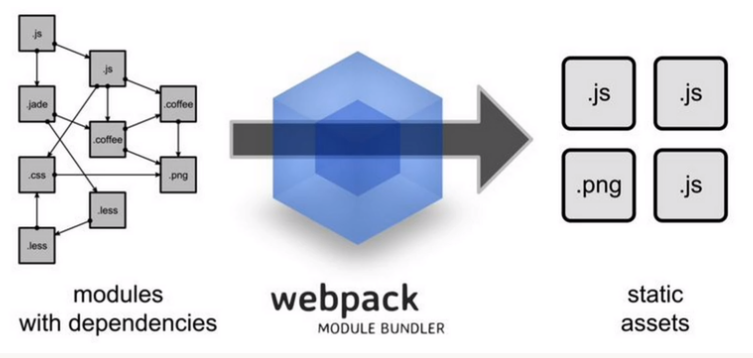
可以实现代码的转换,文件优化,代码分割,模块合并,自动刷新,代码校验,自动发布。
安装本地的webpack
webpack webpack-cli -D
初始化:
yarn init -y
yarn add webpack webpack-cli -D
webpack可以进行0配置,它是一个打包工具,可以输出后的结果(Js模块),打包(支持js的模块化)
运行webpack命令打包
npx webpack
webpack.config.js,webpack是node写出来的node的写法:
let path = require('path')
console.log(path.resolve('dist');

module.exports = {
    mode: 'development',
    // 模式,默认两种,production,development
    entry: '' // 入口
    output: {
        filename: 'bundle.js',
        // 打包后的文件名
        path: path.resolve(__dirname, 'build'),
        // 把相对路径改写为绝对路径
    }
}
自定义,webpack.config.my.js
使用命令:
npx webpack --config webpack.config.my.js
package.json:
{
    "name": 'webpack-dev-1',
    "version": "1.0.0",
    "main": "index.js",
    "license": "MIT",
    "scripts": {
      "build": "webpack --config webpack.config.my.js"
    },
    "devDependencies": {
        "webpack": "^4.28.3",
        "webpack-cli": "^3.2.0"
    }
}
使用命令:
npm run build

// npm run build -- --config webpack.config.my.js
开发服务器的配置
代码:
let path = require('path')
let HtmlWebpackPlugin = require('html-webpack-plugin')
console.log(path.resolve('dist');

module.exports = {
    devServer: {
      // 开发服务器的配置
      port: 3000,
      // 看到进度条
      progress: true,
      contentBase: "./build",
      compress: true
    },
    mode: 'development',
    // 模式,默认两种,production,development
    entry: '' // 入口
    output: {
        filename: 'bundle.js',
        // 打包后的文件名
        path: path.resolve(__dirname, 'build'),
        // 把相对路径改写为绝对路径
    },
    plugins: [
        // 数组,所有的webpack插件
        new HtmlWebpackPlugin({
            template: './src/index.html',
            filename: 'index.html',
            minify:{
                removeAttributeQuotes: true,//删除“”
                collapseWhitespace: true, // 变成一行

            },
             hash: true
        })
    ],
    module: {
        // 模块
        rules: [
            // 规则
            {test: /\.css$/, use: [{
                loader: 'style-loader',
                options: {
                    insertAt: 'top'
                }
            },'css-loader'] },
        ]
    }
}
output: {
    filename: 'bundle.[hash:8].js',// 打包文件名后只显示8位
}
{
    "name": 'webpack-dev-1',
    "version": "1.0.0",
    "main": "index.js",
    "license": "MIT",
    "scripts": {
      "build": "webpack --config webpack.config.my.js",
      "dev": "webpack-dev-server"
    },
    "devDependencies": {
        "webpack": "^4.28.3",
        "webpack-cli": "^3.2.0"
    }
}
yarn add css-loader style-loader -D
样式:
style-loader将模块的导出作为样式添加到dom中css-loader解析css文件后,使用import加载,并且返回css代码less-loader加载和转译less文件sass-loader加载和转译sass/scss文件postcss-loader使用PostCSS加载和转译css/sss文件stylus-loader加载和转译Stylus文件
style-loader安装:
npm install style-loader --save-dev
用法:
建议将style-loader与css-loader结合使用
component.js
import style from './file.css'
css-loader只负责将css文件进行加载style-loader负责将样式添加到dom中使用多个 loader时,是从右到左
代码:
// webpack.config.js
module: {
    rules: [
        {
            test: /\.css$/,
            use: ['style-loader', 'css-loader']
        }
    ]
}
css文件处理:style-loader
安装style-loader
npm install --save-dev style-loader
style-loader需要放在css-loader的前面,webpack在读取使用的loader的过程中,是按照从右向左的顺序读取的。
webpack.config.js的配置如下:
const path = require('path')

module.exports = {
    // 入口:可以是字符串/数组/对象,这里我们入口只有一个,所以写一个字符串即可。
    entry: './src/main.js',
    // 出口:通常是一个对象,里面至少包含两个重要属性,path和filename
    output:{
        path: path.resolve(__dirname, 'dist'), // 注意:path通常是一个绝对路径
        filename: 'bundle.js'
    },
    module: {
        rules: {
            {
                test: /\.css$/,
                use: ['style-loader','css-loader']
            }
        }
    }
}
webpack less文件处理
安装:
npm install --save-dev less-loader less
示例:
将css-loader,style-loader,less-loader链式调用,可以把所有样式立即应用于dom。
// webpack.config.js
module.exports = {
    ...
    rules: [{
        test: /\.less$/,
        use: [{
            loader: 'style-loader'
        },{
            loader: 'css-loader'
        },{
            loader: 'less-loader'
        }]
    }]
}
图片文件处理
css normal代码:
body {
    background: url("../img/test.jpg")
}
url-loader
npm install --save-dev url-loader
用法
url-loader功能类似于file-loader,但是在文件大小低于指定的限制时,可以返回一个DataURL
import img from './image.png'
webpack.config.js
module.exports = {
    module: {
        rules: [
            {
                test: /\.(png|jpg|gif)$/,
                use: [
                    {
                        loader: 'url-loader',
                        options: {
                            limit: 8192
                        }
                    }
                ]
            }
        ]
    }
}
img,文件要打包到的文件夹
name,获取图片原来的名字,放在该位置
hash:8,为了防止图片名称冲突,依然使用hash,但是我们只保留8位
ext,使用图片原来的扩展名
es6转es5的babel
如果希望es6转成es5,那么就需要使用babel
npm install --save-dev babel-loader@7 babel-core babel-preset-es2015
配置webpack.config.js文件:
{
    test: /\.m?js$/,
    use: {
        loader: 'babel-loader',
        options: {
            presets: ['es2015']
        }
    }
}
使用vue
如何在我们的webpack环境中集成vue.js
代码:
npm install vue --save
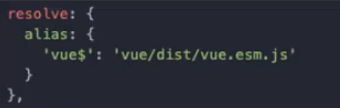
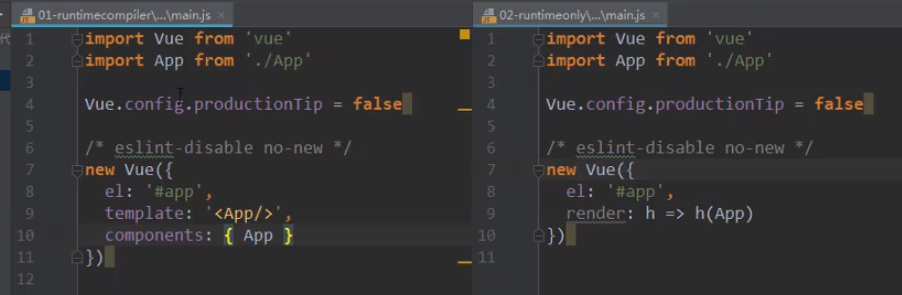
runtime-only代码中,不可以有任何的templateruntime-compiler代码中,可以有template因为有compiler可以用于编译template
spa(simple age web application)->vue-router(前端路由)
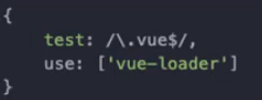
.vue文件封装处理
安装vue-loader和vue-template-compiler
npm install vue-loader vue-template-compiler --save-dev

认识webpack的plugin
plugin是什么?
plugin是插件的意思,通常用于对某个现有的架构进行扩展。webpack中的插件,是对webpack现有功能的各种扩展。
loader和plugin的区别
loader主要用于转换某些类型的模块,它是一个转换器。plugin是插件,它是对webpack本身的扩展,是一个扩展器。
plugin的使用过程:
通过 npm安装需要使用的plugins在 webpack.config.js中的plugins中配置插件
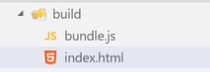
webpack.config.js的文件:
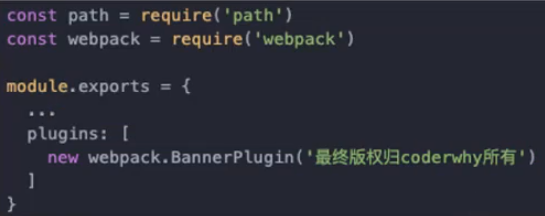
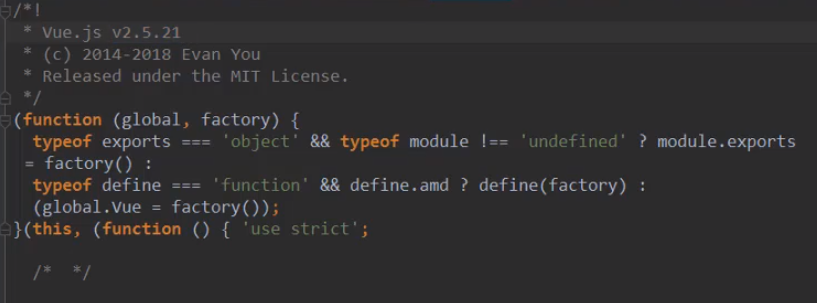
查看bundle.js文件的头部:

Vue Cli详解
什么是vue cli,Command-Line Interface,命令行界面,俗称脚手架,vue cli是一个官方发布的项目脚手架。使用vue-cli可以快速搭建vue开发环境以及对应的webpack配置。
vue cli的使用
安装vue脚手架
npm install -g @vue/cli
vuecli2初始化过程
代码:
vue init webpack vuecli2test
根据名称创建一个文件夹,存放之后项目的内容,该名称会作为默认的项目名称,但是不能包含大写字母等 Project name项目名称,不能包含大写Project description项目描述Author作者信息Vue build``runtimeInstall vue-router``no是否安装等
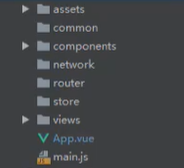
目录结构详解
build``config 是 webpack相关配置,node_modules 是依赖的node相关的模块,src是写代码地方。.babelrc是es代码相关转换配置,.editorconfig项目文本相关配置,.gitignore``git仓库忽略的文件夹配置,.postcssrc.js为css相关转化的配置。
.editorconfig
前端模块化:
为什么使用模块化,简单写js代码带来的问题,闭包引起代码不可复用,自己实现了简单的模块化,es中模块化的使用:export和import。
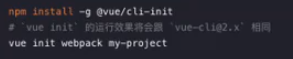
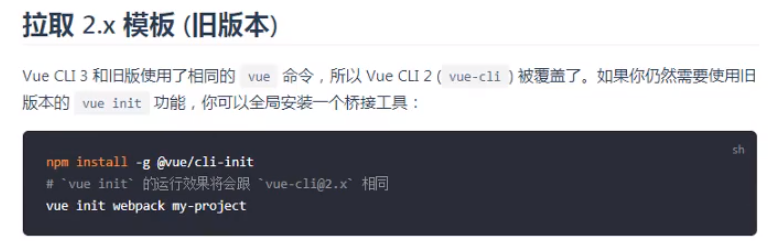
npm install @vue/cli -g
npm clean cache -force
vue cli2初始化:
vue init webpack my-project
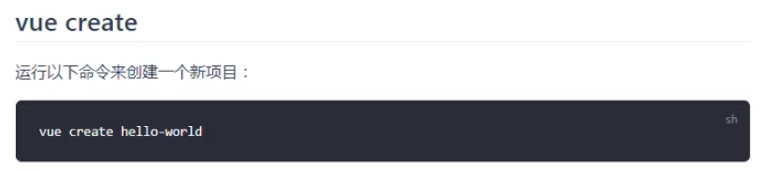
vue cli3初始化项目:
vue create my-project
箭头函数的使用和this
箭头函数,是一种定义函数的方式
定义函数的方式: function
const a = function(){

}
对象字面量中定义函数
const obj = {
    b: function() {

    },
    b() {

    }
}
箭头函数
const c = (参数列表) => {

}
const c = () => {

}
箭头函数参数和返回值
代码:
const sum = (num1, num2) => {
    return num1 + num2
}

const power = (num) => {
    return num * num
}

const num = (num1,num2) => num1 + num2
const obj = {
    a() {
        setTimeout(function() {
            console.log(this); // window
        })
        setTimeout(()=>{
          console.log(this); // obj对象
        })
    }
}
路由,,vue-router基本使用,vue-router嵌套路由,vue-router参数传递,vue-router导航守卫。
路由是一个网络工程里面的术语,路由就是通过互联的网络把信息从源地址传输到目的地址的活动。
路由器提供了两种机制:路由和转送。路由是决定数据包从来源到目的地的路径,转送将输入端的数据转移到合适的输出端。路由中有一个非常重要的概念叫路由表。路由表本质上就是一个映射表,决定了数据包的指向。
后端路由:后端处理url和页面之间的映射关系。
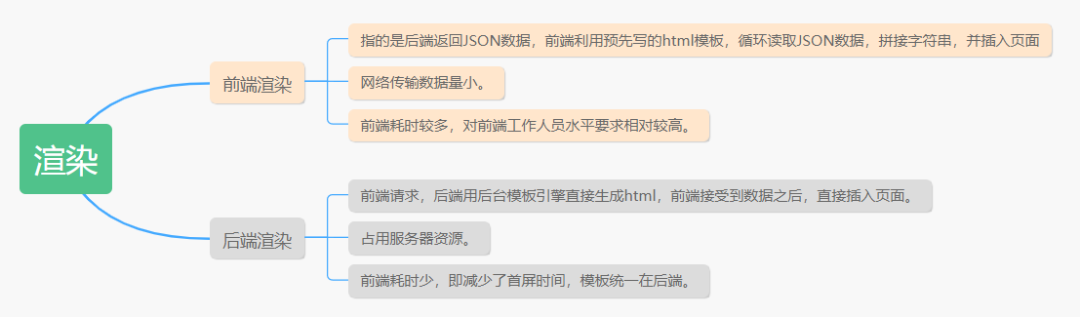
前端路由和后端路由,前端渲染和后端渲染
vue-router和koa-router的区别:
vue-router是前端路由,koa-router是后端路由。
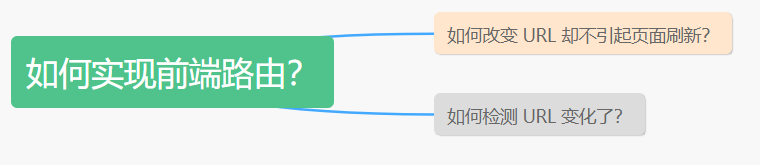
vue-router前端路由原理:
前端路由主要模式:hash模式和history模式。
路由的概念来源于服务端,在服务端中路由描述的是 URL 与处理函数之间的映射关系。
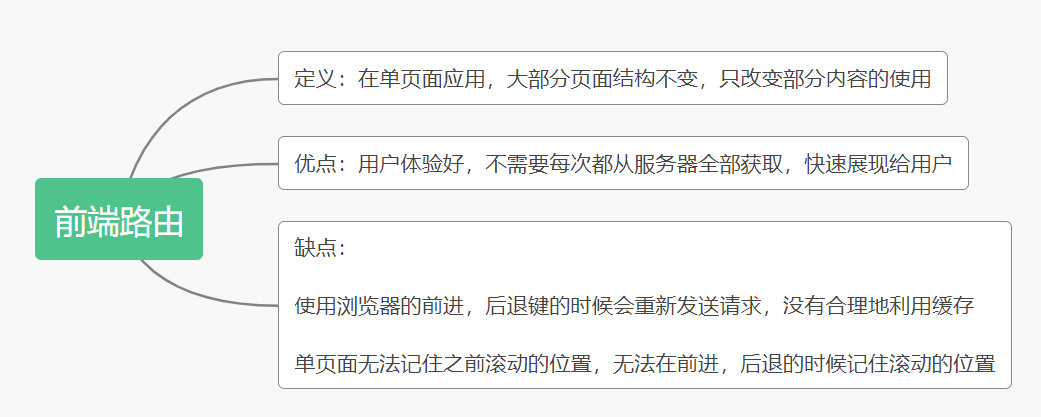
前后端渲染之争

url中的hash和html5的history
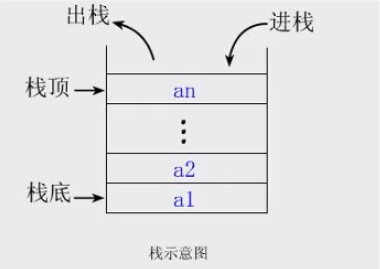
前端路由的核心是改变url,但是页面不进行整体的刷新。单页面,其实spa最重要的特点就是在前后端分离的基础上加了一层前端路由。就是前端来维护一套路由规则。
url的hash
url的hash是锚点#,本质上是改变window.location的href属性。直接赋值location.hash来改变href,但是页面不发生刷新。

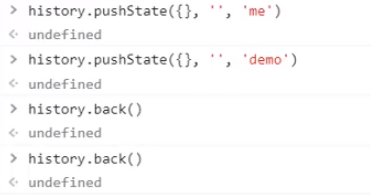
html5的history模式:pushState


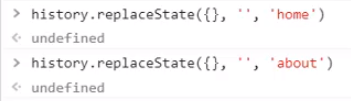
html5的history模式:replaceState
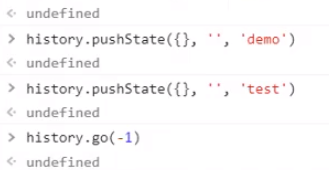
html5的history模式:go
history.go()
history.back()等价于history.go(-1)
history.forward()等价于history.go(1)
安装vue-router
npm install vue-router --save
导入路由对象,并且调用 Vue.use(VueRouter)创建路由实例,并且传入路由映射配置 在 Vue实例中挂载创建的路由实例
代码:
// 配置路由相关的信息
import VueRouter from 'vue-router'
import vue from 'vue'
import Home from '../components/Home'
import About from '../components/About'

// 通过Vue.use(插件),安装插件
Vue.use(VueRouter)

// 配置路由和组件之间的应用关系
const routes = [
 {
     path: '/home',
     component: Home
 },
 {
     path: '/about',
     component: About
 }
]

// 创建VueRouter对象
const router = new VueRouter({
 routes
})

// 将router对象传入到`Vue`实例
export default router
main.js
import Vue from 'vue'
import App from './App'
import router from './router'

Vue.config.productionTip = false

new Vue({
 el: '#app',
 router,
 render: h => h(App)
})
使用vue-router的步骤
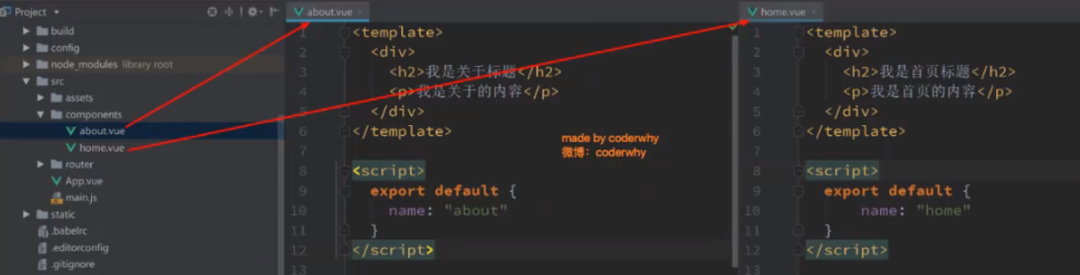
创建路由组件 配置路由映射:组件和路径映射关系 使用路由:通过
代码:
组件components
// home


  我是首页
我是关于
App.vue
 "app">
  "/home">首页
  "/about">关于
main.js
import Vue from 'vue'
import App from './App'
import router from './router'
Vue.config.productionTip = false
new Vue({
 el: '#app',
 router,
 render: h => h(App)
})
路由的偶然值和修改为
history模式
创建router实例
代码:
router->index.js
import Vue from 'vue'
import VueRouter from 'vue-router'

// 注入插件
Vue.use(VueRouter)

// 定义路由
const routes = []

// 创建router实例
const router = new VueRouter({
 routes
})

// 导出router实例
export default router
main.js代码:
import Vue from 'vue'
import App from './App'
import router from './router'

new Vue({
 el: '#app',
 router,
 render: h=>h(App)
})
router->index.js
import Vue from 'vue'
import VueRouter from 'vue-router'

import Home from '../components/home'
import About from '../components/about'

// 注入插件
Vue.use(VueRouter)

// 定义路由
const  routes = [
 {
     path: '/home',
     component: Home
 },
 {
     path: '/about',
     component: About
 }
]
使用App.vue代码
 "app">
  "/home">首页
  "/about">关于


"imgURL" alt="">
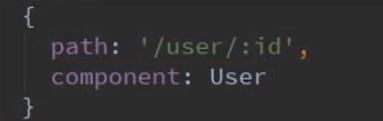
"'/uer/' + userId"> 用户
注意:不要再mutation中进行异步操作,mutation同步函数,在其中的方法必须时同步方法。
action的基本定义,如果有异步操作,比如网络请求,
// 不能再mutation中使用异步操作,不能再这里进行异步操作
update(state) {
    setTimeout(()=>{
        state.info.name = 'web'
    },1000)
}

mutations: {
    // 方法
    [INCREMENT](state){
        state.counter++
    }
}
actions: {
    // context:上下文,=》store


}
actions: {
    aUpdateInfo(context) {
        setTimeout(()=>{
            context.commit('updateInfo')
        },1000)
    }
}

// xx.vue
updateInfo(){
    this.$store.dispatch('aUpdateInfo')
}

updateInfo(){

    this.$store.dispatch('aUpdateInfo',{
        message: 'web',
        success: () => {
            console.log('web')
        }
    })
}
aUpdateInfo(context, payload) {
    return new Promise((resolve, reject) => {...})
}
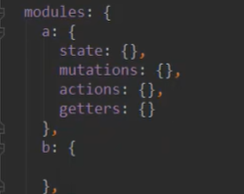
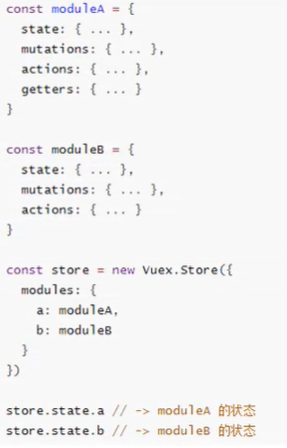
vuex中的modules使用
modules时模块的意思
getters: {
    stu(){

    },
    stuLength(state, getters) {
        return getters.stu.length
    }
}
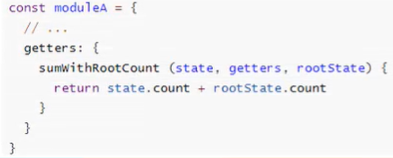
使用根数据:
getters: {
    fullName(state) {
        return state.name + '1'
    },
    fullName1(state, getters) {
        return getters.fullName + '2'
    },
    fullName3(state, getters, rootState) {
        return getters.fullName2+rootState.counter
    }
}
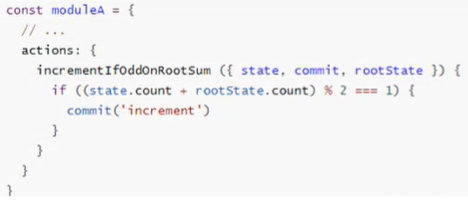
在模块中actions打印console.log(context)
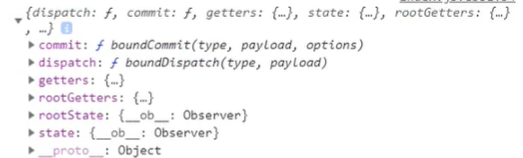
actions接收一个context参数对象,局部状态通过context.state暴露出来,根节点状态为context.rootState
import mutations from './mutations'
import actions from './actions'
import getters from './getters'
import moduleA from './modules/moduleA'

import Vuex from 'vuex'
import Vue from 'vue'
Vue.use(Vuex)

const state = {

}

const store = new Vuex.Store({
    state,
    mutations,
    actions,
    getters,
    modules: {
        a: moduleA
    }
})

export default store
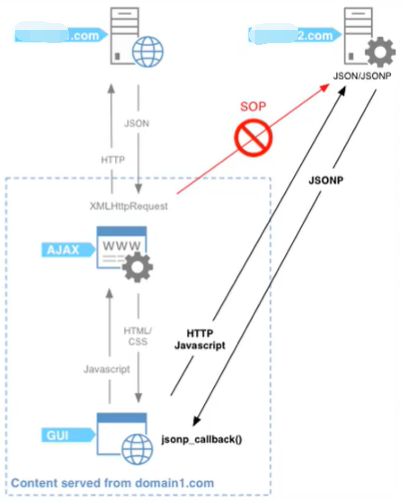
网络封装
axios网络模块的封装
ajax是基于XMLHttpRequest(XHR);jQuery-Ajax相对于传统的ajax非常好用。
axios特点:
在浏览器中发送 XMLHttpRequests请求在 node.js中发送http请求支持 Promise API拦截请求和响应 转换请求和响应数据
axios请求方式:
axios(config)
axios.request(config)
axios.get()
axios.delete()
axios.head()
axios.post()
axios.put()
axios.patch()
安装
npm install axios --save
axios({
    // 默认get
    url: '',
    method: 'get'
}).then(res=>{
    console.log(res)
})
// import request from "../utils/request.js"
import {request} from './network'

export function getHome() {
    return request({
        url: '/home/xxx'
    })
}

export function getXX(type, page) {
    return request({
        url: '/home/xx',
        params: {
            type,
            page
        }
    })
}
并发请求
代码:
axios.all([axios({
 url: ''
}), axios({
 url: '',
 params: {
     type: '',
     page: 1,
 }
})]).then(results => {

})

// then(axios.spread((res1,res2)=>{...}))
全局配置
axios.defaults.baseURL=''

axios.all ..{
    url: '/home'
}

axios.defaults.baseURL = 'https://api.example.com';
axios.defaults.headers.common['Authorization'] = AUTH_TOKEN;
axios.defaults.headers.post['Content-Type'] = 'application/x-www-form-urlencoded';

axios.defaults.baseURL = global.HOST;
request.js
import axios from 'axios'
export function request(config,success,failure){
// 创建axios实例
const instance = axios.create({
baseURL: '',
timeout: 5000
})
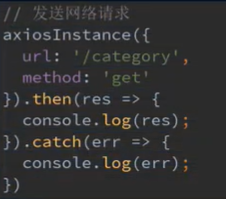
// 发送网络请求
instance(config)
.then(res=>{
success(res)
})
.catch(err=>{
failure(err)
})
}
main.js
import {request} from './xx/request'

request({
    url: ''
},res=>{

),err=>{

}
也可以使用promise方法,不过本身返回的就是promise
import axios from 'axios'
export function request(config) {
    const instance = axios.create({
        baseURL: '',
        timeout: 2000
    })
    return instance(config)
}
axios拦截器的使用
// 配置请求和响应拦截
instance.interceptors.request.use(config => {
    console.log('request拦截success中')
    return config
},err => {
    console.log('request拦截failure中')
    return err
})

instance.interceptors.response.use(response => {
    console.log('response拦截success中')
    return response.data
},err => {
    console.log('response拦截failure中')
    return err
})
封装axios
// request.js
import axios from 'axios'
cosnt service = axios.create({
 baseURL: process.env.BASE_API,
 timeout: 2000
})

service.interceptors.request.use(config=>{
 //发请求前做的一些处理,数据转化,配置请求头,设置token,设置loading等
 config.data=JSON.stringify(config.data);
 config.headers = {
     'Content-Type':'application/x-www-form-urlencoded'
 }
 return config
},error=>{
 Promise.reject(error)
})

// 响应拦截器
service.interceptors.response.use(response => {
 return response
}, error => {
  if (error && error.response) {
    switch (error.response.status) {
      case 400:
        error.message = '错误请求'
        break;
      case 401:
        error.message = '未授权,请重新登录'
        break;
      case 403:
        error.message = '拒绝访问'
        break;
      case 404:
        error.message = '请求错误,未找到该资源'
        window.location.href = "/NotFound"
        break;
      case 405:
        error.message = '请求方法未允许'
        break;
      case 408:
        error.message = '请求超时'
        break;
      case 500:
        error.message = '服务器端出错'
        break;
      case 501:
        error.message = '网络未实现'
        break;
      case 502:
        error.message = '网络错误'
        break;
      case 503:
        error.message = '服务不可用'
        break;
      case 504:
        error.message = '网络超时'
        break;
      case 505:
        error.message = 'http版本不支持该请求'
        break;
      default:
        error.message = `连接错误${error.response.status}`
    }
  } else {
    if (JSON.stringify(error).includes('timeout')) {
      Message.error('服务器响应超时,请刷新当前页')
    }
    error.message('连接服务器失败')
  }
  Message.error(err.message)
  return Promise.resolve(error.response)
})
// 导入文件
export default service
封装请求http.js
import request from './request'
const http ={
    /**
     * methods: 请求
     * @param url 请求地址
     * @param params 请求参数
     */
    get(url,params){
        const config = {
            methods: 'get',
            url:url
        }
        if(params){
         config.params = params
        }
        return request(config)
    },
    post(url,params){
        const config = {
            methods: 'post',
            url:url
        }
        if(params){
         config.data = params
        }
        return request(config)
    },
    put(url,params){
        const config = {
            methods: 'put',
            url:url
        }
        if(params){
         config.params = params
        }
        return request(config)
    },
    delete(url,params){
        const config = {
            methods: 'delete',
            url:url
        }
        if(params) {
         config.params = params
        }
        return request(config)
    }
}

export default http
// api.js
import http from '../utils/http'
let resquest = "/xx/request/"
// get请求
export function getListAPI(params){
return http.get(`${resquest}/getList.json`,params)
}
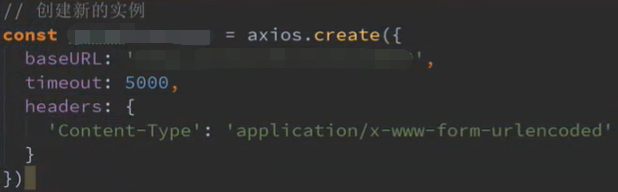
// js
//创建新的axios实例,
const service = axios.create({
baseURL: process.env.BASE_API,
timeout: 3 * 1000
})
项目
创建项目:
vue create webMall

npm run serve
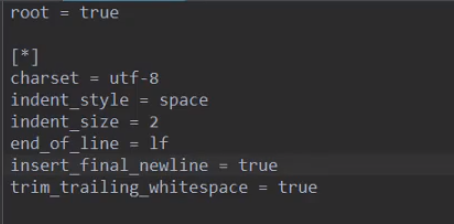
// .editorconfig
root = true
[*]
charset = utf-8
indent_style=space
indent_size = 2
end_of_line = lf
insert_final_newline = true
trim_trailing_whitespace = true
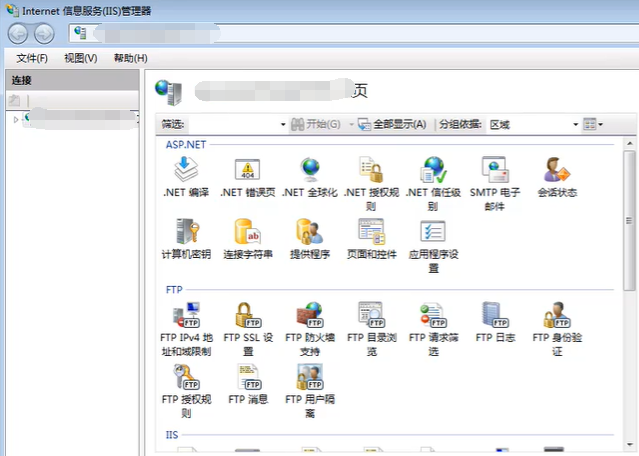
项目在
window下部署
main.js代码:
import store from './store'
import FastClick from 'fastclick'
import VueLazyLoad from 'vue-lazyload'

import toast from 'components/common/toast'

Vue.config.productionTip = false
// 添加事件总线对象
Vue.prototype.$bus = new Vue()
// 安装toast插件
Vue.use(toast)
// 解决移动端300ms延迟
FastClick.attach(document.body)
// 使用懒加载的插件
Vue.use(VueLazyLoad,{
 loading: require('./xx.png')
})
windows安装nginx,linux部署,centos上安装nginx
linux ubuntu
Ubuntu是一个以桌面应用为主的Linux操作系统,其名称来自非洲南部祖鲁语或豪萨语的“ubuntu"一词。
操作系统:Window10 + Centos6.5(虚拟机)
yum install nginx
systemtl start nginx.service
systemctl enable nginx.service
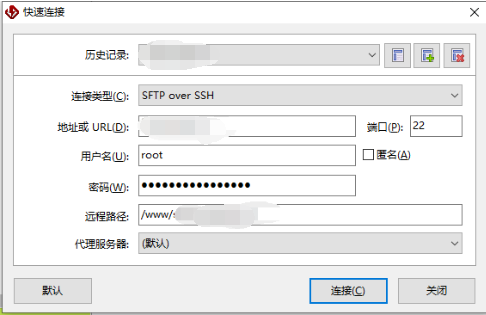
通过Xftp将vue项目文件上传至云服务器
使用Xshell连接云服务器
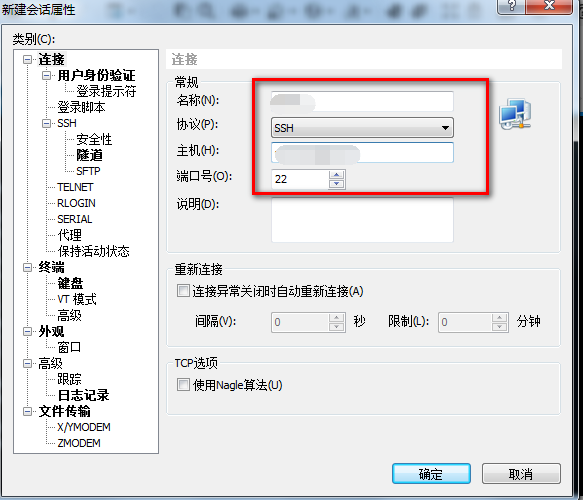
主机就是阿里云上创建的实例的公网ip
输入登录名和密码,登录名就是购买服务器时输入的登录名和密码。

运行npm run build命令,有一个dist文件夹,这就是vue项目打包后的文件。
nginx安装配置
在Xshell终端输入命令yum install nginx,当需要确认时输入”y“回车。
安装完成后,输入service nginx start启动nginx服务。
通过命令nginx -t查看nginx所在的安装目录。
在命令行输入命令cd/etc/nginx 切换到nginx目录下,再输入cat nginx.conf可查看当前nginx配置文件。
输入命令 wget https://nodejs.org/dist/v10.8.0/node-v10.8.0-linux-x64.tar.xz 回车,等待安装。
输入命令tar xvf node-v10.8.0-linux-x64.tar.xz 回车进行解压操作。
小结:
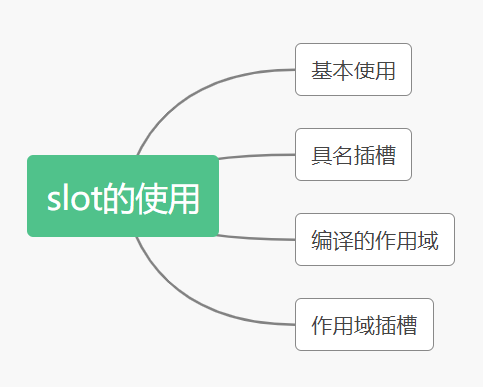
计算属性在多次使用时,只会调用一次,因为它是有缓存额 修饰符: stop,prevent,.enter,.once,.native等,lazy,number,trim等。模板的分类写法: script,template父子组件的通信:父传子, props,子传父,$emit项目, npm install,npm run servewebStorm开发vue在Plugins安装插件vue.js在 2.6.0版本中,Vue为具名插槽和作用域插槽引入了一个新的统一的语法 (即slot和slot-scope这两个目前已被废弃、尚未移除,仍在文档中的特性。v-slot用法,分为三类:默认插槽、具名插槽以及作用域插槽。
作用域插槽,通过 slot-scope属性来接受子组件传入的属性集合
默认插槽
代码:
// 子组件


      默认值
任何没有被包裹在带有v-slot的中的内容都会被视为默认插槽的内容。当子组件只有默认插槽时,
// 父组件


      内容1
      内容2
      内容3


    "web">
      插槽

      插槽
具名插槽: v-slot重复定义同样的name后只会加载最后一个定义的插槽内容
// 子组件
"main">
作用域插槽:
// 子组件
Vue如何直接调用Component里的方法
"BComponent">
最后
我是程序员哆啦A梦,蓝胖子,简书万粉优秀创作者,掘金优秀作者、CSDN博客专家,云+社区社区活跃作者,致力于打造一系列能够帮助程序员提高的优质文章。网站@http://www.dadaqianduan.cn
扫码关注公众号,订阅更多精彩内容。
