
微服务的注册与发现:如何集成Eureka Server?
如何集成Eureka Server
本节将创建一个基于Eureka Server实现的注册服务器。由于Spring Cloud项目本身也是基于Spring Boot的,因此,我们可以基于现有的Spring Boot来进行更改。
以前面创建的hello-world应用作为基础,改造成为新的应用micro-weather-eureka- server。
所需环境
为了演示本例,需要采用如下开发环境。
JDK 8。
●Gradle 4.0。
●Spring Boot 2.0.0.M3。
●Spring Cloud Starter Netflix Eureka Server Finchley.M2。
更改build.gradle配置
与hello-world相比,
micro-weather-eureka-server 应用的build.gradle 配置的变化,主要体现在以下几点。
●springBootVersion 变量指定了Spring Boot的版本,这里设定为2.0.0.M3,而非之前的2.0.0.M4。
因为最新的Spring Cloud并未对Spring Boot 2.0.0.M4做好兼容。
添加了springCloudVersion变量,用于指定Spring Cloud的版本。目前,本书中主要用了Finchley.M2版本。
在dependencyManagement (依赖管理)中,我们导入了Spring Cloud的依赖的管理。
最为重要的是,在依赖中,我们添加了Spring Cloud Starter Netlix Eureka Server依赖。
micro-weather-eureka-server应用的build.gradle详细配置如下。
// buildscript 代码块中脚本优先执行
buildscript {
// ext用于定义动态属性
ext {
springBootversion = '2.0.0.M3'
//使用了Maven的中央仓库及Spring自己的仓库(也可以指定其他仓库)
repositories {
/ /mavenCentral()
maven { url "https://repo. spring. io/snapshot" }
maven { url "https://repo. spring. io/milestone" }
maven { url "http:/ /maven. aliyun. com/ nexus/ content/groups/
public/" }
//依赖关系
dependencies {
// classpath声明 了在执行其余的脚本时,ClassLoader 可以使用这些依赖项
classpath ("org. springframework . boot :spring-boot-gradle-plugin:
${ springBootVersion}")
}
//使用插件
apply plugin: 'java'
apply plugin: 'eclipse'
apply plugin: ' org. springf ramework . boot'
apply plugin: ' io. spring .dependency-management'
//指定了生成的编译文件的版本,默认是打成了jar包
group = ' com. waylau. spring.cloud'
version = '1.0.0'
//指定编译. java文件的JDK版本
sourceCompatibility =1.8
//使用了Maven的中央仓库及Spr ing自己的仓库(也可以指定其他仓库)
repositories
/ /mavenCentral ()
maven { url "https:// repo.spring. io/ snapshot" }
maven { url "https://repo. spring. io/milestone" }
maven { url "http: //maven. aliyun. com/ nexus/content/groups/public/"
ext
springCloudVersion = 'Finchley .M2 '
dependencies {
//添加Spring Cloud Starter Netflix Eureka Server依赖
compile ('org. springf ramework. cloud:spring-cloud-starter-netflix-
eureka-server')
//该依赖用于测试阶段
tes tCompile ( 'org. spr ingf ramework . boot: spring-boot-starter-test')
dependencyManagement{
imports {
mavenBom "org. spr ingf ramework.cloud:spring-cloud-dependencies:
$ {springCloudVersion}"
其中,Spring Cloud Starter Netlix Eureka Server自身又依赖了如下的项目。
<dependencies>
<dependency>
<groupId>org.spr ingframework.cloudgroupId>
<arti factId>spring-cloud-starterarti factId>
dependency>
<dependency>
<groupId>org. spr ingf ramework.cloudgroupId>
<arti factId>spring-cloud-netflix-eureka-serverartifactId>
dependency>
<dependency>
<groupId>org. spr ingframework. cloudgroupId>
<arti factId>spring-cloud-starter-netflix-archaiusarti factId>
dependency>
<dependency>
<groupId>org . springfr amework.cloudgroupId>
<arti factId> spring-cloud-starter -netflix- ribbonarti factId>
dependency>
<dependency>
<groupId>com. netflix. ribbongroupId>
<artifactId> ribbon-eurekaartifactId>
dependency>
dependencies>
所有配置都能够在Spring Cloud Starter Netlix Eureka Server项目的porm文件中查看到。
启用Eureka Server
为了启用Eureka Server, 在应用的根目录的Application类上增加@EnableEurekaServer注解即可。
import org. springframework.boot .SpringApplication;
import org. springf ramework . boot . autoconfigure . Spr ingBootApplication;
import org. springframework. cloud. netflix. eureka.server .EnableEurekaServer;
/**
主应用程序.
* @since 1.0.0 2017年10月31日
@author Way Lau
*/
@SpringBootApplication
@EnableEurekaServer
public class Application {
public static void main(String[] args) {
SpringApplication. run (Application.class, args) ;
}
}
该注解就是为了激活Eureka Server相关的自动配置类
org.springframework.cloud.ntix.eureka.server.EurekaServerAutoConfiguration。
修改项目配置
修改application.properties,增加如下配置。
server.port: 8761
eureka. instance . hostname: localhost
eureka. client. registerWithEureka: false
eureka.client. fetchRegistry: false
eureka. client. serviceUrl . defaultZone: http:/ /${eureka. instance. hostname} :
${server . port}/eureka/
其中:
server.port:指明了应用启动的端口号;
eureka.instance.hostname:应用的主机名称;
●
eureka.client.registerWithEureka: 值为false 意味着自身仅作为服务器,不作为客户端;
eureka.client.fetchRegstry:值为false 意味着无须注册自身;
●
eureka.client.serviceUrl.defaultZone: 指明了应用的URL。
清空资源目录
在src/main/resources目录下,除了application.properties 文件外,其他没有用到的目录或文件都删除,特别是templates目录,因为这个目录会覆盖Eureka Server自带的管理界面。
启动
启动应用,访问htt:/tcalhost:8761,可以看到如图8-1所示的Eureka Server自带的UI管理界面。
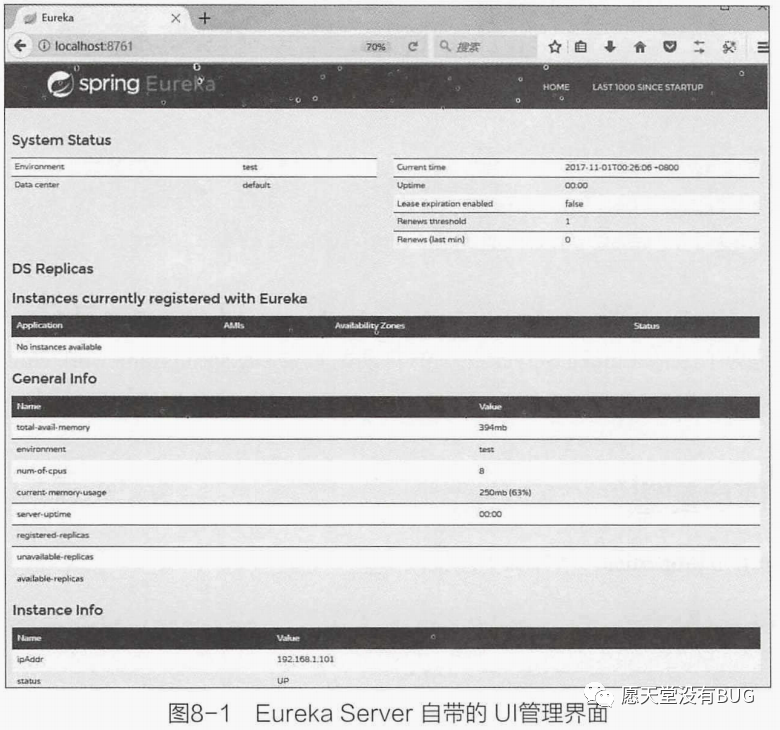
自此,Eureka Server注册服务器搭建完毕。
本篇文章给大家讲解的内容是如何集成Eureka Server
下篇文章给大家讲解如何集成Eureka Client;
觉得文章不错的朋友可以转发此文关注小编;
感谢大家的支持!
本文就是愿天堂没有BUG给大家分享的内容,大家有收获的话可以分享下,想学习更多的话可以到微信公众号里找我,我等你哦。