Python OpenCV像素操作
点击上方“小白学视觉”,选择加"星标"或“置顶”
重磅干货,第一时间送达
本文转自:opencv学堂
环境声明 : Python3.6 + OpenCV3.3 + PyCharm IDE
import cv2 as cv;
import numpy as np;
对RGB图像来说,在Python中第一个维度表示高度、第二个维度表示宽度、第三个维度是通道数目,可以通过下面的代码获取图像三个维度的大小
print(image.shape)
print(image.size)
print(image.dtype)
直接从图像中读取,缺点是每次都需要访问imread之后的Mat对象,进行native操作,速度是个问题, 代码实现如下:
height = image.shape[0]
width = image.shape[1]
channels = image.shape[2]
print(image.shape)
for row in range(height):
for col in range(width):
for c in range(channels):
level = image[row, col, c]
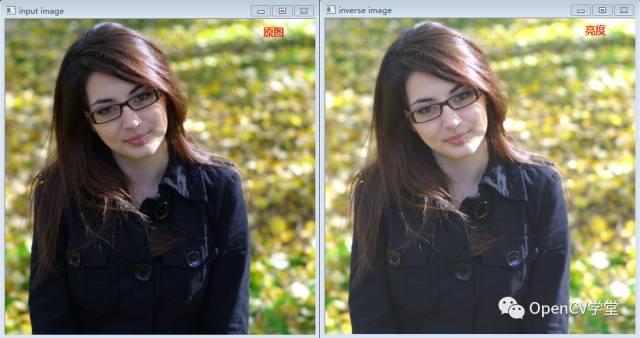
pv = level + 30
image[row, col, c] = (255 if pv>255 else pv)
首先通过Numpy把像素数据读到内存中,在内存中进行高效循环访问每个像素,修改之后,在赋值回去即可,代码如下:
# read once
pixel_data = np.array(image, dtype = np.uint8);
# loop pixel by pixel
for row in range(height):
for col in range(width):
for c in range(channels):
level = pixel_data[row, col, c]
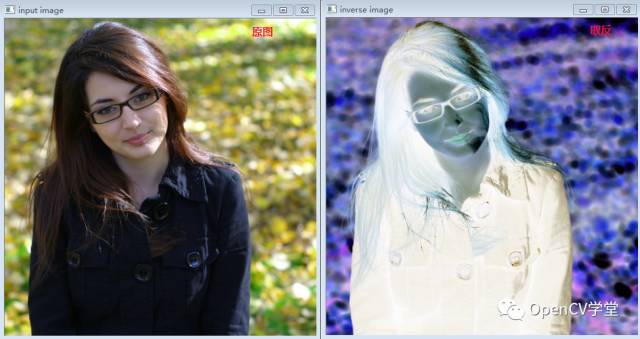
pixel_data[row, col, c] = 255 - level
# write once
image[ : : ] = pixel_data
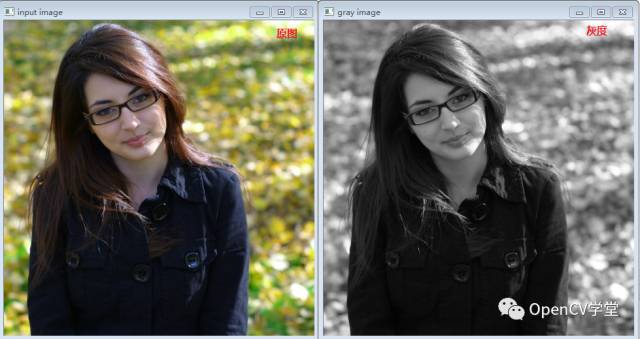
案例演示 在Python语言中完成图像的属性读取、像素读取与操作、实现了图像的颜色取反、亮度提升、灰度化、梯度化、操作。首先看一下效果:


完整的Python代码实现如下:
import cv2 as cv;
import numpy as np;
def inverse(image):
print("read and write pixel by pixel")
print(image.shape)
print(image.size)
print(image.dtype)
height = image.shape[0]
width = image.shape[1]
channels = image.shape[2]
# read once
pixel_data = np.array(image, dtype = np.uint8);
# loop pixel by pixel
for row in range(height):
for col in range(width):
for c in range(channels):
level = pixel_data[row, col, c]
pixel_data[row, col, c] = 255 - level
# write once
image[ : : ] = pixel_data
cv.imshow("inverse image", image)
def brightness(image):
print("read and write pixel by pixel")
height = image.shape[0]
width = image.shape[1]
channels = image.shape[2]
print(image.shape)
for row in range(height):
for col in range(width):
for c in range(channels):
level = image[row, col, c]
pv = level + 30
image[row, col, c] = (255 if pv>255 else pv)
cv.imshow("inverse image", image);
def to_gray(image):
print("RGB to Gray Image")
height = image.shape[0]
width = image.shape[1]
channels = image.shape[2]
print("channels : ", channels);
print(image.shape)
for row in range(height):
for col in range(width):
blue = image[row, col, 0]
green = image[row, col, 1];
red = image[row, col, 2]
gray = (0.2989*red + 0.5870*green + 0.1140*blue);
image[row, col, 0] = gray;
image[row, col, 1] = gray;
image[row, col, 2] = gray;
cv.imshow("gray image", image)
def gradient_image(image):
gx = cv.Sobel(image, cv.CV_32F, 1, 0)
gy = cv.Sobel(image, cv.CV_32F, 0, 1)
dst = cv.addWeighted(gx, 0.5, gy, 0.5, 50)
sobel_abs = np.absolute(dst)
sobel_8u = np.uint8(sobel_abs)
cv.imshow("gradient image", sobel_8u)
def clam(pv):
if pv > 255:
return 255
if pv < 0:
return 0;
return pv;
print("Image Pixel Operation Demo")
src = cv.imread("D:/vcprojects/images/demo.png")
cv.namedWindow("input image", cv.WINDOW_AUTOSIZE)
cv.imshow("input image", src)
gradient_image(src)
cv.waitKey(0)
cv.destroyAllWindows()
交流群
欢迎加入公众号读者群一起和同行交流,目前有SLAM、三维视觉、传感器、自动驾驶、计算摄影、检测、分割、识别、医学影像、GAN、算法竞赛等微信群(以后会逐渐细分),请扫描下面微信号加群,备注:”昵称+学校/公司+研究方向“,例如:”张三 + 上海交大 + 视觉SLAM“。请按照格式备注,否则不予通过。添加成功后会根据研究方向邀请进入相关微信群。请勿在群内发送广告,否则会请出群,谢谢理解~

