
使用PixelLib来实现图像分割
点击上方“小白学视觉”,选择加"星标"或“置顶”
重磅干货,第一时间送达
帮助无人驾驶汽车视觉系统有效的了解道路场景。 医学图像分割:为执行诊断测试提供身体部位的分割。 卫星图像分析。
pip3 install tensorflow
pip3 install opencv-python
pip3 install scikit-image
pip3 install pillow
pip3 install pixellib
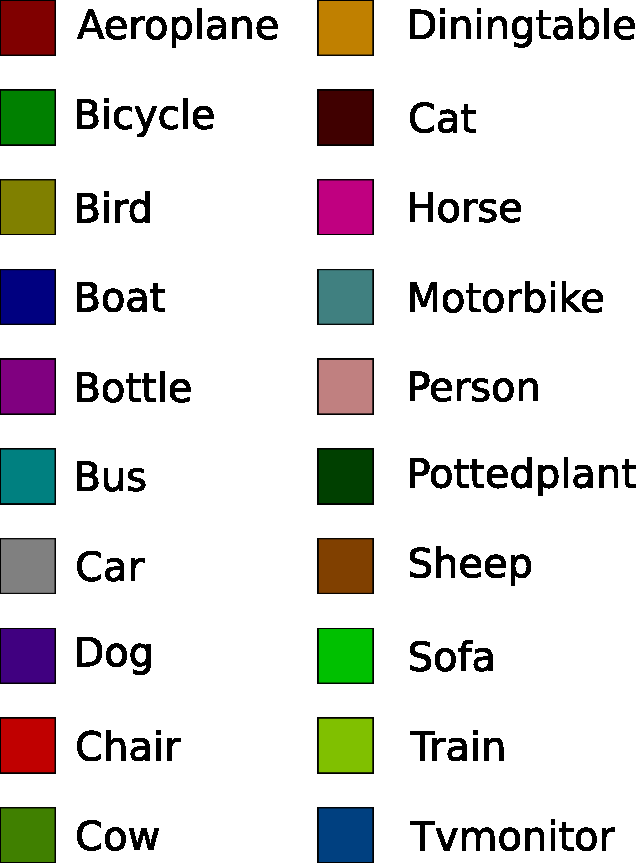
import pixellibfrom pixellib.semantic import semantic_segmentationsegment_image = semantic_segmentation()segment_image.load_pascalvoc_model("deeplabv3_xception_tf_dim_ordering_tf_kernels.h5")segment_image.segmentAsPascalvoc("path_to_image", output_image_name = "path_to_output_image")
import pixellibfrom pixellib.semantic import semantic_segmentationsegment_image = semantic_segmentation()
segment_image.load_pascalvoc_model(“deeplabv3_xception_tf_dim_ordering_tf_kernels.h5”)https://github.com/ayoolaolafenwa/PixelLib/releases/download/1.1/deeplabv3_xception_tf_dim_ordering_tf_kernels.h5
segment_image.segmentAsPascalvoc(“path_to_image”, output_image_name = “path_to_output_image)
path_to_image:这个是要分割的图像路径。 output_image_name:这个是保存分割图像的路径。它将保存在当前工作目录中。
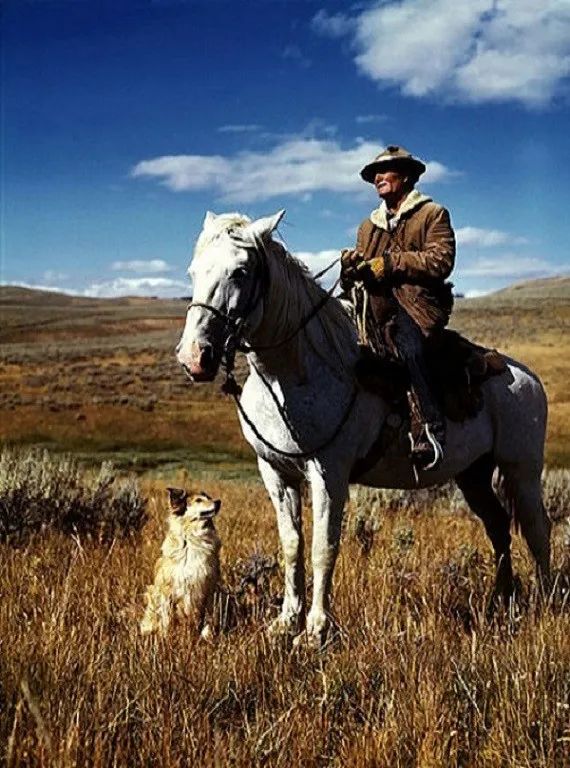
import pixellibfrom pixellib.semantic import semantic_segmentationsegment_image = semantic_segmentation()segment_image.load_pascalvoc_model("deeplabv3_xception_tf_dim_ordering_tf_kernels.h5")segment_image.segmentAsPascalvoc("sample1.jpg", output_image_name = "image_new.jpg")
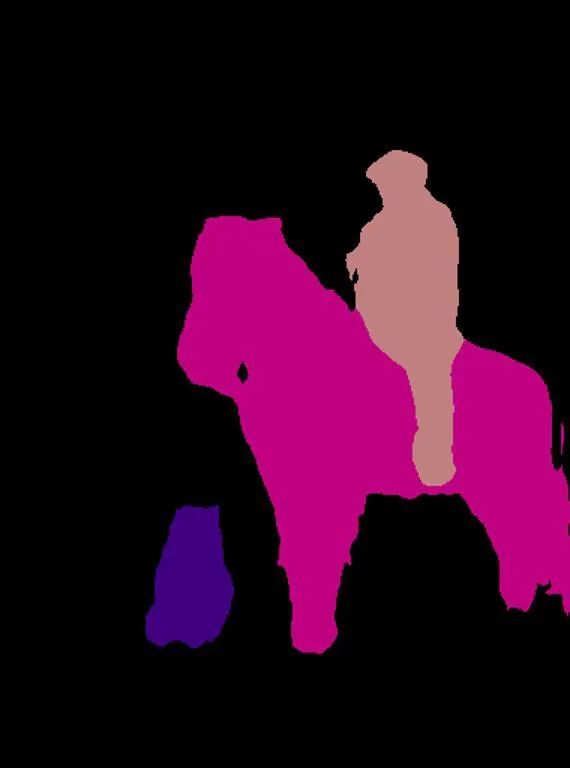
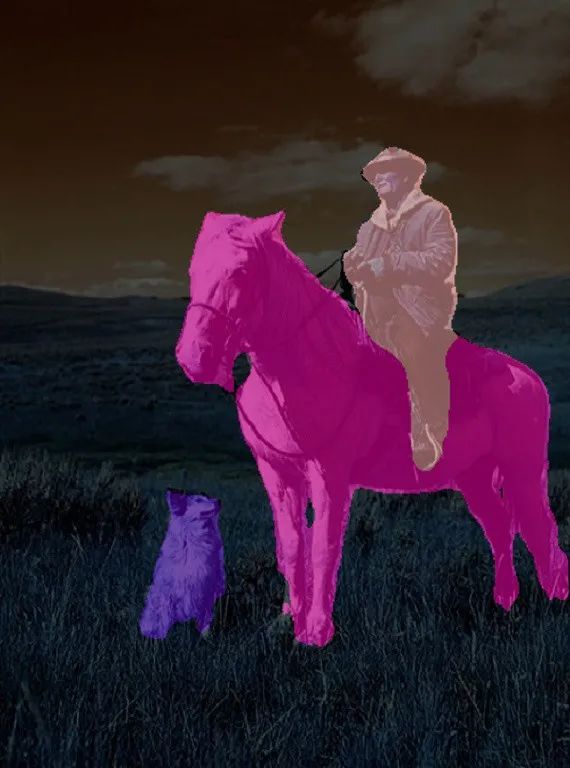
segment_image.segmentAsPascalvoc("sample1.jpg", output_image_name = "image_new.jpg", overlay = True)
import pixellibfrom pixellib.semantic import semantic_segmentationimport timesegment_image = semantic_segmentation()segment_image.load_pascalvoc_model("pascal.h5")start = time.time()segment_image.segmentAsPascalvoc("sample1.jpg", output_image_name= "image_new.jpg")end = time.time()print(f"Inference Time: {end-start:.2f}seconds")
Inference Time: 7.38seconds
output, segmap = segment_image.segmentAsPascalvoc()
import pixellibfrom pixellib.semantic import semantic_segmentationimport cv2segment_image = semantic_segmentation()segment_image.load_pascalvoc_model("pascal.h5")output, segmap = segment_image.segmentAsPascalvoc("sample1.jpg")cv2.imwrite("img.jpg", output)print(output.shape)
segmap, segoverlay = segment_image.segmentAsPascalvoc(overlay = True)
import pixellibfrom pixellib.semantic import semantic_segmentationimport cv2segment_image = semantic_segmentation()segment_image.load_pascalvoc_model("pascal.h5")segmap, segoverlay = segment_image.segmentAsPascalvoc("sample1.jpg", overlay= True)cv2.imwrite("img.jpg", segoverlay)print(segoverlay.shape)import pixellibfrom pixellib.instance import instance_segmentationsegment_image = instance_segmentation()segment_image.load_model("mask_rcnn_coco.h5")segment_image.segmentImage("path_to_image", output_image_name = "output_image_path")
import pixellibfrom pixellib.instance import instance_segmentationsegment_image = instance_segmentation()
segment_image.load_model("mask_rcnn_coco.h5")
https://github.com/ayoolaolafenwa/PixelLib/releases/download/1.2/mask_rcnn_coco.h5
segment_image.segmentImage("path_to_image", output_image_name = "output_image_path")
path_to_image:模型要预测的图像路径。 output_image_path:保存分割结果的路径。它将保存在当前工作目录中。

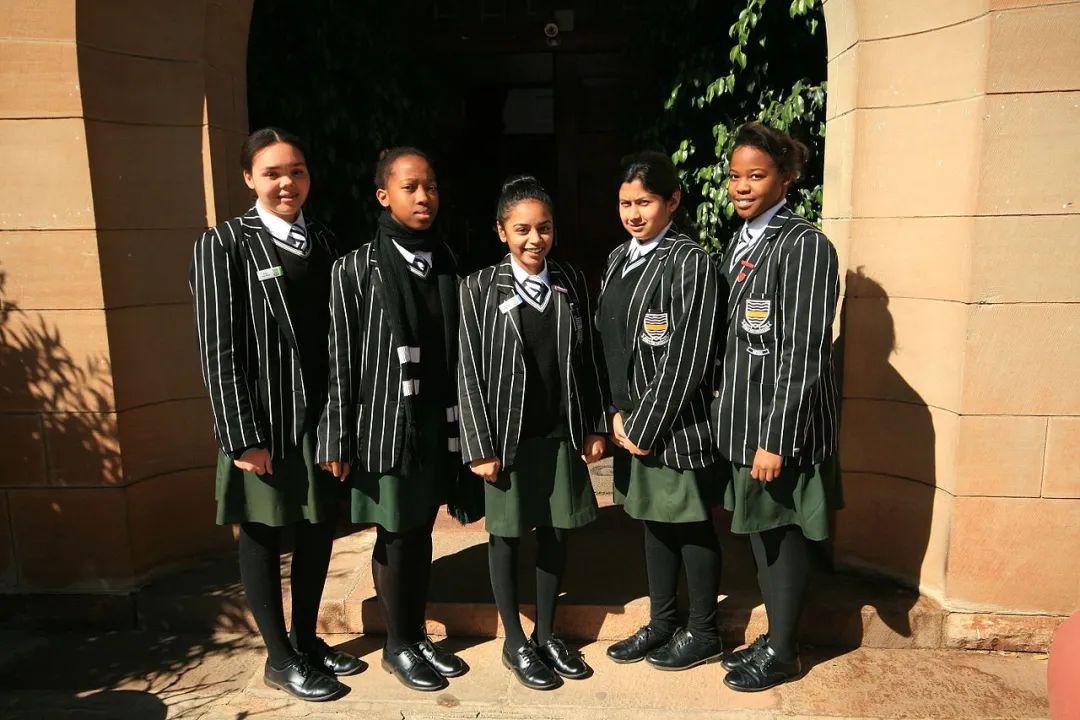
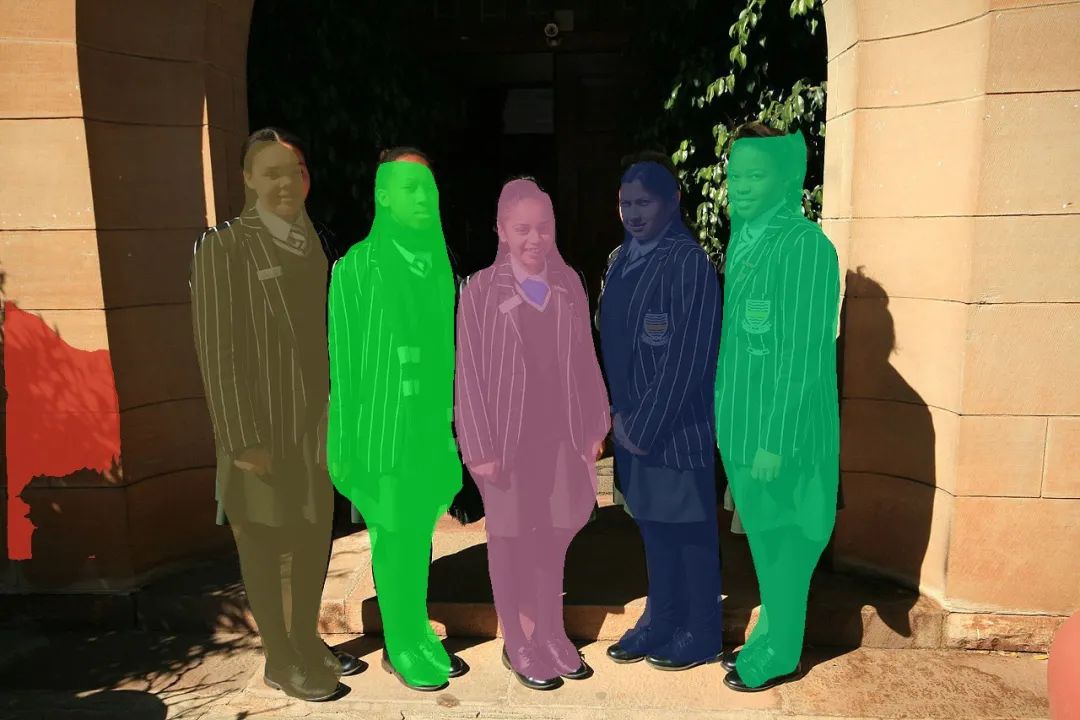
import pixellibfrom pixellib.instance import instance_segmentationsegment_image = instance_segmentation()segment_image.load_model("mask_rcnn_coco.h5")segment_image.segmentImage("sample2.jpg", output_image_name = "image_new.jpg")
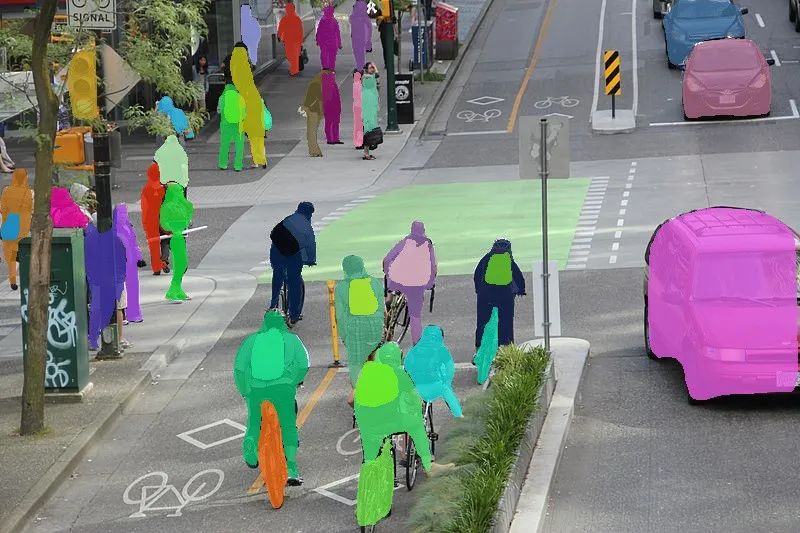
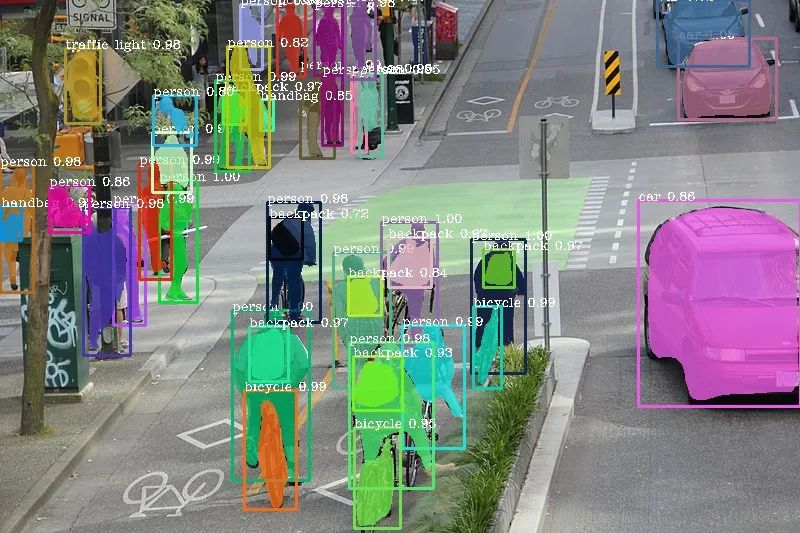
segment_image.segmentImage("path_to_image", output_image_name = "output_image_path", show_bboxes = True)
import pixellibfrom pixellib.instance import instance_segmentationimport timesegment_image = instance_segmentation()segment_image.load_model("mask_rcnn_coco.h5")start = time.time()segment_image.segmentImage("former.jpg", output_image_name= "image_new.jpg")end = time.time()print(f"Inference Time: {end-start:.2f}seconds")
Inference Time: 12.87seconds
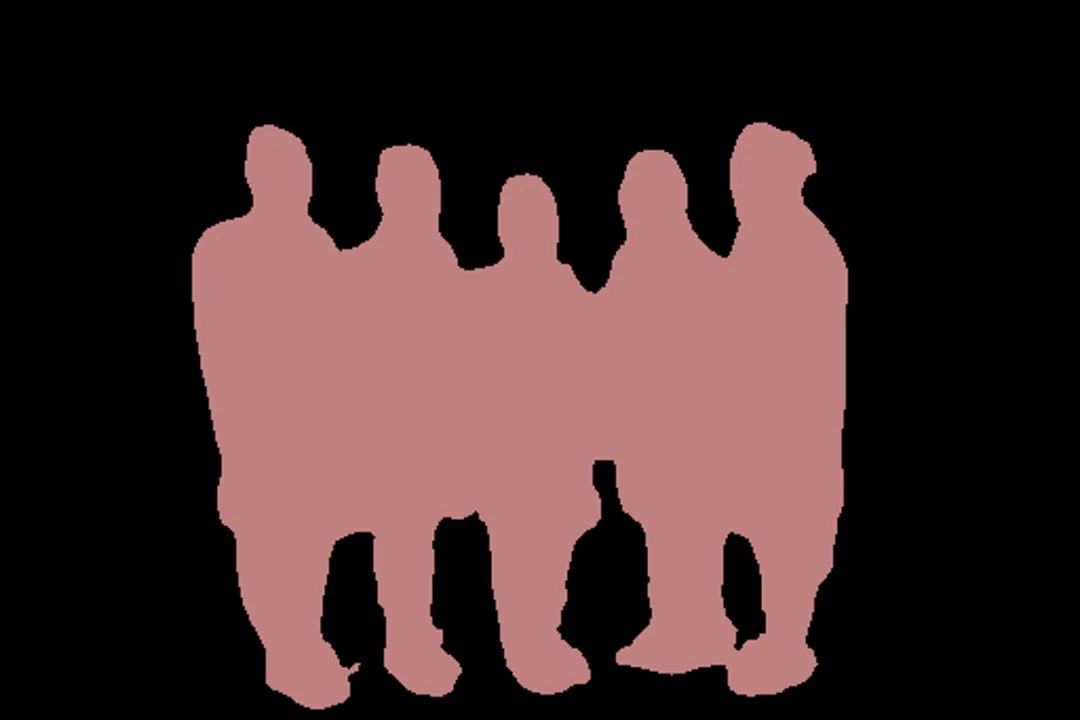
检测到的对象数组 对象对应类的id数组 分割掩码数组 输出的数组
segmask, output = segment_image.segmentImage()
import pixellibfrom pixellib.instance import instance_segmentationimport cv2instance_seg = instance_segmentation()instance_seg.load_model("mask_rcnn_coco.h5")segmask, output = instance_seg.segmentImage("sample2.jpg")cv2.imwrite("img.jpg", output)print(output.shape)
segmask, output = segment_image.segmentImage(show_bboxes = True)
import pixellibfrom pixellib.instance import instance_segmentationimport cv2instance_seg = instance_segmentation()instance_seg.load_model("mask_rcnn_coco.h5")segmask, output = instance_seg.segmentImage("sample2.jpg", show_bboxes= True)cv2.imwrite("img.jpg", output)print(output.shape)
https://github.com/ayoolaolafenwa/PixelLib
https://pixellib.readthedocs.io/en/latest/
交流群
欢迎加入公众号读者群一起和同行交流,目前有SLAM、三维视觉、传感器、自动驾驶、计算摄影、检测、分割、识别、医学影像、GAN、算法竞赛等微信群(以后会逐渐细分),请扫描下面微信号加群,备注:”昵称+学校/公司+研究方向“,例如:”张三 + 上海交大 + 视觉SLAM“。请按照格式备注,否则不予通过。添加成功后会根据研究方向邀请进入相关微信群。请勿在群内发送广告,否则会请出群,谢谢理解~
评论