【小白学习Keras教程】四、Keras基于数字数据集建立基础的CNN模型
「@Author:Runsen」
加载数据集
1.创建模型
2.卷积层
3. 激活层
4. 池化层
5. Dense(全连接层)
6. Model compile & train
基本卷积神经网络(CNN)
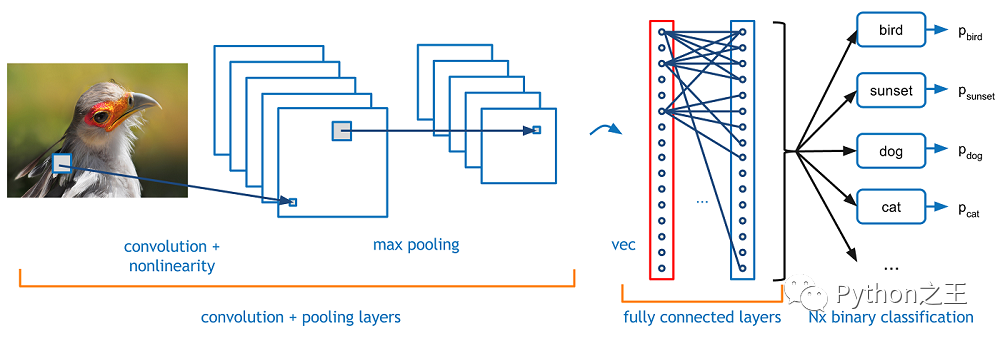
-CNN的基本结构:CNN与MLP相似,因为它们只向前传送信号(前馈网络),但有CNN特有的不同类型的层
「Convolutional layer」:在一个小的感受野(即滤波器)中处理数据 「Pooling layer」:沿2维向下采样(通常为宽度和高度) 「Dense (fully connected) layer」:类似于MLP的隐藏层
import numpy as np
import matplotlib.pyplot as plt

from sklearn import datasets
from sklearn.model_selection import train_test_split
from keras.utils.np_utils import to_categorical
加载数据集
sklearn中的数字数据集 文档:http://scikit-learn.org/stable/auto_examples/datasets/plot_digits_last_image.html
data = datasets.load_digits()
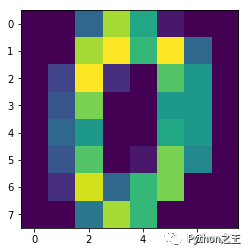
plt.imshow(data.images[0])    # show first number in the dataset
plt.show()
print('label: ', data.target[0])    # label = '0'
X_data = data.images
y_data = data.target
# shape of data
print(X_data.shape)    # (8 X 8) format
print(y_data.shape)

# reshape X_data into 3-D format
X_data = X_data.reshape((X_data.shape[0], X_data.shape[1], X_data.shape[2], 1))
# one-hot encoding of y_data
y_data = to_categorical(y_data)
将数据划分为列车/测试集
X_train, X_test, y_train, y_test = train_test_split(X_data, y_data, test_size = 0.3, random_state = 777)
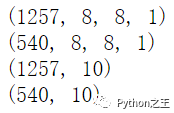
print(X_train.shape)
print(X_test.shape)
print(y_train.shape)
print(y_test.shape)
from keras.models import Sequential
from keras import optimizers
from keras.layers import Dense, Activation, Flatten, Conv2D, MaxPooling2D
1.创建模型
创建模型与MLP(顺序)相同
model = Sequential()
2.卷积层
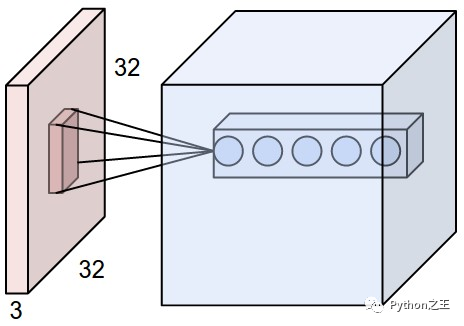
通常,二维卷积层用于图像处理 滤波器的大小(由“kernel\u Size”参数指定)定义感受野的宽度和高度** 过滤器数量(由“过滤器”参数指定)等于下一层的「深度」 步幅(由“步幅”参数指定)是「过滤器每次移动改变位置」的距离 图像可以「零填充」以防止变得太小(由“padding”参数指定) Doc: https://keras.io/layers/convolutional/
# convolution layer
model.add(Conv2D(input_shape = (X_data.shape[1], X_data.shape[2], X_data.shape[3]), filters = 10, kernel_size = (3,3), strides = (1,1), padding = 'valid'))
3. 激活层
与 MLP 中的激活层相同 一般情况下,也使用relu Doc: http://cs231n.github.io/assets/cnn/depthcol.jpeg
model.add(Activation('relu'))
4. 池化层
一般使用最大池化方法 减少参数数量 文档:https://keras.io/layers/pooling/
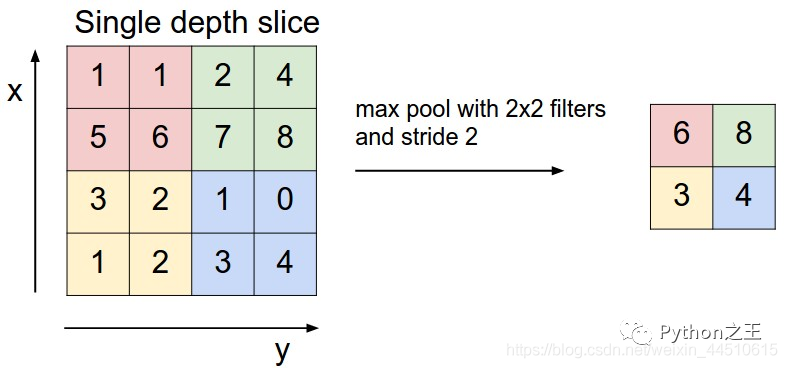
model.add(MaxPooling2D(pool_size = (2,2)))
5. Dense(全连接层)
卷积和池化层可以连接到密集层 文档:https://keras.io/layers/core/
# prior layer should be flattend to be connected to dense layers
model.add(Flatten())
# dense layer with 50 neurons
model.add(Dense(50, activation = 'relu'))
# final layer with 10 neurons to classify the instances
model.add(Dense(10, activation = 'softmax'))
6. Model compile & train
adam = optimizers.Adam(lr = 0.001)
model.compile(loss = 'categorical_crossentropy', optimizer = adam, metrics = ['accuracy'])
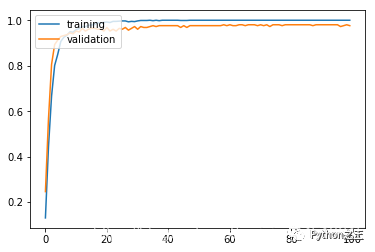
history = model.fit(X_train, y_train, batch_size = 50, validation_split = 0.2, epochs = 100, verbose = 0)
plt.plot(history.history['acc'])
plt.plot(history.history['val_acc'])
plt.legend(['training', 'validation'], loc = 'upper left')
plt.show()
results = model.evaluate(X_test, y_test)
print('Test accuracy: ', results[1])

公众号后台回复《资料》可以获得对应的大量Python笔记和手册
评论
