
使用Python+OpenCV+Dlib实现人脸检测与人脸特征关键点识别
点击上方“小白学视觉”,选择加"星标"或“置顶”
重磅干货,第一时间送达
相关阅读:https://towardsdatascience.com/essential-opencv-functions-to-get-you-started-into-computer-vision-743df932e60
Dlib:http://dlib.net/
它是如何工作的?
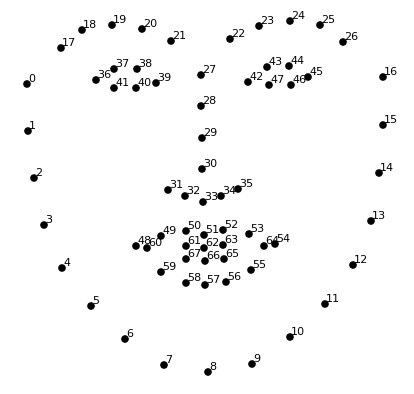
颚点= 0–16 右眉点= 17–21 左眉点= 22–26 鼻点= 27–35 右眼点= 36–41 左眼点= 42–47 口角= 48–60 嘴唇分数= 61–67
安装要求
opencv python dlib
pipenv,可以使用以下命令安装所有这些文件:pipenv install opencv-python, dlib
brew install cmake
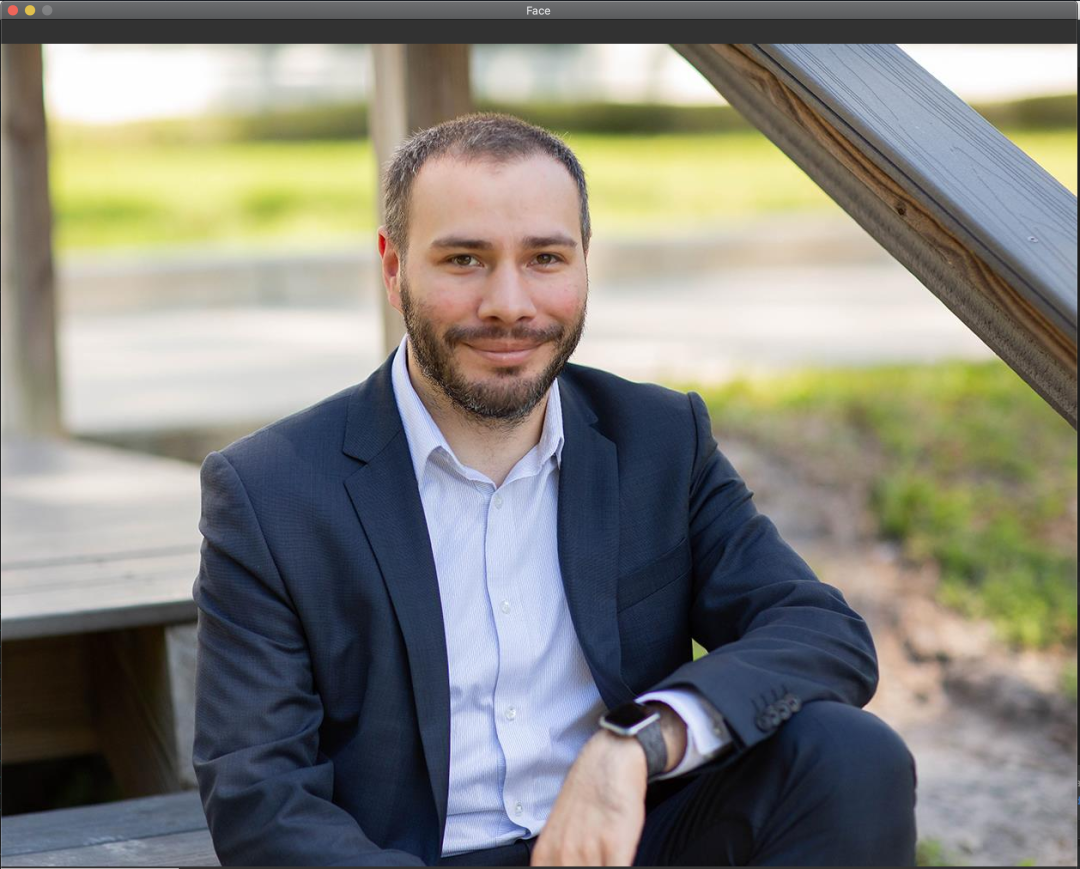
步骤1:载入并显示图片
import cv2# read the imageimg = cv2.imread("face.jpg")# show the imagecv2.imshow(winname="Face", mat=img)# Wait for a key press to exitcv2.waitKey(delay=0)# Close all windowscv2.destroyAllWindows()
步骤2:人脸识别
import cv2import dlib# Load the detectordetector = dlib.get_frontal_face_detector()# read the imageimg = cv2.imread("face.jpg")# Convert image into grayscalegray = cv2.cvtColor(src=img, code=cv2.COLOR_BGR2GRAY)# Use detector to find landmarksfaces = detector(gray)for face in faces:x1 = face.left() # left pointy1 = face.top() # top pointx2 = face.right() # right pointy2 = face.bottom() # bottom point# Draw a rectanglecv2.rectangle(img=img, pt1=(x1, y1), pt2=(x2, y2), color=(0, 255, 0), thickness=4)# show the imagecv2.imshow(winname="Face", mat=img)# Wait for a key press to exitcv2.waitKey(delay=0)# Close all windowscv2.destroyAllWindows()

步骤3:识别人脸特征
import cv2import dlib# Load the detectordetector = dlib.get_frontal_face_detector()# Load the predictorpredictor = dlib.shape_predictor("shape_predictor_68_face_landmarks.dat")# read the imageimg = cv2.imread("face.jpg")# Convert image into grayscalegray = cv2.cvtColor(src=img, code=cv2.COLOR_BGR2GRAY)# Use detector to find landmarksfaces = detector(gray)for face in faces:x1 = face.left() # left pointy1 = face.top() # top pointx2 = face.right() # right pointy2 = face.bottom() # bottom point# Look for the landmarkslandmarks = predictor(image=gray, box=face)x = landmarks.part(27).xy = landmarks.part(27).y# Draw a circlecv2.circle(img=img, center=(x, y), radius=5, color=(0, 255, 0), thickness=-1)# show the imagecv2.imshow(winname="Face", mat=img)# Wait for a key press to exitcv2.waitKey(delay=0)# Close all windowscv2.destroyAllWindows()
landmarks = predictor(image=gray, box=face)x = landmarks.part(27).xy = landmarks.part(27).y

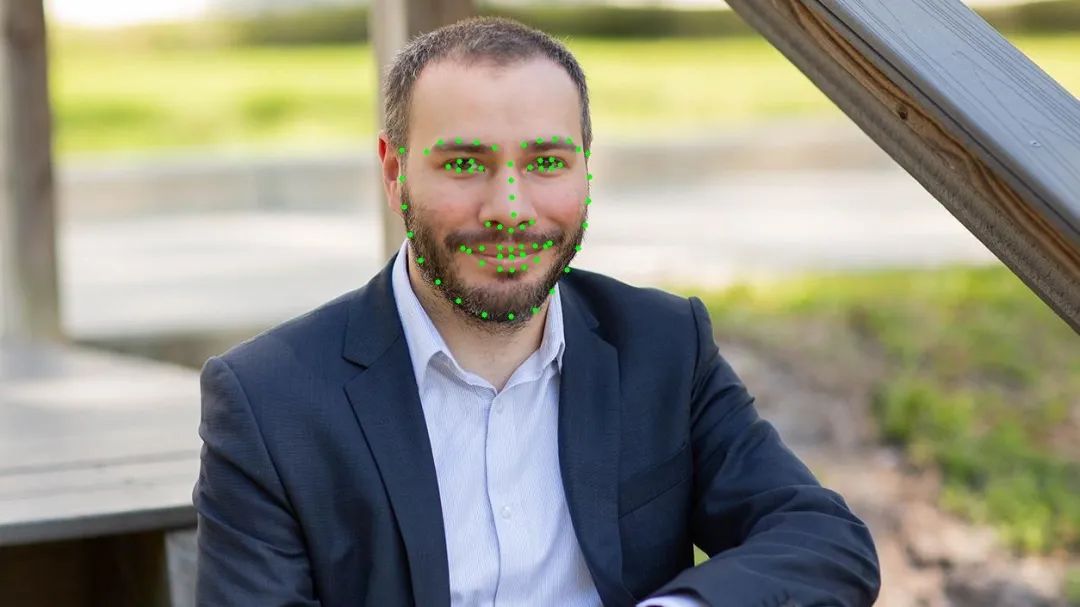
import cv2import numpy as npimport dlib# Load the detectordetector = dlib.get_frontal_face_detector()# Load the predictorpredictor = dlib.shape_predictor("shape_predictor_68_face_landmarks.dat")# read the imageimg = cv2.imread("face.jpg")# Convert image into grayscalegray = cv2.cvtColor(src=img, code=cv2.COLOR_BGR2GRAY)# Use detector to find landmarksfaces = detector(gray)for face in faces:x1 = face.left() # left pointy1 = face.top() # top pointx2 = face.right() # right pointy2 = face.bottom() # bottom point# Create landmark objectlandmarks = predictor(image=gray, box=face)# Loop through all the pointsfor n in range(0, 68):x = landmarks.part(n).xy = landmarks.part(n).y# Draw a circlecv2.circle(img=img, center=(x, y), radius=3, color=(0, 255, 0), thickness=-1)# show the imagecv2.imshow(winname="Face", mat=img)# Delay between every framcv2.waitKey(delay=0)# Close all windowscv2.destroyAllWindows()


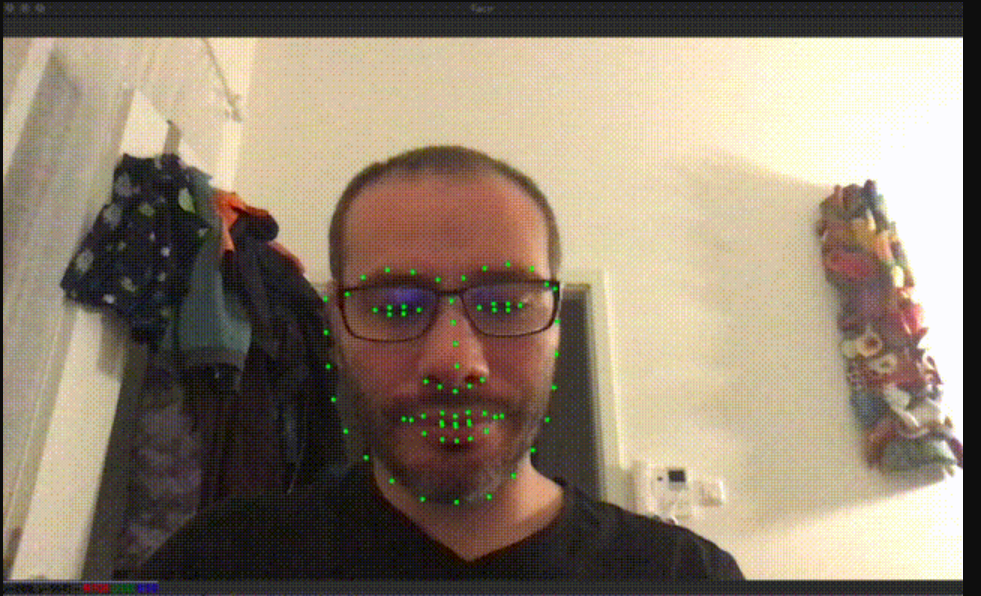
步骤4:实时检测
import cv2import dlib# Load the detectordetector = dlib.get_frontal_face_detector()# Load the predictorpredictor = dlib.shape_predictor("shape_predictor_68_face_landmarks.dat")# read the imagecap = cv2.VideoCapture(0)while True:_, frame = cap.read()# Convert image into grayscalegray = cv2.cvtColor(src=frame, code=cv2.COLOR_BGR2GRAY)# Use detector to find landmarksfaces = detector(gray)for face in faces:x1 = face.left() # left pointy1 = face.top() # top pointx2 = face.right() # right pointy2 = face.bottom() # bottom point# Create landmark objectlandmarks = predictor(image=gray, box=face)# Loop through all the pointsfor n in range(0, 68):x = landmarks.part(n).xy = landmarks.part(n).y# Draw a circlecv2.circle(img=frame, center=(x, y), radius=3, color=(0, 255, 0), thickness=-1)# show the imagecv2.imshow(winname="Face", mat=frame)# Exit when escape is pressedif cv2.waitKey(delay=1) == 27:break# When everything done, release the video capture and video write objectscap.release()# Close all windowscv2.destroyAllWindows()
结论
评论