
一文教你如何对接【支付宝】支付接口,网友:666啊!
点击上方[全栈开发者社区]→右上角[...]→[设为星标⭐]

场景
最近在做支付宝的接口对接,之前做过一个版本,但是由于申请了新的账号以前旧的的接口对接就不能使用了
所以就开始对接新的版本接口对接,在这里也记录一下让那些还没有对接的兄弟少走点弯路。
准备
先申请一个企业账户
https://memberprod.alipay.com/account/reg/enterpriseIndex.htm
创建应用
去支付宝的开放平台
https://open.alipay.com/platform/home.htm
添加应用:
https://docs.open.alipay.com/200/105310
按照这个链接的文档一步一步操作;
账号准备好之后,就可以了解相关的接口了,以(即时到账)支付接口为例。
阅读接口文档
https://docs.open.alipay.com/270/alipay.trade.page.pay/
下载SDK
https://docs.open.alipay.com/54/103419
选择java版本
将sdk集成进入项目中
sdk中有一个jar包
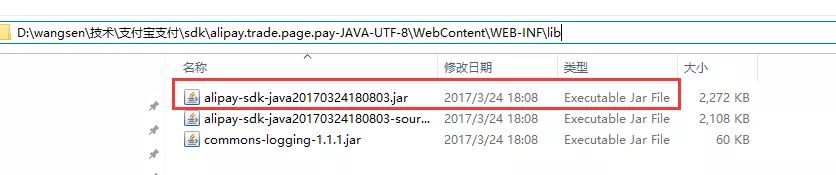
将这个jar包上传到私服上去。
参考这个:
http://blog.csdn.net/huchunlinnk/article/details/17789175
项目引入sdk中的关键jar包
这里的gav的写法取决于你上传私服的时候的填写
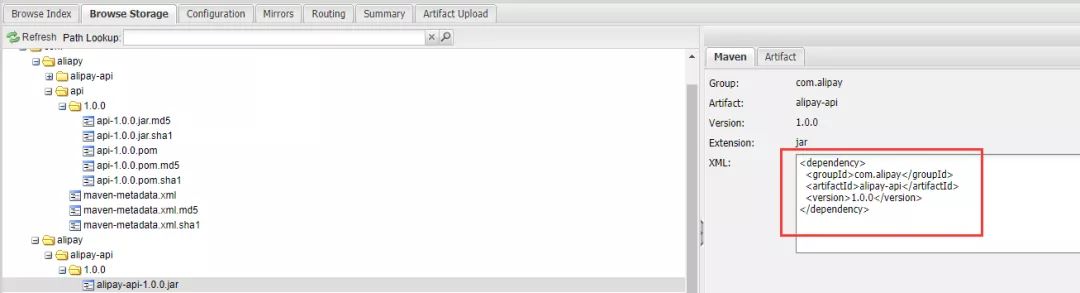
    com.alipay
    alipay-api
    1.0.0
处理AlipayConfig对象
取消AlipayConfig配置文件中的部分常量
打开下载sdk应该可以找到
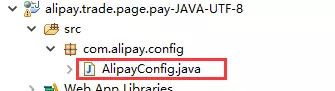
将这个类中的前几个静态常量变成非静态的,以便可以支持多个配置对象。
/* *
 *类名:AlipayConfig
 *功能:基础配置类
 *详细:设置帐户有关信息及返回路径
 *修改日期:2017-04-05
 *说明:
 *以下代码只是为了方便商户测试而提供的样例代码,商户可以根据自己网站的需要,按照技术文档编写,并非一定要使用该代码。
 *该代码仅供学习和研究支付宝接口使用,只是提供一个参考。
 */
@Data
public class AlipayConfig {
    //↓↓↓↓↓↓↓↓↓↓请在这里配置您的基本信息↓↓↓↓↓↓↓↓↓↓↓↓↓↓↓
    // 应用ID,您的APPID,收款账号既是您的APPID对应支付宝账号
    public String app_id = "";
    // 商户私钥,您的PKCS8格式RSA2私钥
    public String merchant_private_key = "";
    // 支付宝公钥,查看地址:https://openhome.alipay.com/platform/keyManage.htm 对应APPID下的支付宝公钥。
    public String alipay_public_key = "";
    // 服务器异步通知页面路径  需http://格式的完整路径,不能加?id=123这类自定义参数,必须外网可以正常访问
    public String notify_url = "";
    // 页面跳转同步通知页面路径 需http://格式的完整路径,不能加?id=123这类自定义参数,必须外网可以正常访问
    public String return_url = "";
    // 签名方式
    public static String sign_type = "RSA2";
    // 字符编码格式
    public static String charset = "utf-8";
    // 支付宝网关
    public static String gatewayUrl = "https://openapi.alipay.com/gateway.do";
    //日志路径
    public static String log_path = "C:\\";
}
编写请求支付的接口
后端向支付宝发起支付的请求,在这个同时需要传递必要参数,下面我们就来编写如何向支付宝发起支付。
编写conroller层
/**
 * 阿里支付控制器
 *
 * @author   WangSen(wangsenhehe@126.com)
 * @Date     2017年8月16日
 */
@Controller
@RequestMapping("/alipay")
public class AliPayController {
    @Autowired
    private AlipayViewService alipayViewService;
    /**
     * 跳转到去支付的jsp页面
     *
     * @param orderId 订单号
     *
     * @param payAccountType 支付账号类型
     *
     * @param model 模型
     *
     * @throws Exception
    */
    @RequestMapping
    public void gotopay(long orderId, Model model) throws Exception {
        alipayViewService.setGoToPayInfo(orderId, model);
    }
}
编写viewService层
/**
 * 阿里支付页面服务类
 *
 * @author   WangSen(wangsenhehe@126.com)
 * @Date     2017年8月16日
 */
@Service
public class AlipayViewService {
    @Autowired
    private NewAlipayBusinessService newAlipayBusinessService;
    /**
     * 设置去支付信息
     *
     * @param orderId 订单id
     * @param model 模型
     * @param payAccountType 支付账号类型
     *
     * @return 构建的字符串
    */
    public void setGoToPayInfo(long orderId, Model model) throws Exception {
        model.addAttribute("htmlStr", newAlipayBusinessService.buildPayRequest(orderId, payPrice, "报名费", "略"));
    }
}
编写service层
/**
 * 新的阿里支付页面服务类
 *
 * 阿里升级接口之后使用这个服务类
 *
 * @author   WangSen(wangsenhehe@126.com)
 * @Date     2017年8月16日
 */
@Data
public class NewAlipayBusinessService {
    /**
     * 阿里的配置文件对象
     */
    private AlipayConfig alipayConfig;
    /**
     * 构建支付请求
     *
     * @param orderId 订单号
     * @param payPrice 付款金额
     * @param orderName 订单名称
     * @param body 商品描述
     *
     * @return html字符串
    */
    public String buildPayRequest(long orderId, long payPrice, String orderName, String body) throws Exception {
        //获得初始化的AlipayClient
        AlipayClient alipayClient = getAlipayClient();
        //设置请求参数
        String bizContent = getBizContent(ConvertUtil.obj2str(orderId), AmountUtils.changeF2Y(payPrice), orderName,
                body);
        return alipayClient.pageExecute(setAlipayRequestParameters(bizContent)).getBody();
    }
    /**
     * 设置阿里支付请求参数
     *
     * @param bizContent 包含关键参数的json字符串
     *
     * @return AlipayTradePagePayRequest对象
    */
    private AlipayTradePagePayRequest setAlipayRequestParameters(String bizContent) {
        AlipayTradePagePayRequest alipayRequest = new AlipayTradePagePayRequest();
        alipayRequest.setReturnUrl(alipayConfig.getReturn_url());
        alipayRequest.setNotifyUrl(alipayConfig.getNotify_url());
        alipayRequest.setBizContent(bizContent);
        return alipayRequest;
    }
    private AlipayClient getAlipayClient() {
        AlipayClient alipayClient = new DefaultAlipayClient(AlipayConfig.gatewayUrl, alipayConfig.getApp_id(),
                alipayConfig.getMerchant_private_key(), "json", AlipayConfig.charset,
                alipayConfig.getAlipay_public_key(), AlipayConfig.sign_type);
        return alipayClient;
    }
    /**
     * 获取业务的关键内容
     *
     * @param out_trade_no 订单号
     * @param total_amount 付款金额
     * @param subject 订单名称
     * @param body 商品描述
     *
     * @return 拼接之后的json字符串
    */
    private String getBizContent(String out_trade_no, String total_amount, String subject, String body) {
        ExceptionUtil.checkEmpty(out_trade_no, "订单号不能为空");
        ExceptionUtil.checkEmpty(total_amount, "价格不能为空");
        ExceptionUtil.checkEmpty(subject, "订单名称不能为空");
        ExceptionUtil.checkEmpty(body, "商品描述不能为空");
        StringBuffer sb = new StringBuffer();
        sb.append("{");
        sb.append("\"out_trade_no\":\"").append(out_trade_no).append("\",");
        sb.append("\"total_amount\":\"").append(total_amount).append("\",");
        sb.append("\"subject\":\"").append(subject).append("\",");
        sb.append("\"body\":\"").append(body).append("\",");
        sb.append("\"product_code\":\"FAST_INSTANT_TRADE_PAY\"");
        sb.append("}");
        return sb.toString();
    }

}
通过xml文件配置支付对象
"1.0" encoding="UTF-8"?>
"http://www.springframework.org/schema/beans" xmlns:xsi="http://www.w3.org/2001/XMLSchema-instance"
    xmlns:context="http://www.springframework.org/schema/context" xmlns:mvc="http://www.springframework.org/schema/mvc"
    xsi:schemaLocation="http://www.springframework.org/schema/beans http://www.springframework.org/schema/beans/spring-beans-4.1.xsd
        http://www.springframework.org/schema/context http://www.springframework.org/schema/context/spring-context-4.1.xsd
        http://www.springframework.org/schema/mvc http://www.springframework.org/schema/mvc/spring-mvc-4.1.xsd">

    "alipayConfig" class="com.we.business.pay.newalipay.config.AlipayConfig">
        "app_id" value="你的appId"/>
        "merchant_private_key" value="你的私钥"/>
        "alipay_public_key" value="支付宝公钥"/>
        "notify_url" value="支付完成的异步通知地址"/>
        "return_url" value="支付完成跳转的地址"/>


    "newAlipayBusinessService" class="com.we.business.pay.service.NewAlipayBusinessService">
        "alipayConfig" ref="alipayConfig"/>
编写jsp页面
<%@page import="com.we.core.common.util.DateTimeUtil"%>
<%@ page language="java" contentType="text/html; charset=UTF-8" pageEncoding="UTF-8"%>
"-//W3C//DTD HTML 4.01 Transitional//EN">


        "Content-Type" content="text/html; charset=UTF-8">
        支付宝即时到账交易接口

    ${htmlStr }
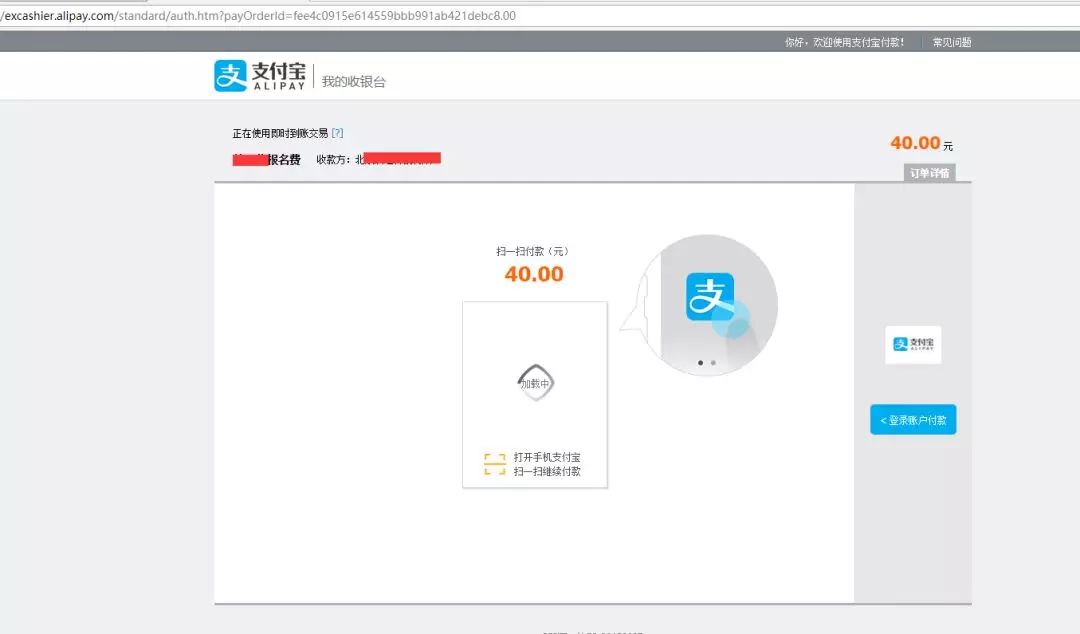
测试
页面访问:
localhost:8091/alipay/gotopay.json?orderId=232323
就可以看到支付页面了;
编写支付的异步通知接口
用户支付完成之后支付宝会通过你配置的的notify_url的值进行回调,
我需要编写这个逻辑,以完成整个的支付流程。
编写controller层
/**
 * 阿里支付控制器
 *
 * @author   WangSen(wangsenhehe@126.com)
 * @Date     2017年8月16日
 */
@Controller
@RequestMapping("/alipay")
public class AliPayController {
    @Autowired
    private AlipayViewService alipayViewService;
    /**
     * 支付完成
     */
    @Void
    @NotSso
    @ResponseBody
    @RequestMapping
    public void payFinish() throws Exception {
        alipayViewService.payFinish();
    }
}
编写viewService层
/**
 * 阿里支付页面服务类
 *
 * @author   WangSen(wangsenhehe@126.com)
 * @Date     2017年8月16日
 */
@Service
public class AlipayViewService {
    @Autowired
    private NewAlipayBusinessService newAlipayBusinessService;
    /**
     * 支付完成
     *
     * @throws IOException io异常
    */
    public void payFinish() throws Exception {
        newAlipayBusinessService.payFinish();
    }
}
编写处理支付完成的servie
/**
 * 新的阿里支付页面服务类
 *
 * 阿里升级接口之后使用这个服务类
 *
 * @author   WangSen(wangsenhehe@126.com)
 * @Date     2017年8月16日
 */
@Data
public class NewAlipayBusinessService {
    /**
     * 阿里的配置文件对象
     */
    private AlipayConfig alipayConfig;
    /**
     * 支付完成
     *
     * @throws Exception 异常对象
    */
    public void payFinish() throws Exception {
        HttpServletRequest request = MvcUtil.getRequest();
        PrintWriter out = MvcUtil.getResponse().getWriter();
        //获取支付宝POST过来反馈信息
        Map params = getParames(request);
        if (!isSuccess(params)) {
            fail(out);
            return;
        }
        long orderId = getOrderId(params);
        long payPrice = getTotalFee(params);
        try {
            //编辑你支付完成之后的逻辑
            success(out);
        } catch (Exception e) {
            fail(out);
        }
    }

    /**
     * 获取订单id
     *
     * @param params 请求参数
     * @return 订单id
    */
    private long getOrderId(Map params) {
        String order_no = params.get("out_trade_no");
        return ConvertUtil.obj2long(order_no);
    }
    /**
     * 获取总金额
     *
     * @param params 请求参数
     * @return 总金额
    */
    private long getTotalFee(Map params) {
        String total_fee = params.get("total_amount");
        return ConvertUtil.obj2long(AmountUtils.changeY2F(total_fee));
    }
    /**
     * 校验支付宝支付是否成功
     *
     * @param params http请求
     * @return 成功即为真
     * @throws AlipayApiException
     */
    private boolean isSuccess(final Map params) throws AlipayApiException {
        boolean signVerified = AlipaySignature.rsaCheckV1(params, alipayConfig.getAlipay_public_key(),
                AlipayConfig.charset, AlipayConfig.sign_type); //调用SDK验证签名
        if (!signVerified) {
            return false;
        }
        //交易状态
        String trade_status = params.get("trade_status");
        if (!trade_status.equals("TRADE_FINISHED") && !trade_status.equals("TRADE_SUCCESS")) {
            return false;
        }
        return true;
    }
    /**
     * 成功
     *
     * TODO 重构方法名
     * @param out 输出流
    */
    private void success(PrintWriter out) {
        out.println("success");
    }
    /**
     * 失败
     *
     * TODO 重构方法名
     * @param out 输出流
    */
    private void fail(PrintWriter out) {
        out.println("fail");
    }
    /**
     * 获取参数
     *
     * @param request HttpServletRequest对象
     *
     * @return 返回支付宝携带的参数
    */
    private Map getParames(HttpServletRequest request) {
        Map params = new HashMap();
        @SuppressWarnings("unchecked")
        Map requestParams = request.getParameterMap();
        for (Iterator iter = requestParams.keySet().iterator(); iter.hasNext();) {
            String name = ConvertUtil.obj2str(iter.next());
            @SuppressWarnings("cast")
            String[] values = (String[]) requestParams.get(name);
            String valueStr = "";
            for (int i = 0; i < values.length; i++) {
                valueStr = (i == values.length - 1) ? valueStr + values[i] : valueStr + values[i] + ",";
            }
            //乱码解决,这段代码在出现乱码时使用
            //valueStr = new String(valueStr.getBytes("ISO-8859-1"), "utf-8");
            params.put(name, valueStr);
        }
        return params;
    }
}
做的过程可能用到的资源
支付接口以及异步通知接口的参数详解:
https://docs.open.alipay.com/270/105902/
生成公钥私钥的步骤:
https://doc.open.alipay.com/docs/doc.htm?treeId=291&articleId=105971&docType=1
服务端的sdk:
https://docs.open.alipay.com/203/105910
即时到账新老版本接口对比:
https://docs.open.alipay.com/270/106759
觉得本文对你有帮助?请分享给更多人
关注「全栈开发者社区」加星标,提升全栈技能
本公众号会不定期给大家发福利,包括送书、学习资源等,敬请期待吧!
如果感觉推送内容不错,不妨右下角点个在看转发朋友圈或收藏,感谢支持。
好文章,留言、点赞、在看和分享一条龙吧❤️