如何在IDEA中使用jcstress进行并发压力测试
点击上方蓝色字体,选择“标星公众号”
优质文章,第一时间送达
1.创建maven项目
通过mvn archetype:generate这种交互方式来创建Maven项目。
mvn archetype:generate -DinteractiveMode=false -DarchetypeGroupId=org.openjdk.jcstress -DarchetypeArtifactId=jcstress-java-test-archetype -DarchetypeVersion=0.5 -DgroupId=exam.offer -DartifactId=testJcstress -Dversion=1.0
pom.xml文件
<project xmlns="http://maven.apache.org/POM/4.0.0" xmlns:xsi="http://www.w3.org/2001/XMLSchema-instance"
         xsi:schemaLocation="http://maven.apache.org/POM/4.0.0 http://maven.apache.org/xsd/maven-4.0.0.xsd">
    <modelVersion>4.0.0</modelVersion>

    <groupId>exam.offer</groupId>
    <artifactId>testJcstress</artifactId>
    <version>1.0</version>
    <packaging>jar</packaging>

    <name>JCStress test sample</name>

    <!--
       This is the demo/sample template build script for building concurrency tests with JCStress.
       Edit as needed.
    -->

    <prerequisites>
        <maven>3.0</maven>
    </prerequisites>


    <dependencies>
        <!-- https://mvnrepository.com/artifact/org.openjdk.jcstress/jcstress-core -->
        <dependency>
            <groupId>org.openjdk.jcstress</groupId>
            <artifactId>jcstress-java-test-archetype</artifactId>
            <version>0.5</version>
        </dependency>
        <dependency>
            <groupId>org.openjdk.jcstress</groupId>
            <artifactId>jcstress-samples</artifactId>
            <version>0.5</version>
        </dependency>
        <dependency>
            <groupId>org.openjdk.jcstress</groupId>
            <artifactId>jcstress-core</artifactId>
            <version>0.5</version>
        </dependency>
    </dependencies>

    <properties>
        <project.build.sourceEncoding>UTF-8</project.build.sourceEncoding>

        <!--
            jcstress version to use with this project.
          -->
        <jcstress.version>0.5</jcstress.version>

        <!--
            Java source/target to use for compilation.
          -->
        <javac.target>1.8</javac.target>

        <!--
            Name of the test Uber-JAR to generate.
          -->
        <uberjar.name>jcstress</uberjar.name>
    </properties>

    <build>
        <plugins>
            <plugin>
                <groupId>org.apache.maven.plugins</groupId>
                <artifactId>maven-compiler-plugin</artifactId>
                <version>3.1</version>
                <configuration>
                    <compilerVersion>${javac.target}</compilerVersion>
                    <source>${javac.target}</source>
                    <target>${javac.target}</target>
                </configuration>
            </plugin>

            <plugin>
                <groupId>org.apache.maven.plugins</groupId>
                <artifactId>maven-shade-plugin</artifactId>
                <version>2.2</version>
                <executions>
                    <execution>
                        <id>main</id>
                        <phase>package</phase>
                        <goals>
                            <goal>shade</goal>
                        </goals>
                        <configuration>
                            <finalName>${uberjar.name}</finalName>
                            <transformers>
                                <transformer
                                        implementation="org.apache.maven.plugins.shade.resource.ManifestResourceTransformer">
                                    <mainClass>org.openjdk.jcstress.Main</mainClass>
                                </transformer>
                                <transformer implementation="org.apache.maven.plugins.shade.resource.AppendingTransformer">
                                    <resource>META-INF/TestList</resource>
                                </transformer>
                            </transformers>
                        </configuration>
                    </execution>
                </executions>
            </plugin>
        </plugins>
    </build>

</project>
2.导入
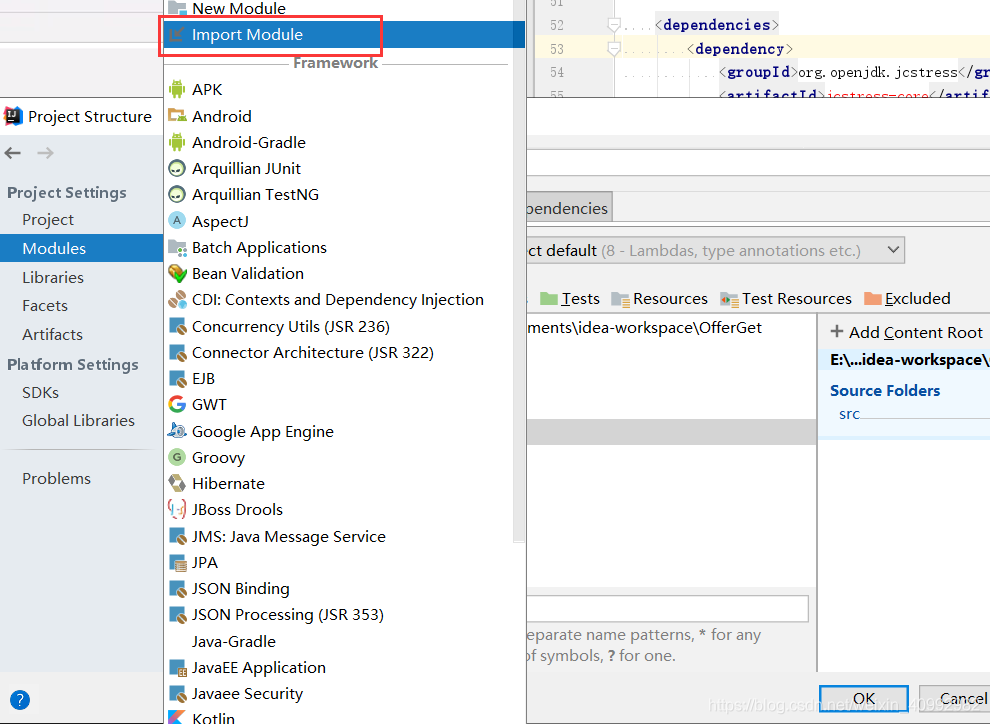
打开Project Structure,然后找到Modules,导入
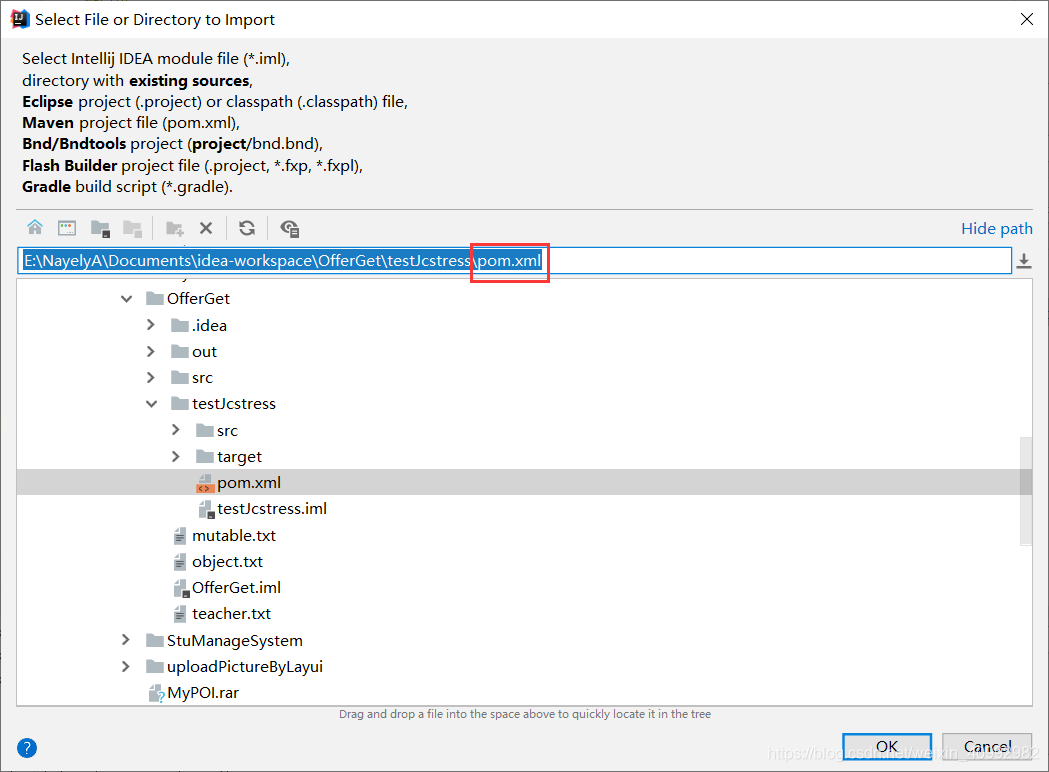
注意选择的是pom.xml,如图所示。
3.编写测试文件
按自己的需求写就可以了,为了方便展示待会咋运行,写一个例子,这个例子是用来测试指令重排序的。
import org.openjdk.jcstress.annotations.*;
import org.openjdk.jcstress.infra.results.II_Result;

// See jcstress-samples or existing tests for API introduction and testing guidelines

@JCStressTest
//表示有可能会出现的结果,其中0是我们感兴趣的结果
@Outcome(id="0",expect = Expect.ACCEPTABLE_INTERESTING,desc="!!!!")
@Outcome(id = "1, 4", expect = Expect.ACCEPTABLE, desc = "ok")
@State
public class ConcurrencyTest {

    int num=0;
    boolean ready=false;
    @Actor
    public void actor1(II_Result r) {
        // Put the code for first thread here
        if(ready){
            r.r1=num+num;
        }else{
            r.r1=1;
        }
    }

    @Actor
    public void actor2(II_Result r) {
        // Put the code for second thread here
        num=2;
        ready=true;
    }

}
4.打成jar包
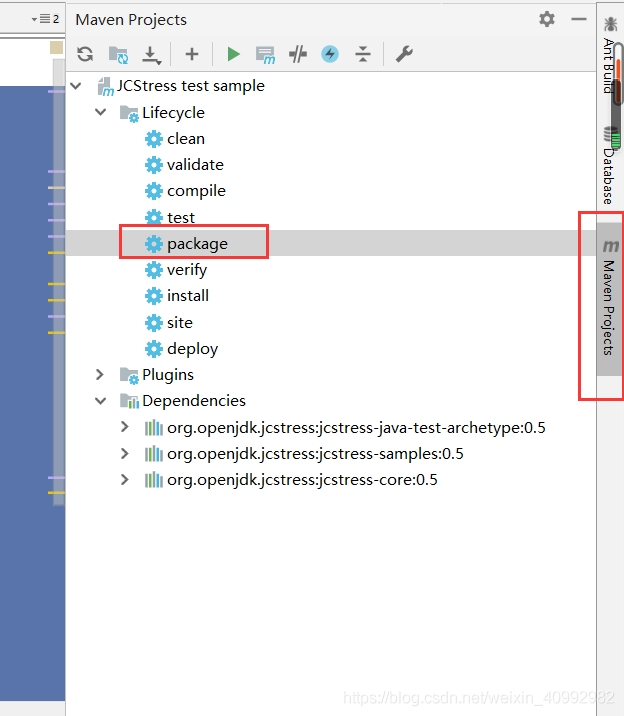
运行的话需要打成jar包,最右侧有一个Maven Projects,然后找到下图所示的package,双击即可。
5.进行并发压力测试
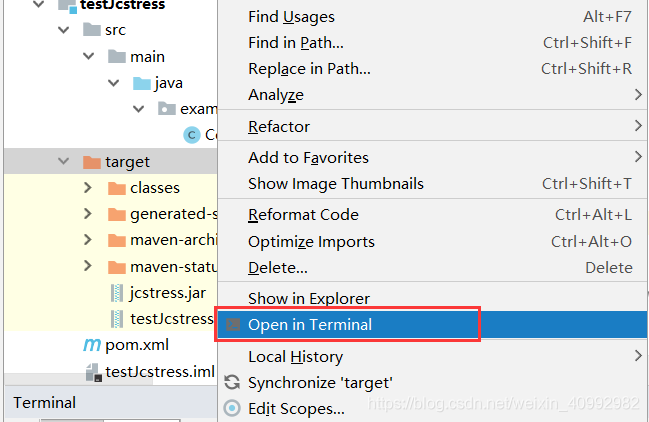
找到target目录并右击,进入Terminal,输入java -jar jcstress.jar
6.结果
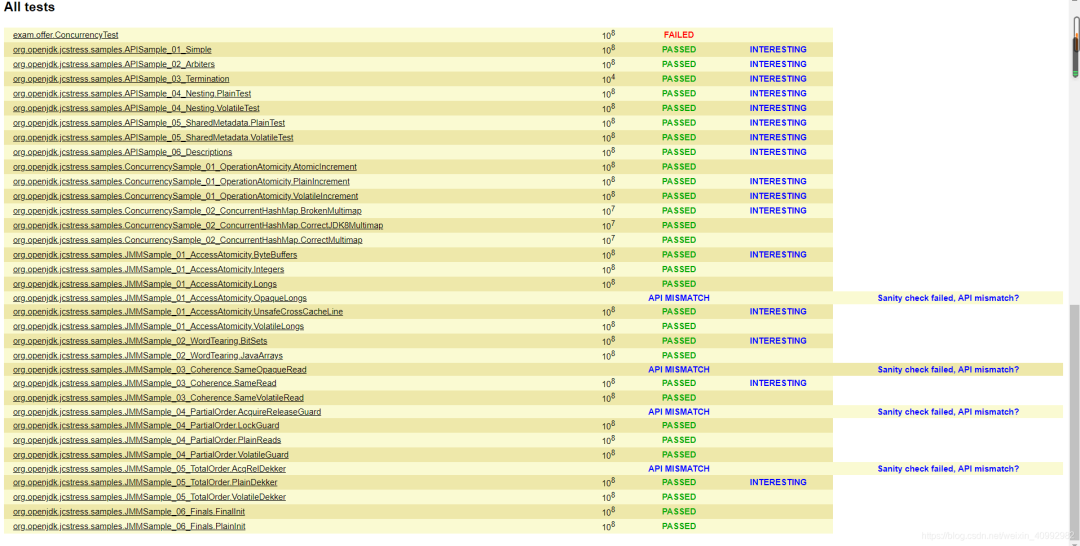
target中有一个results文件夹下的index.html可以查看结果,也可以直接看控制台输出的测试结果。
————————————————
版权声明:本文为CSDN博主「NayelyAA」的原创文章,遵循CC 4.0 BY-SA版权协议,转载请附上原文出处链接及本声明。
原文链接:
https://blog.csdn.net/weixin_40992982/article/details/104087744
粉丝福利:Java从入门到入土学习路线图
👇👇👇

👆长按上方微信二维码 2 秒
感谢点赞支持下哈 
评论
