一行代码不用写,就可以训练、测试、使用模型,这个 star 量 1.5k 的项目帮你做到
公众号关注 “小詹学Python”

转自 | 机器之心
# dataset operationsdataset:type: csv # [str] -> type of your datasetread_data_options: # options you want to supply for reading your data (See the detailed overview about this in the next section)sep: # [str] -> Delimiter to use.delimiter: # [str] -> Alias for sep.header: # [int, list of int] -> Row number(s) to use as the column names, and the start of the data.names: # [list] -> List of column names to useindex_col: # [int, str, list of int, list of str, False] -> Column(s) to use as the row labels of the DataFrame,usecols: # [list, callable] -> Return a subset of the columnssqueeze: # [bool] -> If the parsed data only contains one column then return a Series.prefix: # [str] -> Prefix to add to column numbers when no header, e.g. ‘X’ for X0, X1, …mangle_dupe_cols: # [bool] -> Duplicate columns will be specified as ‘X’, ‘X.1’, …’X.N’, rather than ‘X’…’X’. Passing in False will cause data to be overwritten if there are duplicate names in the columns.dtype: # [Type name, dict maping column name to type] -> Data type for data or columnsengine: # [str] -> Parser engine to use. The C engine is faster while the python engine is currently more feature-complete.converters: # [dict] -> Dict of functions for converting values in certain columns. Keys can either be integers or column labels.true_values: # [list] -> Values to consider as True.false_values: # [list] -> Values to consider as False.skipinitialspace: # [bool] -> Skip spaces after delimiter.skiprows: # [list-like] -> Line numbers to skip (0-indexed) or number of lines to skip (int) at the start of the file.skipfooter: # [int] -> Number of lines at bottom of file to skipnrows: # [int] -> Number of rows of file to read. Useful for reading pieces of large files.na_values: # [scalar, str, list, dict] -> Additional strings to recognize as NA/NaN.keep_default_na: # [bool] -> Whether or not to include the default NaN values when parsing the data.na_filter: # [bool] -> Detect missing value markers (empty strings and the value of na_values). In data without any NAs, passing na_filter=False can improve the performance of reading a large file.verbose: # [bool] -> Indicate number of NA values placed in non-numeric columns.skip_blank_lines: # [bool] -> If True, skip over blank lines rather than interpreting as NaN values.parse_dates: # [bool, list of int, list of str, list of lists, dict] -> try parsing the datesinfer_datetime_format: # [bool] -> If True and parse_dates is enabled, pandas will attempt to infer the format of the datetime strings in the columns, and if it can be inferred, switch to a faster method of parsing them.keep_date_col: # [bool] -> If True and parse_dates specifies combining multiple columns then keep the original columns.dayfirst: # [bool] -> DD/MM format dates, international and European format.cache_dates: # [bool] -> If True, use a cache of unique, converted dates to apply the datetime conversion.thousands: # [str] -> the thousands operatordecimal: # [str] -> Character to recognize as decimal point (e.g. use ‘,’ for European data).lineterminator: # [str] -> Character to break file into lines.escapechar: # [str] -> One-character string used to escape other characters.comment: # [str] -> Indicates remainder of line should not be parsed. If found at the beginning of a line, the line will be ignored altogether. This parameter must be a single character.encoding: # [str] -> Encoding to use for UTF when reading/writing (ex. ‘utf-8’).dialect: # [str, csv.Dialect] -> If provided, this parameter will override values (default or not) for the following parameters: delimiter, doublequote, escapechar, skipinitialspace, quotechar, and quotingdelim_whitespace: # [bool] -> Specifies whether or not whitespace (e.g. ' ' or ' ') will be used as the seplow_memory: # [bool] -> Internally process the file in chunks, resulting in lower memory use while parsing, but possibly mixed type inference.memory_map: # [bool] -> If a filepath is provided for filepath_or_buffer, map the file object directly onto memory and access the data directly from there. Using this option can improve performance because there is no longer any I/O overhead.split: # split optionstest_size: 0.2 #[float] -> 0.2 means 20% for the test data, so 80% are automatically for trainingshuffle: true # [bool] -> whether to shuffle the data before/while splittingstratify: None # [list, None] -> If not None, data is split in a stratified fashion, using this as the class labels.preprocess: # preprocessing optionsmissing_values: mean # [str] -> other possible values: [drop, median, most_frequent, constant] check the docs for moreencoding:type: oneHotEncoding # [str] -> other possible values: [labelEncoding]scale: # scaling optionsmethod: standard # [str] -> standardization will scale values to have a 0 mean and 1 standard deviation | you can also try minmaxtarget: inputs # [str] -> scale inputs. | other possible values: [outputs, all] # if you choose all then all values in the dataset will be scaled# model definitionmodel:type: classification # [str] -> type of the problem you want to solve. | possible values: [regression, classification, clustering]algorithm: NeuralNetwork # [str (notice the pascal case)] -> which algorithm you want to use. | type igel algorithms in the Terminal to know morearguments: # model arguments: you can check the available arguments for each model by running igel help in your terminaluse_cv_estimator: false # [bool] -> if this is true, the CV class of the specific model will be used if it is supportedcross_validate:cv: # [int] -> number of kfold (default 5)n_jobs: # [signed int] -> The number of CPUs to use to do the computation (default None)verbose: # [int] -> The verbosity level. (default 0)# target you want to predicttarget: # list of strings: basically put here the column(s), you want to predict that exist in your csv dataset- put the target you want to predict here- you can assign many target if you are making a multioutput prediction
支持所有机器学习 SOTA 模型(甚至包括预览版模型);
支持不同的数据预处理方法;
既能写入配置文件,又能提供灵活性和数据控制;
支持交叉验证;
支持 yaml 和 json 格式;
支持不同的 sklearn 度量,进行回归、分类和聚类;
支持多输出 / 多目标回归和分类;
在并行模型构建时支持多处理。
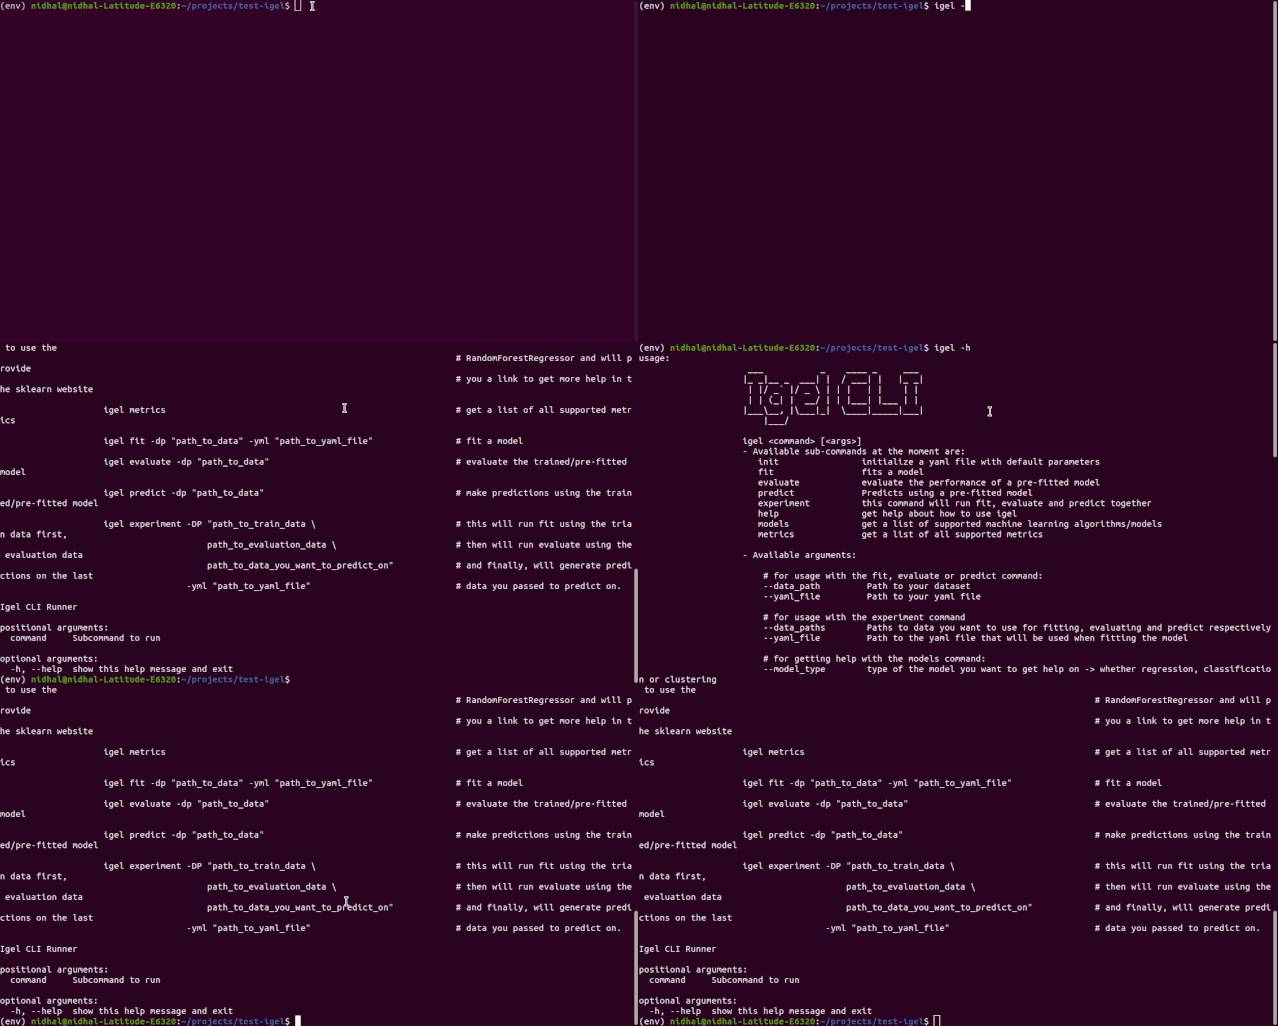
$ igel --help# or just$ igel -h"""Take some time and read the output of help command. You ll save time later if you understand how to use igel."""
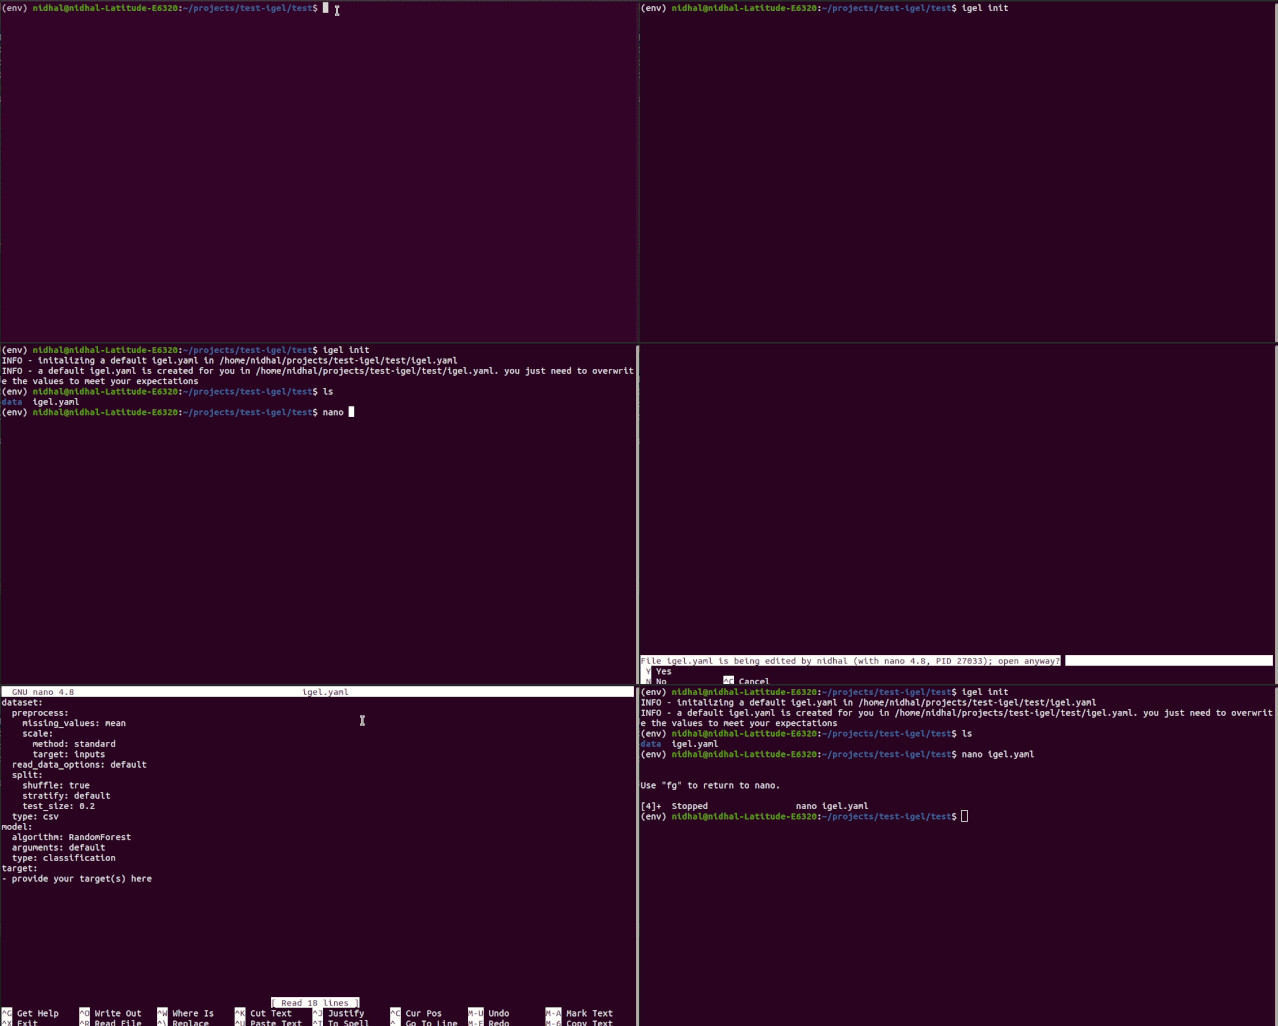
"""igel initpossible optional args are: (notice that these args are optional, so you can also just run igel init if you want)-type: regression, classification or clustering-model: model you want to use-target: target you want to predictExample:If I want to use neural networks to classify whether someone is sick or not using the indian-diabetes dataset,then I would use this command to initliaze a yaml file: igel init -type "classification" -model "NeuralNetwork" -target "sick""""igel init
# model definitionmodel:# in the type field, you can write the type of problem you want to solve. Whether regression, classification or clustering# Then, provide the algorithm you want to use on the data. Here I'm using the random forest algorithmtype: classificationalgorithm: RandomForest # make sure you write the name of the algorithm in pascal casearguments:n_estimators: 100 # here, I set the number of estimators (or trees) to 100max_depth: 30 # set the max_depth of the tree# target you want to predict# Here, as an example, I'm using the famous indians-diabetes dataset, where I want to predict whether someone have diabetes or not.# Depending on your data, you need to provide the target(s) you want to predict heretarget:- sick
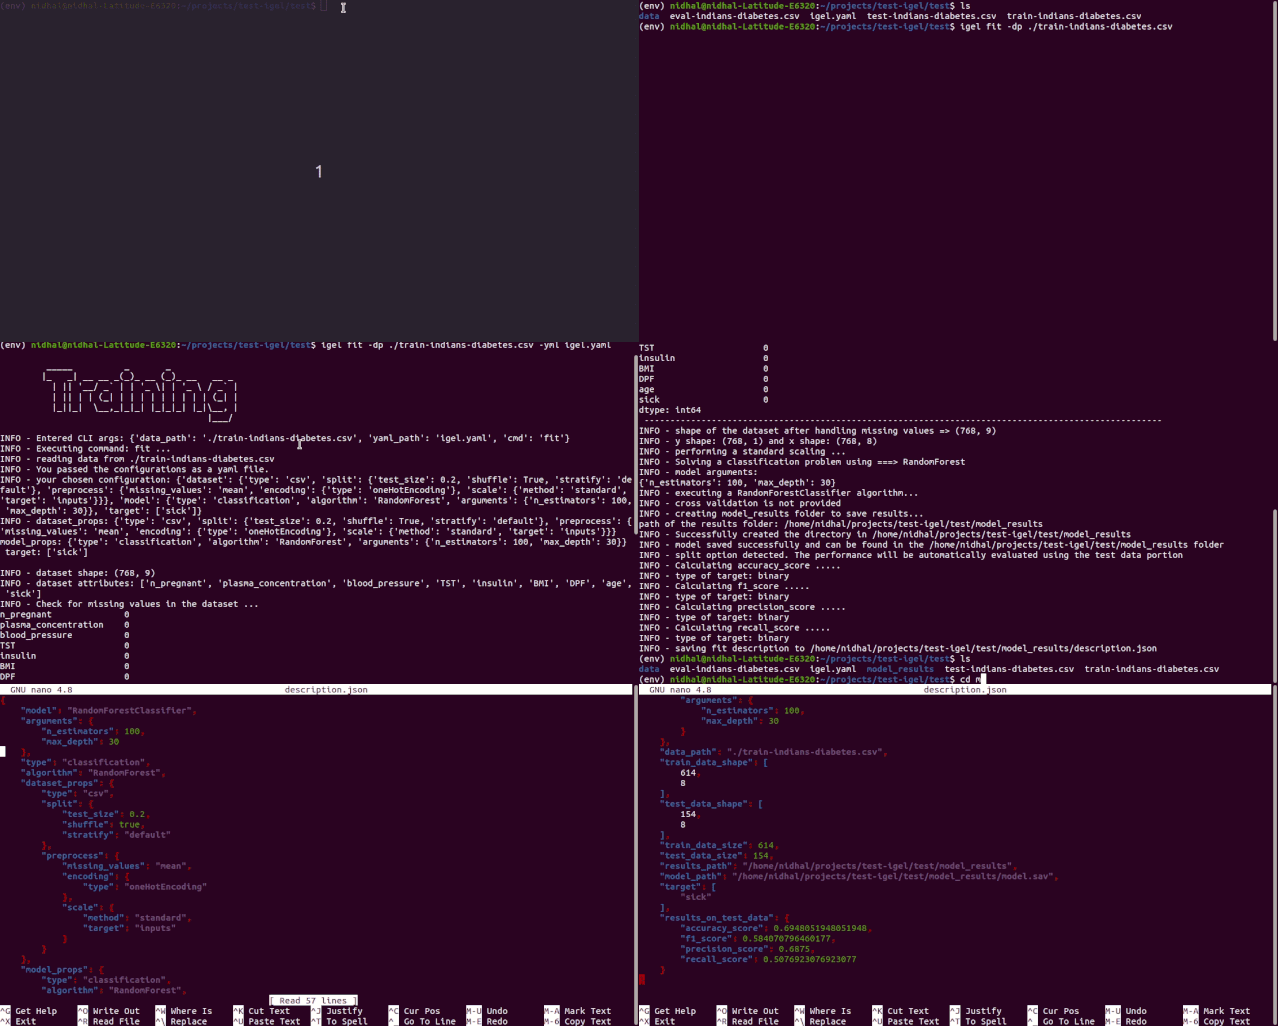
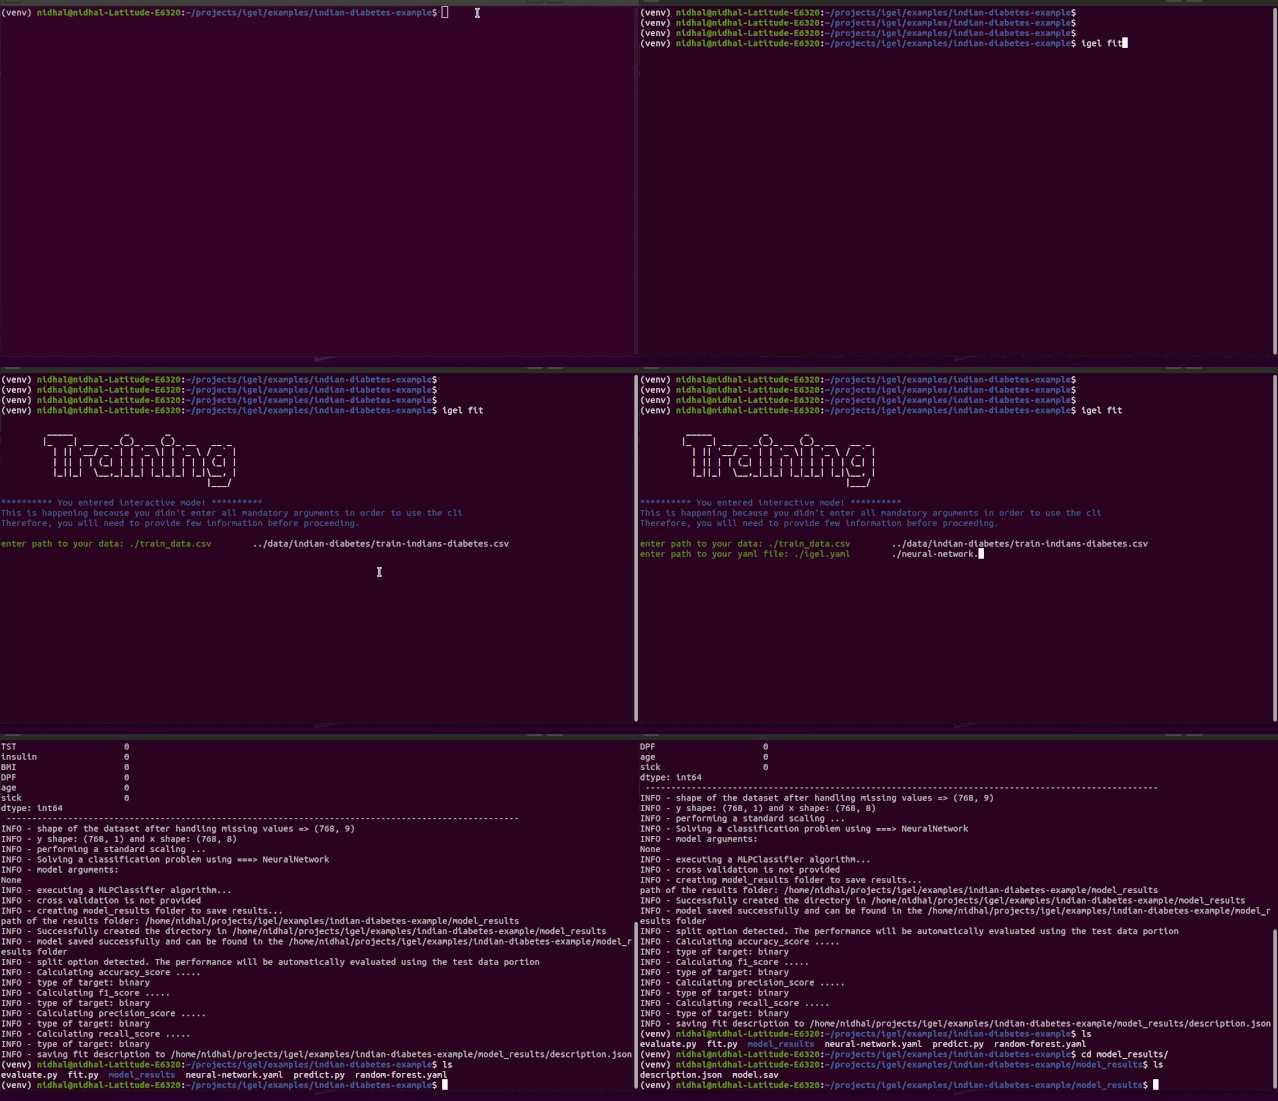
$ igel fit --data_path 'path_to_your_csv_dataset.csv' --yaml_file 'path_to_your_yaml_file.yaml'# or shorter$ igel fit -dp 'path_to_your_csv_dataset.csv' -yml 'path_to_your_yaml_file.yaml'"""That's it. Your "trained" model can be now found in the model_results folder(automatically created for you in your current working directory).Furthermore, a description can be found in the description.json file inside the model_results folder."""
$ igel evaluate -dp 'path_to_your_evaluation_dataset.csv'"""This will automatically generate an evaluation.json file in the current directory, where all evaluation results are stored"""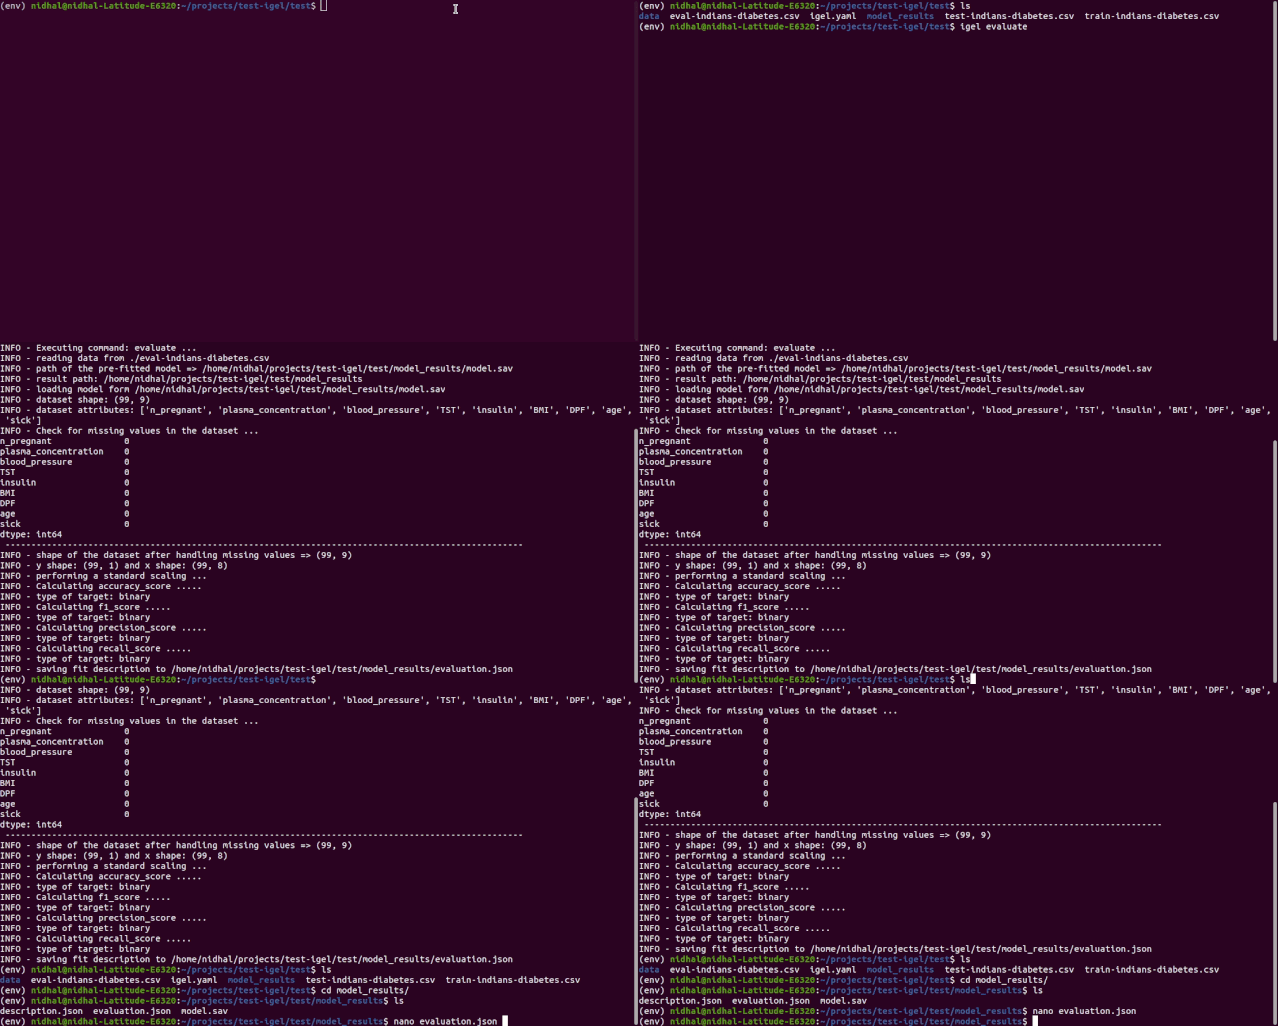
如果你对评估结果比较满意,就可以使用这个训练 / 预训练好的模型执行预测。
$ igel predict -dp 'path_to_your_test_dataset.csv'"""This will generate a predictions.csv file in your current directory, where all predictions are stored in a csv file"""
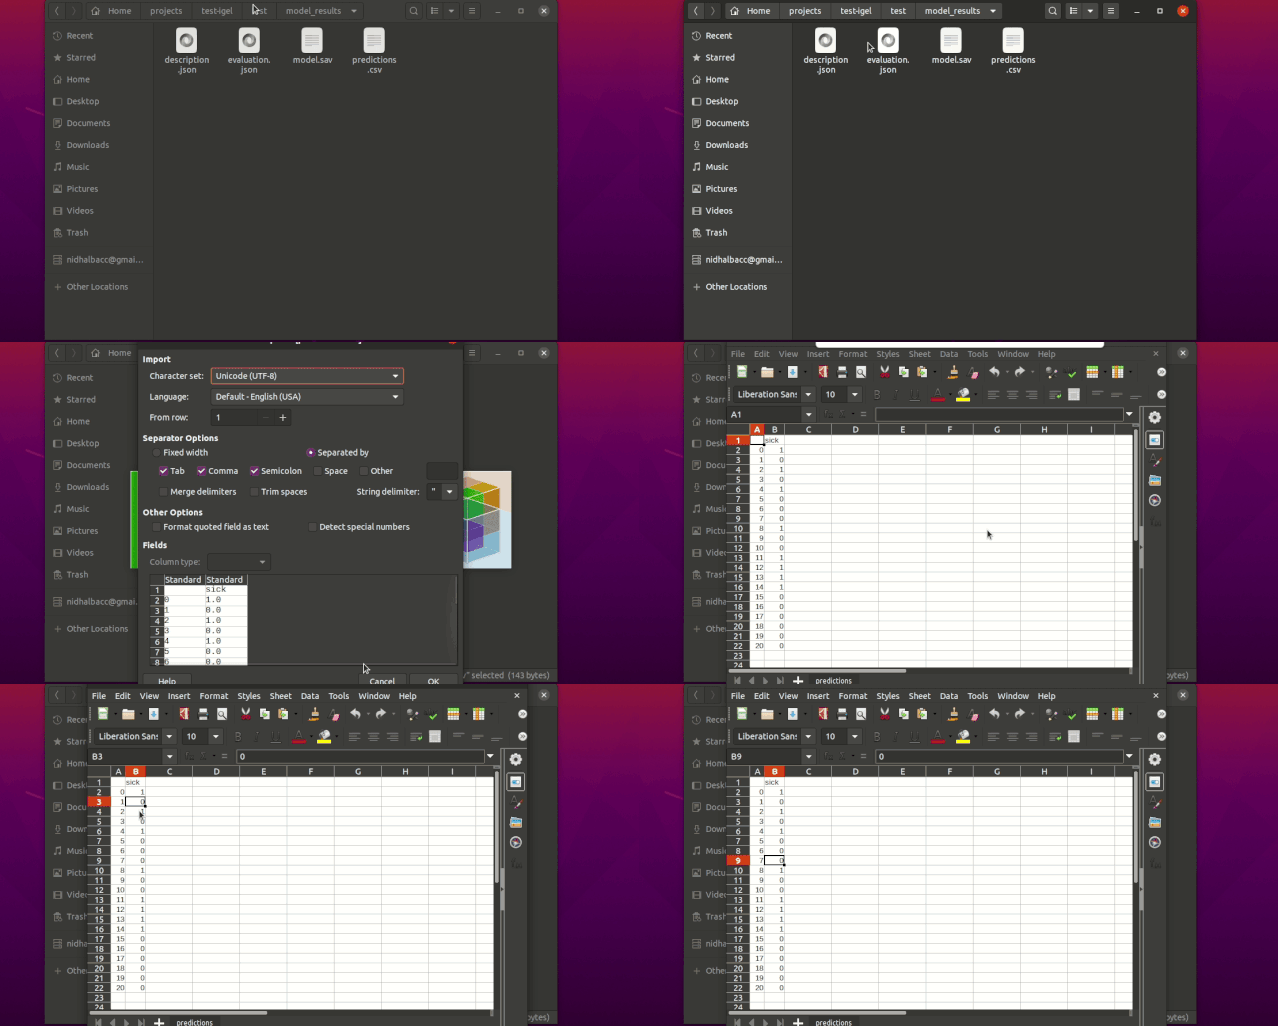
$ igel experiment -DP "path_to_train_data path_to_eval_data path_to_test_data" -yml "path_to_yaml_file""""This will run fit using train_data, evaluate using eval_data and further generate predictions using the test_data"""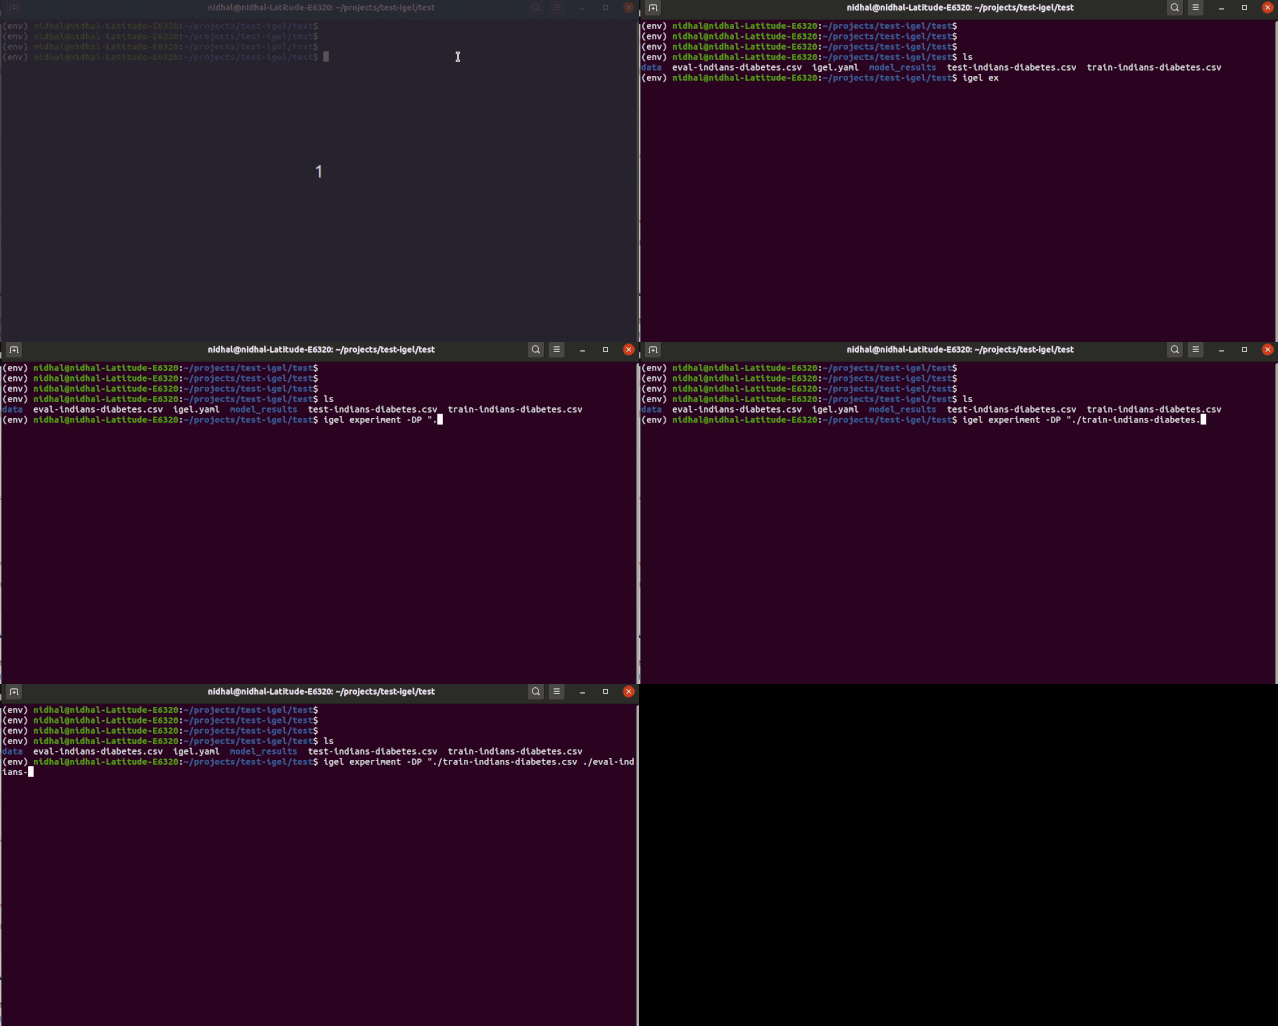
igel fit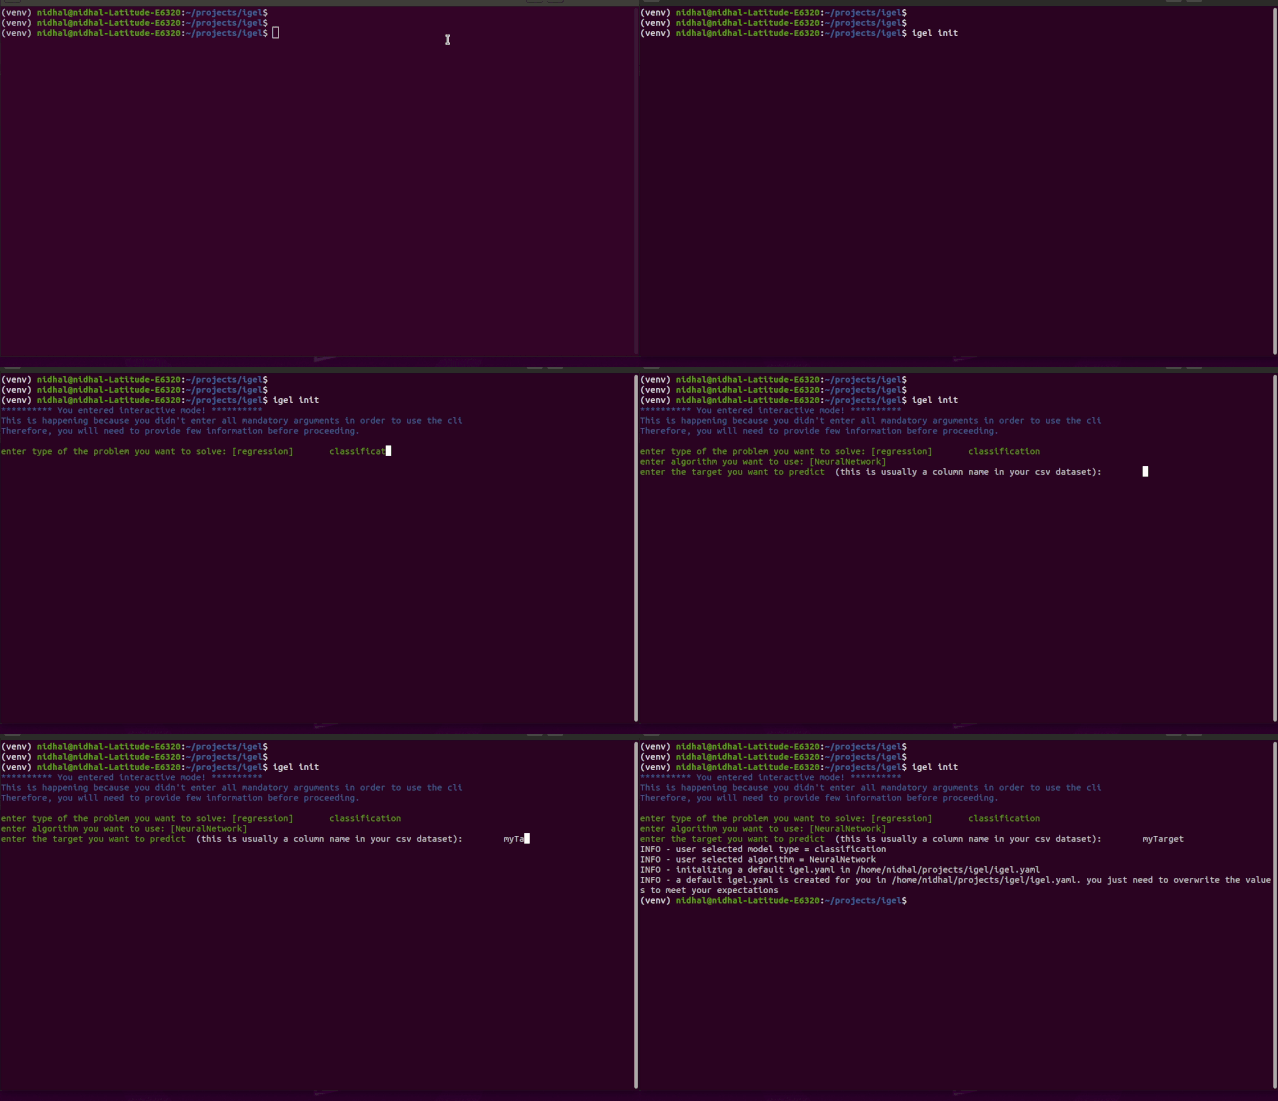
model:type: classificationalgorithm: DecisionTreetarget:sick
igel fit -dp path_to_the_dataset -yml path_to_the_yaml_file igel evaluate -dp path_to_the_evaluation_dataset igel predict -dp path_to_the_new_dataset# dataset operationsdataset:split:test_size: 0.2shuffle: Truestratify: defaultpreprocess: # preprocessing optionsmissing_values: mean # other possible values: [drop, median, most_frequent, constant] check the docs for moreencoding:type: oneHotEncoding # other possible values: [labelEncoding]scale: # scaling optionsmethod: standard # standardization will scale values to have a 0 mean and 1 standard deviation | you can also try minmaxtarget: inputs # scale inputs. | other possible values: [outputs, all] # if you choose all then all values in the dataset will be scaled# model definitionmodel:type: classificationalgorithm: RandomForestarguments:# notice that this is the available args for the random forest model. check different available args for all supported models by running igel helpn_estimators: 100max_depth: 20# target you want to predicttarget:sick
igel fit -dp path_to_the_dataset -yml path_to_the_yaml_file igel evaluate -dp path_to_the_evaluation_dataset igel predict -dp path_to_the_new_dataset
由于微信平台算法改版,公号内容将不再以时间排序展示,如果大家想第一时间看到我们的推送,强烈建议星标我们和给我们多点点【在看】。星标具体步骤为:

(1)点击页面最上方“小詹学Python”,进入公众号主页。
(2)点击右上角的小点点,在弹出页面点击“设为星标”,就可以啦。
感谢支持,比心。
评论

