【译】LiveData-Flow在MVVM中的最佳实践

点击上方蓝字关注我,知识会给你力量

最近在Medium上看到了Flow开发者写的几篇文章,觉得很不错,推荐给大家。
1
原文链接:https://proandroiddev.com/using-livedata-flow-in-mvvm-part-i-a98fe06077a0
最近,我一直在寻找MVVM架构中Kotlin Flow的最佳实践。在我回答了这个关于LiveData和Flow的问题后,我决定写这篇文章。在这篇文章中,我将解释如何在MVVM模式中使用Flow与LiveData。然后我们将看到如何通过使用Flow来改变应用程序的主题。
sample地址:https://github.com/fgiris/LiveDataWithFlowSample
什么是Flow?
Flow是coroutines库中的一个反应式流,能够从一个Suspend函数中返回多个值。
尽管Flow的用法似乎与LiveData非常相似,但它有更多的优势,比如:
-
本身是异步的,具有结构化的并发性 -
用map、filter等操作符简单地转换数据 -
易于测试
如何在MVVM中使用Flow
如果你的应用程序有MVVM架构,你通常有一个数据层(数据库、数据源等)、ViewModel和View(Fragment或Activity)。你可能会使用LiveData在这些层之间进行数据传输和转换。但LiveData的主要目的是什么?它是为了进行数据转换而设计的吗?
❝LiveData从来没有被设计成一个完全成熟的反应式流构建器
——Jose Alcérreca在2019年Android Dev峰会上说
❞
由于LiveData是一个具有生命周期意识的组件,因此最好在View和ViewModel层中使用它。但数据层呢?我认为在数据库层使用LiveData的最大问题是所有的数据转换都将在主线程上完成,除非你启动一个coroutine并在里面进行工作。这就是为什么你可能更喜欢在数据层中使用Suspend函数。
假设你想从网络上获取天气预报数据。那么在你的数据库中使用Suspend函数就会类似于下面的情况。
class WeatherForecastRepository @Inject constructor() {
    suspend fun fetchWeatherForecast(): Result<Int> {
        // Since you can only return one value from suspend function
        // you have to set data loading before calling fetchWeatherForecast

        // Fake api call
        delay(1000)

        // Return fake success data
        return Result.Success((0..20).random())
    }
}
你可以在ViewModel中用viewModelScope调用这个函数。
class WeatherForecastOneShotViewModel @Inject constructor(
    val weatherForecastRepository: WeatherForecastRepository
) : ViewModel() {

    private var _weatherForecast = MutableLiveData<Result<Int>>()
    val weatherForecast: LiveData<Result<Int>>
        get() = _weatherForecast

    fun fetchWeatherForecast() {
        // Set value as loading
        _weatherForecast.value = Result.Loading

        viewModelScope.launch {
            // Fetch and update weather forecast LiveData
            _weatherForecast.value = weatherForecastRepository.fetchWeatherForecast()
        }
    }
}
这种方法对于每次被调用时都会运行的单次请求来说效果不错。但是在获取数据流的时候呢?
这里就是Flow发挥作用的地方。如果你想从你的服务器上获取实时更新,你可以用Flow来做,而不用担心资源的泄露,因为结构化的并发性迫使你这样做。
让我们转换我们的数据库,使其返回Flow。
class WeatherForecastRepository @Inject constructor() {

    /**
     * This methods is used to make one shot request to get
     * fake weather forecast data
     */
    fun fetchWeatherForecast() = flow {
        emit(Result.Loading)
        // Fake api call
        delay(1000)
        // Send a random fake weather forecast data
        emit(Result.Success((0..20).random()))
    }

    /**
     * This method is used to get data stream of fake weather
     * forecast data in real time
     */
    fun fetchWeatherForecastRealTime() = flow {
        emit(Result.Loading)
        // Fake data stream
        while (true) {
            delay(1000)
            // Send a random fake weather forecast data
            emit(Result.Success((0..20).random()))
        }
    }
}
现在,我们能够从一个Suspend函数中返回多个值。你可以使用asLiveData扩展函数在ViewModel中把Flow转换为LiveData。
class WeatherForecastOneShotViewModel @Inject constructor(
    weatherForecastRepository: WeatherForecastRepository
) : ViewModel() {

    private val _weatherForecast = weatherForecastRepository
        .fetchWeatherForecast()
        .asLiveData(viewModelScope.coroutineContext) // Use viewModel scope for auto cancellation

    val weatherForecast: LiveData<Result<Int>>
        get() = _weatherForecast
}
这看起来和使用LiveData差不多,因为没有数据转换。让我们看看从数据库中获取实时更新。
class WeatherForecastDataStreamViewModel @Inject constructor(
    weatherForecastRepository: WeatherForecastRepository
) : ViewModel() {

    private val _weatherForecast = weatherForecastRepository
        .fetchWeatherForecastRealTime()
        .map {
            // Do some heavy operation. This operation will be done in the
            // scope of this flow collected. In our case it is the scope
            // passed to asLiveData extension function
            // This operation will not block the UI
            delay(1000)
            it
        }
        .asLiveData(
            // Use Default dispatcher for CPU intensive work and
            // viewModel scope for auto cancellation when viewModel
            // is destroyed
            Dispatchers.Default + viewModelScope.coroutineContext
        )

    val weatherForecast: LiveData<Result<Int>>
        get() = _weatherForecast
}
当你获取实时天气预报数据时,map函数中的所有数据转换将在Flow collect的scope内以异步方式完成。
❝注意:如果你在资源库中没有使用Flow,你可以通过使用liveData builder实现同样的数据转换功能。
❞
private val _weatherForecast = liveData {
    val response = weatherForecastRepository.fetchWeatherForecast()

    // Do some heavy operation with response
    delay(1000)

    emit(transformedResponse)
}
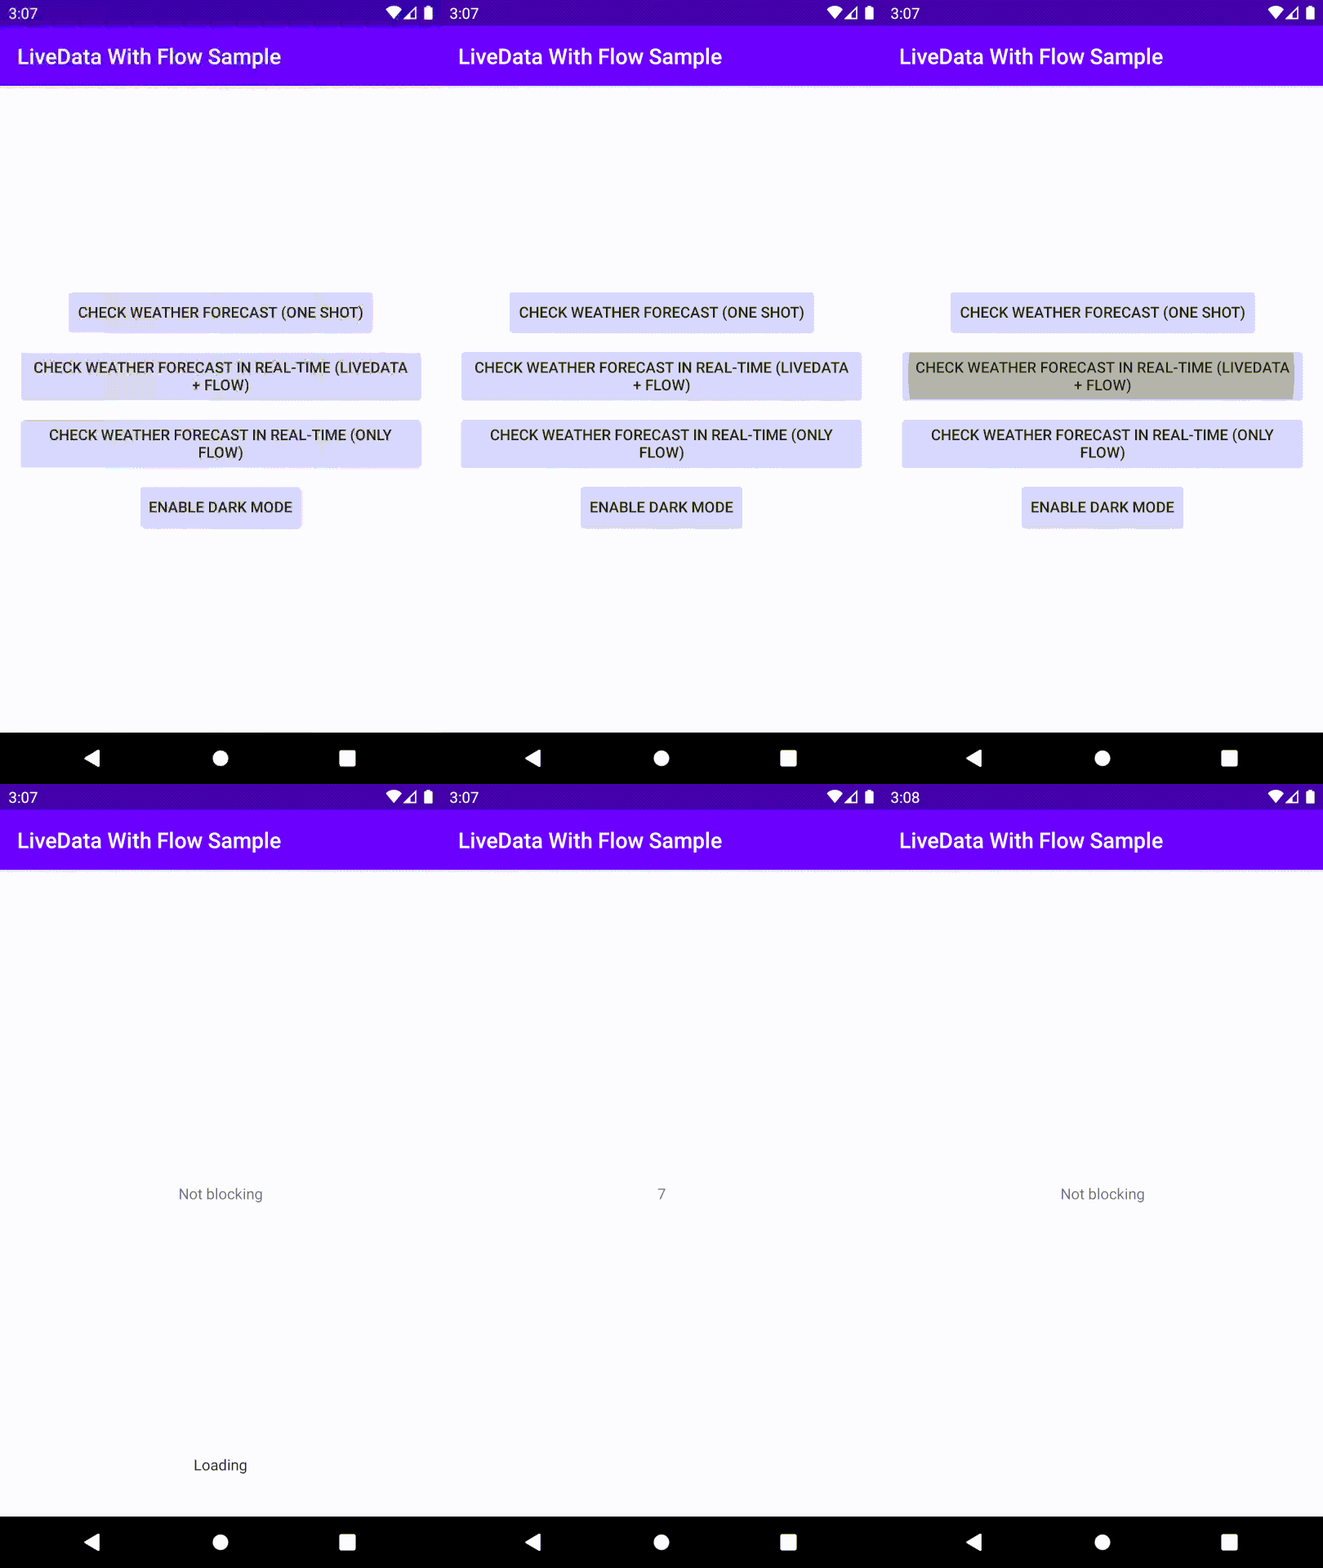
再次回到Flow的实时数据获取,我们可以看到它在观察数据流的同时更新文本字段,并没有阻塞UI。
class WeatherForecastDataStreamFragment : DaggerFragment() {

    ...

    override fun onActivityCreated(savedInstanceState: Bundle?) {
        super.onActivityCreated(savedInstanceState)

        // Obtain viewModel
        viewModel = ViewModelProviders.of(
            this,
            viewModelFactory
        ).get(WeatherForecastDataStreamViewModel::class.java)

        // Observe weather forecast data stream
        viewModel.weatherForecast.observe(viewLifecycleOwner, Observer {
            when (it) {
                Result.Loading -> {
                    Toast.makeText(context, "Loading", Toast.LENGTH_SHORT).show()
                }
                is Result.Success -> {
                    // Update weather data
                    tvDegree.text = it.data.toString()
                }
                Result.Error -> {
                    Toast.makeText(context, "Error", Toast.LENGTH_SHORT).show()
                }
            }
        })

        lifecycleScope.launch {
            while (true) {
                delay(1000)
                // Update text
                tvDegree.text = "Not blocking"
            }
        }
    }
}
那么它将看起来像这样:

用Flow改变你的应用程序的主题
由于Flow可以发出实时更新,我们可以把用户的输入看作是一种更新,并通过Flow发送。为了做到这一点,让我们创建一个主题数据源,它有一个用于广播更新的主题channel。
class ThemeDataSource @Inject constructor(
    private val sharedPreferences: SharedPreferences
) {
    private val themeChannel: ConflatedBroadcastChannel<Theme> by lazy {
        ConflatedBroadcastChannel<Theme>().also { channel ->
            // When there is an access to theme channel
            // get the current theme from shared preferences
            // and send it to consumers
            val theme = sharedPreferences.getString(
                Constants.PREFERENCE_KEY_THEME,
                null
            ) ?: Theme.LIGHT.name // Default theme is light

            channel.offer(Theme.valueOf(theme))
        }
    }

    @FlowPreview
    fun getTheme(): Flow<Theme> {
        return themeChannel.asFlow()
    }

    fun setTheme(theme: Theme) {
        // Save theme to shared preferences
        sharedPreferences
            .edit()
            .putString(Constants.PREFERENCE_KEY_THEME, theme.name)
            .apply()

        // Notify consumers
        themeChannel.offer(theme)
    }
}

// Used to change the theme of the app
enum class Theme {
    DARK, LIGHT
}
正如你所看到的,没有从外部直接访问themeChannel,themeChannel在被发送之前被转换为Flow。
在Activity层面上消费主题更新是更好的,因为所有来自其他Fragment的更新都可以被安全地观察到。
让我们在ViewModel中获取主题更新。
class MainViewModel @Inject constructor(
    private val themeDataSource: ThemeDataSource
) : ViewModel() {
    // Whenever there is a change in theme, it will be
    // converted to live data
    private val _theme: LiveData<Theme> = themeDataSource
        .getTheme()
        .asLiveData(viewModelScope.coroutineContext)

    val theme: LiveData<Theme>
        get() = _theme

    fun setTheme(theme: Theme) {
        themeDataSource.setTheme(theme)
    }
}
而且在Activity中可以很容易地观察到这一点。
class MainActivity : DaggerAppCompatActivity() {

    ...

    override fun onCreate(savedInstanceState: Bundle?) {
        super.onCreate(savedInstanceState)
        setContentView(R.layout.activity_main)

        ...

        observeTheme()
    }

    private fun observeTheme() {
        // Observe and update app theme if any changes happen
        viewModel.theme.observe(this, Observer { theme ->
            when (theme) {
                Theme.LIGHT -> AppCompatDelegate.setDefaultNightMode(AppCompatDelegate.MODE_NIGHT_NO)
                Theme.DARK -> AppCompatDelegate.setDefaultNightMode(AppCompatDelegate.MODE_NIGHT_YES)
            }
        })
    }
}
剩下的事情就是按下Fragment中的按钮。
class MainFragment : DaggerFragment() {

    private lateinit var viewModel: MainViewModel

    ...

    override fun onViewCreated(view: View, savedInstanceState: Bundle?) {

        ...

        btnDarkMode.setOnClickListener {
            // Enable dark mode
            viewModel.setTheme(Theme.DARK)
        }
    }
}
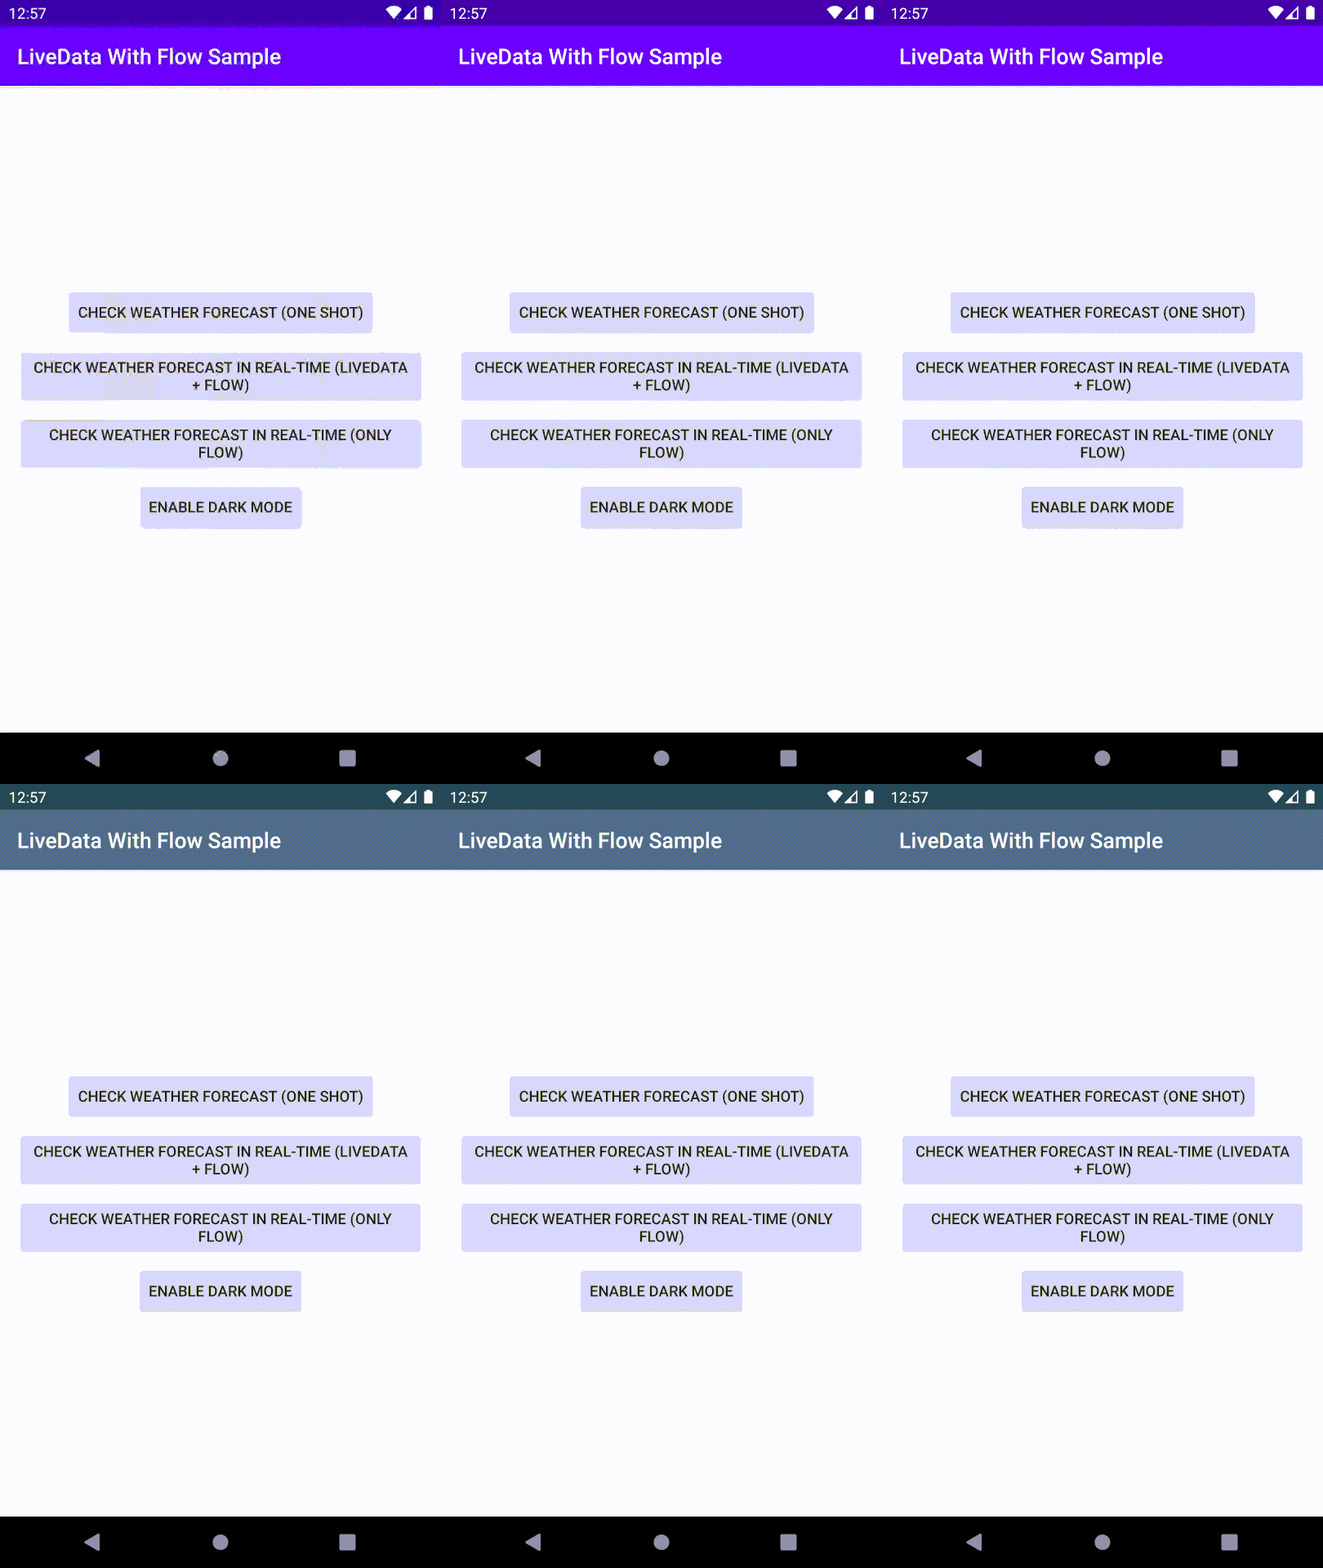
瞧瞧! 刚刚用Flow改变了主题。

2
原文链接:https://proandroiddev.com/using-livedata-flow-in-mvvm-part-ii-252ec15cc93a
在第一部分中,我们已经看到了如何在资源库层中使用Flow,以及如何用Flow和LiveData改变应用程序的主题。在这篇文章中,我们将看到如何移除LiveData(甚至是MediatorLiveData),在所有层中只使用Flow。我们还将深入研究常见的Flow操作,如map、filter、transform等。最后,我们将实现一个搜索栏的例子,这个例子是由Sean McQuillan在 "Fragmented Podcast - 187: 与Manuel Vivo和Sean McQuillan的Coroutines "中给出的例子,使用了Channel和Flow。
Say 👋 to LiveData
使用LiveData可以确保在生命周期所有者销毁的情况下,你不会泄露任何资源。如果我告诉你,你几乎可以(后面会解释为什么不一样,但几乎)用Flow获得同样的好处呢?
让我们来看看我们如何做到这一点。
储存库
存储库层保持不变,因为我们已经在返回Flow。
/**
     * This method is used to get data stream of fake weather
     * forecast data in real time with 1000 ms delay
     */
    fun fetchWeatherForecastRealTime() : Flow<Result<Int>> = flow {
        // Fake data stream
        while (true) {
            delay(1000)
            // Send a random fake weather forecast data
            emit(Result.Success((0..20).random()))
        }
    }
ViewModel
我们不需要用asLiveData将Flow转换为LiveData,而只是在ViewModel中使用Flow。
之前是这样的。
class WeatherForecastDataStreamViewModel @Inject constructor(
    weatherForecastRepository: WeatherForecastRepository
) : ViewModel() {

    private val _weatherForecast = weatherForecastRepository
        .fetchWeatherForecastRealTime()
        .map {
            // Do some heavy operation. This operation will be done in the
            // scope of this flow collected. In our case it is the scope
            // passed to asLiveData extension function
            // This operation will not block the UI
            delay(1000)
            it
        }
        .asLiveData(
            // Use Default dispatcher for CPU intensive work and
            // viewModel scope for auto cancellation when viewModel
            // is destroyed
            Dispatchers.Default + viewModelScope.coroutineContext
        )

    val weatherForecast: LiveData<Result<Int>>
        get() = _weatherForecast
}
只用Flow,它就变成了。
class WeatherForecastDataStreamFlowViewModel @Inject constructor(
    weatherForecastRepository: WeatherForecastRepository
) : ViewModel() {

    private val _weatherForecast = weatherForecastRepository
        .fetchWeatherForecastRealTime()

    val weatherForecast: Flow<Result<Int>>
        get() = _weatherForecast
}
但是,等等。map过程缺少了,让我们添加它,以便在绘制地图时将摄氏温度转换为华氏温度。
private val _weatherForecast = weatherForecastRepository
    .fetchWeatherForecastRealTime()
    .map {
        // Do some heavy mapping
        delay(500)

        // Let's add an additional mapping to convert
        // celsius degree to Fahrenheit
        if (it is Result.Success) {
            val fahrenheitDegree = convertCelsiusToFahrenheit(it.data)
            Result.Success(fahrenheitDegree)
        } else it // Do nothing if result is loading or error
    }

/**
 * This function converts given [celsius] to Fahrenheit.
 *
 * Fahrenheit degree = Celsius degree * 9 / 5 + 32
 *
 * @return Fahrenheit integer for [celsius]
 */
private fun convertCelsiusToFahrenheit(celsius: Int) = celsius * 9 / 5 + 32
你可能想在用户界面中显示加载,那么onStart就是一个完美的地方。
private val _weatherForecast = weatherForecastRepository
    .fetchWeatherForecastRealTime()
    .onStart {
        emit(Result.Loading)
    }
    .map { ... }
如果你想过滤数值,那就去吧。你有过滤运算符。
private val _weatherForecast = weatherForecastRepository
        .fetchWeatherForecastRealTime()
        .onStart { ... }
        .filter {
            // There could be millions of data when filtering
            // Do some filtering
            delay(2000)

            // Let's add an additional filtering to take only
            // data which is less than 10
            if (it is Result.Success) {
                it.data < 10
            } else true // Do nothing if result is loading or error
        }
        .map { ... }
你也可以用transform操作符对数据进行转换,这使你可以灵活地对一个单一的值发出你想要的信息。
private val _weatherForecast = weatherForecastRepository
        .fetchWeatherForecastRealTime()
        .onStart { ... }
        .filter { ... }
        .map { ... }
        .transform {
            // Let's send only even numbers
            if (it is Result.Success && it.data % 2 == 0) {
                val evenDegree = it.data
                emit(Result.Success(evenDegree))
              // You can call emit as many as you want in transform
              // This makes transform different from filter operator
            } else emit(it) // Do nothing if result is loading or error
        }
由于Flow是顺序的,collecting一个值的总执行时间是所有运算符的执行时间之和。如果你有一个长期运行的运算符,你可以使用buffer,这样直到buffer的所有运算符的执行将在一个不同的coroutine中处理,而不是在协程中对Flow collect。这使得总的执行速度更快。
private val _weatherForecast = weatherForecastRepository
        .fetchWeatherForecastRealTime()
        .onStart { ... }
        .filter { ... }
        // onStart and filter will be executed on a different
        // coroutine than this flow is collected
        .buffer()
        // The following map and transform will be executed on the same
        // coroutine which this flow is collected
        .map { ... }
        .transform { ... }
如果你不想多次收集相同的值呢?那么你就可以使用distinctUntilChanged操作符,它只在值与前一个值不同时发送。
private val _weatherForecast = weatherForecastRepository
      .fetchWeatherForecastRealTime()
      .onStart { ... }
      .distinctUntilChanged()
      .filter { ... }
      .buffer()
      .map { ... }
      .transform { ... }
比方说,你只想在显示在用户界面之前缓存修改过的数据。你可以利用onEach操作符来完成每个值的工作。
private val _weatherForecast = weatherForecastRepository
      .fetchWeatherForecastRealTime()
      .onStart { ... }
      .distinctUntilChanged()
      .filter { ... }
      .buffer()
      .map { ... }
      .transform { ... }
      .onEach {
        // Do something with the modified data. For instance
        // save the modified data to cache
        println("$it has been modified and reached until onEach operator")
      }
如果你在所有运算符中做一些繁重的工作,你可以通过使用flowOn运算符简单地改变整个运算符的执行环境。
private val _weatherForecast = weatherForecastRepository
      .fetchWeatherForecastRealTime()
      .onStart { ... }
      .distinctUntilChanged()
      .filter { ... }
      .buffer()
      .map { ... }
      .transform { ... }
      .onEach { ... }
      .flowOn(Dispatchers.Default) // Changes the context of flow
错误怎么处理?只需使用catch操作符来捕捉下行流中的任何错误。
private val _weatherForecast = weatherForecastRepository
      .fetchWeatherForecastRealTime()
      .onStart { ... }
      .distinctUntilChanged()
      .filter { ... }
      .buffer()
      .map { ... }
      .transform { ... }
      .onEach { ... }
      .flowOn(Dispatchers.Default)
      .catch { throwable ->
          // Catch exceptions in all down stream flow
          // Any error occurs after this catch operator
          // will not be caught here
          println(throwable)
      }
如果我们有另一个流要与_weatherForecast流合并呢?(你可能会认为这是一个有多个LiveData源的MediatorLiveData)你可以使用合并函数来合并任何数量的流量。
private val _weatherForecast = weatherForecastRepository
      .fetchWeatherForecastRealTime()
      .onStart { ... }
      .distinctUntilChanged()
      .filter { ... }
      .buffer()
      .map { ... }
      .transform { ... }
      .onEach { ... }
      .flowOn(Dispatchers.Default)
      .catch { ... }

private val _weatherForecastOtherDataSource = weatherForecastRepository
        .fetchWeatherForecastRealTimeOtherDataSource()

// Merge flows when consumer gets
val weatherForecast: Flow<Result<Int>>
    get() = merge(_weatherForecast, _weatherForecastOtherDataSource)
最后,我们的ViewModel看起来像这样。
@ExperimentalCoroutinesApi
class WeatherForecastDataStreamFlowViewModel @Inject constructor(
    weatherForecastRepository: WeatherForecastRepository
) : ViewModel() {

    private val _weatherForecastOtherDataSource = weatherForecastRepository
        .fetchWeatherForecastRealTimeOtherDataSource()

    private val _weatherForecast = weatherForecastRepository
        .fetchWeatherForecastRealTime()
        .onStart {
            emit(Result.Loading)
        }
        .distinctUntilChanged()
        .filter {
            // There could be millions of data when filtering
            // Do some filtering
            delay(2000)

            // Let's add an additional filtering to take only
            // data which is less than 10
            if (it is Result.Success) {
                it.data < 10
            } else true // Do nothing if result is loading or error
        }
        .buffer()
        .map {
            // Do some heavy mapping
            delay(500)

            // Let's add an additional mapping to convert
            // celsius degree to Fahrenheit
            if (it is Result.Success) {
                val fahrenheitDegree = convertCelsiusToFahrenheit(it.data)
                Result.Success(fahrenheitDegree)
            } else it // Do nothing if result is loading or error
        }
        .transform {
            // Let's send only even numbers
            if (it is Result.Success && it.data % 2 == 0) {
                val evenDegree = it.data
                emit(Result.Success(evenDegree))
            } else emit(it) // Do nothing if result is loading or error
        }
        .onEach {
            // Do something with the modified data. For instance
            // save the modified data to cache
            println("$it has modified and reached until onEach operator")
        }
        .flowOn(Dispatchers.Default) // Changes the context of flow
        .catch { throwable ->
            // Catch exceptions in all down stream flow
            // Any error occurs after this catch operator
            // will not be caught here
            println(throwable)
        }

    // Merge flows when consumer gets
    val weatherForecast: Flow<Result<Int>>
        get() = merge(_weatherForecast, _weatherForecastOtherDataSource)

    /**
     * This function converts given [celsius] to Fahrenheit.
     *
     * Fahrenheit degree = Celsius degree * 9 / 5 + 32
     *
     * @return Fahrenheit integer for [celsius]
     */
    private fun convertCelsiusToFahrenheit(celsius: Int) = celsius * 9 / 5 + 32
}
唯一剩下的就是Fragment中对Flow实现collect。
class WeatherForecastDataStreamFlowFragment : DaggerFragment() {

    ...

    override fun onActivityCreated(savedInstanceState: Bundle?) {
        super.onActivityCreated(savedInstanceState)

        // Obtain viewModel
        viewModel = ViewModelProviders.of(
            this,
            viewModelFactory
        ).get(WeatherForecastDataStreamFlowViewModel::class.java)

        // Consume data when fragment is started
        lifecycleScope.launchWhenStarted {
            // Since collect is a suspend function it needs to be called
            // from a coroutine scope
            viewModel.weatherForecast.collect {
                when (it) {
                    Result.Loading -> {
                        Toast.makeText(context, "Loading", Toast.LENGTH_SHORT).show()
                    }
                    is Result.Success -> {
                        // Update weather data
                        tvDegree.text = it.data.toString()
                    }
                    Result.Error -> {
                        Toast.makeText(context, "Error", Toast.LENGTH_SHORT).show()
                    }
                }
            }
        }
    }
}
这些只是部分Flow运算符。你可以从这里找到整个操作符的列表。
https://kotlin.github.io/kotlinx.coroutines/kotlinx-coroutines-core/kotlinx.coroutines.flow/index.html
注意:移除LiveData会增加配置变化的额外工作。为了保留配置变化,你需要缓存最新的值。你可以从这里查看Dropbox存储库如何处理缓存。
Search bar using Channel and Flow
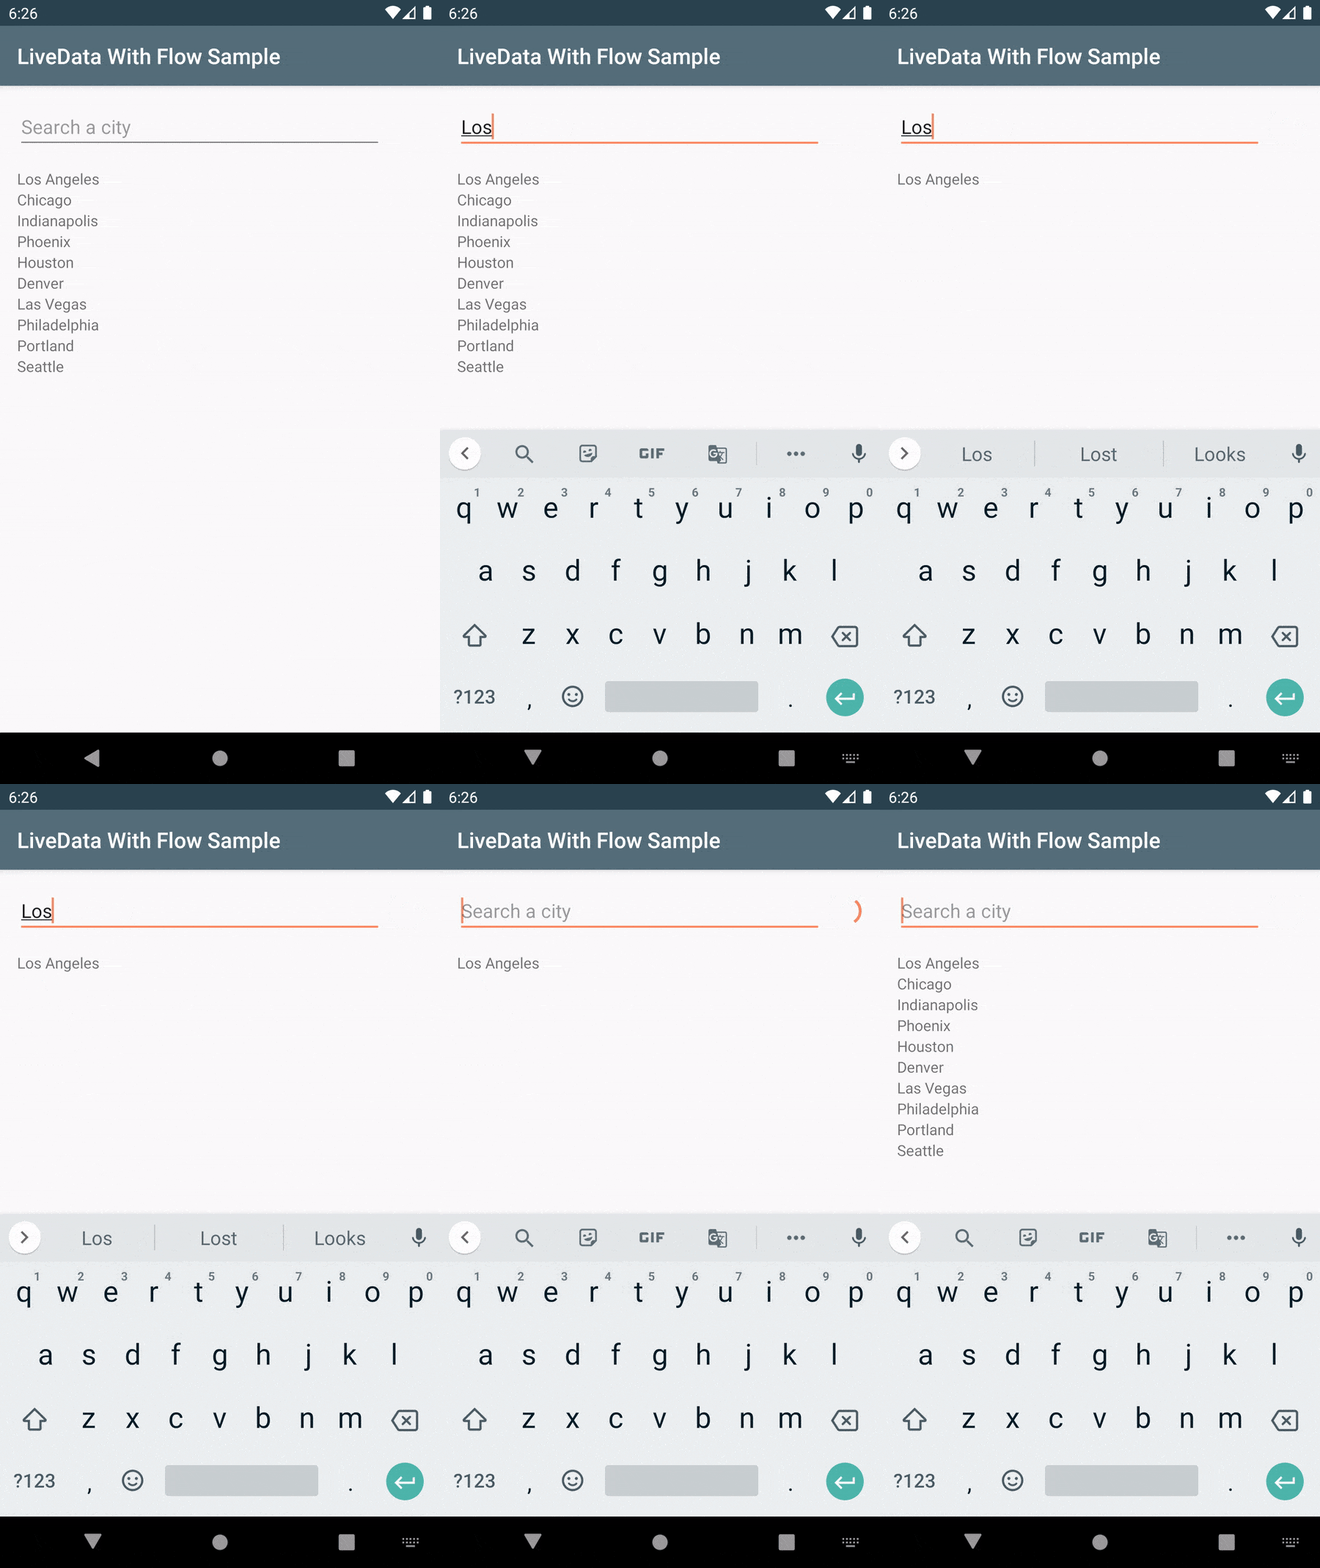
在这个播客中,Sean McQuillan举了一个例子,说明如何使用Channel和Flow创建一个搜索栏。这个想法是要有一个带有过滤列表的搜索栏。每当用户在搜索栏中输入一些东西时,列表就会被搜索栏中的文本过滤掉。这是通过在channel中保存文本值和观察通过该channel的流量变化来实现的。
为了演示这个例子,让我们有一个城市列表和一个搜索栏。最后,它看起来会是这样的。

我们将在Fragment里有一个EditText。每当文本被更新时,我们将把它发送到存储在ViewModel中的channel。
etCity.doAfterTextChanged {
    val key = it.toString()

    // Set loading indicator
    pbLoading.show()

    // Offer the current text to channel
    viewModel.cityFilterChannel.offer(key)
}
当channel被更新为最新值时,我们将过滤城市并将列表发送给订阅者。
class SearchCityViewModel @Inject constructor() : ViewModel() {
    val cityList = listOf(
        "Los Angeles", "Chicago", "Indianapolis", "Phoenix", "Houston",
        "Denver", "Las Vegas", "Philadelphia", "Portland", "Seattle"
    )

    // Channel to hold the text value inside search box
    val cityFilterChannel = ConflatedBroadcastChannel<String>()

    // Flow which observes channel and sends filtered list
    // whenever there is a update in the channel. This is
    // observed in UI to get filtered result
    val cityFilterFlow: Flow<List<String>> = cityFilterChannel
        .asFlow()
        .map {
            // Filter cities with new value
            val filteredCities = filterCities(it)

            // Do some heavy work
            delay(500)

            // Return the filtered list
            filteredCities
        }

    override fun onCleared() {
        super.onCleared()

        // Close the channel when ViewModel is destroyed
        cityFilterChannel.close()
    }

    /**
     * This function filters [cityList] if a city contains
     * the given [key]. If key is an empty string then this
     * function does not do any filtering.
     *
     * @param key Key to filter out the list
     *
     * @return List of cities containing the [key]
     */
    private fun filterCities(key: String): List<String> {
        return cityList.filter {
            it.contains(key)
        }
    }
}
然后,只需观察Fragment中的变化。
lifecycleScope.launchWhenStarted {
    viewModel.cityFilterFlow.collect { filteredCities ->
        // Hide the progress bar
        pbLoading.hide()

        // Set filtered items
        adapter.setItems(filteredCities)
    }
}
好了,我们刚刚实现了一个使用channel和流👊的搜索和过滤机制。
3
https://proandroiddev.com/using-livedata-flow-in-mvvm-part-iii-8703d305ca73
第三篇文章主要是针对Flow的测试,这篇文章我相信大家在国内几乎用不上,所以,感兴趣的朋友可以自己去看下。
向大家推荐下我的网站 https://xuyisheng.top/ 专注 Android-Kotlin-Flutter 欢迎大家访问
向大家推荐下我的网站 https://xuyisheng.top/ 点击原文一键直达
专注 Android-Kotlin-Flutter 欢迎大家访问
往期推荐
更文不易,点个“三连”支持一下👇
