还在手动部署springboot项目?不妨试试它,让你部署项目飞起来!
领读:
简单来说,docker是个好东西!
作者 | 流星 007
来源 | http://suo.im/6biT68
目录
docker 介绍
安装 docker
Ubuntu 安装 docker
CentOS 安装 docker
通过脚本安装
拉取 java 环境
创建 springboot 项目
打包 springboot 到 docker
docker 查看容器的日志
查看 log4j2 输出问文件日志
docker 介绍
Docker 是一个开源的应用容器引擎,让开发者可以打包他们的应用以及依赖包到一个可移植的镜像中,然后发布到任何流行的 Linux 或 Windows 机器上,也可以实现虚拟化。容器是完全使用沙箱机制,相互之间不会有任何接口。
docker 的核心思想是通过对应用的封装、分发、部署、运行生命周期进行管理,达到应用组件级别的 “一次性封装,到处运行”。这里的应用组件,可以是一个 web 应用,也可以是一个环境,更可以是一个数据库等等。
安装 docker
既然 docker 这么神奇,那我们如何安装 docker 呢?我们一起来走一下吧。
Ubuntu 安装 docker
由于本人的系统是 CentOS,所以这里就只展示一下 CentOS 的安装方式,Ubuntu 以及其他系统请自行百度。
CentOS 安装 docker
docker 要求 CentOS 在 7.0 以后的版本,如果你的系统版本还在 7.0 以前,请先升级一下版本在进行安装,同时不支持 32 位的系统,内核版本至少 3.10。
请先确保没有安装过 docker,否则有可能会导致安装失败,如果之前安装过,可以尝试直接 yum isntall -y docker
更新软件源第一个命令
yum update

遇到他输入 y,然后回车,看到下面信息表示更新成功:
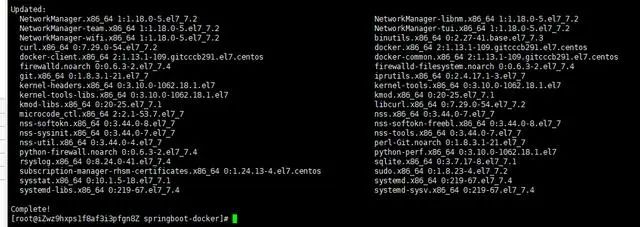
第二个命令
yum install -y yum-utils device-mapper-persistent-data lvm2

添加 docker 稳定版本的 yum 软件源
yum-config-manager --add-repo https://download.docker.com/linux/centos/docker-ce.repo

再次更新 yum 源,并安装 docker
yum update

yum install -y docker-ce

看到这个页面,标识 docker 已经安装成功了。
安装完成之后启动 docker
systemctl start docker
重启
systemctl restart docker
停止
systemctl stop docker
开机自启动
systemctl enable docker
查看 docker 的状态
systemctl status docker
通过脚本安装
除了上面的 yum 安装,还可以采用 shell 脚本安装,安装流程如下:
curl -fsSL https://get.docker.com/ | sh
或者
wget -qO- https://get.docker.com/ | sh
拉取 java 环境
搜索公纵号:MarkerHub,关注回复[ vue ]获取前后端入门教程!
拉取 jdk 很简单,直接执行一行代码即可,我这里拉取的时 java 8 的版本。
docker pull java:8
拉取完成之后执行:
docker images
如果出现下面内容,表示拉取成功

创建 springboot 项目
新建项目
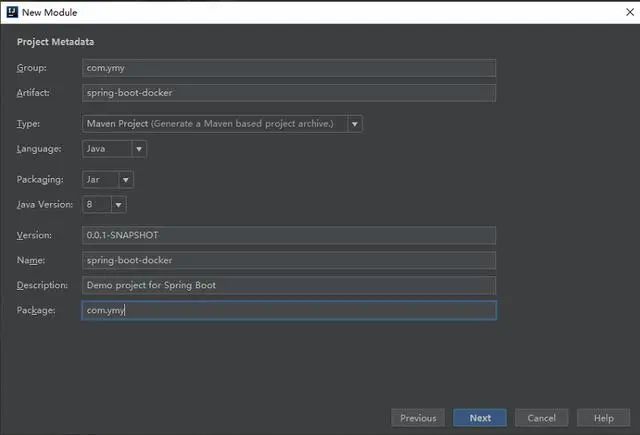
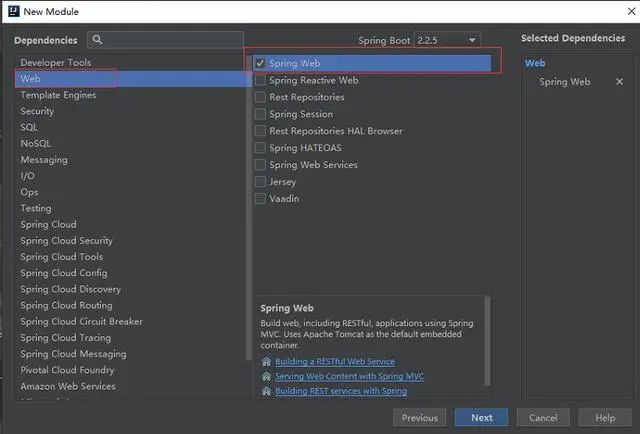
引入 sprint-boot-web 的依赖
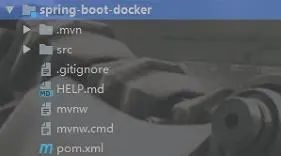
新建完成之后的项目结构
引入 docker 依赖
<properties>
       <docker.image.prefix>registry.aliyuncs.com/linhuatest</docker.image.prefix>
    </properties>


 <!-- docker插件 -->
            <plugin>
                <groupId>com.spotify</groupId>
                <artifactId>docker-maven-plugin</artifactId>
                <version>1.0.0</version>
                <configuration>
                    <imageName>${docker.image.prefix}/${project.artifactId}</imageName>
                    <!--docker文件所在的目录-->
                    <dockerDirectory>src/main/docker</dockerDirectory>
                    <resources>
                        <resource>
                            <targetPath>/</targetPath>
                            <directory>${project.build.directory}</directory>
                            <include>${project.build.finalName}.jar</include>
                        </resource>
                    </resources>
                </configuration>
            </plugin>
新建 docker 文件在 main 目录下新建 docker 目录,然后在 docker 目录下创建 dockerfile 文件,不需要后缀名。
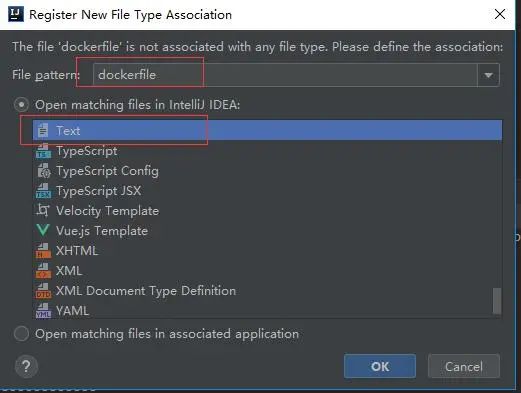
创建完成之后的工程目录如下:
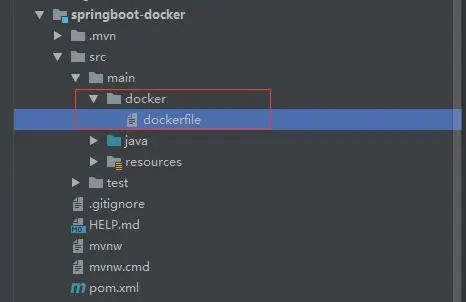
编辑 dockerfile 文件
FROM java:8
VOLUME /tmp/tomcat
ADD spring-boot-docker-0.0.1-SNAPSHOT.jar springboot-docker.jar
ENTRYPOINT ["java","-Djava.security.egd=file:/dev/./urandom","-jar","/springboot-docker.jar"]
FROM:指定存在的镜像,java:8 是我刚刚拉取的镜像,运行的基础。VOLUME:指向的一个临时文件,用于存储 tomcat 工作。ADD:复制文件并且重命名文件。ENTRYPOINT:初始化配置或者自定义配置。
创建测试接口

TestController 内容如下:
package com.ymy.controller;

import lombok.extern.slf4j.Slf4j;
import org.springframework.web.bind.annotation.RequestMapping;
import org.springframework.web.bind.annotation.RequestMethod;
import org.springframework.web.bind.annotation.RestController;

@RestController
@Slf4j
public class TestController {

    @RequestMapping(value = "/test",method = RequestMethod.GET)
    public String test(){
        System.out.println("这是控制台日志!");
        log.info("这是输出到文件的日志");
        return   "HELLO-BUG!!!!!!!!!!";
    }
}
在 resources 目录下创建 log4j2.xml 文件主要看这两个参数:

这里我使用了 log4j2 的日志,如何配置 log4j2 的日志,请参考 springboot 整合 Log4j2(将日志输出到指定文件)。
编写 application.yml 配置文件
server:
  port: 9999
到这里 springboot 项目就创建完成了,我们现在启动一下项目。
. ____ _ __ _ _
 /\\ / ___'_ __ _ _(_)_ __ __ _ \ \ \ \ ( ( )\___ | '_ | '_| | '_ \/ _` | \ \ \ \
 \\/ ___)| |_)| | | | | || (_| | ) ) ) )
  ' |____| .__|_| |_|_| |_\__, | / / / /
 =========|_|==============|___/=/_/_/_/
 :: Spring Boot :: (v2.2.5.RELEASE)

15:29:19.386 [main] INFO com.ymy.SpringBootDockerApplication - Starting SpringBootDockerApplication on LAPTOP-3GLHJRE9 with PID 20652 (D:\springboot\spring-boot-docker\target\classes started by admin in D:\springboot)
15:29:19.395 [main] INFO com.ymy.SpringBootDockerApplication - No active profile set, falling back to default profiles: default
15:29:20.183 [main] INFO org.springframework.boot.web.embedded.tomcat.TomcatWebServer - Tomcat initialized with port(s): 9999 (http)
15:29:20.200 [main] INFO org.apache.coyote.http11.Http11NioProtocol - Initializing ProtocolHandler ["http-nio-9999"]
15:29:20.201 [main] INFO org.apache.catalina.core.StandardService - Starting service [Tomcat]
15:29:20.201 [main] INFO org.apache.catalina.core.StandardEngine - Starting Servlet engine: [Apache Tomcat/9.0.31]
15:29:20.309 [main] INFO org.apache.catalina.core.ContainerBase.[Tomcat].[localhost].[/] - Initializing Spring embedded WebApplicationContext
15:29:20.309 [main] INFO org.springframework.web.context.ContextLoader - Root WebApplicationContext: initialization completed in 881 ms
15:29:20.452 [main] INFO org.springframework.scheduling.concurrent.ThreadPoolTaskExecutor - Initializing ExecutorService 'applicationTaskExecutor'
15:29:20.568 [main] INFO org.apache.coyote.http11.Http11NioProtocol - Starting ProtocolHandler ["http-nio-9999"]
15:29:20.596 [main] INFO org.springframework.boot.web.embedded.tomcat.TomcatWebServer - Tomcat started on port(s): 9999 (http) with context path ''
15:29:20.599 [main] INFO com.ymy.SpringBootDockerApplication - Started SpringBootDockerApplication in 1.664 seconds (JVM running for 4.04)
如果看到这个页面表示 springboot 项目没有问题,现在我们将项目拷贝到服务器中。关注公众号:Java后端编程,回复:Java 获取学习资料 。
打包 springboot 到 docker

我现在已经将项目拷贝到服务器中,我们现在需要将它打包到 docker 中,借助 maven 实现打包,如果还没有安装 maven 的,请先安装 maven,切换到项目的根目录

执行
mvn clean package docker:build
执行完之后将会看到
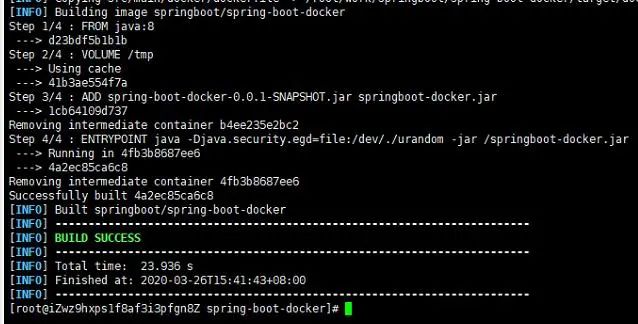
表示打包成功。
执行
docker images

我们发现 docker 的镜像中多了一个 springboot/spring-boot-docker,没错,这个就是我们的 springboot 项目,既然镜像已经生成,那么如何使用这个镜像呢?
执行
docker run --name springbooot-docker -p 9999:9999 -d 4a2

run: 运行的意思–name:指定镜像启动的之后的名称 - p:容器和外部的端口映射 第一个端口:外部 第二个端口:内部 - d:后台运行 -t: 实时运行,窗口关闭,程序结束。4a2:表示镜像的 id(IMAGE ID)前 3 位,这里的 id 并不需要输入全称,只需要输入前几个就行,有一个前提:当有很多镜像的时候,前面几个字符就有可能会相同,这个时候就需要多输入几位,直到不相同位置。
启动了镜像之后我怎么知道有没有成功呢?这个时候我们就需要一个命令来查看已经启动的任务
docker ps

我们发现这里已经出现了我们之前启动的镜像,所以这基本上代表启动成功了,为了验证是否启动成功,我们在浏览器输入测试的接口:ip:9999/test

docker 查看容器的日志
这说明我们已经 springboot 项目已经启动成功了,到这里 docker 部署 springboot 项目差不就结束了,但是你可能还有一个疑问,如果我想看控制台的日志怎么办呢?像我们一般使用 java -jar 的时候都会生成一个控制台的日志文件,那 docker 容器中怎么查看控制台日志呢?其实很简单,只需要一行命令即可
docker ps
找到容器的 id

然后执行
docker logs -f --tail=100 ca
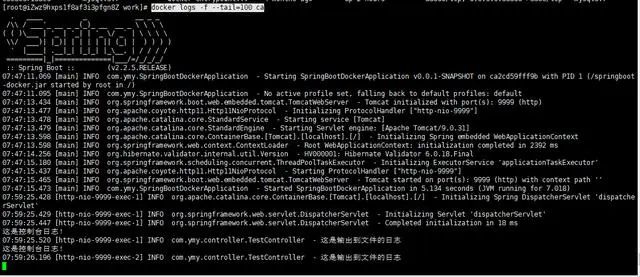
这个时候我们就能看到控制台的日志了,如何我们想看 log4j2 输出的文件日志呢?
查看 log4j2 输出问文件日志
还记得我们在 log4j2 中配置了日志的输出目录了吗?

没错,就是这个, 我们切换到这个目下

发现这里生成了三个文件,我们打开 info.log
tail -100f info.log

我们发现并没有输入我们打印的:“这是输出到文件的日志”,难道是我们配置错了问题?不是的,是因为我们找错了位置,真正的文件日志在容器内部,所以我们需要先进入容器内部
docker exec -it ca2cd59fff9b /bin/bash
ca2cd59fff9b:容器 id
然后再切换到我们日志的输出路径
cd work/spring-boot-docker

这里也找到了三个日志文件,我们打印 info.log
tail -100f info.log

这就是我们 log4j2 输出到文件的日志,到这里 docker 整合 springboot 项目就差不多结束了,如果想要退出 docker 容器可以使用
exit
—————END————— 推荐阅读: 谷歌发布新编程语言,专治SQL各种不服 Java实现超市管理系统,包含源代码! Spring Boot 接入支付宝,实战来了! Nginx 除了负载均衡,还能做什么? SpringBoot+MyBatis+docker电商项目,附带超详细的文档! 最近面试BAT,整理一份面试资料《Java面试BAT通关手册》,覆盖了Java核心技术、JVM、Java并发、SSM、微服务、数据库、数据结构等等。 获取方式:关注公众号并回复 java 领取,更多内容陆续奉上。 明天见(。・ω・。)ノ♡
