
Flutter 漏斗加载动画效果

漏斗加载动画效果是Loading动画系列中的一个,github地址:https://github.com/LaoMengFlutter/flutter-do
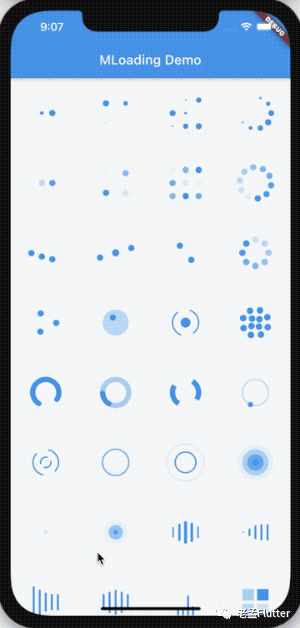
Loading动画效果如下
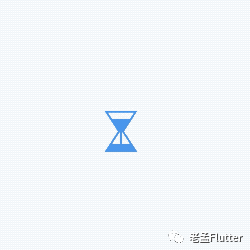
其中漏斗加载动画效果如下
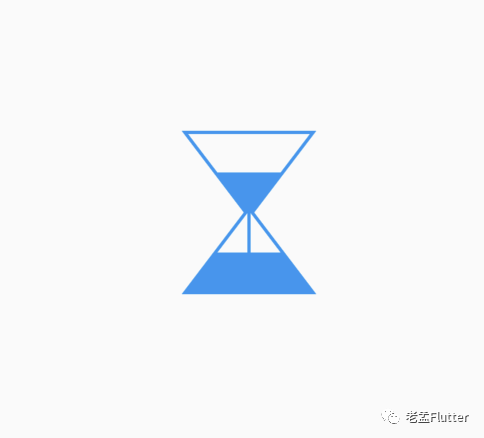
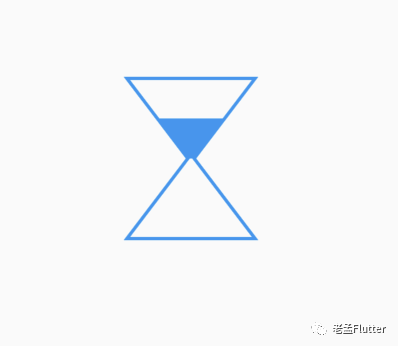
下面我们看看漏斗加载动画效果是如何实现的?动画效果实现的思路是绘制一个静止的效果,其中可变的效果使用参数控制,回到我们的漏斗加载动画,先绘制一个中间状态,效果如下:
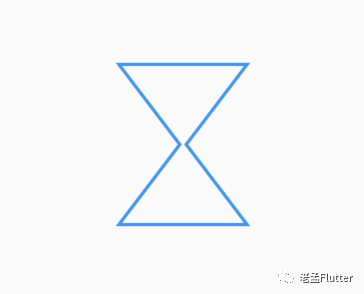
绘制这样一个自定义UI需要使用 「CustomPaint」,先绘制外面的边框,
//酒瓶
var _path = Path()
  ..moveTo(0, 0)
  ..lineTo(size.width, 0)
  ..lineTo(size.width / 2 + _middleWidth, size.height / 2)
  ..lineTo(size.width, size.height)
  ..lineTo(0, size.height)
  ..lineTo(size.width / 2 - _middleWidth, size.height / 2)
  ..close();
canvas.drawPath(_path, _paint);
绘制上半部分三角形
//上部三角形
_paint.style = PaintingStyle.fill;

double _offsetX = progress * (size.width / 2 - _middleWidth);
var _topTrianglePath = Path()
  ..moveTo(_offsetX, progress * size.height / 2)
  ..lineTo(size.width - _offsetX, progress * size.height / 2)
  ..lineTo(size.width / 2 + _middleWidth, size.height / 2)
  ..lineTo(size.width / 2 - _middleWidth, size.height / 2)
  ..close();
canvas.drawPath(_topTrianglePath, _paint);
绘制下半部分三角形
//底部三角形
var _bottomTrianglePath = Path()
  ..moveTo(0, size.height)
  ..lineTo(size.width, size.height)
  ..lineTo(size.width - _offsetX, size.height - progress * size.height / 2)
  ..lineTo(_offsetX, size.height - progress * size.height / 2)
  ..close();
canvas.drawPath(_bottomTrianglePath, _paint);
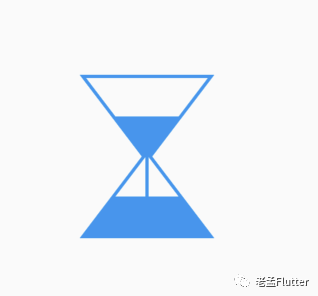
在绘制一条直线
//垂直线条
_paint.style = PaintingStyle.stroke;
var _linePath = Path()
  ..moveTo(size.width / 2, size.height / 2)
  ..lineTo(size.width / 2, size.height - progress * size.height / 2)
  ..close();
canvas.drawPath(_linePath, _paint);
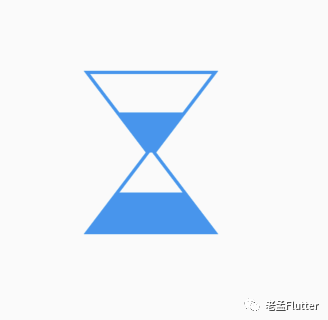
让其从上面向下面流入,其实就是上面的三角形越来越小,下面的越来越大,设置一个参数 「progress」,
class _PouringHourGlassPainter extends CustomPainter {
  final double progress;
  final Color color;

  late Paint _paint;

  double _middleWidth = 2;

  _PouringHourGlassPainter(this.progress, this.color) {
    _paint = Paint()
      ..color = color
      ..strokeWidth = 2
      ..style = PaintingStyle.stroke;
  }

  @override
  void paint(Canvas canvas, Size size) {
    //酒瓶
    var _path = Path()
      ..moveTo(0, 0)
      ..lineTo(size.width, 0)
      ..lineTo(size.width / 2 + _middleWidth, size.height / 2)
      ..lineTo(size.width, size.height)
      ..lineTo(0, size.height)
      ..lineTo(size.width / 2 - _middleWidth, size.height / 2)
      ..close();
    canvas.drawPath(_path, _paint);

    //上部三角形
    _paint.style = PaintingStyle.fill;

    double _offsetX = progress * (size.width / 2 - _middleWidth);
    var _topTrianglePath = Path()
      ..moveTo(_offsetX, progress * size.height / 2)
      ..lineTo(size.width - _offsetX, progress * size.height / 2)
      ..lineTo(size.width / 2 + _middleWidth, size.height / 2)
      ..lineTo(size.width / 2 - _middleWidth, size.height / 2)
      ..close();
    canvas.drawPath(_topTrianglePath, _paint);

    //底部三角形
    var _bottomTrianglePath = Path()
      ..moveTo(0, size.height)
      ..lineTo(size.width, size.height)
      ..lineTo(size.width - _offsetX, size.height - progress * size.height / 2)
      ..lineTo(_offsetX, size.height - progress * size.height / 2)
      ..close();
    canvas.drawPath(_bottomTrianglePath, _paint);

    //垂直线条
    _paint.style = PaintingStyle.stroke;
    var _linePath = Path()
      ..moveTo(size.width / 2, size.height / 2)
      ..lineTo(size.width / 2, size.height - progress * size.height / 2)
      ..close();
    canvas.drawPath(_linePath, _paint);
  }

  @override
  bool shouldRepaint(covariant _PouringHourGlassPainter old) {
    return color != old.color || progress != old.progress;
  }
}
加上动画控制
class PouringHourGlassLoading extends StatefulWidget {
  final Color color;
  final Duration duration;
  final Curve curve;

  const PouringHourGlassLoading(
      {Key? key,
        this.color = Colors.white,
        this.duration = const Duration(milliseconds: 2500),
        this.curve = Curves.linear})
      : super(key: key);

  @override
  _PouringHourGlassLoadingState createState() =>
      _PouringHourGlassLoadingState();
}

class _PouringHourGlassLoadingState extends State<PouringHourGlassLoading>
    with SingleTickerProviderStateMixin {
  late AnimationController _controller;
  late Animation _animation;

  @override
  void initState() {
    _controller =
    AnimationController(vsync: this, duration: widget.duration)
      ..repeat();

    _animation = Tween(begin: 0.0, end: 1.0).animate(
        CurvedAnimation(parent: _controller, curve: Interval(0.0, 0.6,curve: widget.curve)));
    super.initState();
  }

  @override
  void dispose() {
    _controller.dispose();
    super.dispose();
  }

  @override
  Widget build(BuildContext context) {
    return AnimatedBuilder(
        animation: _controller,
        builder: (context, child) {
          return CustomPaint(
            painter: _PouringHourGlassPainter(_animation.value, widget.color),
          );
        });
  }
}

在给其加上一个旋转
class PouringHourGlassLoading extends StatefulWidget {
  final Color color;
  final Duration duration;
  final Curve curve;

  const PouringHourGlassLoading(
      {Key? key,
      this.color = Colors.white,
      this.duration = const Duration(milliseconds: 2500),
      this.curve = Curves.linear})
      : super(key: key);

  @override
  _PouringHourGlassLoadingState createState() =>
      _PouringHourGlassLoadingState();
}

class _PouringHourGlassLoadingState extends State<PouringHourGlassLoading>
    with SingleTickerProviderStateMixin {
  late AnimationController _controller;
  late Animation _animation, _rotateAnimation;

  @override
  void initState() {
    _controller = AnimationController(vsync: this, duration: widget.duration)
      ..repeat();

    _animation = Tween(begin: 0.0, end: 1.0).animate(CurvedAnimation(
        parent: _controller, curve: Interval(0.0, 0.6, curve: widget.curve)));
    _rotateAnimation = Tween(begin: 0.0, end: pi).animate(CurvedAnimation(
        parent: _controller, curve: Interval(0.6, 1.0, curve: widget.curve)));

    super.initState();
  }

  @override
  void dispose() {
    _controller.dispose();
    super.dispose();
  }

  @override
  Widget build(BuildContext context) {
    return AnimatedBuilder(
        animation: _controller,
        builder: (context, child) {
          return Transform.rotate(
            angle: _rotateAnimation.value,
            child: CustomPaint(
              painter: _PouringHourGlassPainter(_animation.value, widget.color),
            ),
          );
        });
  }
}
到这里,我们就完成了,如果你有比较酷炫的加载动画效果想要实现,可以将效果发给我,我来实现,或者已经实现的动画效果想要分享给大家,也可以发给我,我会加到github中。

评论