
深入理解Spring Security授权机制原理
点击上方蓝色字体,选择“标星公众号”
优质文章,第一时间送达
作者 | 朱季谦
来源 | urlify.cn/i2UJRn
  1 @PostMapping("/test")
  2  @Secured({WebResRole.ROLE_PEOPLE_W})
  3  public void test(){
  4  ......
  5  return null;
6 } 1 @PostMapping("save")
2 @PreAuthorize("hasAuthority('sys:user:add') AND hasAuthority('sys:user:edit')")
3 public RestResponse save(@RequestBody @Validated SysUser sysUser, BindingResult result) {
4 ValiParamUtils.ValiParamReq(result);
5 return sysUserService.save(sysUser);
6 } 1 @Override
2 protected void configure(HttpSecurity httpSecurity) throws Exception {
3 //使用的是JWT,禁用csrf
4 httpSecurity.cors().and().csrf().disable()
5 //设置请求必须进行权限认证
6 .authorizeRequests()
7 //首页和登录页面
8 .antMatchers("/").permitAll()
9 .antMatchers("/login").permitAll()
10 // 其他所有请求需要身份认证
11 .anyRequest().authenticated();
12 //退出登录处理
13 httpSecurity.logout().logoutSuccessHandler(...);
14 //token验证过滤器
15 httpSecurity.addFilterBefore(...);
16 } 1 @PostMapping("save")
2 @PreAuthorize("hasAuthority('sys:user:add')")
3 public RestResponse save(@RequestBody @Validated SysUser sysUser, BindingResult result) {
4 ValiParamUtils.ValiParamReq(result);
5 return sysUserService.save(sysUser);
6 } 1 @Configuration
2 @EnableWebSecurity
3 @EnableGlobalMethodSecurity(prePostEnabled = true)
4 public class SecurityConfig extends WebSecurityConfigurerAdapter {
5 ......
6 @Override
7 protected void configure(HttpSecurity httpSecurity) throws Exception {
8 //使用的是JWT,禁用csrf
9 httpSecurity.cors().and().csrf().disable()
10 //设置请求必须进行权限认证
11 .authorizeRequests()
12 ......
13 //首页和登录页面
14 .antMatchers("/").permitAll()
15 .antMatchers("/login").permitAll()
16 // 其他所有请求需要身份认证
17 .anyRequest().authenticated();
18 ......
19 //token验证过滤器
20 httpSecurity.addFilterBefore(new JwtFilter(authenticationManager()), UsernamePasswordAuthenticationFilter.class);
21 }
22 } 1 public class JwtFilter extends BasicAuthenticationFilter {
2
3 @Autowired
4 public JwtFilter(AuthenticationManager authenticationManager) {
5 super(authenticationManager);
6 }
7
8 @Override
9 protected void doFilterInternal(HttpServletRequest request, HttpServletResponse response, FilterChain chain) throws IOException, ServletException {
10 // 获取token, 并检查登录状态
11 // 获取令牌并根据令牌获取登录认证信息
12 Authentication authentication = JwtTokenUtils.getAuthenticationeFromToken(request);
13 // 设置登录认证信息到上下文
14 SecurityContextHolder.getContext().setAuthentication(authentication);
15
16 chain.doFilter(request, response);
17 }
18
19 } 1 package javax.servlet;
2
3 import java.io.IOException;
4
5 public interface FilterChain {
6 void doFilter(ServletRequest var1, ServletResponse var2) throws IOException, ServletException;
7 }
  1 public void doFilter(ServletRequest request, ServletResponse response,
  2       FilterChain chain) throws IOException, ServletException {
  3    FilterInvocation fi = new FilterInvocation(request, response, chain);
  4    invoke(fi);
5 } 1 public class FilterInvocation {
2
3 private FilterChain chain;
4 private HttpServletRequest request;
5 private HttpServletResponse response;
6
7
8 public FilterInvocation(ServletRequest request, ServletResponse response,
9 FilterChain chain) {
10 if ((request == null) || (response == null) || (chain == null)) {
11 throw new IllegalArgumentException("Cannot pass null values to constructor");
12 }
13
14 this.request = (HttpServletRequest) request;
15 this.response = (HttpServletResponse) response;
16 this.chain = chain;
17 }
18 ......
19 } 1 public void invoke(FilterInvocation fi) throws IOException, ServletException {
2 if ((fi.getRequest() != null)
3 && (fi.getRequest().getAttribute(FILTER_APPLIED) != null)
4 && observeOncePerRequest) {
5 //筛选器已应用于此请求,每个请求处理一次,所以不需重新进行安全检查
6 fi.getChain().doFilter(fi.getRequest(), fi.getResponse());
7 }
8 else {
9 // 第一次调用此请求时,需执行安全检查
10 if (fi.getRequest() != null && observeOncePerRequest) {
11 fi.getRequest().setAttribute(FILTER_APPLIED, Boolean.TRUE);
12 }
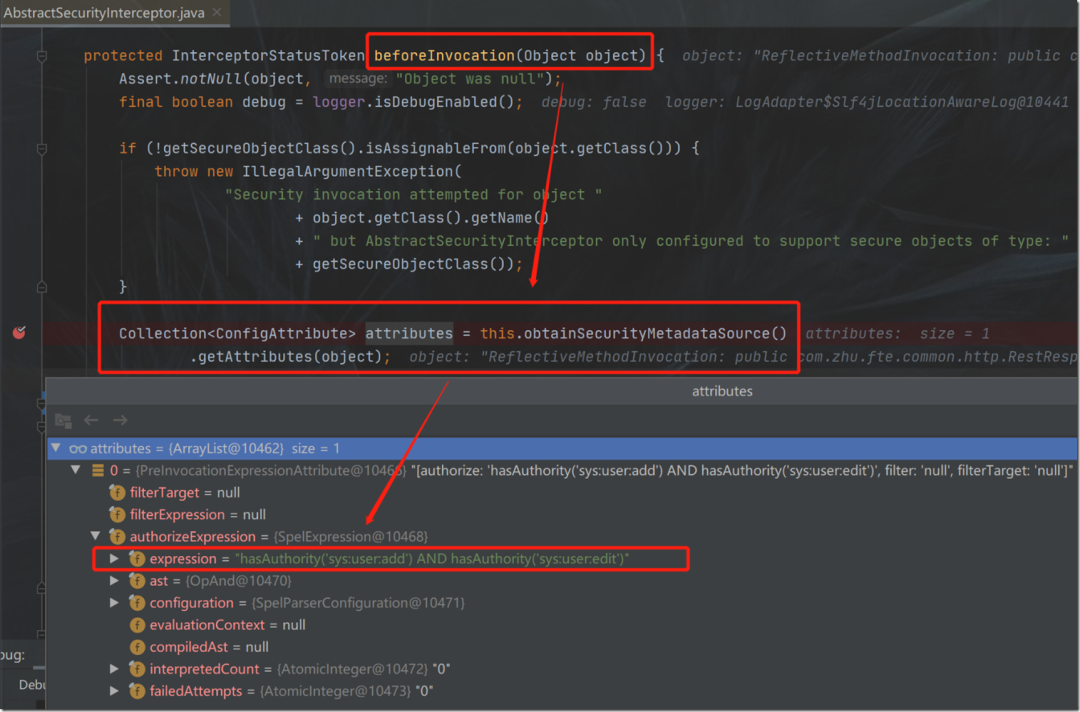
13 //1.授权具体实现入口
14 InterceptorStatusToken token = super.beforeInvocation(fi);
15 try {
16 //2.授权通过后执行的业务
17 fi.getChain().doFilter(fi.getRequest(), fi.getResponse());
18 }
19 finally {
20 super.finallyInvocation(token);
21 }
22 //3.后续处理
23 super.afterInvocation(token, null);
24 }
25 }
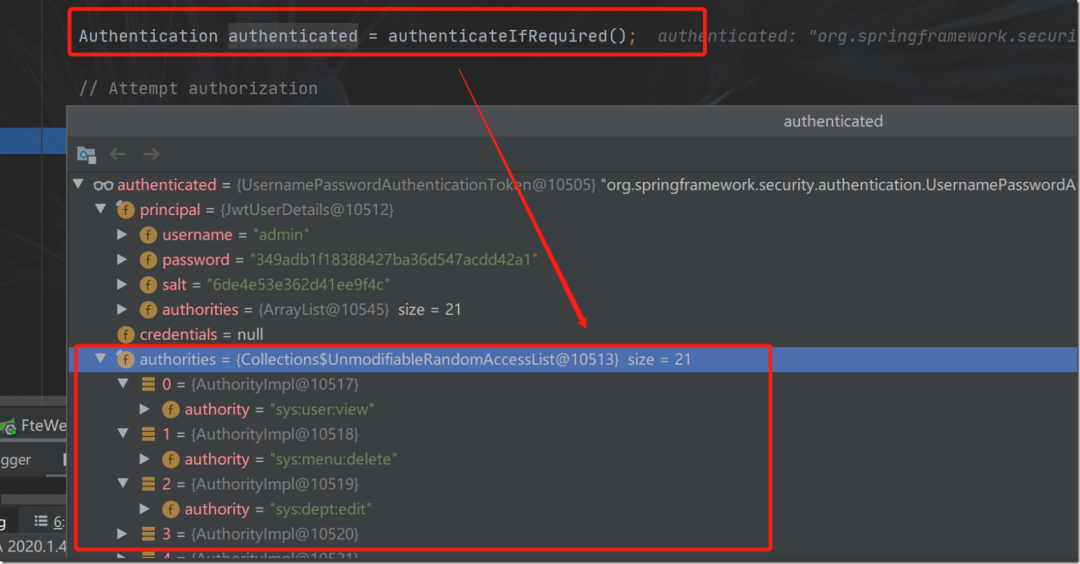
  1 private Authentication authenticateIfRequired() {
  2    Authentication authentication = SecurityContextHolder.getContext()
  3          .getAuthentication();
  4    if (authentication.isAuthenticated() && !alwaysReauthenticate) {
  5      ......
  6       return authentication;
  7    }
  8    authentication = authenticationManager.authenticate(authentication);
  9    SecurityContextHolder.getContext().setAuthentication(authentication);
 10    return authentication;
 11 }

  1 public interface AccessDecisionManager {
  2    void decide(Authentication authentication, Object object,
  3          Collection<ConfigAttribute> configAttributes) throws AccessDeniedException,
  4          InsufficientAuthenticationException;
  5    boolean supports(ConfigAttribute attribute);
  6    boolean supports(Class<?> clazz);
7 } 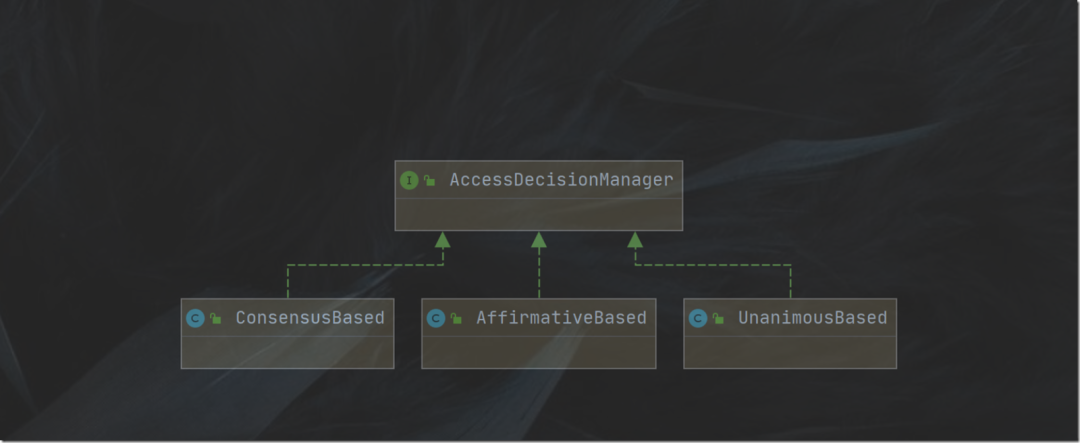
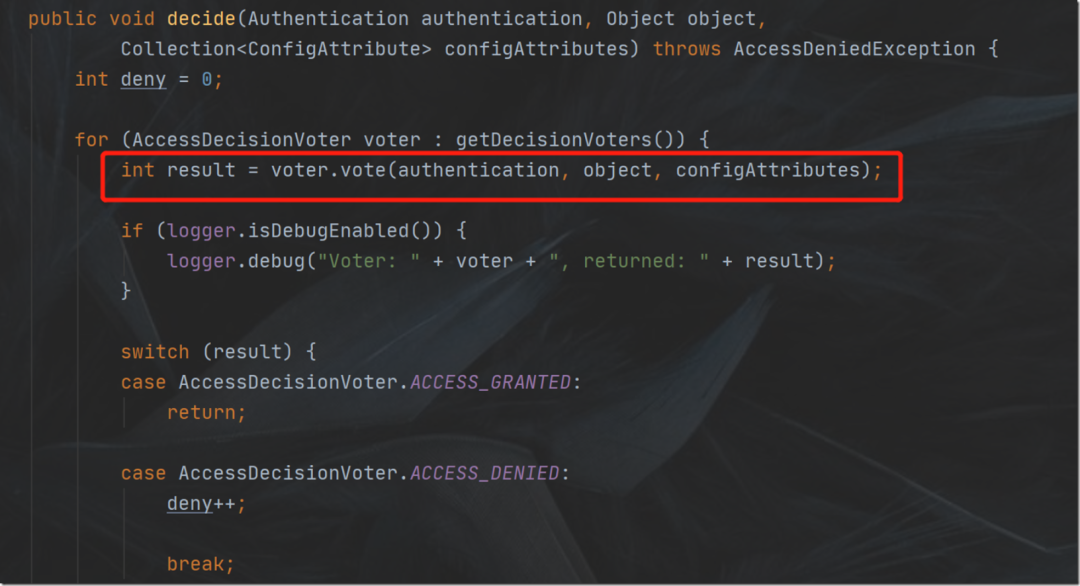
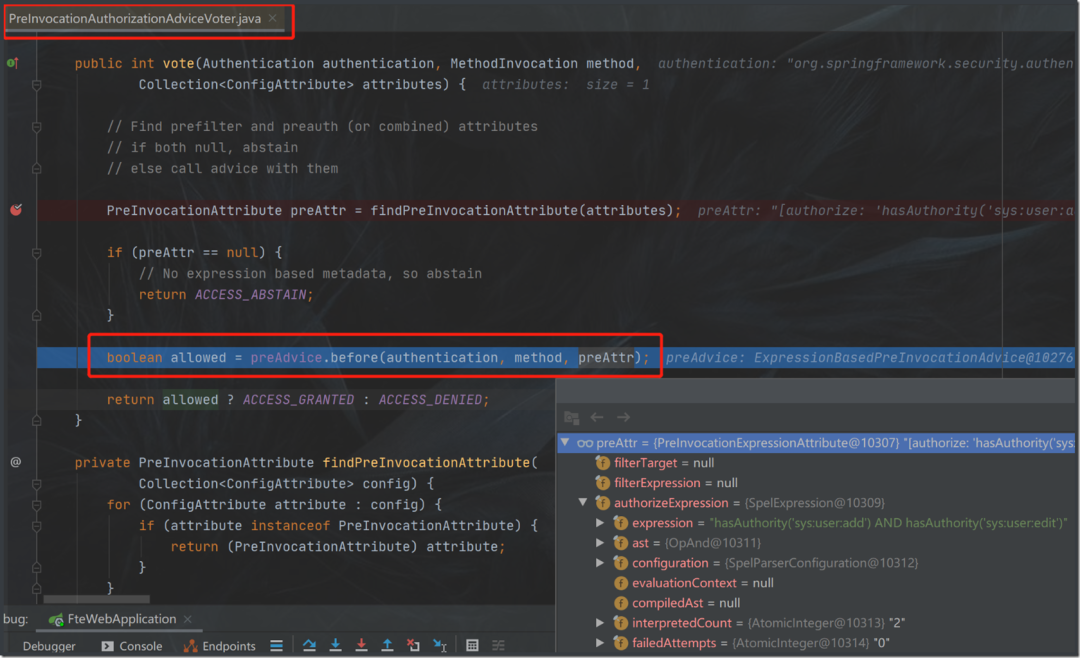
  1 public interface AccessDecisionVoter<S> {
  2    int ACCESS_GRANTED = 1;//表示同意
  3    int ACCESS_ABSTAIN = 0;//表示弃权
  4    int ACCESS_DENIED = -1;//表示拒绝
  5    ......
6 } 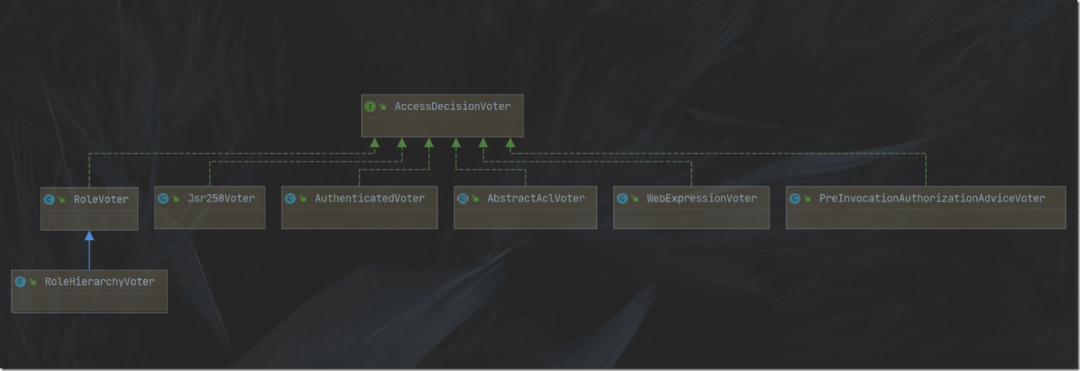
锋哥最新SpringCloud分布式电商秒杀课程发布
👇👇👇
👆长按上方微信二维码 2 秒
感谢点赞支持下哈 
评论