基于 TDD 模式在 Laravel 项目中开发后端评论接口

在继续编写前端 Vue 评论组件之前,我们使用同样的测试驱动开发模式在 Laravel 项目中开发后端评论接口,正如学院君前面说的,除了框架和语法的不同,思路和模式是一模一样的。
编写测试用例
首先,在 Laravel 项目根目录下运行 make:test 命令创建一个测试类 CommentTest:

然后打开这个测试类文件(位于 tests/Feature 目录下),编写简单的符合 BDD 风格的评论保存和获取接口测试用例代码如下:
<?php

namespace Tests\Feature;

use Illuminate\Foundation\Testing\RefreshDatabase;
use Illuminate\Foundation\Testing\WithFaker;
use Tests\TestCase;

class CommentTest extends TestCase
{
    use RefreshDatabase;  // 测试用例在执行完毕后回滚数据库更新
    use WithFaker;  // 引入 Faker 伪造评论内容

    protected function setUp(): void
    {
        parent::setUp();
        $this->faker = $this->makeFaker('zh_CN');  // 本地化 Faker
    }

    /**
     * @test
     */
    public function submit_comment_add_then_display()
    {
          // Given
        $content = $this->faker->sentence;

        // When
        $response = $this->post('/comments', ['content' => $content]);

        // Then
        $response->assertStatus(200);

        $response = $this->get('/comments');
        $response->assertSeeText($content);
    }
}
我们先通过 Faker 伪造评论内容,调用后端保存评论接口,保存成功后,再调用后端评论列表接口,如果返回数据包含刚刚提交的评论,则意味着评论保存和获取功能可用。
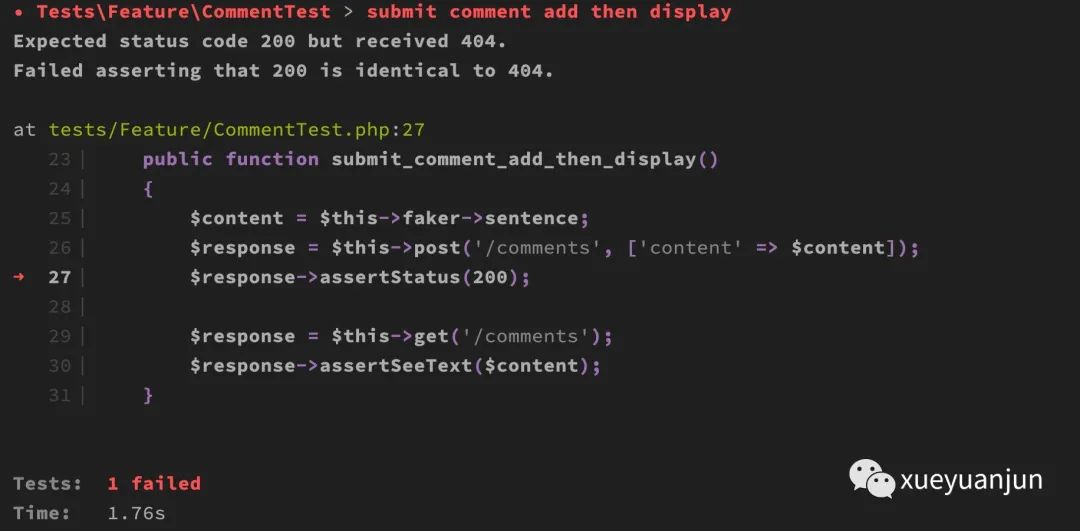
现在通过 php artisan test tests/Feature/CommentTest.php 命令运行这个测试用例,肯定会失败,因为后端接口都没有实现:

所有相关的响应断言返回的都是 404 状态码。接下来我们需要编写业务代码。
路由和控制器
首先我们需要注册相应的后端接口路由:
use App\Http\Controllers\CommentController;
Route::group(['prefix' => '/comments'], function () {
    Route::get('/', [CommentController::class, 'all']);
    Route::post('/', [CommentController::class, 'store']);
});
以及对应的控制器代码:
<?php

namespace App\Http\Controllers;

use App\Models\Comment;
use Illuminate\Http\Request;

class CommentController extends Controller
{
    public function all()
    {
        return Comment::orderByDesc('created_at')->simplePaginate(10);
    }
    public function store(Request $request)
    {
        $data = $request->validate([
            'content' => 'required'
        ]);
        $comment = new Comment($data);
        return $comment->save();
    }
}
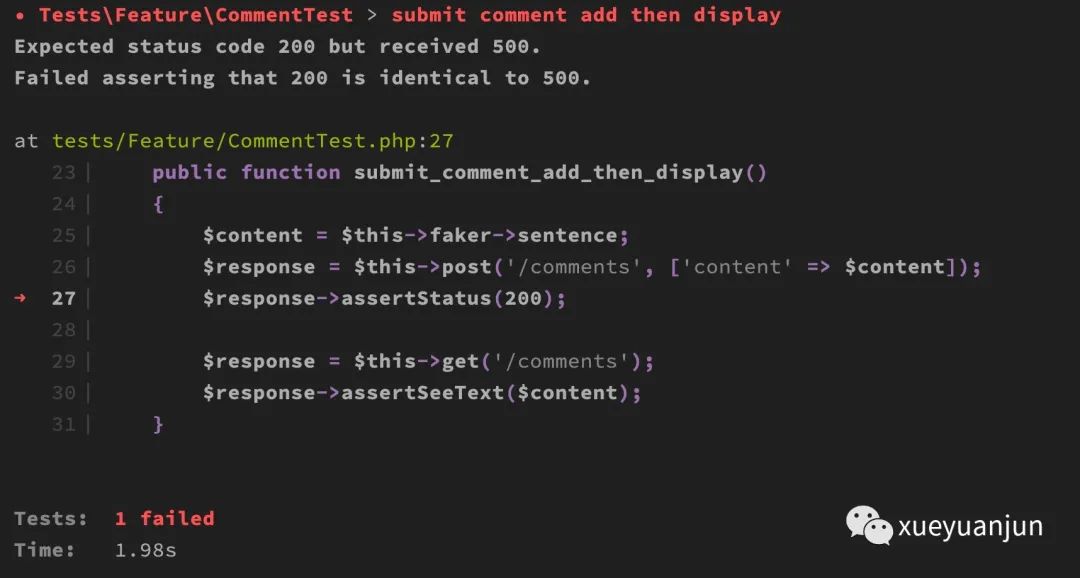
此时测试仍然不通过,因为模型类和数据库还不存在:

所以响应状态码是 500。
模型类和数据库准备
接下来我们创建模型类和数据库迁移文件:
php artisan make:model Comment -m
生成的模型类位于 app/Models/Comment.php,我们在这个模型类中设置批量赋值白名单和关联关系:
<?php

namespace App\Models;

use Illuminate\Database\Eloquent\Factories\HasFactory;
use Illuminate\Database\Eloquent\Model;

class Comment extends Model
{
    use HasFactory;

    protected $fillable = ['content'];

    public function user()
    {
        $this->belongsTo(User::class);
    }
}
在 .env 中配置数据库连接信息(需要提前创建好数据库 component_test):
DB_CONNECTION=mysql
DB_HOST=127.0.0.1
DB_PORT=3306
DB_DATABASE=component_test
DB_USERNAME=root
DB_PASSWORD=root
编辑评论表对应的数据库迁移文件如下:
<?php

use Illuminate\Database\Migrations\Migration;
use Illuminate\Database\Schema\Blueprint;
use Illuminate\Support\Facades\Schema;

class CreateCommentsTable extends Migration
{
    /**
     * Run the migrations.
     *
     * @return void
     */
    public function up()
    {
        Schema::create('comments', function (Blueprint $table) {
            $table->id();
            $table->bigInteger('user_id')->unsigned()->default(0);
            $table->string('content');
            $table->timestamps();
        });
    }

    /**
     * Reverse the migrations.
     *
     * @return void
     */
    public function down()
    {
        Schema::dropIfExists('comments');
    }
}
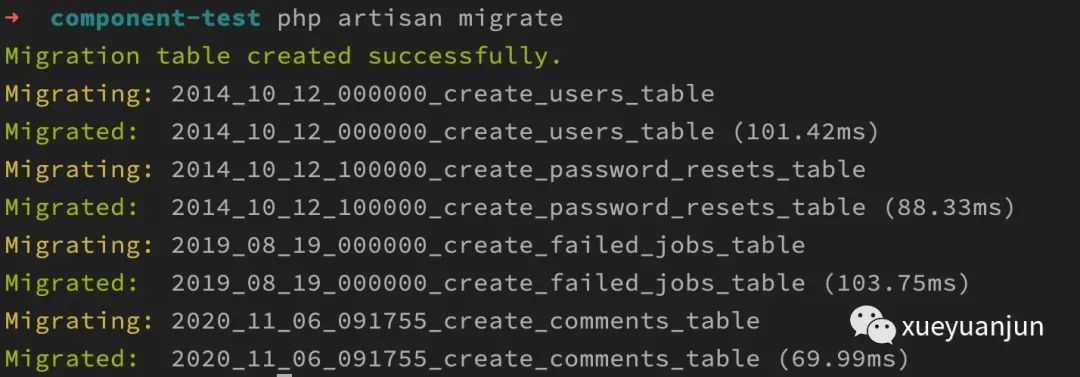
我们只设置了主键 ID、user_id、content 以及创建/更新时间几个字段。然后运行 php artisan migrate 命令创建数据表:

让业务代码通过测试用例
此时再去运行 php artisan test 测试命令,测试通过:

表明我们的后端评论接口已经可以正常对外提供服务。
怎么样,你已经熟悉了 TDD 开发模式的精髓了吧:基于业务需求编写 BDD 风格的测试用例,然后编写能够通过这个测试用例的业务代码,接下来编写下一个测试用例。。。最终交付完整可用的功能代码。相信你会和我一样逐渐爱上这种让测试用例从红色变成绿色的感觉!
这里可以将业务代码编写和单元测试运行粒度变得更小,比如注册路由、编写控制器动作、实现模型类、数据表初始化等每个步骤进行一次测试,逐步迭代出通过测试用例的代码。测试驱动开发有两种模式,一种是先写测试用例,再写业务代码,一种是先写业务代码,再写测试用例,最终都要让业务代码通过每个测试用例,既然最终结果变绿,看你个人更喜欢哪种模式了。更多关于 Laravel 测试的功能和使用细节,请参考 Laravel 官方文档。
下篇教程,学院君将给大家演示如何在前端 Vue 评论组件调用后端接口保存评论信息和渲染评论列表。
本系列教程首发在Laravel学院(laravelacademy.org),你可以点击页面左下角阅读原文链接查看最新更新的教程。
