
基于React SSR实现的仿MOO音乐风格的音乐网站,支持PWA
github 地址:
https://github.com/mbaxszy7/pika-music项目网址:https://111.229.9.30/
https://juejin.im/post/6864204617152987150
pika-music api 服务器参考 Binaryify 的 NeteaseCloudMusicApi
项目技术特点:
PWA 支持。支持PWA的浏览器可以安装到桌面 实现 React-SSR 框架 实现结合 SSR 的 Dynamic Import 实现 webpack module/nomudule 模式的打包 实现全站图片懒加载
node后端采用koa
其他特点:
后端支持http2 安卓端支持锁屏音乐控制
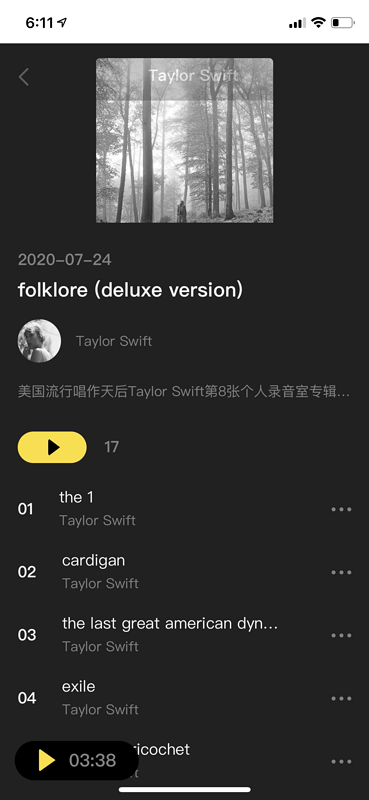
网站截图


技术特点介绍
React-SSR 框架介绍
主要思想参考的是 NextJS。首屏服务端渲染时,调用组件的 getInitialProps(store)方法,注入 redux store,getInitialProps 获取该页面的数据后,把数据储存到 redux store 中。在客户端 hydrate 时,从 redux store 中获取数据,然后把数据注入swr的 initialData 中,后续页面的数据获取和更新就使用了 swr 的能力。非 SSR 的页面会直接使用 swr。
下面以首页(Discover)为例:项目中有 ConnectCompReducer 这个父类:
class ConnectCompReducer {
  constructor() {
    this.fetcher = axiosInstance
    this.moment = moment
  }

  getInitialData = async () => {
    throw new Error("child must implememnt this method!")
  }
}
每个实现 SSR 的页面都需要继承这个类,比如主页面:
class ConnectDiscoverReducer extends ConnectCompReducer {
  // Discover 页面会实现的getInitialProps方法就是调用getInitialData,注入redux store
  getInitialData = async store => {}
}

export default new ConnectDiscoverReducer()
Discover 的 JSX:
import discoverPage from "./connectDiscoverReducer"

const Discover = memo(() => {
  // banner 数据
  const initialBannerList = useSelector(state => state.discover.bannerList)

  // 把banner数据注入swr的initialData中
  const { data: bannerList } = useSWR(
    "/api/banner?type=2",
    discoverPage.requestBannerList,
    {
      initialData: initialBannerList,
    },
  )

  return (
    ...

      <BannerListContainer bannerList={bannerList ?? []} />
    BannersSection>
    ...
  )
})

Discover.getInitialProps = async (store, ctx) => {
  // store -> redux store,  ctx -> koa 的ctx
  await discoverPage.getInitialData(store, ctx)
}
服务端数据的获取:
// matchedRoutes: 匹配到的路由页面,需要结合dynamic import,下一小节会介绍
const setInitialDataToStore = async (matchedRoutes, ctx) => {
  // 获取redux store
  const store = getReduxStore({
    config: {
      ua: ctx.state.ua,
    },
  })

  // 600ms后超时,中断获取数据
  await Promise.race([
    Promise.allSettled(
      matchedRoutes.map(item => {
        return Promise.resolve(
          // 调用页面的getInitialProps方法
          item.route?.component?.getInitialProps?.(store, ctx) ?? null,
        )
      }),
    ),
    new Promise(resolve => setTimeout(() => resolve(), 600)),
  ]).catch(error => {
    console.error("renderHTML 41,", error)
  })

  return store
}
自行实现结合 SSR 的 Dynamic Import
页面 dynamic import 的封装, 重要的处理是加载错误后的 retry 和 避免页面 loading 闪现:
class Loadable extends React.Component {
  constructor(props) {
    super(props)
    this.state = {
      Comp: null,
      error: null,
      isTimeout: false,
    }
  }

  // eslint-disable-next-line react/sort-comp
  raceLoading = () => {
    const { pastDelay } = this.props
    return new Promise((_, reject) => {
      setTimeout(() => reject(new Error("timeout")), pastDelay || 200)
    })
  }

  load = async () => {
    const { loader } = this.props
    try {
      this.setState({
        error: null,
      })
      // raceLoading 避免页面loading 闪现
      const loadedComp = await Promise.race([this.raceLoading(), loader()])
      this.setState({
        isTimeout: false,
        Comp:
          loadedComp && loadedComp.__esModule ? loadedComp.default : loadedComp,
      })
    } catch (e) {
      if (e.message === "timeout") {
        this.setState({
          isTimeout: true,
        })
        this.load()
      } else {
        this.setState({
          error: e,
        })
      }
    }
  }

  componentDidMount() {
    this.load()
  }

  render() {
    const { error, isTimeout, Comp } = this.state
    const { loading } = this.props
    // 加载错误,retry
    if (error) return loading({ error, retry: this.load })
    if (isTimeout) return loading({ pastDelay: true })

    if (Comp) return <Comp {...this.props} />
    return null
  }
}
标记动态加载的组件,用于服务端识别:
const asyncLoader = ({ loader, loading, pastDelay }) => {
  const importable = props => (
    <Loadable
      loader={loader}
      loading={loading}
      pastDelay={pastDelay}
      {...props}
    />
  )

  // 标记
  importable.isAsyncComp = true

  return importable
}
封装好页面的动态加载后需要考虑两点:
ssr 的时候需要主动去执行动态路由的组件,不然服务端不会渲染组件本身的内容 在浏览器端不先去加载动态 split 出的组件的话,会导致组件的 loading 状态闪现。所以,要先加载好动态路由组件,再去渲染页面。
具体代码如下:
服务端加载标记 isAsyncComp 的动态组件:
const ssrRoutesCapture = async (routes, requestPath) => {
  const ssrRoutes = await Promise.allSettled(
    [...routes].map(async route => {
      if (route.routes) {
        return {
          ...route,
          routes: await Promise.allSettled(
            [...route.routes].map(async compRoute => {
              const { component } = compRoute

              if (component.isAsyncComp) {
                try {
                  const RealComp = await component().props.loader()

                  const ReactComp =
                    RealComp && RealComp.__esModule
                      ? RealComp.default
                      : RealComp

                  return {
                    ...compRoute,
                    component: ReactComp,
                  }
                } catch (e) {
                  console.error(e)
                }
              }
              return compRoute
            }),
          ).then(res => res.map(r => r.value)),
        }
      }
      return {
        ...route,
      }
    }),
  ).then(res => res.map(r => r.value))

  return ssrRoutes
}
浏览器端加载动态组件:
const clientPreloadReady = async routes => {
  try {
    // 匹配当前页面的组件
    const matchedRoutes = matchRoutes(routes, window.location.pathname)

    if (matchedRoutes && matchedRoutes.length) {
      await Promise.allSettled(
        matchedRoutes.map(async route => {
          if (
            route?.route?.component?.isAsyncComp &&
            !route?.route?.component.csr
          ) {
            try {
              await route.route.component().props.loader()
            } catch (e) {
              await Promise.reject(e)
            }
          }
        }),
      )
    }
  } catch (e) {
    console.error(e)
  }
}
最后,在浏览器端 ReactDOM.hydrate 的时候先加载动态分割出的组件:
clientPreloadReady(routes).then(() => {
  render(<App store={store} />, document.getElementById("root"))
})
module/nomudule 模式
主要实现思路:
webpack先根据webpack.client.js的配置打包出支持es module的代码,其中产出index.html。然后
webpack根据webpack.client.lengacy.js的配置,用上一步的index.html为template,打包出不支持es module的代码,插入script nomodule和script type="module"的脚本。主要依赖的是html webpack plugin的相关hooks。
webpack.client.js和webpack.client.lengacy.js主要的不同是babel的配置和html webpack plugin的template
babel presets 配置:
exports.babelPresets = env => {
  const common = [
    "@babel/preset-env",
    {
      // targets: { esmodules: true },
      useBuiltIns: "usage",
      modules: false,
      debug: false,
      bugfixes: true,
      corejs: { version: 3, proposals: true },
    },
  ]
  if (env === "node") {
    common[1].targets = {
      node: "13",
    }
  } else if (env === "legacy") {
    common[1].targets = {
      ios: "9",
      safari: "9",
    }
    common[1].bugfixes = false
  } else {
    common[1].targets = {
      esmodules: true,
    }
  }
  return common
}
实现在 html 内插入 script nomodule 和 script type="module"的 webpack 插件代码链接:https://github.com/mbaxszy7/pika-music/blob/master/module-html-plugin.js
全站图片懒加载
图片懒加载的实现使用的是 IntersectionObserver 和浏览器原生支持的image lazy loading
const pikaLazy = options => {
  // 如果浏览器原生支持图片懒加载,就设置懒加载当前图片
  if ("loading" in HTMLImageElement.prototype) {
    return {
      lazyObserver: imgRef => {
        load(imgRef)
      },
    }
  }

  // 当前图片出现在当前视口,就加载图片
  const observer = new IntersectionObserver(
    (entries, originalObserver) => {
      entries.forEach(entry => {
        if (entry.intersectionRatio > 0 || entry.isIntersecting) {
          originalObserver.unobserve(entry.target)
          if (!isLoaded(entry.target)) {
            load(entry.target)
          }
        }
      })
    },
    {
      ...options,
      rootMargin: "0px",
      threshold: 0,
    },
  )

  return {
    // 设置观察图片
    lazyObserver: () => {
      const eles = document.querySelectorAll(".pika-lazy")
      for (const ele of Array.from(eles)) {
        if (observer) {
          observer.observe(ele)
          continue
        }
        if (isLoaded(ele)) continue

        load(ele)
      }
    },
  }
}
PWA
PWA 的缓存控制和更新的能力运用的是 workbox。但是加了缓存删除的逻辑:
import { cacheNames } from "workbox-core"

const currentCacheNames = {
  "whole-site": "whole-site",
  "net-easy-p": "net-easy-p",
  "api-banner": "api-banner",
  "api-personalized-newsong": "api-personalized-newsong",
  "api-playlist": "api-play-list",
  "api-songs": "api-songs",
  "api-albums": "api-albums",
  "api-mvs": "api-mvs",
  "api-music-check": "api-music-check",
  [cacheNames.precache]: cacheNames.precache,
  [cacheNames.runtime]: cacheNames.runtime,
}

self.addEventListener("activate", event => {
  event.waitUntil(
    caches.keys().then(cacheGroup => {
      return Promise.all(
        cacheGroup
          .filter(cacheName => {
            return !Object.values(currentCacheNames).includes(`${cacheName}`)
          })
          .map(cacheName => {
            // 删除与当前缓存不匹配的缓存
            return caches.delete(cacheName)
          }),
      )
    }),
  )
})
项目的 PWA 缓存控制策略主要选择的是 StaleWhileRevalidate,先展示缓存(如果有的话),然后 pwa 会更新缓存。由于项目用了 swr,该库会轮询页面的数据或者在页面从隐藏到显示时也会请求更新数据,从而达到了使用 pwa 更新的缓存的目的。
浏览器兼容
IOS >=10, Andriod >=6
本地开发
node 版本
node version >= 13.8
本地开发开启 SSR 模式
npm run build:servernpm run build:client:modernnodemon --inspect ./server\_app/bundle.js
本地开发开启 CSR 模式
npm run start:client
最后,如果对你的 react 学习有帮助的话,麻烦 star 一下呗~
https://github.com/mbaxszy7/pika-music ??