
极致舒适的Vue高性能列表
列表是一种常见的UI组件,相信大家应该都遇到过,并且也都自己实现过!不知道大家是怎么实现的,是根据业务进行CSS布局还是使用了第三方的组件。
在这里分享下自认为比较舒适的列表组件及实现思路。
使用及效果
网格列表
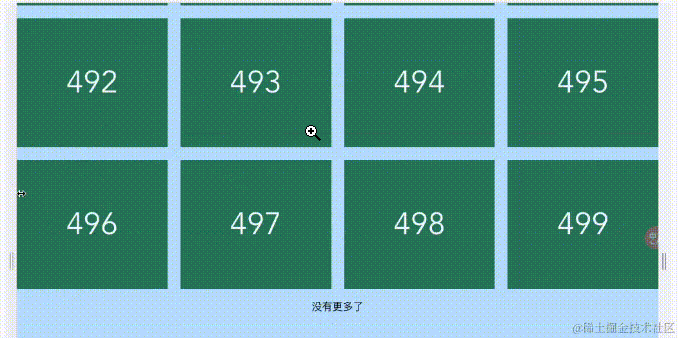
代码
      <script setup lang="ts">
import GridList, { RequestFunc } from '@/components/GridList.vue';

const data: RequestFunc<number> = ({ page, limit }) => {
  return new Promise((resolve) => {
    console.log('开始加载啦', page, limit);

    setTimeout(() => {
      resolve({
        data: Array.from({ length: limit }, (_, index) => index + (page - 1) * limit),
        total: 500,
      });
    }, 1000);
  });
};
</script>

<template>
  <GridList :request="data" :column-gap="20" :row-gap="20" :limit="100" :item-min-width="200" class="grid-list">
    <template #empty>
      <p>暂无数据</p>
    </template>
    <template #default="{ item }">
      <div class="item">{{ item }}</div>
    </template>
    <template #loading>
      <p>加载中...</p>
    </template>
    <template #noMore>
      <p>没有更多了</p>
    </template>
  </GridList>
</template>
行列表
实现行列表只需要将item-min-width属性配置为100%,即表示每个item最小宽度为容器宽度。
代码
      <script setup lang="ts">
import GridList, { RequestFunc } from '@/components/GridList.vue';

const data: RequestFunc<number> = ({ page, limit }) => {
  return new Promise((resolve) => {
    console.log('开始加载啦', page, limit);

    setTimeout(() => {
      resolve({
        data: Array.from({ length: limit }, (_, index) => index + (page - 1) * limit),
        total: 500,
      });
    }, 1000);
  });
};
</script>

<template>
  <GridList :request="data" :column-gap="20" :row-gap="20" :limit="100" item-min-width="100%" class="grid-list">
    <template #empty>
      <p>暂无数据</p>
    </template>
    <template #default="{ item }">
      <div class="item">{{ item }}</div>
    </template>
    <template #loading>
      <p>加载中...</p>
    </template>
    <template #noMore>
      <p>没有更多了</p>
    </template>
  </GridList>
</template>
实现思路
网格布局
我们创建了一个名为GridList的组件,用于展示网格卡片的效果。该组件的主要功能是处理网格布局,而不关心卡片的具体内容。
GridList组件通过data-source属性接收数据。为了实现响应式布局,我们还提供了一些辅助属性,如item-min-width、item-min-height、row-gap和column-gap。
      <script lang="ts" setup>
import { computed, ref, watch } from 'vue';

const props = defineProps<{
  dataSource?: any[];
  itemMinWidth?: number;
  itemMinHeight?: number;
  rowGap?: number;
  columnGap?: number;
}>();

const data = ref<any[]>([...props.dataSource]);
</script>

<template>
  <div ref="containerRef" class="infinite-list-wrapper">
    <div v-else class="list">
      <div v-for="(item, index) in data" :key="index">
        <slot :item="item" :index="index">
          {{ item }}
        </slot>
      </div>
    </div>
  </div>
</template>

<style lang="scss" scoped>
.infinite-list-wrapper {
  text-align: center;
  overflow-y: scroll;
  position: relative;
  -webkit-overflow-scrolling: touch;

  .list {
    display: grid;
    grid-template-columns: repeat(auto-fill, minmax(calc(v-bind(itemMinWidth) * 1px), 1fr));
    grid-auto-rows: minmax(auto, calc(v-bind(itemMinHeight) * 1px));
    column-gap: calc(v-bind(columnGap) * 1px);
    row-gap: calc(v-bind(rowGap) * 1px);

    div:first-of-type {
      grid-column-start: 1;
      grid-column-end: 1;
    }
  }
}
</style>
实现响应式网格布局的关键点如下:
- 使用
display: grid;将.list元素设置为网格布局。 -
grid-template-columns属性创建了自适应的列布局。使用repeat(auto-fill, minmax(...))表示根据容器宽度自动填充列,并指定每列的最小和最大宽度。 -
grid-auto-rows属性创建了自适应的行布局。使用minmax(auto, ...)表示根据内容自动调整行高度。 -
column-gap和row-gap属性设置了网格项之间的列间距和行间距。
分页加载
尽管我们的组件能够满足设计要求,但面临的最明显问题是处理大量数据时的效率问题。随着数据量的增加,接口响应速度变慢,页面可能出现白屏现象,因为 DOM 元素太多。
这时候,后端团队提出了一个合理的疑问(BB)🤬:难道我们不能进行分页查询吗?我们需要联合多个表进行数据组装,这本身就很耗时啊...
确实,他们说得有道理。为了解决这个问题,我们需要在不改变交互方式的情况下实现数据的分页查询。
以前,GridList 组件的数据是通过 data-source 属性传递给它的,由组件的使用方进行数据处理和传递。但如果每个使用 GridList 的页面都要自己处理分页逻辑,那会变得非常麻烦。
为了提供更舒适的组件使用体验,我们决定在 GridList 组件内部完成分页逻辑。无论数据如何到达,对于 GridList 组件来说,都是通过函数调用的方式进行数据获取。为此,我们引入了一个新的属性 request,用于处理分页逻辑。
通过这样的改进,我们可以在不影响现有交互方式的前提下,让 GridList 组件自己处理数据分页,从而提升整体的使用便捷性。
request 接受一个类型为 RequestFunc 的函数,该函数的定义如下:
      export interface Pagination {
  limit: number;
  page: number;
}

export interface RequestResult<T> {
  data: T[];
  total: number;
}

export type RequestFunc<T> = (pagination: Pagination) => Promise<RequestResult<T>> | RequestResult<T>;
通过使用 request 函数,使用方无需手动维护 data 数据或处理分页逻辑。现在只需将数据获取逻辑封装到 request 函数中。
一旦滚动条滚动到底部,就会触发 props.request 函数来获取数据,实现滚动分页加载的效果。
这样的改进使得使用方能够专注于数据获取逻辑,并将其封装到 request 函数中。不再需要手动管理数据和分页逻辑,简化了使用方式,使得整体体验更加简洁和便捷。
        <script lang="ts" setup>


import { computed, ref, watch } from 'vue';

const props = defineProps<{
    request?: RequestFunc<any>;
    limit?: number;
    loadDistance?: number;
    //...原有props
  }>();

const containerRef = ref<HTMLDivElement>();
const loading = ref<boolean>(false);
const data = ref<any[]>([]);
const total = ref<number>(0);
const page = ref<number>(1);
/** 没有更多了 */
const noMore = computed<boolean>(
  () => total.value === 0 || data.value.length >= total.value || data.value.length < props.limit
);

//... watch处理

function handleScroll(event: Event) {
  event.preventDefault();
  const container = event.target as HTMLDivElement;
  const canLoad =
    container.scrollTop + container.clientHeight >= container.scrollHeight - props.loadDistance &&
    !loading.value &&
    !noMore.value;
  if (canLoad) {
    load();
  }
}

async function load() {
  loading.value = true;
  const result = await Promise.resolve(
    props.request({
      limit: props.limit,
      page: page.value,
    })
  );
  total.value = result.total;
  data.value.push(...result.data);
  if (!noMore.value) {
    page.value = page.value + 1;
  }
  loading.value = false;
}


        </script>
虚拟列表
除了添加 request 属性以实现分页加载数据,我们还需要进一步优化。尽管这种懒加载的分页加载可以解决网络请求和首屏加载的问题,但随着数据增加,DOM 元素的数量也会不断增加,可能导致页面出现卡顿的情况。
为了解决这个问题,我们可以引入虚拟列表的概念和实现方法。虚拟列表的原理和实现思路已经在网上有很多资料,这里就不再赘述。
虚拟列表的主要目标是解决列表渲染性能问题,并解决随着数据增加而导致的 DOM 元素过多的问题。
虚拟列表的关键在于计算出当前可视区域的数据起始索引 startIndex 和终点索引 endIndex。GridList 组件本身并不需要关心计算的具体过程,只需要获得 startIndex 和 endIndex 即可。因此,我们可以将虚拟列表的计算逻辑封装成一个自定义 Hook,该 Hook 的作用就是计算当前可视区域的 startIndex 和 endIndex ✨🔍。
通过这样的优化,我们能够更好地处理大量数据的渲染问题,提升页面的性能和流畅度。同时,GridList 组件无需关心具体的计算过程,只需要使用计算得到的 startIndex 和 endIndex 即可 🚀💡。
useVirtualGridList
在虚拟列表中,只渲染可视区域的 DOM 元素,为了实现滚动效果,我们需要一个隐藏的 DOM 元素,并将其高度设置为列表的总高度。
已知属性:
-
containerWidth: 容器宽度,通过container.clientWidth获取 -
containerHeight: 容器高度,通过container.clientHeight获取 -
itemMinWidth: item 最小宽度,通过props.itemMinWidth获取 -
itemMinHeight: item 最小高度,通过props.itemMinHeight获取 -
columnGap: item 的列间距,通过props.columnGap获取 -
rowGap: item 的行间距,通过props.rowGap获取 -
data: 渲染数据列表,通过props.dataSource/props.request获取 -
scrollTop: 滚动条偏移量,通过container.addEventListener('scroll', () => {...})获取
计算属性:
- 渲染列数
columnNum:Math.floor((containerWidth - itemMinWidth) / (itemMinWidth + columnGap)) + 1 - 渲染行数
rowNum:Math.ceil(data.length / columnNum) - 列表总高度
listHeight:Math.max(rowNum * itemMinHeight + (rowNum - 1) * rowGap, 0) - 可见行数
visibleRowNum:Math.ceil((containerHeight - itemMinHeight) / (itemMinHeight + rowGap)) + 1 - 可见 item 数
visibleCount:visibleRowNum * columnNum - 起始索引
startIndex:Math.ceil((scrollTop - itemMinHeight) / (itemMinHeight + rowGap)) * columnNum - 终点索引
endIndex:startIndex + visibleCount - 列表偏移位置
startOffset:scrollTop - (scrollTop % (itemMinHeight + rowGap))
通过以上计算,我们可以根据容器尺寸、item 最小尺寸、间距和滚动条位置来计算出虚拟列表的相关参数,以便准确渲染可见区域的数据。这样的优化能够提升列表的渲染性能,并确保用户在滚动时获得平滑的体验。
      //vue依赖引入
export const useVirtualGridList = ({
  containerRef,
  itemMinWidth,
  itemMinHeight,
  rowGap,
  columnGap,
  data,
}: VirtualGridListConfig) => {
  const phantomElement = document.createElement('div');
  //...phantomElement布局

  const containerHeight = ref<number>(0);
  const containerWidth = ref<number>(0);
  const startIndex = ref<number>(0);
  const endIndex = ref<number>(0);
  const startOffset = ref<number>(0);

  /** 计算列数 */
  const columnNum = computed<number>(
    () => Math.floor((containerWidth.value - itemMinWidth.value) / (itemMinWidth.value + columnGap.value)) + 1
  );
  /** 计算行数 */
  const rowNum = computed<number>(() => Math.ceil(data.value.length / columnNum.value));
  /** 计算总高度 */
  const listHeight = computed<number>(() =>
    Math.max(rowNum.value * itemMinHeight.value + (rowNum.value - 1) * rowGap.value, 0)
  );
  /** 可见行数 */
  const visibleRowNum = computed<number>(
    () => Math.ceil((containerHeight.value - itemMinHeight.value) / (itemMinHeight.value + rowGap.value)) + 1
  );
  /** 可见item数量 */
  const visibleCount = computed<number>(() => visibleRowNum.value * columnNum.value);

  watch(
    () => listHeight.value,
    () => {
      phantomElement.style.height = `${listHeight.value}px`;
    }
  );

  watchEffect(() => {
    endIndex.value = startIndex.value + visibleCount.value;
  });

  const handleContainerResize = () => {
    nextTick(() => {
      if (containerRef.value) {
        containerHeight.value = containerRef.value.clientHeight;
        containerWidth.value = containerRef.value.clientWidth;
      }
    });
  };

  const handleScroll = () => {
    if (!containerRef.value) {
      return;
    }
    const scrollTop = containerRef.value.scrollTop;
    const startRowNum = Math.ceil((scrollTop - itemMinHeight.value) / (itemMinHeight.value + rowGap.value));
    /** 计算起始索引 */
    startIndex.value = startRowNum * columnNum.value;
    /** 计算内容偏移量 */
    startOffset.value = scrollTop - (scrollTop % (itemMinHeight.value + rowGap.value));
  };

  onMounted(() => {
    if (containerRef.value) {
      containerRef.value.appendChild(phantomElement);
      containerRef.value.addEventListener('scroll', (event: Event) => {
        event.preventDefault();
        handleScroll();
      });
      handleScroll();
    }
  });

  return { startIndex, endIndex, startOffset, listHeight };
};
这段代码实现了虚拟网格列表的核心逻辑,通过监听容器的滚动和大小改变事件,实现了仅渲染可见区域的列表项,从而提高性能。🚀
在代码中,我们创建了一个 phantomElement 占位元素,其高度被设置为列表的总高度,以确保滚动条的滚动范围与实际列表的高度一致。这样,在滚动时,我们可以根据滚动位置动态计算可见区域的起始和结束索引,并只渲染可见的列表项,避免了不必要的 DOM 元素渲染,从而提升了性能。📈
在代码中,phantomElement 被创建为绝对定位的元素,并设置了其位置属性和高度。通过 watch 监听器,它的高度会根据列表的总高度进行更新,以保持与实际列表的高度一致。🔍
通过利用占位元素,我们成功实现了虚拟列表的滚动渲染,减少了不必要的 DOM 元素渲染,从而显著提升了用户体验和性能表现。💯✨
在GridList中使用useVirtualGridList:
      <script lang="ts" setup>
import { computed, ref, watch } from 'vue';

import { useVirtualGridList } from '@/hooks/useVirtualGridList';

//...其他代码

/** 计算最小宽度的像素值 */
const itemMinWidth = computed<number>(() => props.itemMinWidth);
/** 计算最小高度的像素值 */
const itemMinHeight = computed<number>(() => props.itemMinHeight);
/** 计算列间距的像素值 */
const columnGap = computed<number>(() => props.columnGap);
/** 计算行间距的像素值 */
const rowGap = computed<number>(() => props.rowGap);
/** 计算虚拟列表的起始/终止索引 */
const { startIndex, endIndex, startOffset, listHeight } = useVirtualGridList({
  containerRef,
  data,
  itemMinWidth,
  itemMinHeight,
  columnGap,
  rowGap,
});

//...其他代码
</script>

<template>
  <div ref="containerRef" class="infinite-list-wrapper" @scroll="handleScroll">
    <div v-if="data.length === 0 && !loading">
      <slot name="empty">No Data</slot>
    </div>
    <div v-else class="list">
      <div v-for="(item, index) in data.slice(startIndex, endIndex)" :key="index">
        <slot :item="item" :index="index">
          {{ item }}
        </slot>
      </div>
    </div>
    <div v-if="loading" class="bottom">
      <slot name="loading"></slot>
    </div>
    <div v-if="noMore && data.length > 0" class="bottom">
      <slot name="noMore"></slot>
    </div>
  </div>
</template>
性能展示
虚拟列表
一次性加载十万条数据
懒加载+虚拟列表
分页加载,每页加载一万条
最后
如果觉得GridList对你有所帮助或启发,希望你能点赞/收藏/评论!