
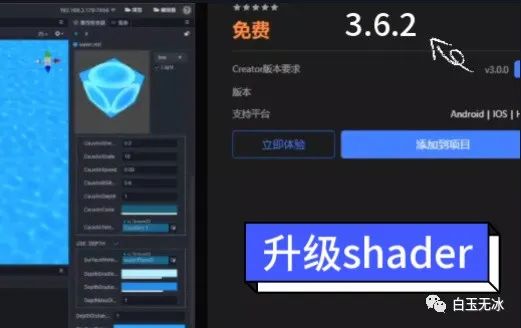
如何快速升级 Cocos Shader 版本,以简易水shader为例
白
背景
讲述如何 将一份 3.0.0 版本的水shader 升级至 Cocos Creator 3.6 。希望对大家有所帮助。
环境
Cocos Creator 3.6.2
效果
玉
此处是鱼🐟,介绍如何使用
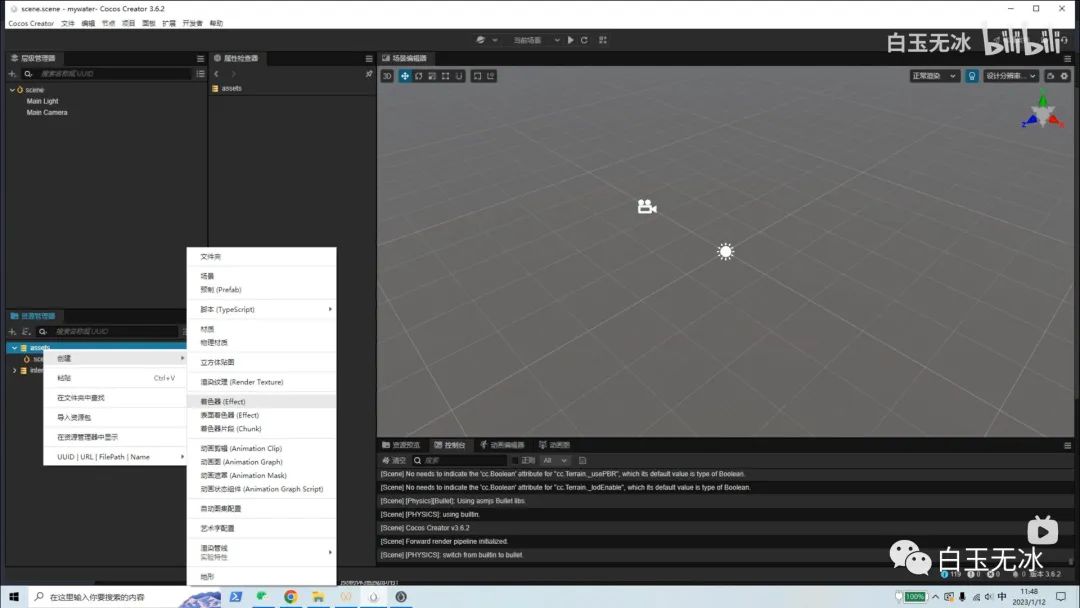
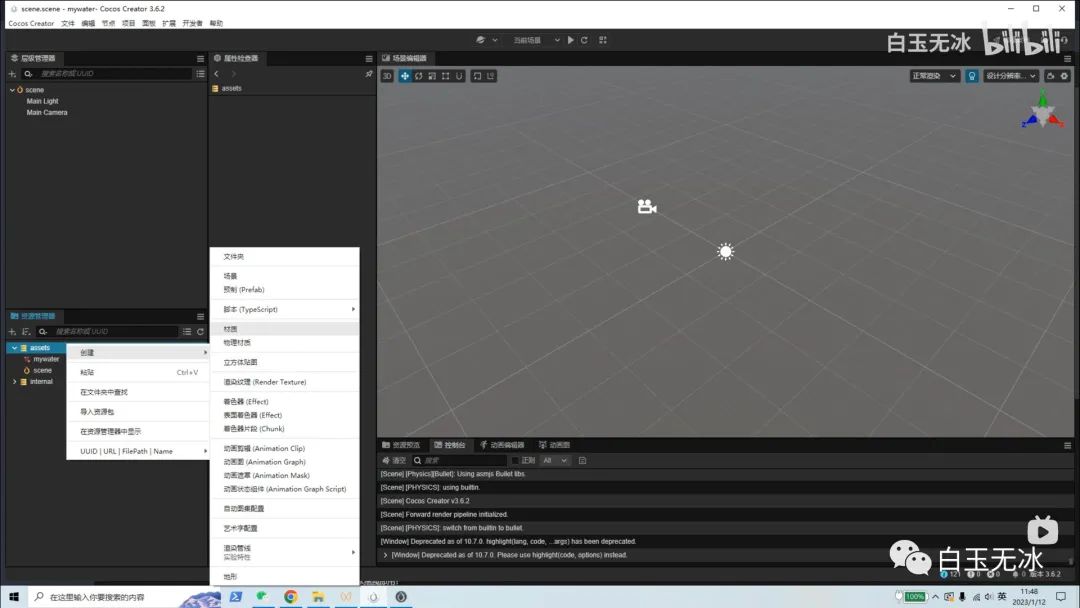
在资源管理器中新建着色器(Effect)
复制 文末的 mywater.effect 代码至当前文件
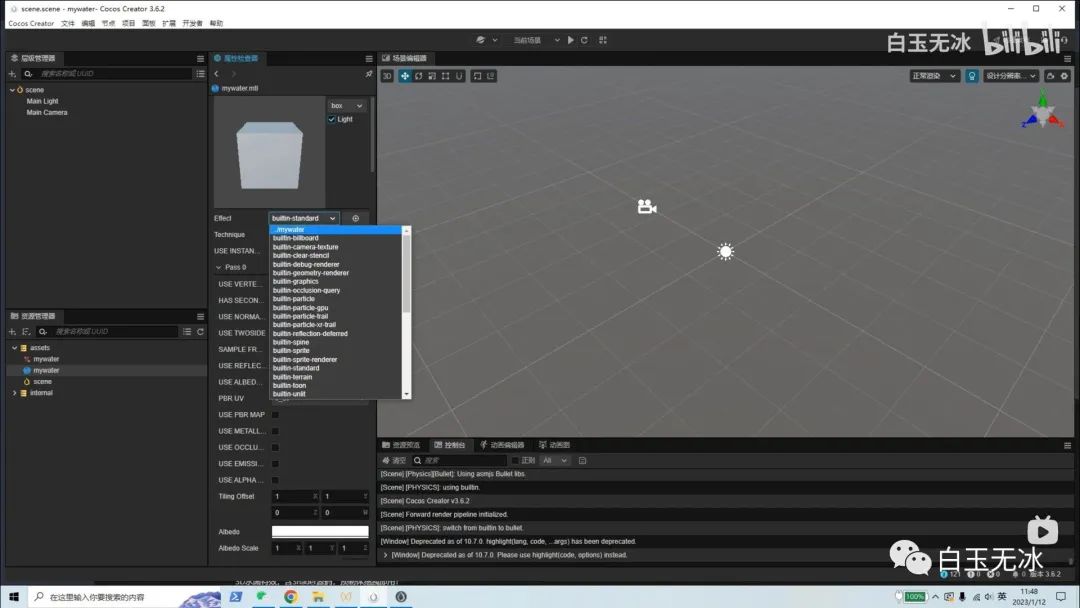
在资源管理器中新建材质
选择材质的着色器
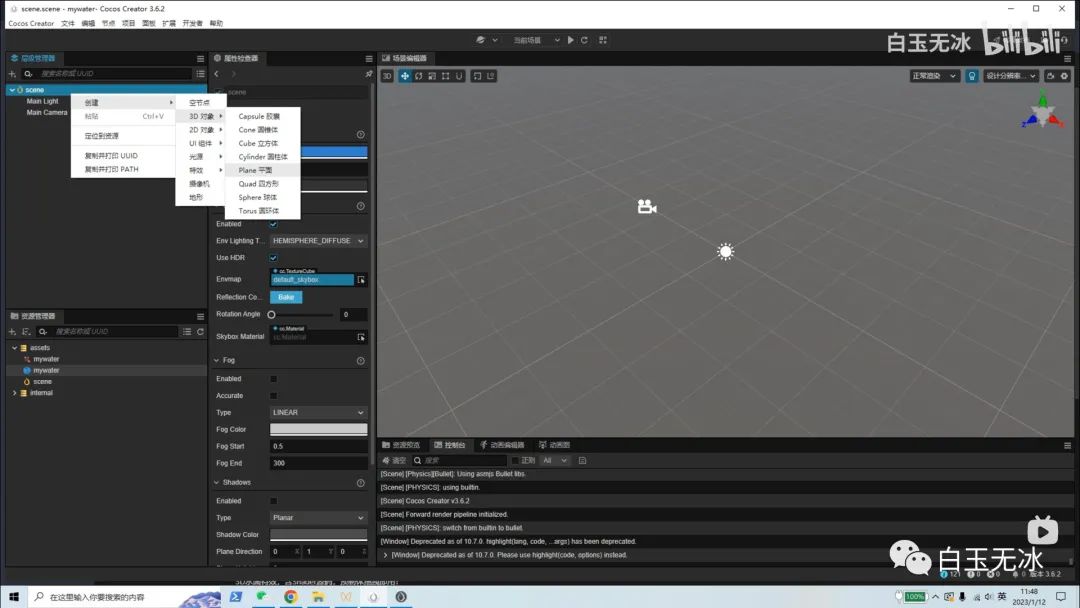
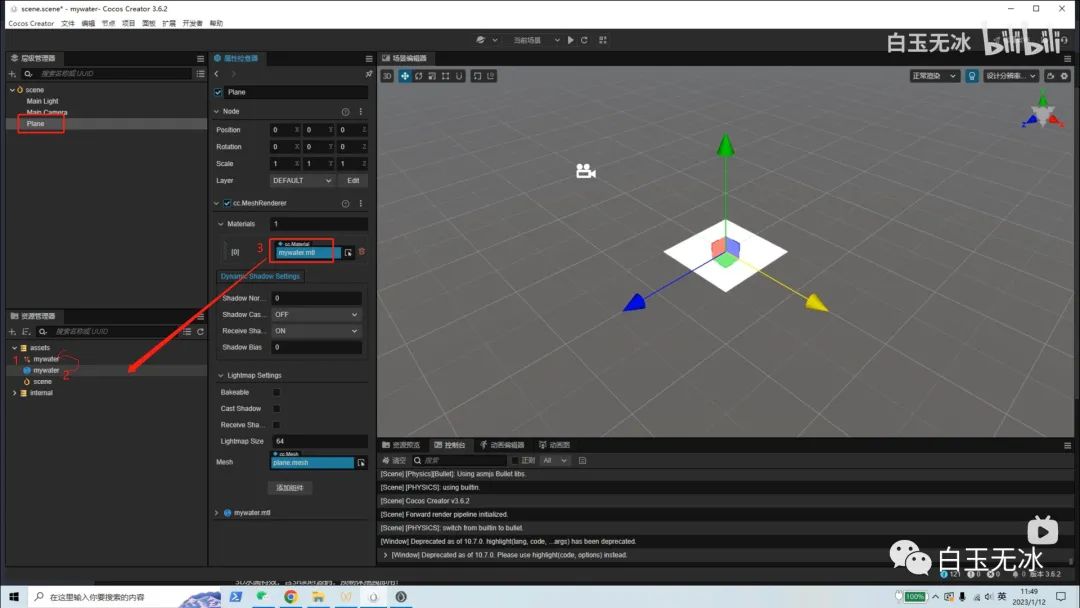
在场景中创建平面
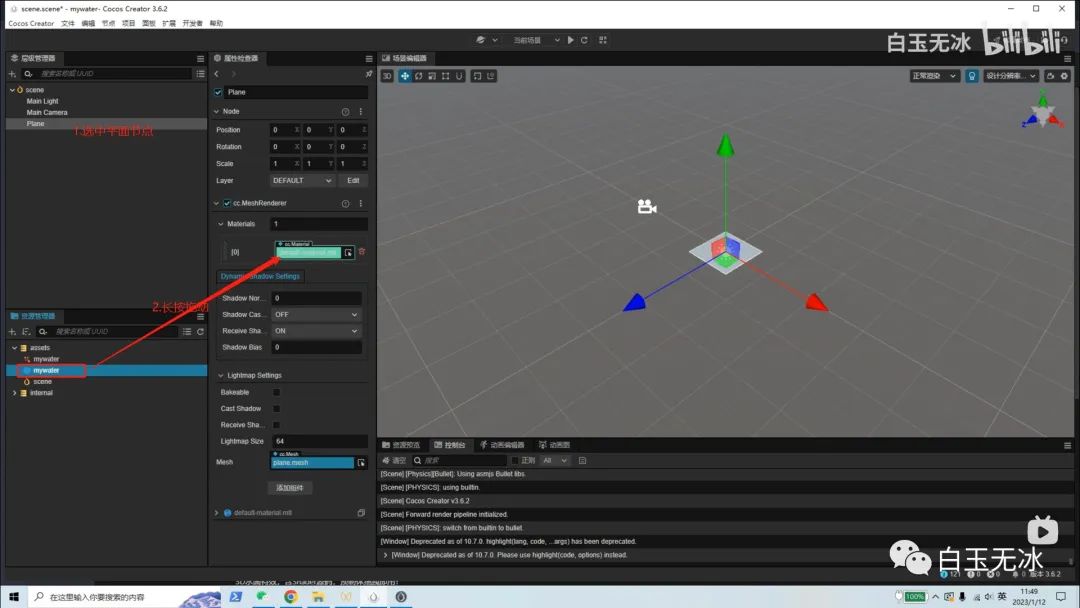
让平面使用水的材质
为材质上贴图
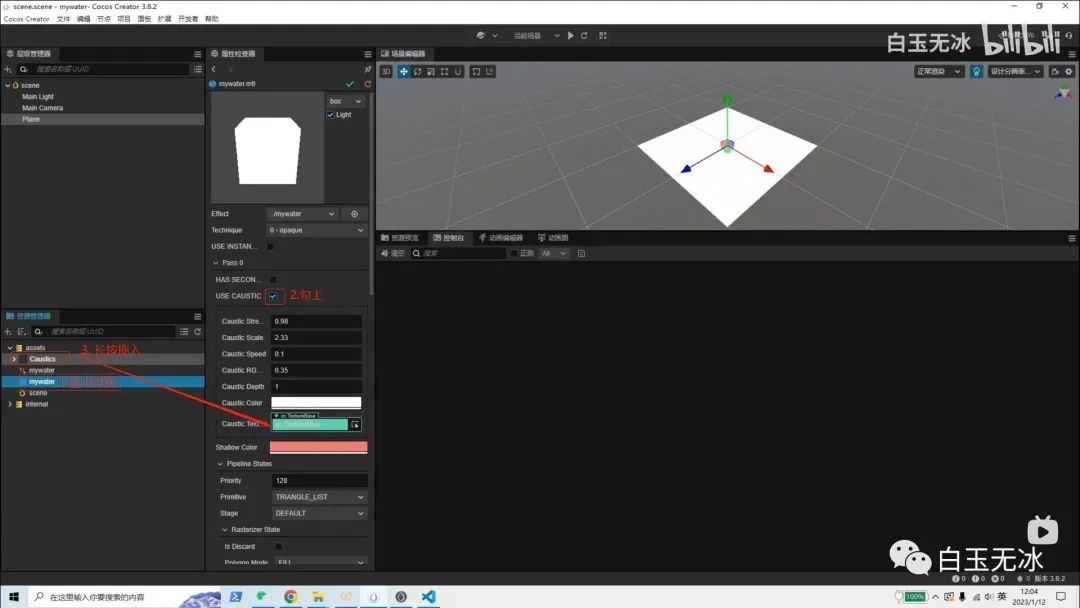
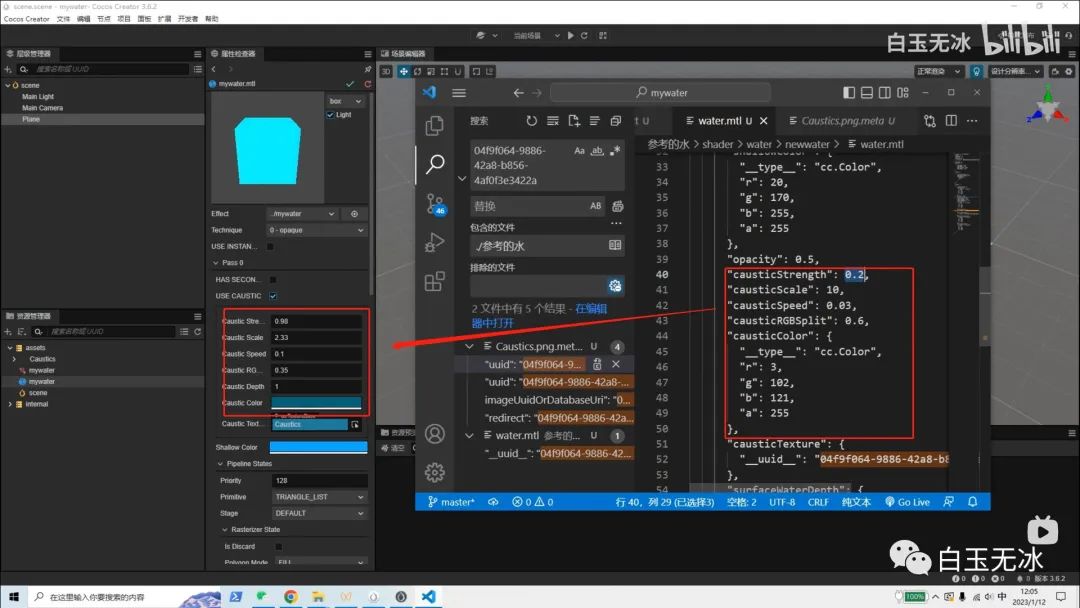
调整材质参数
可以根据预览效果调整参数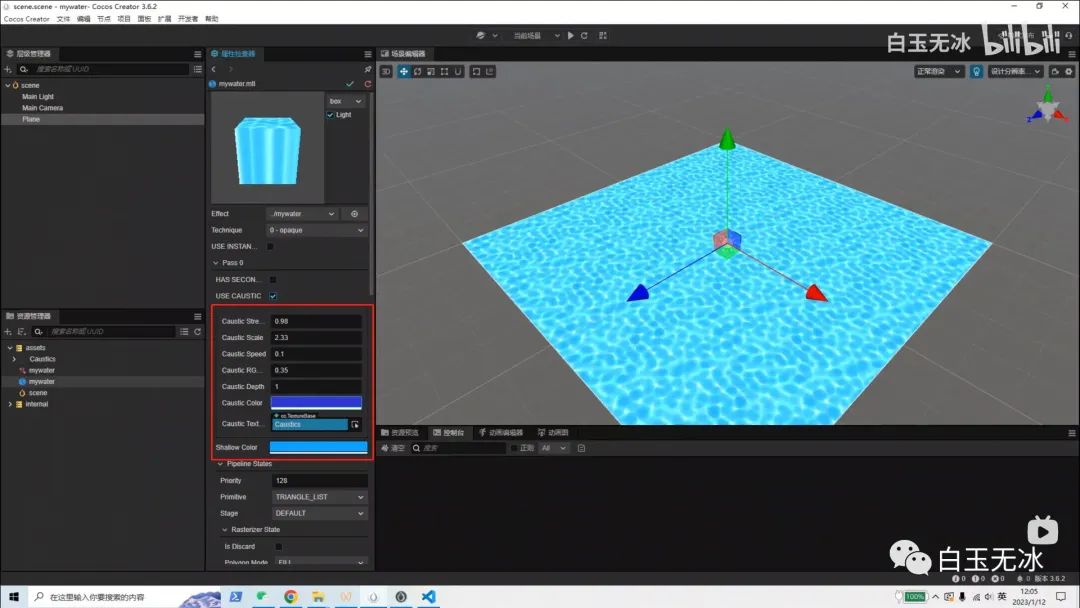
无
此处是渔,介绍如何快速升级
https://www.bilibili.com/video/BV1WY4y1f7mS
前置准备
参考前面的步骤准备以下几个点:
1. 新建着色器(Effect), mywater.effect
2. 新建材质 mywater.mtl ,并使用 mywater.effect 材质
3. 在场景中创建平面,并使用mywater.mtl材质
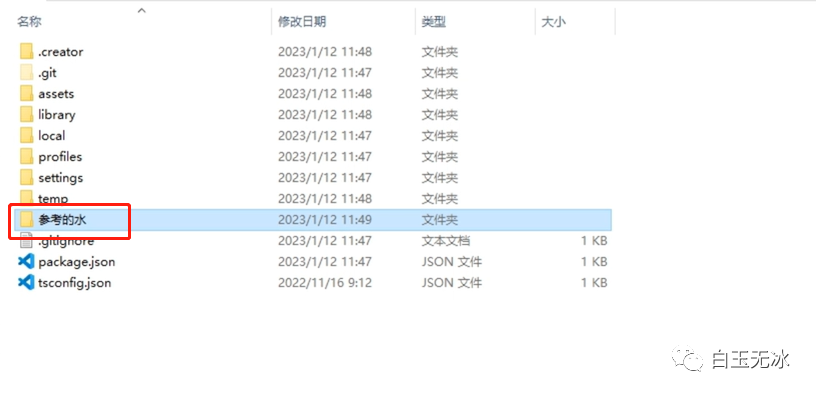
4.将参考的水放在工程中
确定入口
打开两份着色器代码,片元着色器的入口在 frag 变量下
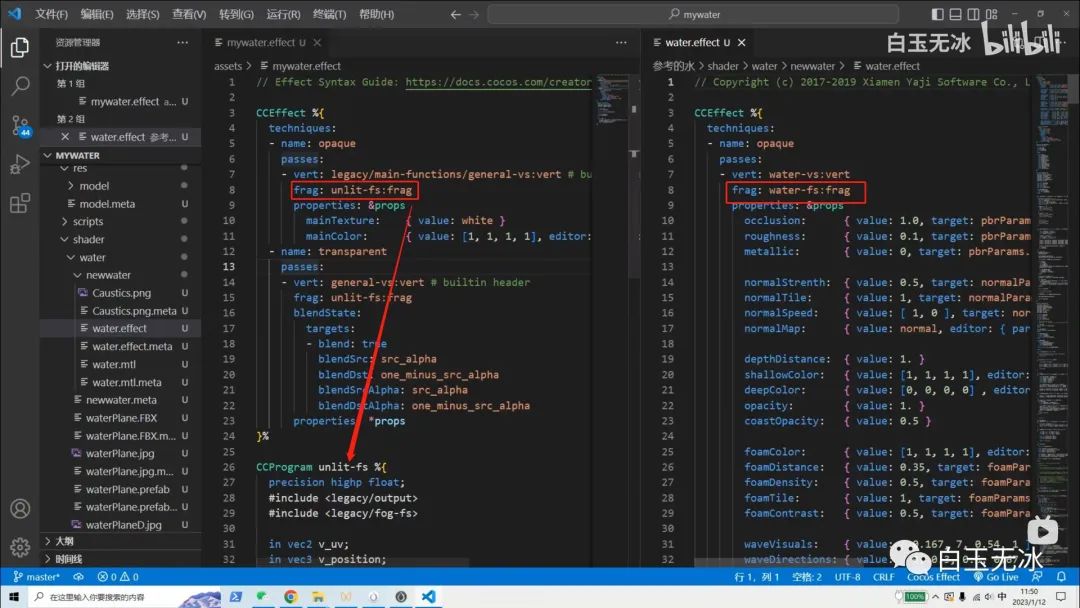
入口在 water-fs:frag
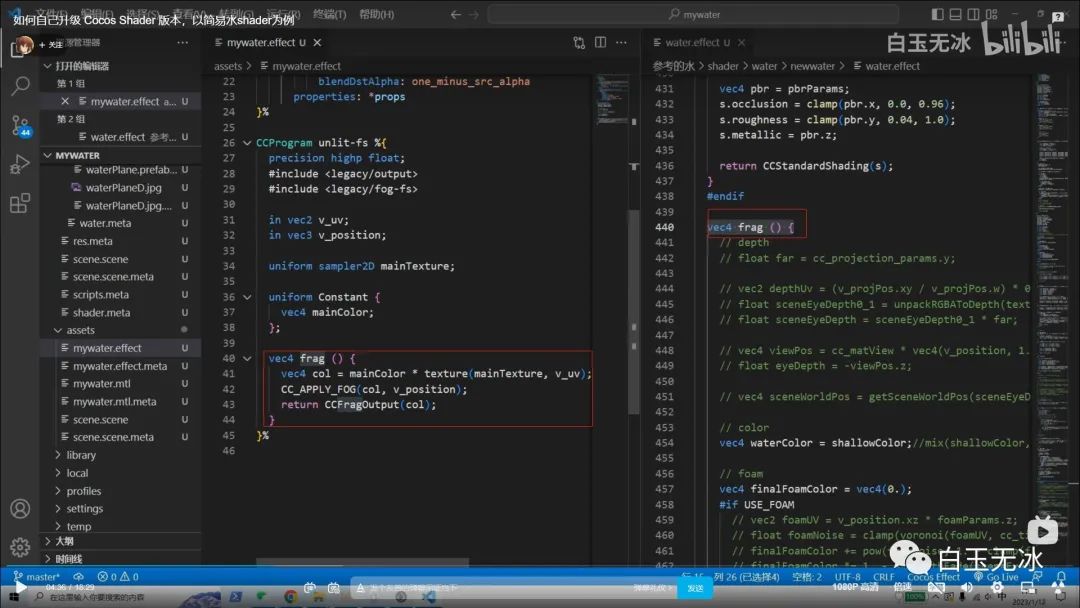
从后往前抄
返回颜色

将每个变量都移植过来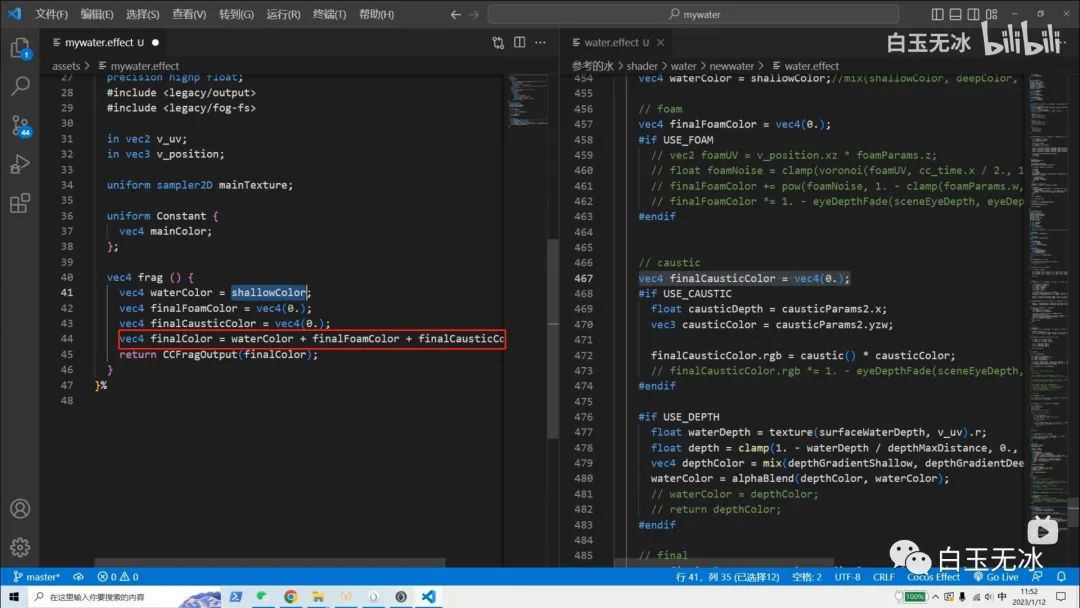
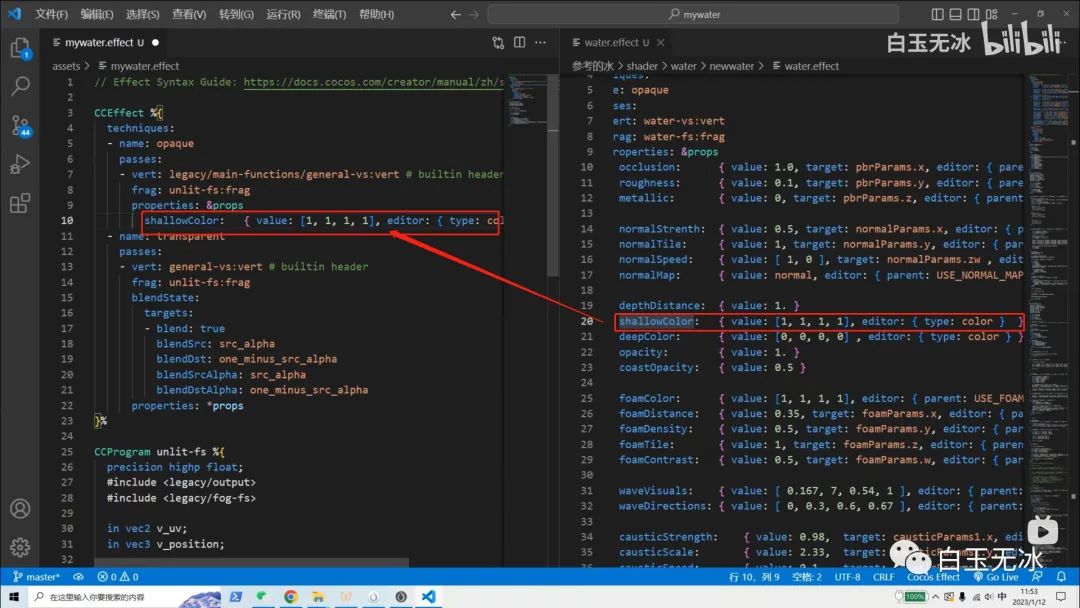
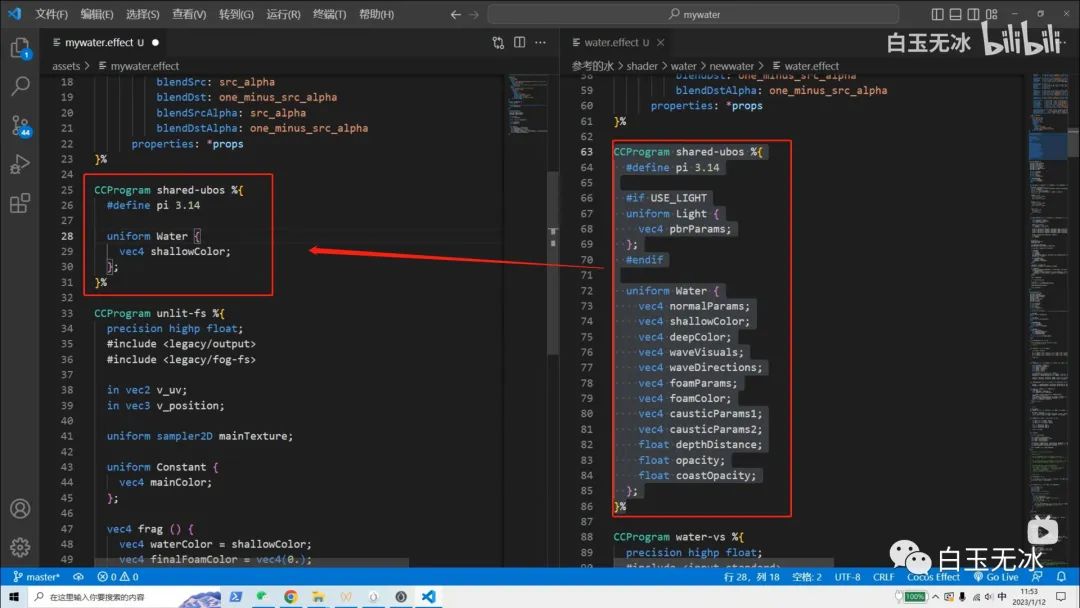
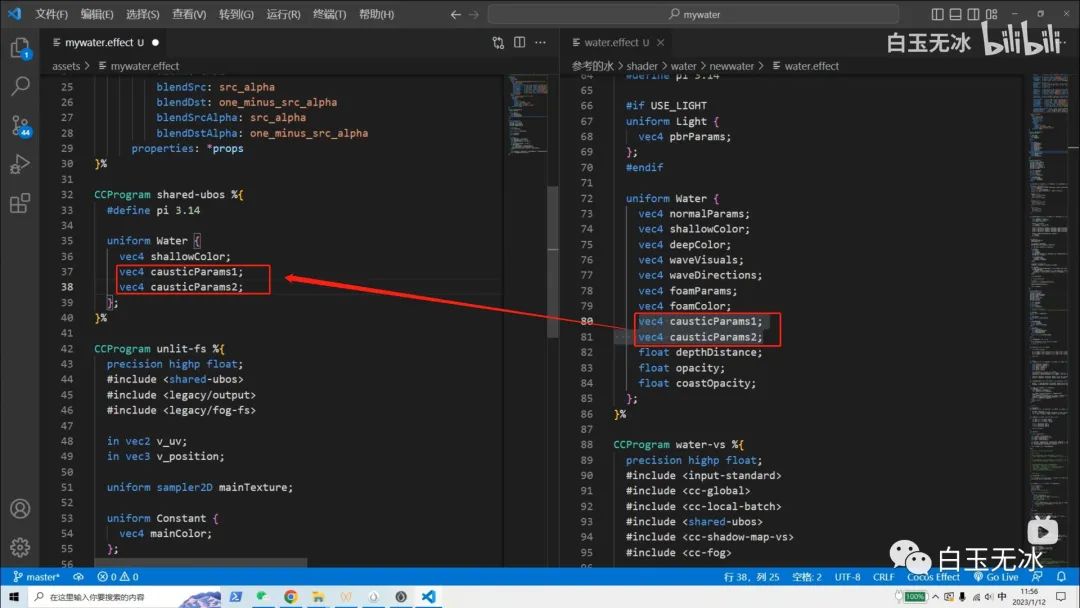
全局变量
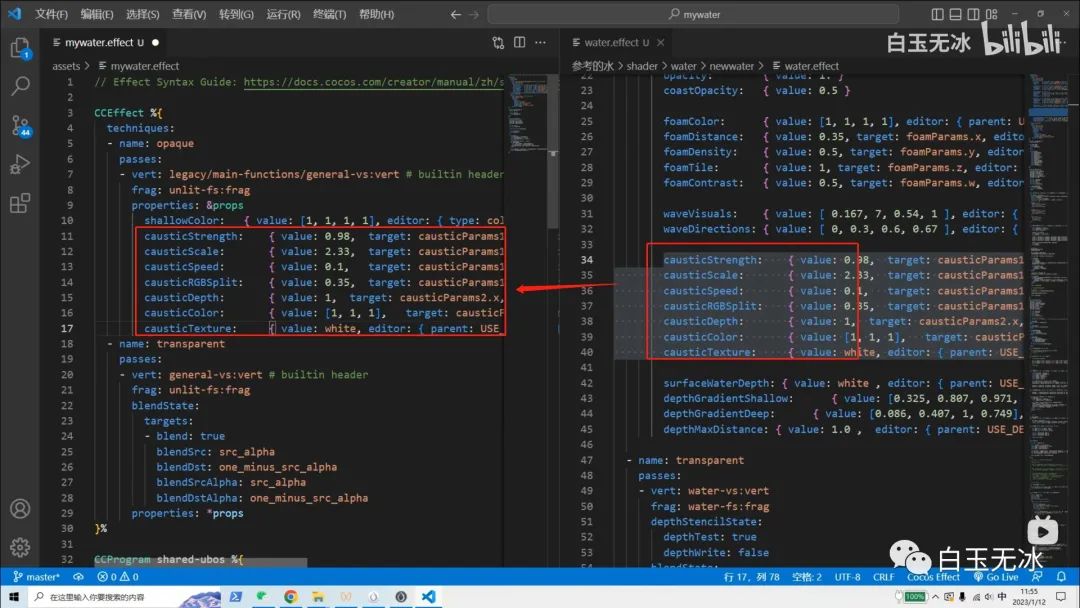
拷贝 属性检查器 面板参数 properties
拷贝UBO。引擎不支持离散声明的 uniform 变量,必须使用 UBO 并保持内存对齐,以避免 implicit padding。
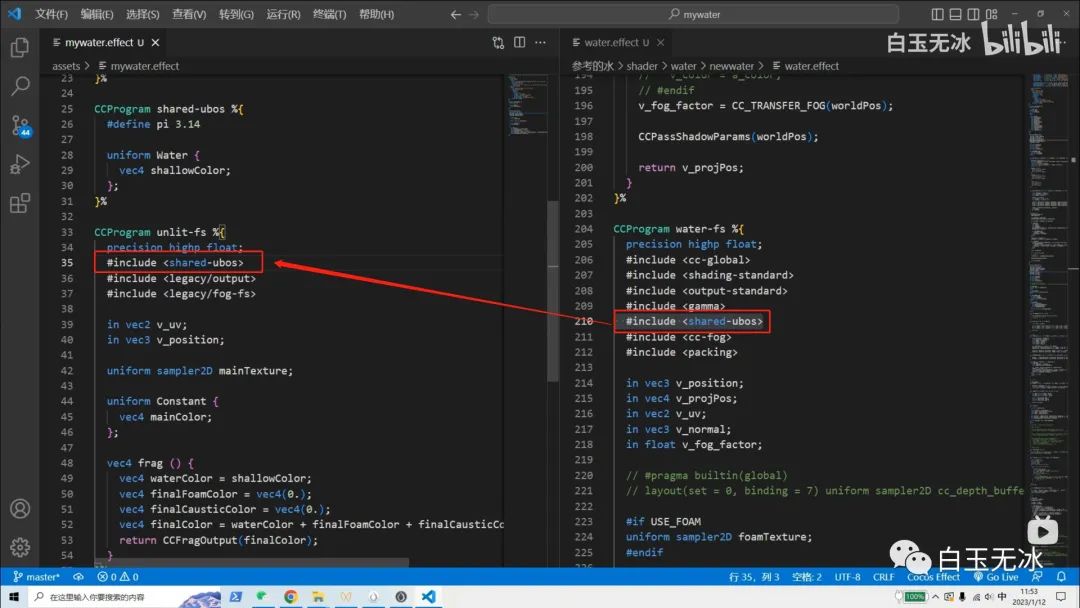
拷贝引用UBO
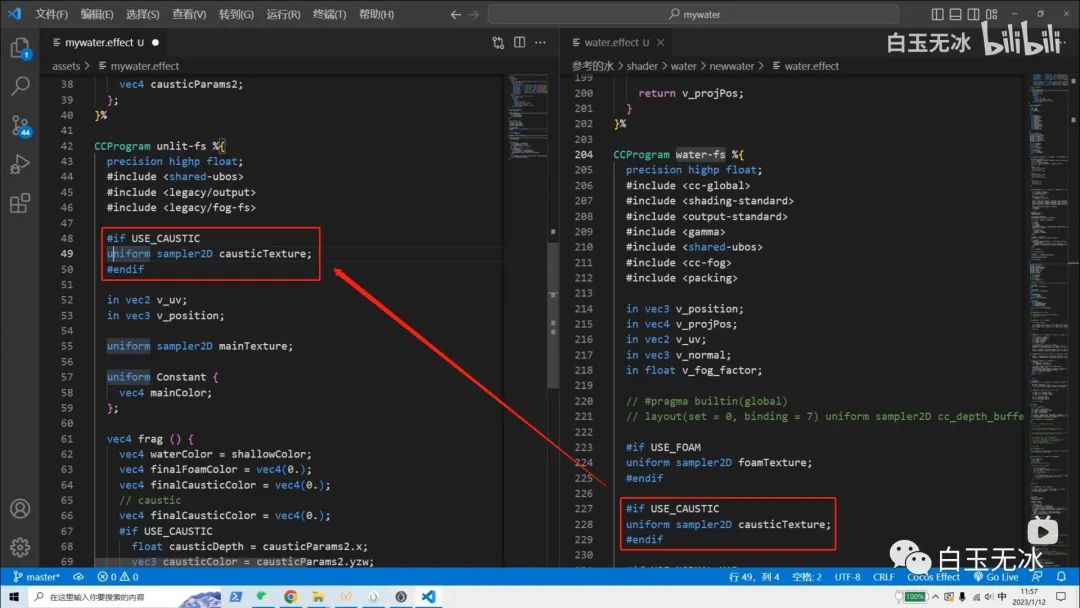
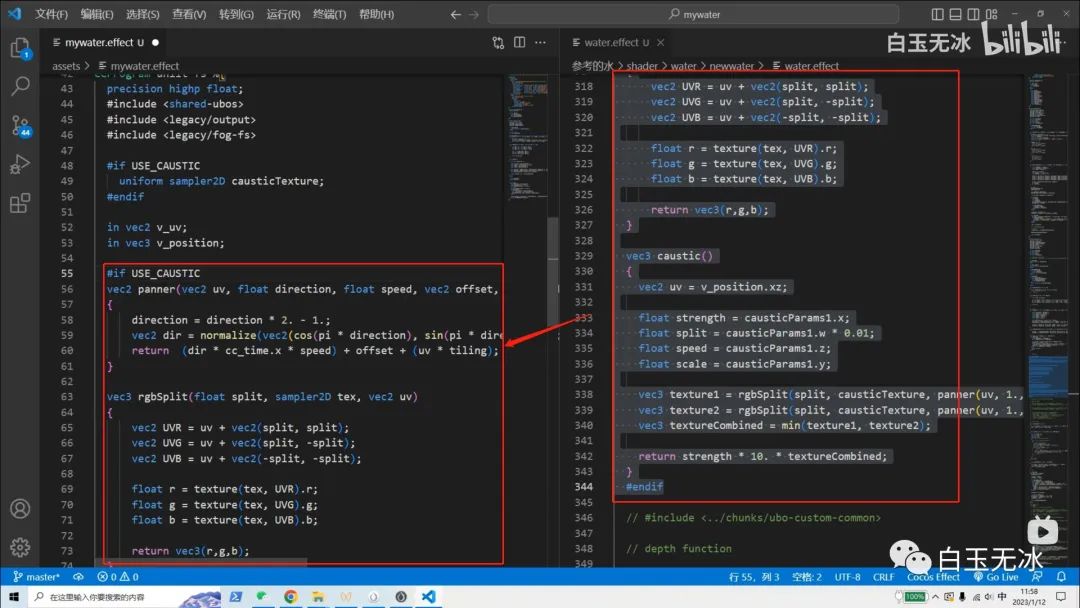
函数
拷贝颜色计算的部分
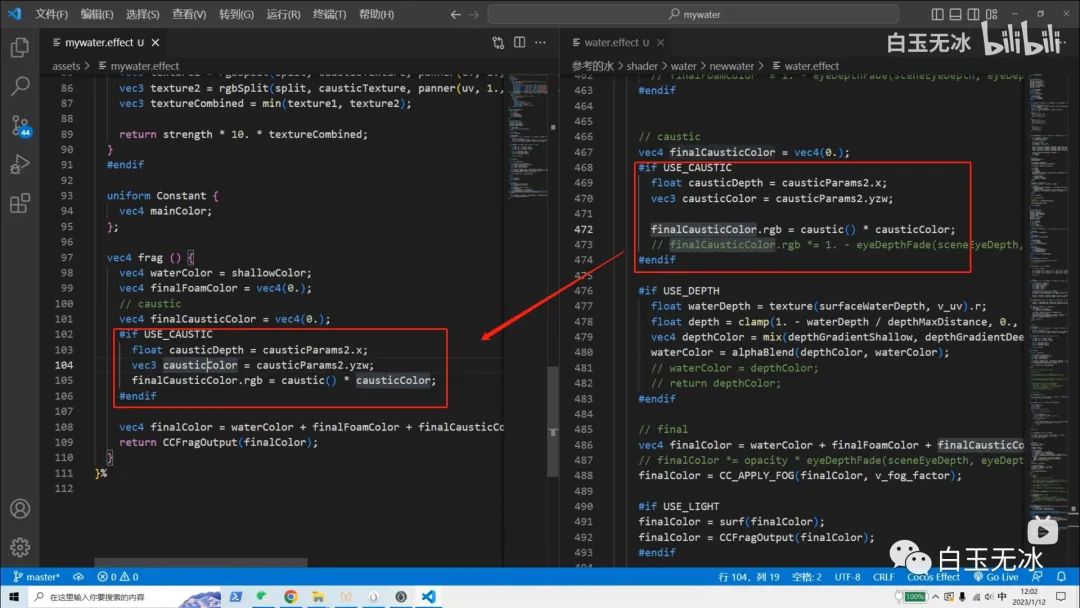
拷贝相关的全局变量
拷贝UBO
拷贝纹理声明 causticTexture
拷贝函数
材质参数
在参考材质中搜索对应的纹理,找到使用的纹理文件
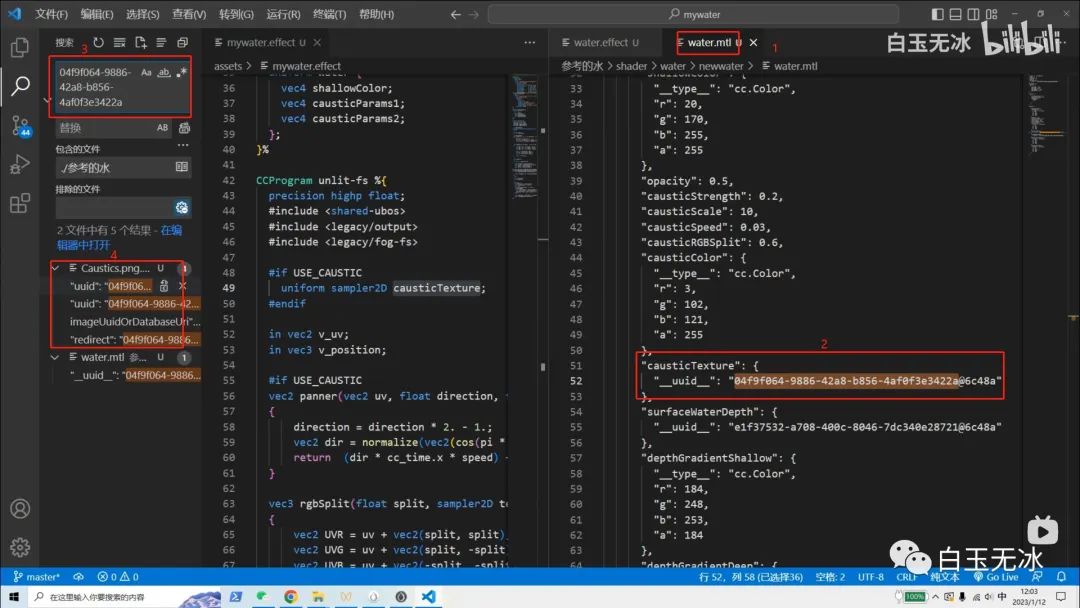
拖入贴图
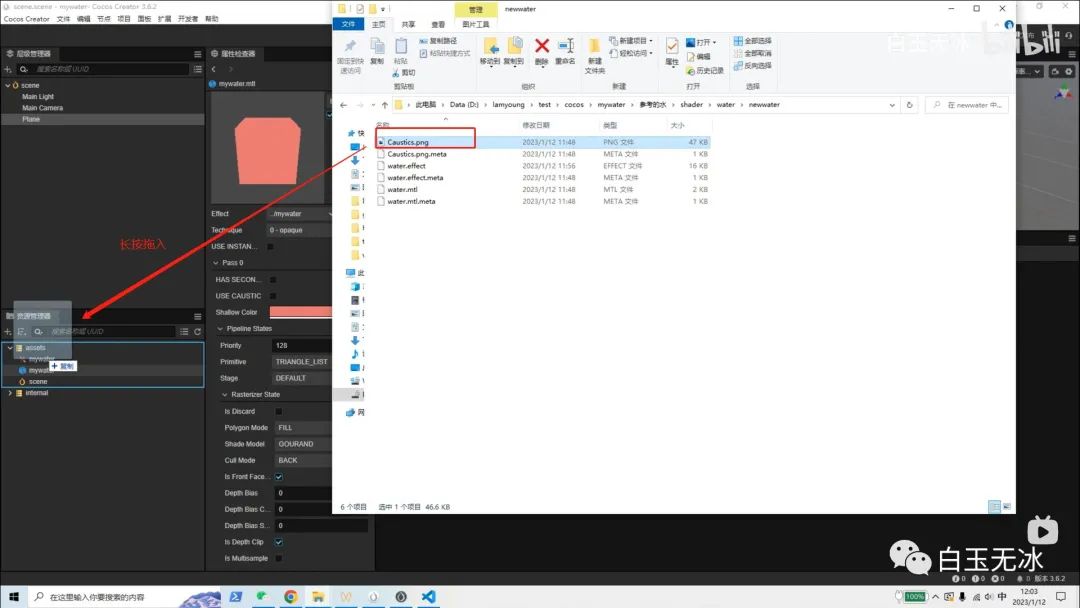
为材质上贴图
其他参数的拷贝
效果
冰
此处是相关资源资料
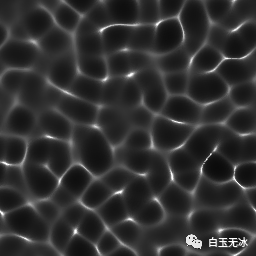
贴图 Caustics
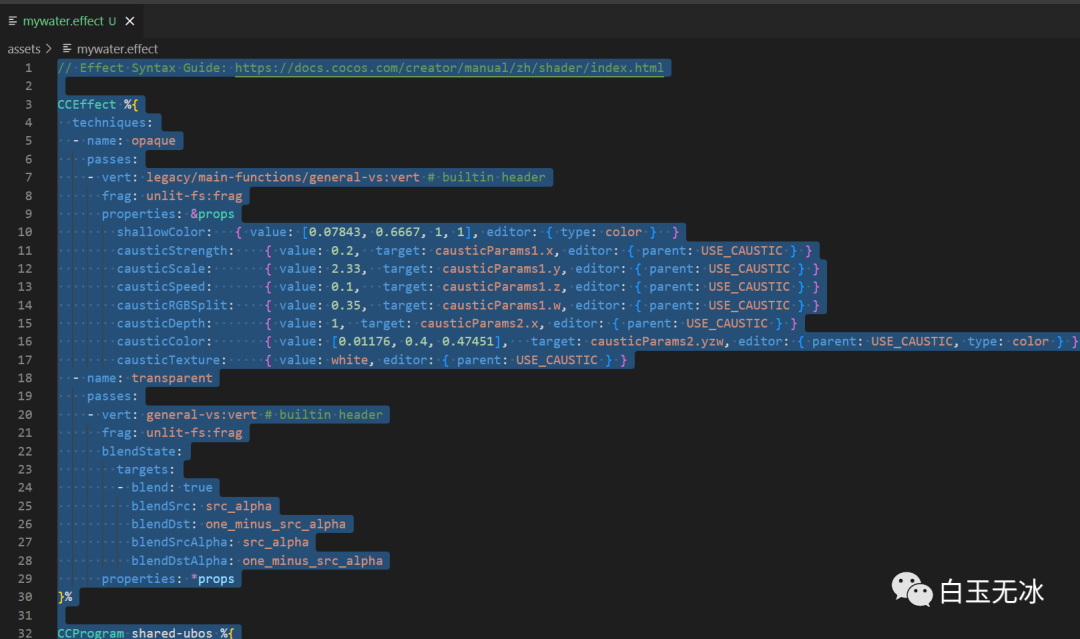
mywater.effect
    // Effect Syntax Guide: https://docs.cocos.com/creator/manual/zh/shader/index.html

CCEffect %{
  techniques:
  - name: opaque
    passes:
    - vert: legacy/main-functions/general-vs:vert # builtin header
      frag: unlit-fs:frag
      properties: &props
        shallowColor:   { value: [0.07843, 0.6667, 1, 1], editor: { type: color }  }
        causticStrength:    { value: 0.2,  target: causticParams1.x, editor: { parent: USE_CAUSTIC } }
        causticScale:       { value: 2.33,  target: causticParams1.y, editor: { parent: USE_CAUSTIC } }
        causticSpeed:       { value: 0.1,   target: causticParams1.z, editor: { parent: USE_CAUSTIC } }
        causticRGBSplit:    { value: 0.35,  target: causticParams1.w, editor: { parent: USE_CAUSTIC } }
        causticDepth:       { value: 1,  target: causticParams2.x, editor: { parent: USE_CAUSTIC } }
        causticColor:       { value: [0.01176, 0.4, 0.47451],   target: causticParams2.yzw, editor: { parent: USE_CAUSTIC, type: color } }
        causticTexture:     { value: white, editor: { parent: USE_CAUSTIC } }
  - name: transparent
    passes:
    - vert: general-vs:vert # builtin header
      frag: unlit-fs:frag
      blendState:
        targets:
        - blend: true
          blendSrc: src_alpha
          blendDst: one_minus_src_alpha
          blendSrcAlpha: src_alpha
          blendDstAlpha: one_minus_src_alpha
      properties: *props
}%

CCProgram shared-ubos %{
  #define pi 3.14

  uniform Water {
    vec4 shallowColor;
    vec4 causticParams1;
    vec4 causticParams2;
  };
}%

CCProgram unlit-fs %{
  precision highp float;
  #include <shared-ubos>
  #include <legacy/output>
  #include <legacy/fog-fs>

  #if USE_CAUSTIC
    uniform sampler2D causticTexture;
  #endif

in vec2 v_uv;
in vec3 v_position;

  #if USE_CAUSTIC
  vec2 panner(vec2 uv, float direction, float speed, vec2 offset, float tiling)
  {
      direction = direction * 2. - 1.;
      vec2 dir = normalize(vec2(cos(pi * direction), sin(pi * direction)));
return  (dir * cc_time.x * speed) + offset + (uv * tiling);
  }

  vec3 rgbSplit(float split, sampler2D tex, vec2 uv)
  {
      vec2 UVR = uv + vec2(split, split);
      vec2 UVG = uv + vec2(split, -split);
      vec2 UVB = uv + vec2(-split, -split);

float r = texture(tex, UVR).r;
float g = texture(tex, UVG).g;
float b = texture(tex, UVB).b;

return vec3(r,g,b);
  }

  vec3 caustic()
  {
    vec2 uv = v_position.xz;

float strength = causticParams1.x;
float split = causticParams1.w * 0.01;
float speed = causticParams1.z;
float scale = causticParams1.y;

    vec3 texture1 = rgbSplit(split, causticTexture, panner(uv, 1., speed, vec2(0., 0.), 1./scale));
    vec3 texture2 = rgbSplit(split, causticTexture, panner(uv, 1., speed, vec2(0., 0.), -1./scale));
    vec3 textureCombined = min(texture1, texture2);

return strength * 10. * textureCombined;
  }
  #endif

  vec4 frag () {
    vec4 waterColor = shallowColor;
    vec4 finalFoamColor = vec4(0.);
// caustic
    vec4 finalCausticColor = vec4(0.);
    #if USE_CAUSTIC
float causticDepth = causticParams2.x;
      vec3 causticColor = causticParams2.yzw;
      finalCausticColor.rgb = caustic() * causticColor;
    #endif

    vec4 finalColor = waterColor + finalFoamColor + finalCausticColor;
    CC_APPLY_FOG(finalColor, v_position);
return CCFragOutput(finalColor);
  }
}%

// 欢迎关注【白玉无冰】 https://mp.weixin.qq.com/s/4WwCjWBtZNnONh8hZ7JVDA
工程
https://forum.cocos.org/uploads/short-url/5ytjWtYU1A4xNheA6nYxtBCs8h4.zip
mywater.zip (391.1 KB)
其他
整理了一份往期的游戏开发资料合集 👉 游戏开发资料合集,2022年版
阅读原文下载相关素材
https://forum.cocos.org/t/topic/144800
👇👇👇
评论