esrally 如何进行简单的自定义性能测试?
1.基础概念
Rally 最初于 2016 年发布,直到 2018 年 7 月才发布 1.0 版本,Rally 工具 是 Elasticsearch 开发团队用来运行夜间基准测试的工具。
Rally 的美妙之处在于它不仅可以充当负载生成器,还可以为构建、设置Elasticsearch 集群,从而帮助我们进行性能测试。
我们可以使用 Rally 对现有的 Elasticsearch 集群进行基准测试、管理基准配置、运行和比较结果,并使用指标和报错(例如 JIT、GC、perf)发现潜在的性能问题。
Rally 并发默认是配置多进程,基础进程数 8+1(client数量)。一台服务器只能运行一个 Rally 实例。
Rally 的 git 地址:
https://github.com/elastic/rally

下文中的:esrally 等价于 Rally 工具。
1.1 相关概念与参数
track:是赛道的意思,在这里是指压测用的数据和测试策略,track.json 便是压测策略的定义文件。
track.json :track主要的操作定义,定义被操作的索引、执行的测试操作和被测试的数据文件。是必要文件。 索引名.json:被测试的索引的mapping数据,也是必要文件。 documents.json(.bz2):被压测的索引数据,-1k的是用于test的部分数据。非必要文件。
operations: 指定具体的操作,比如 index 索引数据的操作、force-merge 强制合并 segment 的操作、search 搜索的操作等等。
schedule: 指定了 challenge 中按顺序执行的 task,其中每个 task 都指定了 一个 operation,除此之外还可以设定 clients (并发客户端数)、warmup-iterations(预热的循环次数)、iterations(operation 执行的循环次数)等。
指定特定的 schedule 可以使用命令行参数--include-tasks和exclude-tasks
challenges: 通过组合 schedule 定义一系列 task ,再组合成一个压测的流程。
指定 challenges 可以使用命令行参数--challenge
pipeline:指的是压测的流程。在生产中,一般都是远端集群,因此主要选择 benchmark-only。
1.2 关注指标
在 Metric 一栏,是压测结果指标数据,一般要关注的数据有:
throughput 每个操作的吞吐量,比如 index、search等 latency 每个操作的响应时长数据 Heap used for x 记录堆栈的使用情况
1.3 配置schedule
clients:(可选,默认为1):并发执行一个任务的客户端数量。 warmup-iterations(可选,默认为0):每个客户机应该执行的迭代数,以预热候选基准测试。热身迭代不会显示在测量结果中。 iterations (可选,默认为1):每个客户端执行的度量迭代的数量。命令行报告将根据这个数字自动调整百分位数(例如,如果您只运行5次迭代,您将不会得到99.9个百分位数,因为我们需要至少1000次迭代来精确地确定这个值)。 ramp-up-time-period(可选,默认为0):Rally将逐步启动客户端。在指定时间段结束时达到客户端指定的数量(以秒为单位)。此属性还需要设置预热时间周期,它必须大于或等于预热时间。有关更多细节,请参阅ramp-up一节。 warmup-time-period(可选,默认为0):Rally考虑的基准测试候选者预热的时间周期,以秒为单位。所有在热身过程中捕获的响应数据都不会显示在测量结果中。 time-period(可选):Rally考虑测量的以秒为单位的时间段。注意,对于批量索引,通常不应该定义此时间段。拉力将只是批量索引所有的文件,并考虑每个样本后的预热时间周期作为测量样本。 schedule(可选,默认为确定性的):为这个任务定义时间表,也就是说,它定义了在基准测试期间应该执行某个操作的时间点。例如,如果你指定了一个确定的调度和目标时间间隔为5(秒),Rally将尝试在秒0,5,10,15 ... .执行相应的操作Rally支持确定性和泊松,但您可以定义自己的自定义时间表。 target-throughput(可选):定义基准测试模式。如果没有定义,Rally将假设这是一个吞吐量基准,并将以尽可能快的速度运行任务。对于批处理风格的操作,这是最需要的,因为实现最佳吞吐量比获得可接受的延迟更重要。如果定义了它,它将指定所有客户端的每秒请求数。例如,如果你指定8个客户机的目标吞吐量为1000,这意味着每个客户机每秒将发出125(= 1000 / 8)个请求。总的来说,所有客户端每秒将发出1000个请求。如果Rally报告的吞吐量小于指定的吞吐量,那么Elasticsearch就无法到达它。 target-interval(可选):这仅仅是1 / target-throughput(以秒为单位),对于吞吐量小于每秒一个操作的情况可能更方便。 completed-by(可选):根据提供的任务名来结束并发的task,如果设置为any那么一旦有一个任务结束,整个schedule结束。假设有八个并发的相同任务,其中一个结束,另外7个结束。 ignore-response-error-level(可选):当基准测试运行时,控制是否忽略任务执行过程中遇到的错误。唯一允许的值是非致命的,它结合cli选项——on-error=abort,将在任务执行期间忽略非致命错误。
注意:
只能定义 target-interval或target-throughput的一个,但不能两者都定义(否则 Rally 将引发错误)。iterations与time-period这两类的参数也不能同时定义。
1.3.1 schedule examples
基础配置
{
  "schedule": [
    {
      "operation": {
        "operation-type": "search",
        "index": "_all",
        "body": {
          "query": {
            "match_all": {}
          }
        }
      },
      "warmup-iterations": 100,
      "iterations": 100,
      "target-throughput": 10
    }
  ]
}
使用一个 client 每秒10个操作 并使用100个迭代作为热身,然后使用100个迭代来测量
并发配置
默认 rally 对每个 operation 分配一个 client 进行处理。
在 parallel 和每个 task 都可以指定 clients。
如果两者的clients参数出现冲突,则可参考以下示例:
"schedule": [
  {
    "parallel": {
      "warmup-iterations": 50,
      "iterations": 100,
      "clients": 2,
      "tasks": [
        {
          "operation": "match-all",
          "target-throughput": 50
        },
        {
          "operation": "term",
          "target-throughput": 200
        },
        {
          "operation": "phrase",
          "target-throughput": 200
        }
      ]
    }
  }
]
Rally 不会同时运行所有三个任务,Rally 将首先同时运行“match-all”和“term”(每个任务一个client)。在他们完成之后,Rally将与一个客户运行“phrase”。
如果 parallel 指定比任务更多的 client,但这些 client 将是空闲的。
{
  "parallel": {
    "clients": 3,
    "warmup-iterations": 50,
    "iterations": 100,
    "tasks": [
      {
        "operation": "default",
        "target-throughput": 50
      },
      {
        "operation": "term",
        "target-throughput": 200
      },
      {
        "operation": "phrase",
        "target-throughput": 200,
        "clients": 2
      }
    ]
  }
}
这种方式确保 phrase 由两个 client 执行,其他任务一个client执行。
2 rally安装
2.1 依赖工程以及相关版本
开发包:curl-devel expat-devel gettext-devel openssl-devel zlib-devel gcc perl-ExtUtils-MakeMaker libffi-devel bzip2-devel python:3.8以上 jdk:1.8 git:2.7.5
2.2 离线安装esrally
 yum -y install curl-devel expat-devel gettext-devel openssl-devel zlib-devel gcc perl-ExtUtils-MakeMaker libffi-devel bzip2-devel
 wget https://mirrors.edge.kernel.org/pub/software/scm/git/git-2.7.5.tar.gz --no-check-certificate
 wget https://www.python.org/ftp/python/3.8.7/Python-3.8.7.tgz
 cd Python-3.8.7/
 ./configure prefix=/usr/local/python3
 make && make install
 echo 'export PYTHON3_HOME=/usr/local/python3' >> /etc/profile
 echo 'export PATH=$PATH:$PYTHON3_HOME/bin' >> /etc/profile
 source /etc/profile
 pip3.8 install sklearn
 tar -zxvf git-2.7.5.tar.gz
 cd git-2.7.5/
 make prefix=/usr/local/esrally/git all
 make prefix=/usr/local/esrally/git install
 rpm -qa | grep -w git
 rpm -e git-1.8.3.1-23.el7_8.x86_64 --nodeps
 echo 'export GIT2_HOME=/usr/local/esrally/git' >> /etc/profile
 echo 'export PATH=$PATH:$GIT2_HOME/bin' >> /etc/profile
 source /etc/profile
 wget https://github.com/elastic/rally/releases/esrally-dist-linux-2.3.1.tar.gz --no-check-certificate
 tar -zxf esrally-dist-linux-2.3.0.tar.gz
 cd  esrally-dist-2.3.0/
 bash install.sh
如果是已存在python3其他版本,后安装的python3.8,需要修改 install.sh中的python3修改成python3.8
默认rally参数和压测文件路径:/root/.rally/
使用 /root/.rally/benchmarks/tracks/default/download.sh 选择下载离线测试数据
安装后测试
esrally race --track=metricbeat --challenge=append-no-conflicts --target-hosts=127.0.0.1:9200 --client-options="use_ssl:false,verify_certs:false,basic_auth_user:'elastic',basic_auth_password:'passwd'" --pipeline=benchmark-only --offline
3 自定义测试
这里分三个场景:
自定义查询压测:对当前索引进行自定义dsl查询压测。
重建索引测试:重建索引,修改分片数,并进行dsl查询测试。
使用challengs方式进行压测。
其中查询的dsl为:
{"query":{"term":{"meta.cloud.instance_id":{"value":"1983702708814995873"}}}}
3.1 自定义简单查询压测
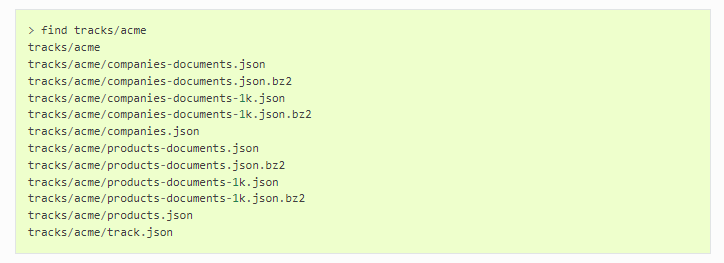
创建track路径
/usr/local/esrally/tracks/acms
获取索引的mapping文件
#命令格式
curl -k --user 用户名:密码 -XGET http://:9200/<索引名>/_mapping?pretty=true > <索引名>.json
#实际命令
curl -k --user elastic:abc123 -XGET http://127.0.0.1:9200/metricbeat/_mapping?pretty=true > metricbeat.json
创建track.json
{% import "rally.helpers" as rally with context %}
{
  "version": 2,
  "description": "Tracker-generated track for test",
  "indices": [
    {
      "name": "metricbeat",      --------索引名
      "body": "metricbeat.json"  --------索引mapping文件名
    }
  ],
  "schedule": [
    {
      "operation": {
        "name": "query-dsl",
        "operation-type": "search",
        "body": {
          "query": {
            "term": {
              "meta.cloud.instance_id": {
                "value": "1983702708814995873"
                 }
              }
            }
          }
          },
      "warmup-time-period": 10, ------warmup10s
      "time-period": 120,       ------实际测试120s
      "target-throughput": 4500,------目标吞吐量
      "clients": 5              ------启动的客户端数量
    }
  ]
}
运行自定义查询测试
esrally race --track-path=/usr/local/esrally/tracks/acme --pipeline=benchmark-only --target-hosts=127.0.0.1:9200 --client-options="use_ssl:false,verify_certs:false,basic_auth_user:'elastic',basic_auth_password:'abc123'" --include-tasks="query-dsl" --report-file=/usr/local/esrally/report/20220128-5-10k.csv
使用 --report-file 定义测试结果输出文件。
3.2 重建索引测试
创建 track ,获取压测数据,此处会生产索引数据文件,因此需要注意track路径的文件使用。
esrally create-track --track=acme --target-hosts=127.0.0.1:9200 --client-options="use_ssl:false,verify_certs:false,basic_auth_user:'elastic',basic_auth_password:'passwd'" --indices="metricbeat" --output-path=/usr/local/esrally/tracks
在 track.json 中添加 operation
{% import "rally.helpers" as rally with context %}
{
  "version": 2,
  "description": "Tracker-generated track for acme",
  "indices": [
    {
      "name": "metricbeat",
      "body": "metricbeat.json"
    }
  ],
  "corpora": [
    {
      "name": "metricbeat",
      "documents": [
        {
          "target-index": "metricbeat",
          "source-file": "metricbeat-documents.json.bz2",
          "document-count": 1079600,
          "compressed-bytes": 97535962,
          "uncompressed-bytes": 1249705758
        }
      ]
    }
  ],
  "schedule": [
    {
      "operation": "delete-index"
    },
    {
      "operation": {
        "operation-type": "create-index",
        "settings": {{index_settings | default({}) | tojson}}
      }
    },
    {
      "operation": {
        "operation-type": "cluster-health",
        "index": "metricbeat",
        "request-params": {
          "wait_for_status": "{{cluster_health | default('green')}}",
          "wait_for_no_relocating_shards": "true"
        },
        "retry-until-success": true
      }
    },
    {
      "operation": {
        "operation-type": "bulk",
        "bulk-size": {{bulk_size | default(5000)}},
        "ingest-percentage": {{ingest_percentage | default(100)}}
      },
      "clients": {{bulk_indexing_clients | default(8)}}
    },
 #### 此处新增
    {
   "operation": {
        "name": "query-dsl",
        "operation-type": "search",
        "body": {
          "query": {
            "term": {
              "meta.cloud.instance_id": {
                "value": "1983702708814995873"
                 }
              }
            }
          }
   },
   "warmup-time-period": 60,
      "time-period": 120,
      "target-throughput": 450,
      "clients": 5
    }
  ]
}
修改索引 metricbeat 的分片数,即修改 metricbeat.json 文件中分片参数
"number_of_shards": "12"
重建索引
esrally race --track-path=/usr/local/esrally/tracks/acme --pipeline=benchmark-only --target-hosts=127.0.0.1:9200 --client-options="use_ssl:false,verify_certs:false,basic_auth_user:'elastic',basic_auth_password:'passwd'" --exclude-tasks="type:search"
测试自定义查询
esrally race --track-path=/usr/local/esrally/tracks/acme --pipeline=benchmark-only --target-hosts=127.0.0.1:9200 --client-options="use_ssl:false,verify_certs:false,basic_auth_user:'elastic',basic_auth_password:'passwd'" --include-tasks="query-dsl" --report-file=/usr/local/esrally/report/20220128-5-10k.csv
3.3 使用 challenges 定义压测内容
创建track的方式与3.2一致。 以添加 challenges 文件的方式增加schedule;
#####原来track.json
{% import "rally.helpers" as rally with context %}
{
  "version": 2,
  "description": "Tracker-generated track for acme",
  "indices": [
    {
      "name": "metricbeat",
      "body": "metricbeat.json"
    }
  ],
  "corpora": [
    {
      "name": "metricbeat",
      "documents": [
        {
          "target-index": "metricbeat",
          "source-file": "metricbeat-documents.json.bz2",
          "document-count": 1079600,
          "compressed-bytes": 97377230,
          "uncompressed-bytes": 1249705758
        }
      ]
    }
  ],
  "schedule": [
    {
      "operation": "delete-index"
    },
    {
      "operation": {
        "operation-type": "create-index",
        "settings": {{index_settings | default({}) | tojson}}
      }
    },
    {
      "operation": {
        "operation-type": "cluster-health",
        "index": "metricbeat",
        "request-params": {
          "wait_for_status": "{{cluster_health | default('green')}}",
          "wait_for_no_relocating_shards": "true"
        },
        "retry-until-success": true
      }
    },
    {
      "operation": {
        "operation-type": "bulk",
        "bulk-size": {{bulk_size | default(5000)}},
        "ingest-percentage": {{ingest_percentage | default(100)}}
      },
      "clients": {{bulk_indexing_clients | default(8)}}
    }
  ]
}
#####修改后
{% import "rally.helpers" as rally with context %}
{
  "version": 2,
  "description": "Tracker-generated track for acme",
  "indices": [
    {
      "name": "metricbeat",
      "body": "metricbeat.json"
    }
  ],
  "corpora": [
    {
      "name": "metricbeat",
      "documents": [
        {
          "target-index": "metricbeat",
          "source-file": "metricbeat-documents.json.bz2",
          "document-count": 1079600,
          "compressed-bytes": 97377230,
          "uncompressed-bytes": 1249705758
        }
      ]
    }
  ],
  "challenges": [   #####此处添加
    {{ rally.collect(parts="challenges/*.json") }}
  ]
}
在/usr/local/esrally/tracks/acme路径下添加 challenges 路径,在其中新建query-dsl.json。
{
  "name": "query-dsl",
  "default": false,
  "schedule": [{
    "operation": {
      "name": "query-dsl",
      "operation-type": "search",
      "body": {
        "query": {
          "term": {
            "meta.cloud.instance_id": {
              "value": "1983702708814995873"
      }
    }
  }
   }
 },
 "warmup-time-period": 60,
    "time-period": 120,
    "target-throughput": 450,
    "clients": 5
  }]
}
将原来的 operations 迁移到default.json,设置 "default": true 使其成为默认的 challenges。
{
 "name": "default",
 "default": true,
 "schedule": [
    {
      "operation": "delete-index"
    },
    {
      "operation": {
        "operation-type": "create-index",
        "settings": {{index_settings | default({}) | tojson}}
      }
    },
    {
      "operation": {
        "operation-type": "cluster-health",
        "index": "metricbeat",
        "request-params": {
          "wait_for_status": "{{cluster_health | default('green')}}",
          "wait_for_no_relocating_shards": "true"
        },
        "retry-until-success": true
      }
    },
    {
      "operation": {
        "operation-type": "bulk",
        "bulk-size": {{bulk_size | default(5000)}},
        "ingest-percentage": {{ingest_percentage | default(100)}}
      },
      "clients": {{bulk_indexing_clients | default(8)}}
    }
 ]
}
修改索引 metricbeat 的分片数,即修改 metricbeat.json 文件中分片参数
"number_of_shards": "12"
重建索引
esrally race --track-path=/usr/local/esrally/tracks/acme --pipeline=benchmark-only --target-hosts=127.0.0.1:9200 --client-options="use_ssl:false,verify_certs:false,basic_auth_user:'elastic',basic_auth_password:'passwd'"
测试自定义查询:
esrally race --track-path=/usr/local/esrally/tracks/acme --challenge=query-dsl --pipeline=benchmark-only --target-hosts=127.0.0.1:9200 --client-options="use_ssl:false,verify_certs:false,basic_auth_user:'elastic',basic_auth_password:'passwd'" --report-file=/usr/local/esrally/report/20220128-5-10k.csv
使用 --report-file 定义测试结果输出文件。
4. 总结
在使用 track进行测试内容定义的时候,如果仅仅是对查询内容的qps测试,则不需要create-track这个命令项创建track,直接创建track.json文件来减少测试的时间和存储成本。面对比较复杂的测试场景,比如有多次 bulk和search的流程,建议定义不同的challenges进行区分。在实际测试(16c32g的虚机)中, esrally单 client 的 bulk 写入性能不到2w docs/s,如果需增加压力则需要加 client。rally 的报告中, latency减去service_time即为 rally 等待 Elasticsearch 的响应时间。
参考文档
rally 详解: https://elasticsearch.cn/article/275 部署参考文档: https://cloud.tencent.com/developer/article/1892344 压测结果指标: https://esrally.readthedocs.io/en/stable/metrics.html 测试数据源地址: http://benchmarks.elasticsearch.org.s3.amazonaws.com/
作者介绍
作者:金多安,Elastic 认证工程师、Elastic 中文社区日报编辑、运维工程师。
审稿人:铭毅天下,Elastic 认证工程师,Elastic 中国合作培训讲师,阿里云 MVP,Elastic Stack 技术博文全网累计阅读量 1000万+。
说明

上个月,死磕 Elasticsearch 知识星球搞了:“群智涌现”杯输出倒逼输入——Elastic干货输出活动。
后续会不定期逐步推出系列文章,目的:以文会友,“输出倒逼输入”。
推荐
更短时间更快习得更多干货!
已带领88位球友通过 Elastic 官方认证!