基于 Flickity 在 Vue 中实现轮播图组件并设置简单的博客布局
一、准备工作
除了自己纯手工从头开始编写之外,还可以基于丰富的第三方 JavaScript 插件更快捷地编写 Vue 组件,这里学院君以 JavaScript 轮播图插件 Flickity 为例给大家演示下如何在 Vue 中集成它来实现轮播图组件:

开始之前现在本地通过 NPM 安装 flickity 依赖:
npm install flickity --save
二、基于 Flickity 编写轮播图组件
然后在 resources/js/components 目录下新建一个 carousel 子目录来存放轮播图组件,这里我们新建一个 Flickity.vue,并初始化代码如下:
<style src="flickity/dist/flickity.css">
</style>

<template>
<div>
    <slot></slot>
</div>
</template>

<script>
import Flickity from 'flickity';

export default {
    props: {
        wrapAround: {default: true},
        autoplay: {default: false}
    },
    mounted() {
        new Flickity(this.$el, {
            wrapAround: this.wrapAround,
            autoplay: this.autoplay
        });
    }
}
</script>
我们只需要参照官方示例代码将其转化为对应的 Vue 组件实现即可:
首先需要引入 Flickity 插件依赖,然后在 Vue 组件 mounted 钩子函数中将组件根元素挂载为轮播图容器(通过 this.$el 实现),具体的轮播图片通过插槽从父级作用域传递进来。
再就是一些轮播图的配置选项,具体含义参照官方文档了解即可。这里我们通过 props 属性允许父级作用域自定义 wrapAround 和 autoplay 配置项。
最后不要忘了在 style 元素上引入 Flickity 的 CSS 样式代码。
非常简单。
三、在视图模板中引入组件
将上述 Flickity 组件注册到 Vue 实例中:
Vue.component('carousel', require('./components/carousel/Flickity').default);
接下来就可以在 Blade 视图模板中渲染这个组件了,我们在 resources/views 目录下新建一个 carousel.blade.php 视图文件进行测试:
@extends('layouts.app')

@section('content')
    <div class="container">
        <carousel>
            <img src="/storage/carousel/xueyuanjun-slogon-big.jpg" alt="Laravel 全栈开发学习平台">
            <img src="/storage/carousel/php-fullstack-880.jpg" alt="Laravel 全栈工程师">
            <img src="/storage/carousel/laravel-8-x-docs-880.jpg" alt="Laravel 8.x 中文文档">
            <img src="/storage/carousel/programmer-internal-skills-880.jpg" alt="程序员内容修炼系列">
            <img src="/storage/carousel/programmer-internal-skills-880.jpg" alt="程序员内容修炼系列">
        </carousel>
    </div>
@stop
这里引入的图片文件都是事先准备好的,存放在 storage/public/carousel 目录下,然后通过 php artisan storage:link 命令在项目根目录下的 public 中建立指向 storage/public 的软链接 storage,具体操作参考前面编写图片上传接口教程,如果你嫌这样做麻烦,也可以基于 PlaceIMG 之类的第三方图片服务应用获取用于测试的模拟图片:
<carousel>
    <img src="http://placeimg.com/640/480/any">
    <img src="http://placeimg.com/640/480/any">
    <img src="http://placeimg.com/640/480/any">
    <img src="http://placeimg.com/640/480/any">
    <img src="http://placeimg.com/640/480/any">
</carousel>
对应参数含义如下:
http://placeimg.com/图片宽度/图片高度/图片类型
你可以按需进行自定义设置。
四、轮播图组件渲染效果
在 routes/web.php 注册一个测试路由 /carousel:
Route::view('carousel', 'carousel');
就可以在浏览器中查看对应的轮播图渲染效果了:
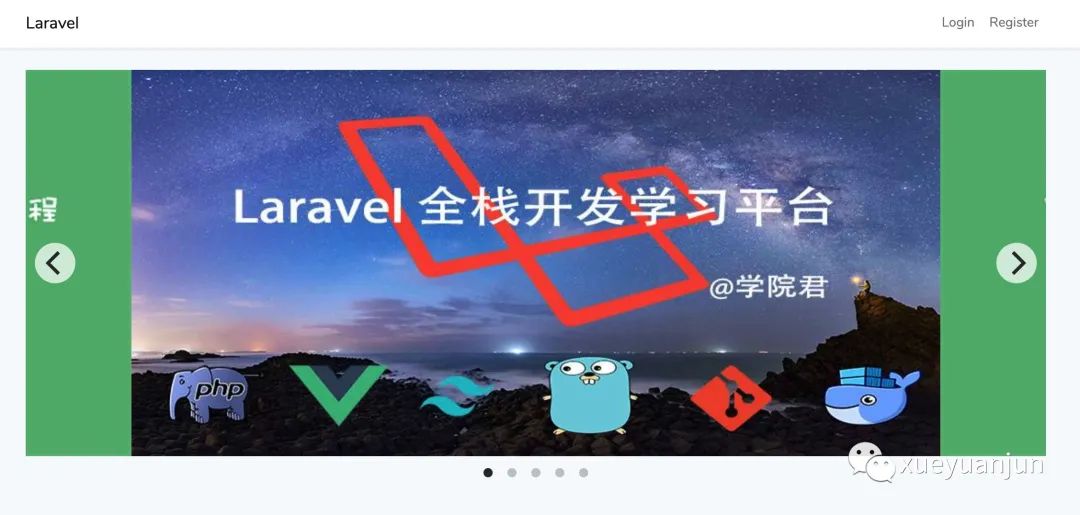
你可以通过属性绑定的方式设置 autoplay 和 wrapAround 的启用或禁用(通过 Vue 数据绑定机制可以确保这两个属性是布尔类型):
<carousel :autoplay="true">
    ...
</carousel>
还可以为轮播图片设置跳转链接:
<carousel :autoplay="true">
    <a href="https://xueyuanjun.com">
        <img src="/storage/carousel/xueyuanjun-slogon-big.jpg" alt="Laravel 全栈开发学习平台">
    </a>
    <a href="https://xueyuanjun.com/books/php-fullstack">
        <img src="/storage/carousel/php-fullstack-880.jpg" alt="Laravel 全栈工程师">
    </a>
    <a href="https://xueyuanjun.com/books/laravel-docs-8">
        <img src="/storage/carousel/laravel-8-x-docs-880.jpg" alt="Laravel 8.x 中文文档">
    </a>
    <a href="https://xueyuanjun.com/books/golang-tutorials">
        <img src="/storage/carousel/golang-tutorials-880.jpg" alt="程序员内容修炼系列">
    </a>
    <a href="https://xueyuanjun.com/shelves/programmer-internal-skills-series">
        <img src="/storage/carousel/programmer-internal-skills-880.jpg" alt="程序员内容修炼系列">
    </a>
</carousel>
五、设置一个简单的博客布局
还可以在此基础上更进一步,设置一个简单的布局,比如一般的博客首页左侧显示轮播图,右侧边栏显示挂件,我们可以基于 Bootstrap 框架提供的栅栏布局快速实现这样的效果,将 carousel.blade.php 视图模板代码调整如下:
@extends('layouts.app')

@section('content')
    <div class="container">
        <div class="row">
            <div class="col-sm-8">
                <carousel :autoplay="true">
                    <a href="https://xueyuanjun.com">
                        <img src="/storage/carousel/xueyuanjun-slogon-big.jpg" alt="Laravel 全栈开发学习平台">
                    </a>
                    <a href="https://xueyuanjun.com/books/php-fullstack">
                        <img src="/storage/carousel/php-fullstack-880.jpg" alt="Laravel 全栈工程师">
                    </a>
                    <a href="https://xueyuanjun.com/books/laravel-docs-8">
                        <img src="/storage/carousel/laravel-8-x-docs-880.jpg" alt="Laravel 8.x 中文文档">
                    </a>
                    <a href="https://xueyuanjun.com/books/golang-tutorials">
                        <img src="/storage/carousel/golang-tutorials-880.jpg" alt="程序员内容修炼系列">
                    </a>
                    <a href="https://xueyuanjun.com/shelves/programmer-internal-skills-series">
                        <img src="/storage/carousel/programmer-internal-skills-880.jpg" alt="程序员内容修炼系列">
                    </a>
                </carousel>
            </div>
            <div class="col-sm-4">
                <div class="card">
                    <div class="card-header">
                        <h5>最新文章</h5>
                    </div>
                    <div class="card-body">
                        <div class="list-group">
                            <a href="#" class="list-group-item list-group-item-action">Cras justo odio</a>
                            <a href="#" class="list-group-item list-group-item-action">Dapibus ac facilisis in</a>
                            <a href="#" class="list-group-item list-group-item-action">Morbi leo risus</a>
                            <a href="#" class="list-group-item list-group-item-action">Porta ac consectetur ac</a>
                            <a href="#" class="list-group-item list-group-item-action">Vestibulum at eros</a>
                            <a href="{{ url('posts') }}" class="list-group-item list-group-item-action text-center active">
                                查看所有文章
                            </a>
                        </div>
                    </div>
                </div>
            </div>
        </div>
    </div>
@stop
然后就可以在浏览器看到对应的渲染效果了:
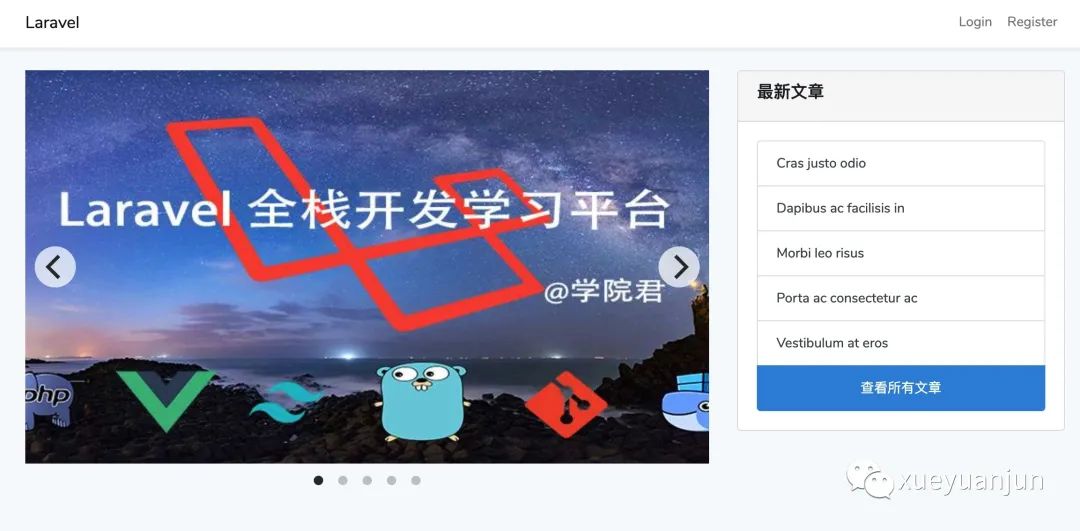
由于使用 col-sm- 前缀,所以该布局对移动端也是友好的:
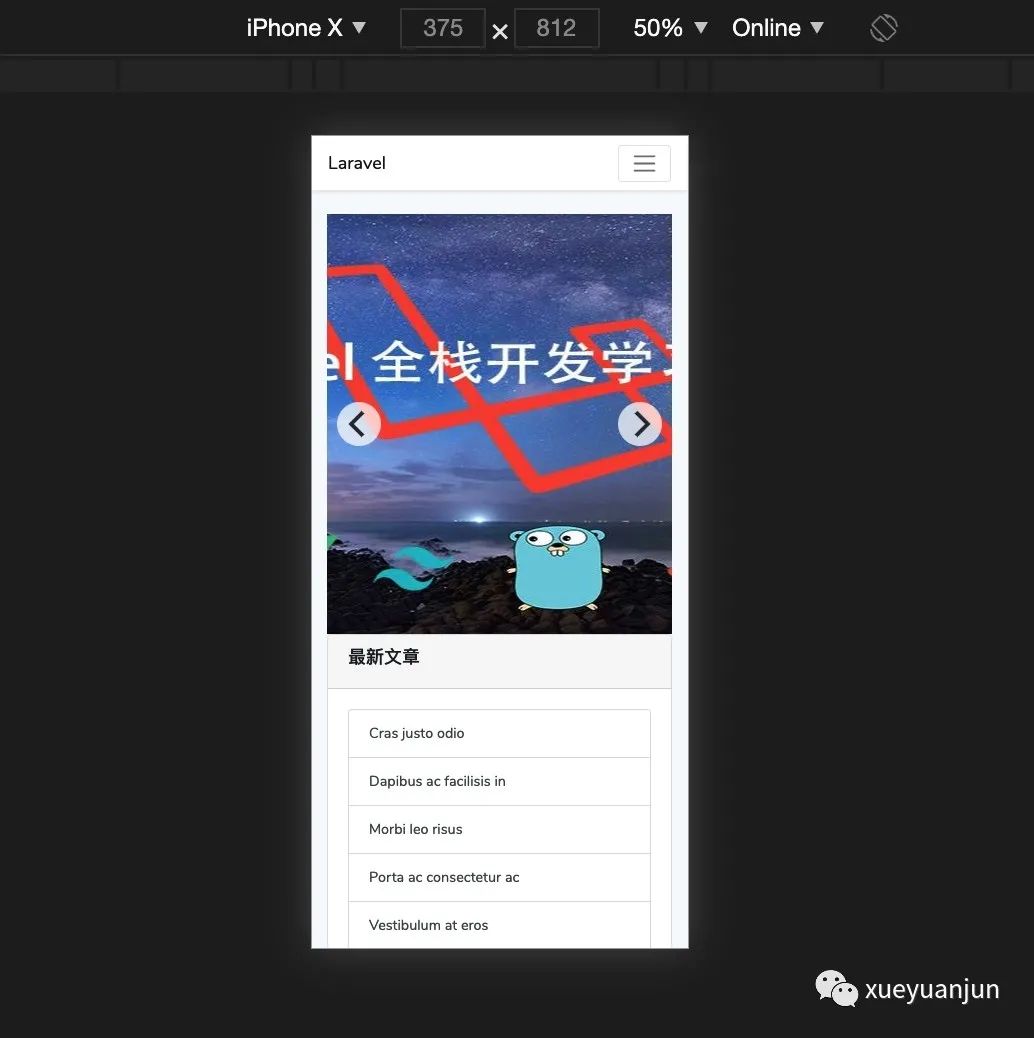
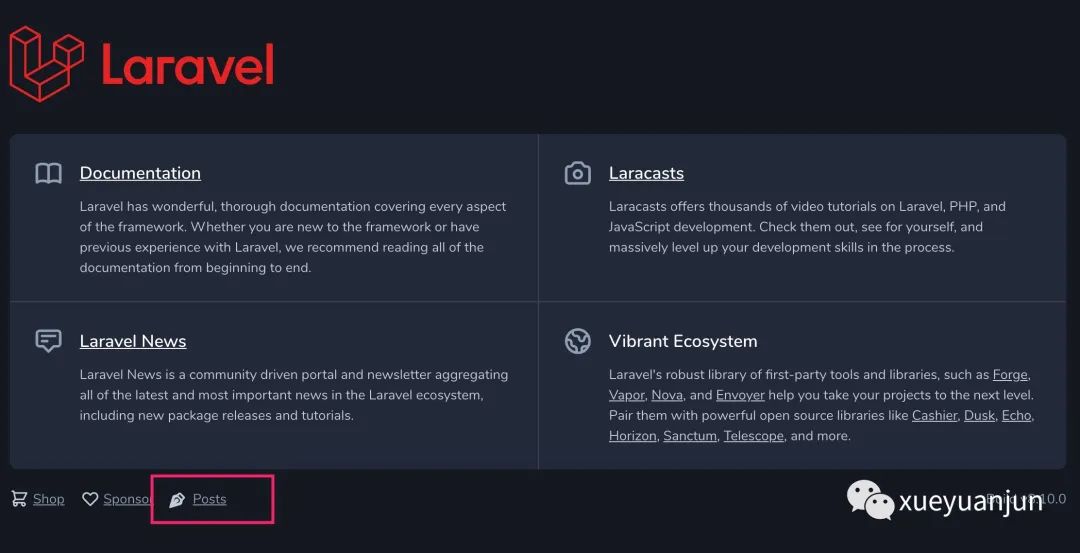
最后如果你觉得本地测试每次手动输入链接麻烦,可以在默认的首页下方添加一个入口链接:
<svg fill="none" stroke-linecap="round" stroke-linejoin="round" stroke-width="2" viewBox="0 0 20 20" stroke="currentColor"  class="ml-4 mt-2 w-5 h-5 text-gray-400" xmlns="http://www.w3.org/2000/svg">
    <path fill-rule="evenodd" d="M10.646.646a.5.5 0 0 1 .708 0l4 4a.5.5 0 0 1 0 .708l-1.902 1.902-.829 3.313a1.5 1.5 0 0 1-1.024 1.073L1.254 14.746 4.358 4.4A1.5 1.5 0 0 1 5.43 3.377l3.313-.828L10.646.646zm-1.8 2.908l-3.173.793a.5.5 0 0 0-.358.342l-2.57 8.565 8.567-2.57a.5.5 0 0 0 .34-.357l.794-3.174-3.6-3.6z"/>
    <path fill-rule="evenodd" d="M2.832 13.228L8 9a1 1 0 1 0-1-1l-4.228 5.168-.026.086.086-.026z"/>
</svg>

<a href="{{ url('carousel') }}" class="ml-1 underline">
    Posts
</a>
这样就可以在首页点击 Posts 链接进入轮播图页面了,通过轮播图页面又可以键入文章列表页,整个流程就可以串起来了:
到这里,我们的 Vue 组件实战部分就告一段落了,希望可以借此帮助你快速入门 Vue 组件开发,接下来,我们将进入基于 Laravel + Vue 开发单页面应用(SPA)的环节。
本系列教程首发在Laravel学院(laravelacademy.org),你可以点击页面左下角阅读原文链接查看最新更新的教程。
