
C# 一个基于.NET Core3.1的开源项目帮你彻底搞懂WPF框架Prism
--概述
这个项目演示了如何在WPF中使用各种Prism功能的示例。如果您刚刚开始使用Prism,建议您从第一个示例开始,按顺序从列表中开始。每个示例都基于前一个示例的概念。
此项目平台框架:.NET Core 3.1
Prism版本:8.0.0.1909
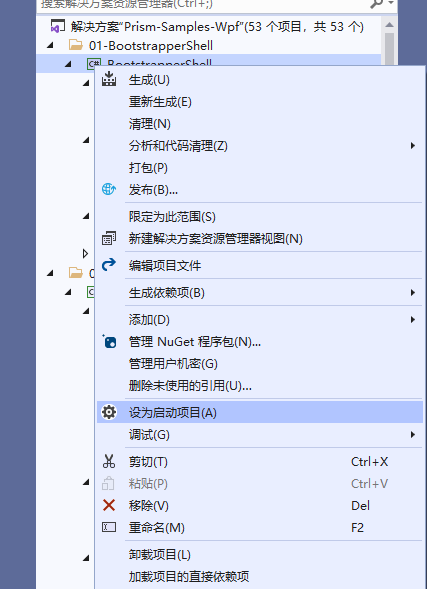
提示:这些项目都在同一解决方法下,需要依次打开运行,可以选中项目-》右键-》设置启动项目,然后运行:
目录介绍
| Topic | 描述 |
| Bootstrapper and the Shell | 创建一个基本的引导程序和shell |
| Regions | 创建一个区域 |
| Custom Region Adapter | 为StackPanel创建自定义区域适配器 |
| View Discovery | 使用视图发现自动注入视图 |
| View Injection | 使用视图注入手动添加和删除视图 |
| View Activation/Deactivation | 手动激活和停用视图 |
| Modules with App.config | 使用应用加载模块。配置文件 |
| Modules with Code | 使用代码加载模块 |
| Modules with Directory | 从目录加载模块 |
| Modules loaded manually | 使用IModuleManager手动加载模块 |
| ViewModelLocator | 使用ViewModelLocator |
| ViewModelLocator - Change Convention | 更改ViewModelLocator命名约定 |
| ViewModelLocator - Custom Registrations | 为特定视图手动注册ViewModels |
| DelegateCommand | 使用DelegateCommand和DelegateCommand |
| CompositeCommands | 了解如何使用CompositeCommands作为单个命令调用多个命令 |
| IActiveAware Commands | 使您的命令IActiveAware仅调用激活的命令 |
| Event Aggregator | 使用IEventAggregator |
| Event Aggregator - Filter Events | 订阅事件时筛选事件 |
| RegionContext | 使用RegionContext将数据传递到嵌套区域 |
| Region Navigation | 请参见如何实现基本区域导航 |
| Navigation Callback | 导航完成后获取通知 |
| Navigation Participation | 通过INavigationAware了解视图和视图模型导航参与 |
| Navigate to existing Views | 导航期间控制视图实例 |
| Passing Parameters | 将参数从视图/视图模型传递到另一个视图/视图模型 |
| Confirm/cancel Navigation | 使用IConfirmNavigationReqest界面确认或取消导航 |
| Controlling View lifetime | 使用IRegionMemberLifetime自动从内存中删除视图 |
| Navigation Journal | 了解如何使用导航日志 |
部分项目演示和介绍
① BootstrapperShell启动界面:
这个主要演示Prism框架搭建的用法:
step1:在nuget上引用Prsim.Unity

step2:修改App.xaml:设置引导程序
<Application x:Class="BootstrapperShell.App"xmlns="http://schemas.microsoft.com/winfx/2006/xaml/presentation"xmlns:x="http://schemas.microsoft.com/winfx/2006/xaml"xmlns:local="clr-namespace:BootstrapperShell"><Application.Resources>Application.Resources>Application>
public partial class App : Application{protected override void OnStartup(StartupEventArgs e){base.OnStartup(e);var bootstrapper = new Bootstrapper();bootstrapper.Run();}}
step3:在引导程序中设置启动项目:
using Unity;using Prism.Unity;using BootstrapperShell.Views;using System.Windows;using Prism.Ioc;namespace BootstrapperShell{class Bootstrapper : PrismBootstrapper{protected override DependencyObject CreateShell(){return Container.Resolve(); }protected override void RegisterTypes(IContainerRegistry containerRegistry){}}}
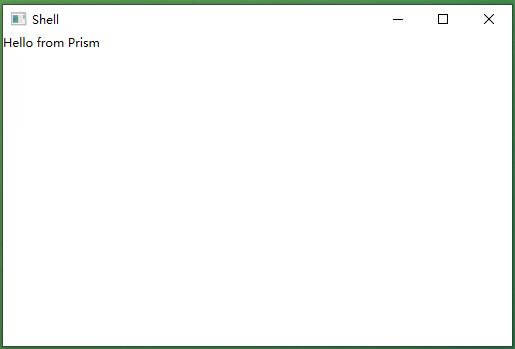
step4:在MainWindow.xaml中显示个字符串
<Window x:Class="BootstrapperShell.Views.MainWindow"xmlns="http://schemas.microsoft.com/winfx/2006/xaml/presentation"xmlns:x="http://schemas.microsoft.com/winfx/2006/xaml"Title="Shell" Height="350" Width="525"><Grid><ContentControl Content="Hello from Prism" />Grid>Window>
②ViewInjection:视图注册
MainWindow.xaml:通过ContentControl 关联视图
<Window x:Class="ViewInjection.Views.MainWindow"xmlns="http://schemas.microsoft.com/winfx/2006/xaml/presentation"xmlns:x="http://schemas.microsoft.com/winfx/2006/xaml"xmlns:prism="http://prismlibrary.com/"Title="Shell" Height="350" Width="525"><DockPanel LastChildFill="True"><Button DockPanel.Dock="Top" Click="Button_Click">Add ViewButton><ContentControl prism:RegionManager.RegionName="ContentRegion" />DockPanel>Window>
MainWindow.xaml.cs:鼠标点击后通过IRegion 接口注册视图
public partial class MainWindow : Window{IContainerExtension _container;IRegionManager _regionManager;public MainWindow(IContainerExtension container, IRegionManager regionManager){InitializeComponent();_container = container;_regionManager = regionManager;}private void Button_Click(object sender, RoutedEventArgs e){var view = _container.Resolve(); IRegion region = _regionManager.Regions["ContentRegion"];region.Add(view);}}
③ActivationDeactivation:视图激活和注销
MainWindow.xaml.cs:这里在窗体构造函数中注入了一个容器扩展接口和一个regin管理器接口,分别用来装载视图和注册regin,窗体的激活和去激活分别通过regions的Activate和Deactivate方法实现
public partial class MainWindow : Window{IContainerExtension _container;IRegionManager _regionManager;IRegion _region;ViewA _viewA;ViewB _viewB;public MainWindow(IContainerExtension container, IRegionManager regionManager){InitializeComponent();_container = container;_regionManager = regionManager;this.Loaded += MainWindow_Loaded;}private void MainWindow_Loaded(object sender, RoutedEventArgs e){_viewA = _container.Resolve(); _viewB = _container.Resolve(); _region = _regionManager.Regions["ContentRegion"];_region.Add(_viewA);_region.Add(_viewB);}private void Button_Click(object sender, RoutedEventArgs e){//activate view a_region.Activate(_viewA);}private void Button_Click_1(object sender, RoutedEventArgs e){//deactivate view a_region.Deactivate(_viewA);}private void Button_Click_2(object sender, RoutedEventArgs e){//activate view b_region.Activate(_viewB);}private void Button_Click_3(object sender, RoutedEventArgs e){//deactivate view b_region.Deactivate(_viewB);}}
④UsingEventAggregator:事件发布订阅
事件类定义:
public class MessageSentEvent : PubSubEvent<string>{}
注册两个组件:ModuleA和ModuleB
protected override void ConfigureModuleCatalog(IModuleCatalog moduleCatalog){moduleCatalog.AddModule(); moduleCatalog.AddModule(); }
ModuleAModule 中注册视图MessageView
public class ModuleAModule : IModule{public void OnInitialized(IContainerProvider containerProvider){var regionManager = containerProvider.Resolve(); regionManager.RegisterViewWithRegion("LeftRegion", typeof(MessageView));}public void RegisterTypes(IContainerRegistry containerRegistry){}}
MessageView.xaml:视图中给button俺妞妞绑定命令
<UserControl x:Class="ModuleA.Views.MessageView"xmlns="http://schemas.microsoft.com/winfx/2006/xaml/presentation"xmlns:x="http://schemas.microsoft.com/winfx/2006/xaml"xmlns:prism="http://prismlibrary.com/"prism:ViewModelLocator.AutoWireViewModel="True" Padding="25"><StackPanel><TextBox Text="{Binding Message}" Margin="5"/><Button Command="{Binding SendMessageCommand}" Content="Send Message" Margin="5"/>StackPanel>UserControl>
MessageViewModel.cs:在vm中把界面绑定的命令委托给SendMessage,然后在方法SendMessage中发布消息:
using Prism.Commands;using Prism.Events;using Prism.Mvvm;using UsingEventAggregator.Core;namespace ModuleA.ViewModels{public class MessageViewModel : BindableBase{IEventAggregator _ea;private string _message = "Message to Send";public string Message{get { return _message; }set { SetProperty(ref _message, value); }}public DelegateCommand SendMessageCommand { get; private set; }public MessageViewModel(IEventAggregator ea){_ea = ea;SendMessageCommand = new DelegateCommand(SendMessage);}private void SendMessage(){_ea.GetEvent().Publish(Message); }}}
在MessageListViewModel 中接收并显示接收到的消息:
public class MessageListViewModel : BindableBase{IEventAggregator _ea;private ObservableCollection<string> _messages;public ObservableCollection<string> Messages{get { return _messages; }set { SetProperty(ref _messages, value); }}public MessageListViewModel(IEventAggregator ea){_ea = ea;Messages = new ObservableCollection<string>();_ea.GetEvent().Subscribe(MessageReceived); }private void MessageReceived(string message){Messages.Add(message);}}
以上就是这个开源项目比较经典的几个入门实例,其它就不展开讲解了,有兴趣的可以下载源码自己阅读学习。
源码下载
github访问速度较慢,所以我下载了一份放到的百度网盘
百度网盘链接:https://pan.baidu.com/s/10Gyks2w-R4B_3z9Jj5mRcA
提取码:0000
---------------------------------------------------------------------
开源项目链接:https://github.com/PrismLibrary/Prism-Samples-Wpf