
Java代码生成
在很多开源的后台管理系统当中都有代码生成的工具,帮助开发者完成通用代码的生成,比如生成 Controller、Service、Dao 和 XML 文件等,能够帮助开发者生成通用的CRUD 代码。还能帮助开发者生成统一的后台列表页面和表单页面,以方便开发者可以快速的完成自己业务的开发,而忽略那些重复而又繁琐的工作。其实在开发框架中也有一些简单的代码生成的工具,比如接下来要介绍的 mybatis-plus 提供的代码生成。
MyBatis-Plus 代码生成器的介绍
引用 MyBatis-Plus 官网的说明,如下:
AutoGenerator 是 MyBatis-Plus 的代码生成器,通过 AutoGenerator 可以快速生成 Entity、Mapper、Mapper XML、Service、Controller 等各个模块的代码,极大的提升了开发效率。
https://mp.baomidou.com/guide/generator.html#使用教程
引入依赖
MyBatis-Plus 官网有较为详细的说明,不过对于刚开始接触的话完全可以通过拿来现成的代码使用。
使用 SpringBoot 来测试一下 Mybatis-Plus 代码生成的功能。
SpringBoot 项目中使用代码生成器需要引入一些依赖,依赖如下:
mysql mysql-connector-java runtime org.projectlombok lombok true com.baomidou mybatis-plus-boot-starter 3.0.5 org.apache.velocity velocity-engine-core 2.0 com.baomidou mybatis-plus-generator 3.4.1
生成代码
引入上面的依赖以后,下面的代码其实进行简单的修改就可以完成自己的代码生成,非常的方便。
public class CodeGenerator {public static void main(String[] args) {// 构建一个代码生成对象AutoGenerator mpg = new AutoGenerator();// 1. 全局配置GlobalConfig gc = new GlobalConfig();String separator = File.separator;gc.setOutputDir("/Users/xxx/Documents/demo/src/main/java");gc.setAuthor("码农UP2U");gc.setOpen(false);//打开目录gc.setFileOverride(true);//是否覆盖gc.setServiceName("%sService");//去Service的I前缀。gc.setIdType(IdType.ID_WORKER);gc.setDateType(DateType.ONLY_DATE);gc.setSwagger2(false);mpg.setGlobalConfig(gc);DataSourceConfig dsc = new DataSourceConfig();dsc.setUrl("jdbc:mysql://ip:port/data?useSSL=false&useUnicode=true&characterEncoding=utf-8&serverTimezone=Asia/Shanghai");dsc.setDriverName("com.mysql.cj.jdbc.Driver");dsc.setUsername("root");dsc.setPassword("password");dsc.setDbType(DbType.MYSQL);mpg.setDataSource(dsc);// 包设置PackageConfig pc = new PackageConfig();pc.setParent("com.example.demo");pc.setEntity("entity");pc.setMapper("mapper");pc.setController("controller");mpg.setPackageInfo(pc);// 策略配置StrategyConfig strategy = new StrategyConfig();strategy.setInclude("ums_member");//表名strategy.setNaming(NamingStrategy.underline_to_camel);// 下划线转他驼峰strategy.setColumnNaming(NamingStrategy.underline_to_camel);// 列 下划线转脱发strategy.setEntityLombokModel(true);//lombok 开启strategy.setLogicDeleteFieldName("deleted");// 自动填充TableFill gmtCreate = new TableFill("gmt_create", FieldFill.INSERT);TableFill gmtModify = new TableFill("gmt_modified", FieldFill.INSERT_UPDATE);ArrayListtableFills = new ArrayList<>(); tableFills.add(gmtCreate);tableFills.add(gmtModify);strategy.setTableFillList(tableFills);// restcontrollerstrategy.setRestControllerStyle(true);strategy.setControllerMappingHyphenStyle(true);// localhost:xxx/hello_2mpg.setStrategy(strategy);mpg.execute();}}
上面的代码中,设置生成文件的路径,设置数据库的连接,设置包名,设置表相关的内容等。代码简单的易懂,就不做过多说明。
生成结果
运行上面的代码,来看一下生成的内容,如下图:
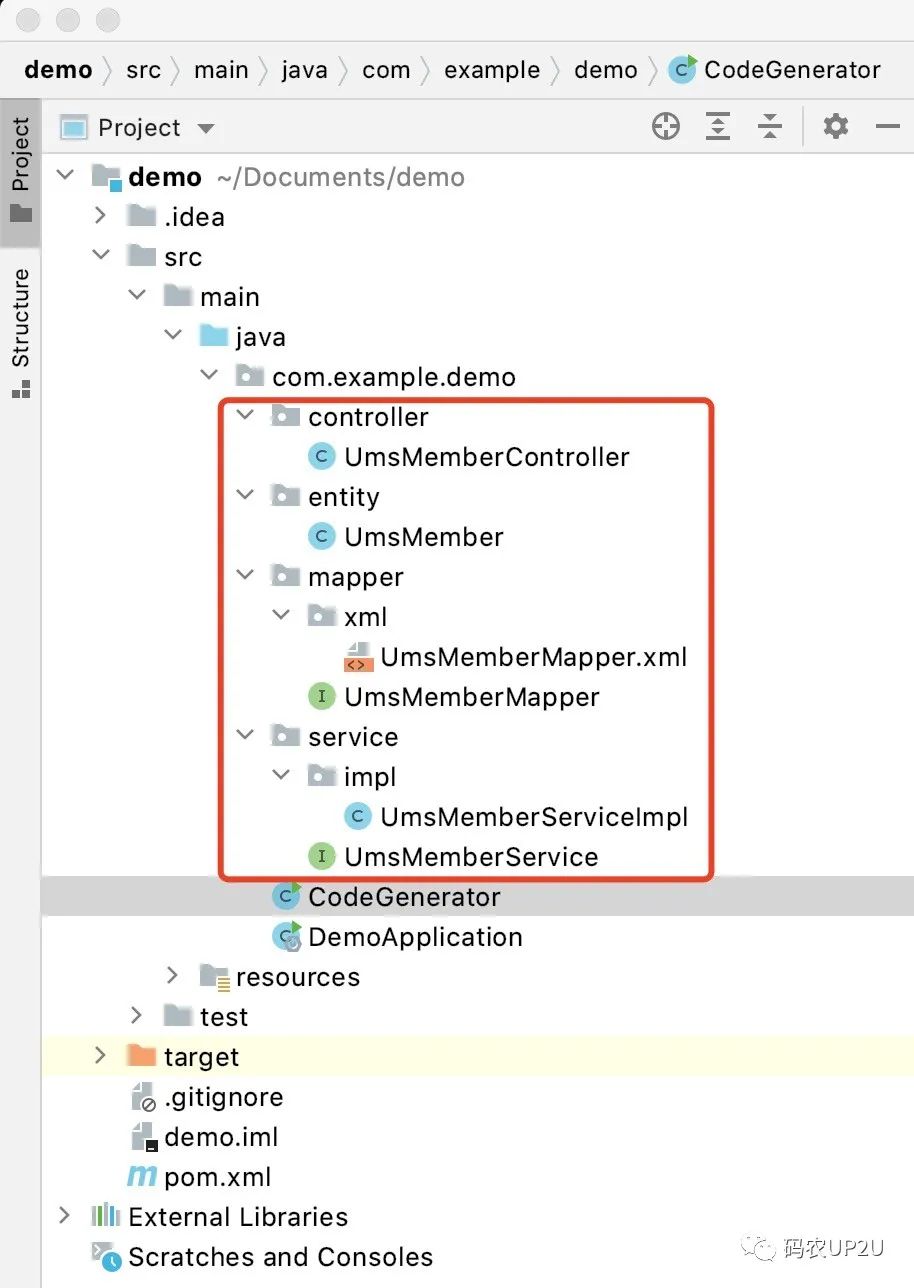
从图中可以看出,生成的内容有 controller、entity、dao 和 service。基本上省去了我们一些手动需要完成的工作,还是比较方便的。代码有一些部分是通用的,一部分是可能是自定义的,可以将整个代码进行封装,使得使用更加的方便的。