图解 | Elasticsearch 获取两个索引数据不同之处的四种方案
1、实战项目问题
......我有2个index,假设其中index1中数据是 id1,id2,id3,index2 中是 id1,id3。我的目的是能找出缺失的 id2 的数据,并且后续进去的 id4,id5 如果有缺失的也能发现。——问题来源:死磕 Elasticsearch 知识星球
2、问题解读
假定有两个索引 index1、index2,这两个索引中有大量相同数据。
这个问题的本质是实现类似:linux 下的 diff 命令的操作,找出一个索引中存在而在另外一个索引不存在的数据。
3、方案探讨
Elasticsearch 没有直接实现找索引数据差异的类 diff 命令可用。
但,redis 中有 sdiff 命令可以一键搞定一个集合中有而另外一个集合中没有的数据。
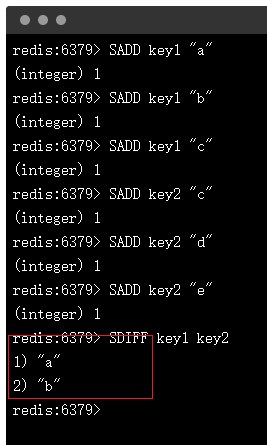
这就引申出方案一:借助 redis 实现。
那么问题来了,不用 redis, Elasticsearch 自身能否搞定呢?
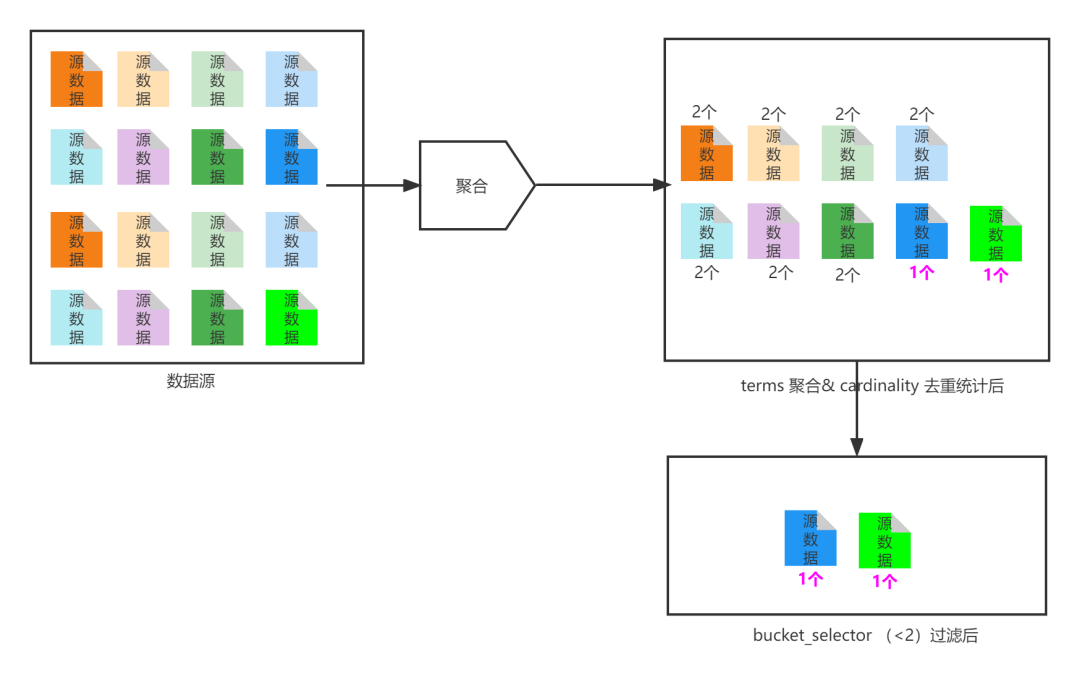
其实是可以搞定的。我们通过组合索引检索,然后对索引中公有相同主键字段进行聚合,然后进行去重统计,找出计数 < 2 的就是我们想要的 id 。因为:如果两个索引都有数据,势必聚合后计数 >= 2。此为方案二。
还有,我们可以借助 Elasticsearch transform 实现,此为方案三。
类似问题是个业界通用问题,有没有开源实现方案呢?此为方案四。
4、方案实现
4.1 方案一:借助 redis sdiff 实现
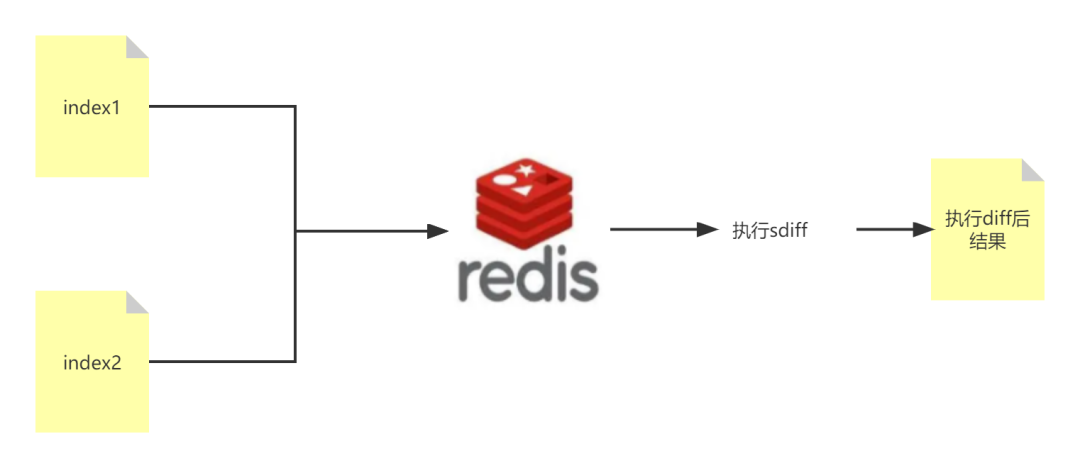
前提:Elasticsearch 索引数据中有类似 MySQL 主键的字段,能唯一标定一条记录。如果没有可以使用 _id 字段,但不建议使用 _id ,下文会说原因。
实施步骤如下:
步骤1:将 index1 (数据量多的,全量索引)的主键字段 uniq_1 导入 redis; 步骤2:将 index2 的主键字段 uniq_2 导入 redis; 步骤3:使用 sdiff 命令行返回结果就是期望不同 id 值。
4.2 方案二:借助 Elasticsearch 聚合实现
我们用 kibana 自带的索引数据仿真一把。
4.2.1 用已有索引实现,好理解,大家都可以复现。
POST _reindex
{
  "source": {
    "index": "kibana_sample_data_flights"
  },
  "dest": {
    "index": "kibana_sample_data_flights_ext"
  }
}

GET kibana_sample_data_flights/_count

共60个,用作不同的值区分用
POST kibana_sample_data_flights_ext/_search
{
  "query": {
    "bool": {
      "must": [
        {
          "term": {
            "OriginCountry.keyword": {
              "value": "US"
            }
          }
        },
        {
          "term": {
            "OriginWeather.keyword": {
              "value": "Rain"
            }
          }
        },
        {
          "term": {
            "DestWeather.keyword": {
              "value": "Rain"
            }
          }
        }
      ]
    }
  }
}

删除掉了60条记录  "deleted" : 60,
POST kibana_sample_data_flights_ext/_delete_by_query
{
  "query": {
    "bool": {
      "must": [
        {
          "term": {
            "OriginCountry.keyword": {
              "value": "US"
            }
          }
        },
        {
          "term": {
            "OriginWeather.keyword": {
              "value": "Rain"
            }
          }
        },
        {
          "term": {
            "DestWeather.keyword": {
              "value": "Rain"
            }
          }
        }
      ]
    }
  }
}
这样操作之后,_data_flights_ext 索引就比 _data_flights 索引少了 60 条数据。
如何实现聚合呢?
先全局设置修复可能的报错,设置如下:
PUT _cluster/settings
{
  "persistent": {
    "indices.id_field_data.enabled": true
  }
}
4.2.2 聚合去重实现 DSL
POST kibana_sample_data_flights,kibana_sample_data_flights_ext/_search
{
  "size": 0,
  "aggs": {
    "group_by_uid": {
      "terms": {
        "field": "_id",
        "size": 1000000
      },
      "aggs": {
        "count_indices": {
          "cardinality": {
            "field": "_index"
          }
        },
        "values_bucket_filter_by_index_count": {
          "bucket_selector": {
            "buckets_path": {
              "count": "count_indices"
            },
            "script": "params.count < 2"
          }
        }
      }
    }
  }
}
size 值设置的比较大,是因为提高聚合精度的原因,否则结果会不准确。
前面如果不设置的话,会报错如下:
"reason" : "Fielddata access on the _id field is disallowed, you can re-enable it by updating the dynamic cluster setting: indices.id_field_data.enabled"
也就是说 8.X 版本不推荐使用 id 作为聚合操作的字段,这也解释了前文让自己生成 uniq_id 的原因所在。
执行结果如下:
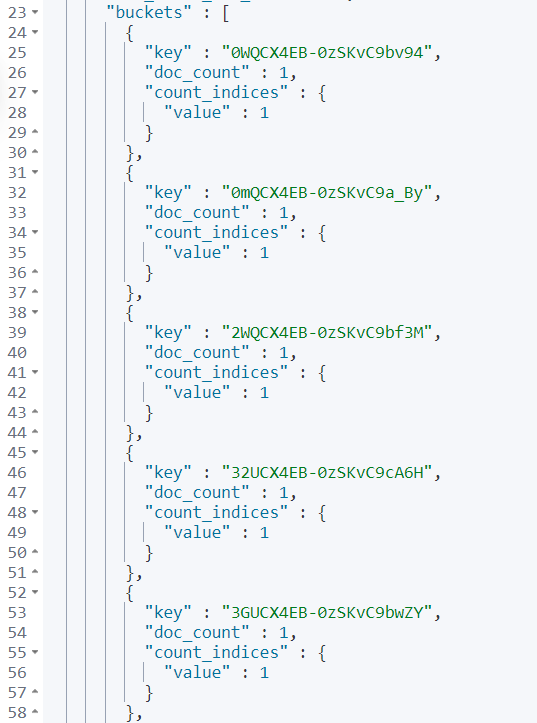
doc_count 为 1 的结果值,就是我们期望的结果。
如果上面聚合不好理解,简化版图解如下:
4.3 方案三:借助 Elasticsearch transform 实现
transform 咱们之前文章提及的少,这里简单说一下。
transform 含义如其英文释义一致“转换、改造”的意思。就是把已有索引“转换、改造”为汇总索引(summarized indices),方便我们做后续的分析操作。

transform 常见的 API 如下所示:
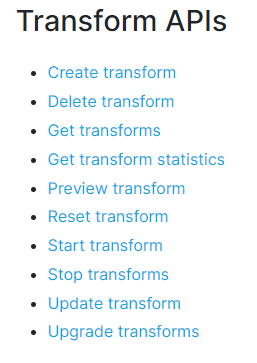
https://www.elastic.co/guide/en/elasticsearch/reference/current/transform-apis.html
步骤1:创建索引
其实这一步非必须,只不过我们后面使用了 _id 字段,不先创建索引、指定 mapping 的话会报错。
PUT compare
{
  "mappings": {
    "_meta": {
      "_transform": {
        "transform": "index_compare",
        "version": {
          "created": "8.2.2"
        },
        "creation_date_in_millis": 1656279927899
      },
      "created_by": "transform"
    },
    "properties": {
      "unique-id": {
        "type": "keyword"
      }
    }
  },
  "settings": {
    "index": {
      "number_of_shards": "1",
      "auto_expand_replicas": "0-1"
    }
  },
  "aliases": {}
}
compare 就是我们目标生成的:汇总索引 。
细心的读者会发现,这个 compare 像是系统生成的索引。没错的,这是借助:POST _transform/_preview ...生成然后人工做部分修改后的索引。
步骤2:创建 transform
PUT _transform/index_compare
{
  "source": {
    "index": [
      "kibana_sample_data_flights",
      "kibana_sample_data_flights_ext"
    ],
    "query": {
      "match_all": {}
    }
  },
  "dest": {
    "index": "compare"
  },
  "pivot": {
    "group_by": {
      "unique-id": {
        "terms": {
          "field": "_id"
        }
      }
    },
    "aggregations": {
      "compare": {
        "scripted_metric": {
          "map_script": "state.doc = new HashMap(params['_source'])",
          "combine_script": "return state",
          "reduce_script": """
            if (states.size() != 2) {
              return "count_mismatch"
            }
            if (states.get(0).equals(states.get(1))) {
              return "match"
            } else {
              return "mismatch"
            }
            """
        }
      }
    }
  }
}
source:指定了两个源索引,便于后续的 compare 操作。
pivot:中枢、枢纽的意思,所有的核心操作都放到这里面。执行的核心:先以_id 做了聚合操作,然后针对聚合后的结果做了处理;聚合结果不为2(必然为1),就是我们期望的结果,返回:count_mismatch。其他,若相等返回:match。
步骤3:执行 transform
POST _transform/index_compare/_start
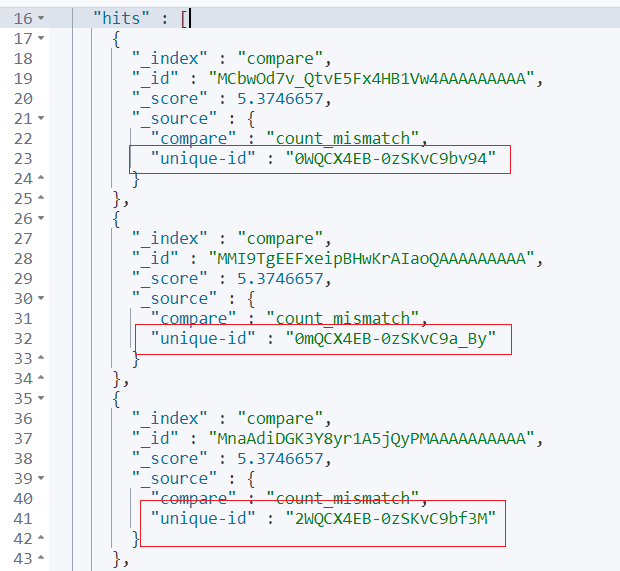
步骤4:基于 transform 生成的目标索引,执行特定检索。
POST compare/_search
{
  "track_total_hits": true,
  "size": 1000,
  "query": {
    "term": {
      "compare.keyword": {
        "value": "count_mismatch"
      }
    }
  }
}
返回结果就是我们期望的不同值,截图如下所示:
4.4 方案四:第三方开源实现
认知前提:只要我们认为是问题的点,极大可能“前人”早已经遇到过,更大可能“前人”早已经给出了解决方案甚至已经开源了解决方案。这是我从业10年+感触比较深的地方,一句话:“非必要,不重复造轮子”。
开源方案 1:https://github.com/Aconex/scrutineer/
可实现不同数据源,如:Elasticsearch VS Elasticsearch,Elasticsearch VS Solr 之间的索引数据比较。
开源方案 2:https://github.com/olivere/esdiff
可实现比较不同索引之间文档的差异。
实现参考如下:
$ ./esdiff -u=true -d=false 'http://localhost:19200/index01/tweet' 'http://localhost:29200/index01/_doc'
Unchanged       1
Updated 3       {*diff.Document}.Source["message"]:
        -: "Playing the piano is fun as well"
        +: "Playing the guitar is fun as well"

Created 4       {*diff.Document}:
        -: (*diff.Document)(nil)
        +: &diff.Document{ID: "4", Source: map[string]interface {}{"message": "Climbed that mountain", "user": "sandrae"}}
5、小结
只要思想不滑坡,方案总比问题多。
自己写程序能否实现呢?当然也是可以的。“index1是完整的可以作为参照物。以插入时间为主线(时间戳,应该每条记录都会有一条数据)拿 index1 的每个id数据在 index2 中进行检索,如果存在,ok没有问题;如果不存在,记录一下id,id 存入一个集合里面,这个 id 集合就是想要的 目标 id 集合。”
你的业务场景有没有遇到类似问题,如何解决的呢?
欢迎留言讨论。
推荐阅读
更短时间更快习得更多干货!
和全球 1600+ Elastic 爱好者一起精进!

