
App开发之网络层搭建
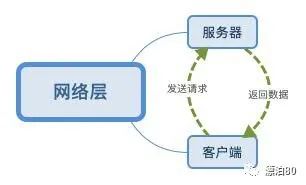
网络层是客户端与服务器通信的核心,本app开发大部分用到的是post请求。
服务器端
utils目录下封装rotesutil.js,主要是对请求与返回的二次封装
var ResJson = function(){this.code;this.data;this.errmsg ;}module.exports ={/*** 返回错误*/resError:function(res,err){console.error(err)var resjson = new ResJson();resjson.code = 1;resjson.errmsg = err;res.json(resjson)},/*** 返回成功*/resSuccess:function(res,data){var resjson = new ResJson();resjson.code = 0;resjson.data = data;console.log('---res succes--- data:',data)res.json(resjson)},/*** 打印*/logReq:function(req){// console.log(req.hostname)// console.log(req.ip)// console.log(req.protocol)// console.log(req.method)// console.log('url:'+req.originalUrl+' body:'+JSON.stringify(req.body));var log = '---hostname:'+req.hostname+' ip:'+req.ip;// console.log(log)log = '---'+req.method+'_'+req.originalUrl;console.log(log)var log = '---body:'+JSON.stringify(req.body);console.log(log)}}
以发送验证码为例,首先在router目录下创建user.js,并且在app.js中注册这个路由
user.js文件中部分代码
var ru = require(_roomdir + 'utils/routersutil');/*** 请求验证码*/router.post('/validate', function(req, res, next) {try {ru.logReq(req);var phone = req.body.phone;var country_code = req.body.country_code;var type = req.body.type;if (!phone || !type || !country_code) {ru.resError(res, '参数错误');} else if (!utils.checkPhone(phone)) {ru.resError(res, '请填写正确的手机号格式');} else {/***此处为验证码服务器逻辑,因为本篇介绍网络层,所以忽略***/ru.resSuccess(res, validate);}} catch (err) {ru.resError(res, err.message);}});
app.js文件中部分代码
var userRouter = require('./routes/user');app.use('/user', userRouter);
客户端
network目录下,对网络请求进行封装
chttp.dart部分代码,主要是封装post请求,定义协议
static String BASE_URL = 'http://xxx.xxx.x.x:xxxx/';static String USER_VALIDATE = 'user/validate';static post(String url, Function successCallback,{Map<String, dynamic> params,Function errorCallback,Function completeCallback}) async {StringBuffer sb = new StringBuffer("");if (params != null) {params.forEach((key, value) {sb.write("$key" + "=" + "$value" + "&");});}String paramStr = sb.toString();if (paramStr.length > 0) {paramStr = paramStr.substring(0, paramStr.length - 1);}LogUtil.e(url,tag: Tag.TAG_CHTTP);LogUtil.e(paramStr,tag: Tag.TAG_CHTTP);BaseOptions options = new BaseOptions(baseUrl: CHttp.BASE_URL,connectTimeout: 10000,receiveTimeout: 10000,contentType: Headers.jsonContentType,responseType: ResponseType.json);Dio dio = new Dio(options);try {Response response = await dio.post(url, data: params);LogUtil.v('---url :${url}', tag: Tag.TAG_CHTTP);LogUtil.v('---paramStr :${paramStr}', tag: Tag.TAG_CHTTP);LogUtil.v('---data :${response.data}', tag: Tag.TAG_CHTTP);if (response.data['code'] == 0) {if (successCallback != null) {successCallback(response.data['data']);}if (completeCallback != null) {completeCallback();}} else {if (errorCallback != null) {errorCallback(response.data['errmsg']);}if (completeCallback != null) {completeCallback();}}} catch (e) {LogUtil.e(url, tag: Tag.TAG_CHTTP);LogUtil.e(e, tag: Tag.TAG_CHTTP);if (errorCallback != null) {errorCallback(e.toString());}if (completeCallback != null) {completeCallback();}}}
params.dart对请求参数封装,创建基础Params,包含基础的信息,可以包括系统,手机型号,ip等等,我们只写了系统
///base paramsabstract class Params{String os;Params(){// LogUtil.e('---Params');if(Platform.isIOS){os = 'ios';}if(Platform.isAndroid){os = 'android';}if(Platform.isMacOS){os = 'macos';}if(Platform.isWindows){os = 'windows';}}Map<String, dynamic> toJson();}
验证码实例
///请求验证码class PUserVerifyCode extends Params{String country_code;String phone ;int type ;//1 注册 2 忘记 3 修改PUserVerifyCode(country_code,phone,type){this.country_code = country_code;this.phone = phone;this.type = type;}//dynamicMap<String, String> toJson() =>{'country_code':country_code,'phone': phone,'type':type.toString(),'os':os,};}
resdata.dart对返回数据的封装处理
同样可以有一个基础Res
abstract class Res{}
验证码返回数据实例
class ResUserVerifyCode extends Res{String phone;int type;String code;int time;int max ;ResUserVerifyCode.fromJson(Map<String, dynamic> json){phone = json['phone'];type = int.parse(json['type']);code = json['code'];time = json['time'];max = json['time'];}String toString() {var to_json = {'phone':phone,'type':type,'code':code,'time':time,'max':max,};String to_str = json.encode(to_json);return to_str;}}
客户端发送验证码实例
///请求验证码 verifycode_reqVerifyCode() {CHttp.post(CHttp.USER_VALIDATE,(data) {ResUserVerifyCode resUserVerifyCode =ResUserVerifyCode.fromJson(data);if (!mounted) {return;}/***客户端处理验证码逻辑***/},params: PUserVerifyCode(country_code, phoneController.text, 1).toJson(),errorCallback: (err) {ToastUtil.showToast(context, err);});}
至此,服务客户端的网络层搭建基本完成,然后就是针对不同功能制定协议,编写客户端服务器协议。
评论