
基于.NetCore开发博客项目 StarBlog - (8) 分类层级结构展示
系列文章
基于.NetCore开发博客项目 StarBlog - (1) 为什么需要自己写一个博客? 基于.NetCore开发博客项目 StarBlog - (2) 环境准备和创建项目 基于.NetCore开发博客项目 StarBlog - (3) 模型设计 基于.NetCore开发博客项目 StarBlog - (4) markdown博客批量导入 基于.NetCore开发博客项目 StarBlog - (5) 开始搭建Web项目 基于.NetCore开发博客项目 StarBlog - (6) 页面开发之博客文章列表 基于.NetCore开发博客项目 StarBlog - (7) 页面开发之文章详情页面 基于.NetCore开发博客项目 StarBlog - (8) 分类层级结构展示 ...
前言
前面 (6) 页面开发之博客文章列表 介绍了文章列表的开发,页面中左侧是分类列表,右侧是该分类下的文章,这个布局乍看还是不错的,不过考虑到本项目支持多级分类,但分类列表只会机械式的把所有分类都显示出来,无法体现分类的层级结构且占用了很大的页面纵向空间,因此本文将对分类列表进行改造,使之能够体现多级分类、节省页面空间。
关于树形结构组件,我找了一圈,适配bootstrap(基于jQuery)的组件很难找,大都是很老的,只找到了bootstrap-treeview这个稍微好用一点的,看了下GitHub项目主页,同样是好久没更新了,它适配的甚至是3.x版本的bootstrap,现在都已经2022年了,bootstrap都更新到5.x版本了,然而没找到更好的,凑合用吧~ (实在不行还能把它代码clone下来魔改)
安装
这个组件是比较老的
依赖bower,如果没有bower的话需要先安装
npm install -g bower
然后在StarBlog.Web目录下执行以下命令安装依赖
npm install bootstrap-treeview
因为我们的静态资源都在wwwroot下,所以npm安装的前端资源还需要通过gulp工具自动复制到wwwroot里,这一点在前面的文章中有介绍过,忘记的同学可以看一下前面这篇:(5) 开始搭建Web项目
编辑gulpfile.js文件,在const libs配置中增加一行
//使用 npm 下载的前端组件包
const libs = [
    // ...
    {name: "bootstrap-treeview", dist: "./node_modules/bootstrap-treeview/dist/**/*.*"},
];
然后执行gulp任务即可
gulp move
完成之后可以看到wwwroot/lib下已经多了一个bootstrap-treeview目录了
接下来我们就可以在页面中引用
用法
正式开始前,先来了解一下这个组件的用法
引入依赖
<script src="~/lib/jquery/dist/jquery.min.js">script>
<script src="~/lib/bootstrap-treeview/dist/bootstrap-treeview.min.js">script>
在网页里放一个容器
<div id="categories">
根据官方例子,使用js激活组件
const instance = $('#categories').treeview({
    data: collections,
});
collections格式如下
const collections = [
    {
        text: 'Parent 1',
        href: '#parent1',
        nodes: [
            {
                text: 'Child 1',
                href: '#child1',
                nodes: [
                    {
                        text: 'Grandchild 1',
                        href: '#grandchild1',
                    },
                    {
                        text: 'Grandchild 2',
                        href: '#grandchild2',
                    }
                ]
            },
            {
                text: 'Child 2',
                href: '#child2',
            }
        ]
    },
    {
        text: 'Parent 2',
        href: '#parent2',
    },
    {
        text: 'Parent 3',
        href: '#parent3',
    },
    {
        text: 'Parent 4',
        href: '#parent4',
    },
    {
        text: 'Parent 5',
        href: '#parent5',
    }
];
官网的默认效果
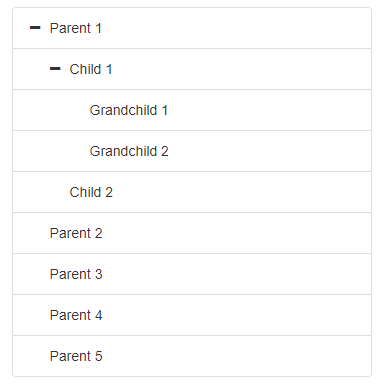
不过经过我的测试,官网这个例子在bootstrap5下是有些问题的,默认的图标都显示不出来。需要我们自定义一下,加上图标配置就行,用到的图标是我们之前的安装的FontAwesome Icons
const instance = $('#categories').treeview({
    data: collections,
    collapseIcon: "fa fa-caret-down",
    expandIcon: "fa fa-caret-right",
    emptyIcon: 'fa fa-circle-o',
});
处理分类数据
为了方便使用这个组件,我们需要在后端把分类层级包装成这个组件需要的形式。
首先定义一个节点类
public class CategoryNode {
    public string text { get; set; } = "";
    public string href { get; set; } = "";
    public List? nodes { get; set; }
}
然后在Services/CategoryyService.cs里新增一个方法,用来生成分类的树结构,为了代码编写方便,我直接用递归来实现。
public List? GetNodes(int parentId = 0) {
    var categories = _cRepo.Select
        .Where(a => a.ParentId == parentId).ToList();

    if (categories.Count == 0) return null;

    return categories.Select(category => new CategoryNode {
        text = category.Name,
        nodes = GetNodes(category.Id)
    }).ToList();
}
这样输出来的数据就是这样
[
    {
      "text": "Android开发",
      "href": "",
      "nodes": null
    },
    {
      "text": "AspNetCore",
      "href": "",
      "nodes": [
        {
          "text": "Asp-Net-Core学习笔记",
          "href": "",
          "nodes": null
        },
        {
          "text": "Asp-Net-Core开发笔记",
          "href": "",
          "nodes": null
        }
      ]
    }
]
哦差点忘了还得给每个节点加上href参数
写死是不可能写死的,ControllerBase实例默认带有一个IUrlHelper类型的Url属性,可以用其Link()方法实现地址路由解析。
不过我们这个方法是写在Service里,并没有ControllerBase实例,这时只能用依赖注入的方式,不过我在Stack Overflow上看到一个说法是,AspNetCore3.x之后,用LinkGenerator更好。
上代码,先注册服务
builder.Services.AddHttpContextAccessor();
然后依赖注入
private readonly IHttpContextAccessor _accessor;
private readonly LinkGenerator _generator;

public CategoryService(IHttpContextAccessor accessor, LinkGenerator generator) {
    _accessor = accessor;
    _generator = generator;
}
修改上面那个GetNodes方法,在CategoryNode初始化器里加上
href = _generator.GetUriByAction(
    _accessor.HttpContext!,
    nameof(BlogController.List),
    "Blog",
    new {categoryId = category.Id}
)
具体代码可以看GitHub:https://github.com/Deali-Axy/StarBlog/blob/master/StarBlog.Web/Services/CategoryService.cs
生成的链接形式是这样的:
{
    "text": "Android开发",
    "href": "http://localhost:5038/Blog/List?categoryId=2",
    "nodes": null
}
前端渲染
数据准备好了,这时遇到一个问题,数据是要放到js中处理的,那我要用fetch之类的异步请求来获取分类数据再显示树形分类吗?这样的好处是写起来比较直观,然而我们项目的博客网站是后端渲染,现在博客列表页面混入了异步请求,会导致割裂感,右边部分的文章列表服务端渲染出来在浏览器上展示了,左侧的分类还要异步去请求。
斟酌了一下,我决定这个分类也使用后端渲染,虽然有点反直觉,但根据bootstrap-treeview组件的文档,它可以使用json方式渲染分类,那我只需要在后端把分类数据序列化成json格式,然后在view中渲染到js代码中就行。
开始吧~
编辑StarBlog.Web/ViewModels/BlogListViewModel.cs文件,添加俩字段
public List CategoryNodes { get; set; }
// 将上面的分类层级数据转换成Json字符串
public string CategoryNodesJson => JsonSerializer.Serialize(
    CategoryNodes,
    new JsonSerializerOptions {Encoder = JavaScriptEncoder.UnsafeRelaxedJsonEscaping}
);
然后修改一下Controller,StarBlog.Web/Controllers/BlogController.cs,先依赖注入CategoryService
然后修改List方法
public IActionResult List(int categoryId = 0, int page = 1, int pageSize = 5) {
    var categories = _categoryRepo.Where(a => a.Visible)
        .IncludeMany(a => a.Posts).ToList();
    categories.Insert(0, new Category {Id = 0, Name = "All", Posts = _postRepo.Select.ToList()});

    return View(new BlogListViewModel {
        CurrentCategory = categoryId == 0 ? categories[0] : categories.First(a => a.Id == categoryId),
        CurrentCategoryId = categoryId,
        Categories = categories,
        // 增加这一行
        CategoryNodes = _categoryService.GetNodes(),
        Posts = _postService.GetPagedList(new PostQueryParameters {
            CategoryId = categoryId,
            Page = page,
            PageSize = pageSize,
            OnlyPublished = true
        })
    });
}
最后一步,修改View,StarBlog.Web/Views/Blog/List.cshtml,在底部加入js引用和一些js代码,treeview组件的配置我已经封装成initTreeView方法,可以直接使用。
@section bottom {
    <script src="~/lib/jquery/dist/jquery.min.js">script>
    <script src="~/lib/bootstrap-treeview/dist/bootstrap-treeview.min.js">script>
    <script src="~/js/blog-list.js">script>
    <script>
        const categories = '@Html.Raw(Model.CategoryNodesJson)'
        initTreeView(categories);
    script>
}
View的关键代码就这几行,完整代码可见:https://github.com/Deali-Axy/StarBlog/blob/master/StarBlog.Web/Views/Blog/List.cshtml
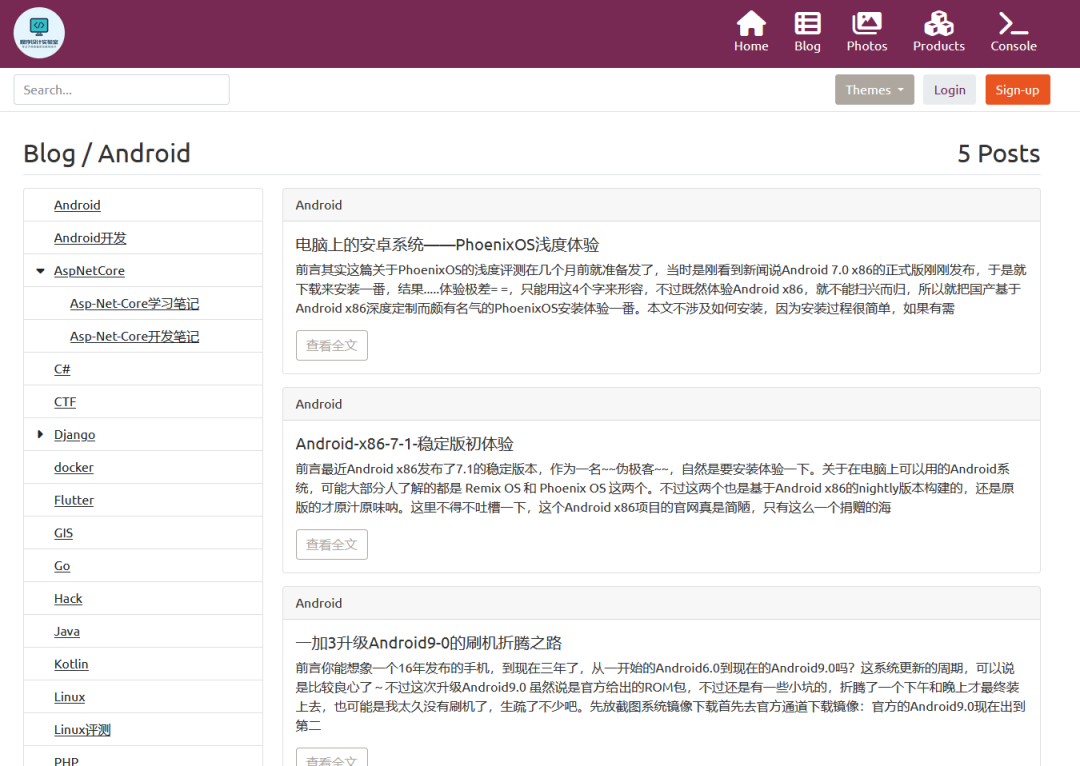
最终效果
完成之后的最终效果如下,算是支持了分类层级了,不过仍然不完美,存在几个问题:
不能高亮显示当前所选分类 没有实现分类文章数量显示(原来的版本是有的) 无法自定义 list-group-item样式,存在下划线不美观...
这几个问题留着后面优化吧~ 暂时先折腾到这里…
博客项目的开发已经基本完成,项目代码完全开源,有兴趣的朋友可以点个star~
博客后端+前台项目地址:https://github.com/Deali-Axy/StarBlog 管理后台前端项目地址:https://github.com/Deali-Axy/StarBlog-Admin
参考资料
Bower官网:https://bower.io/ bootstrap-treeview项目主页:https://github.com/jonmiles/bootstrap-treeview https://onelib.biz/blog/a/602b8b65906abf3c8f946fd7 https://stackoverflow.com/questions/37322076/injection-of-iurlhelper-in-asp-net-core