【手把手教程】维护机器学习代码的正确姿势
↓↓↓点击关注,回复资料,10个G的惊喜

setup.cfg — flake8 和 mypy 的配置。
pyproject.toml — black 的配置。
pip install black flake8 mypy
black .
flake8
class MyModel(nn.Module):
    ....

def forward(x: torch.Tensor) -> torch.Tensor:
    ....
return self.final(x)mypy .
pip install pre-commit
pre-commit install
- name: Install dependencies
      run: |
        python -m pip install --upgrade pip
        pip install -r requirements.txt
        pip install black flake8 mypy
    - name: Run black
      run:
        black --check .
    - name: Run flake8
      run: flake8
    - name: Run Mypy
      run: mypy retinaface
对你自己而言:可能你认为你永远都不会再用到这些代码了,但实际上并不一定。下次用的时候你可能也记不得它的具体内容了,但 readme 可以帮到你。
对其他人而言:readme 是一个卖点。如果人们看不出该存储库的用途以及它所解决的问题,大家就不会使用它,你所做的所有工作都不会对他人产生积极影响。
用一张图来说明任务是什么以及如何解决,而不需要任何文字。在花了几周解决问题之后,你可能有 100500 张图,但你不能把他们放在 readme 里;
数据放在哪里;
怎样开始训练;
如何进行推理。
model = MyFancyModel()
state_dict = torch.load()
model.load_state_dict(state_dict)
from retinaface.pre_trained_models import get_model
model = get_model("resnet50_2020-07-20", max_size=2048)

# https://github.com/ternaus/retinaface/blob/master/retinaface/pre_trained_models.py
 from collections import namedtuple
 from torch.utils import model_zoo
 from retinaface.predict_single import Model
 model = namedtuple("model", ["url", "model"])
 models = {
 "resnet50_2020-07-20": model(
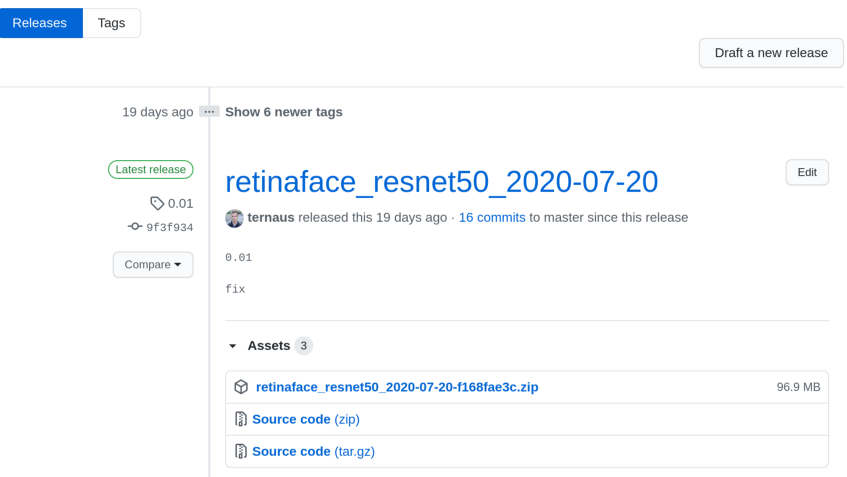
 url="https://github.com/ternaus/retinaface/releases/download/0.01/retinaface_resnet50_2020-07-20-f168fae3c.zip", # noqa: E501
 model=Model,
    )
 }
 def get_model(model_name: str, max_size: int, device: str = "cpu") -> Model:
     model = models[model_name].model(max_size=max_size, device=device)
     state_dict = model_zoo.load_url(models[model_name].url, progress=True, map_location="cpu")
     model.load_state_dict(state_dict)
     return model
pip freeze > requiements.txt
python setup.py sdist
python setup.py sdist upload
pip install
"""Streamlit web app"""
import numpy as np
import streamlit as st
from PIL import Image
from retinaface.pre_trained_models import get_model
from retinaface.utils import vis_annotations
import torch
st.set_option("deprecation.showfileUploaderEncoding", False)
@st.cache
def cached_model():
    m = get_model("resnet50_2020-07-20", max_size=1048, device="cpu")
    m.eval()
    return m
model = cached_model()
st.title("Detect faces and key points")
uploaded_file = st.file_uploader("Choose an image...", type="jpg")
if uploaded_file is not None:
    image = np.array(Image.open(uploaded_file))
    st.image(image, caption="Before", use_column_width=True)
    st.write("")
    st.write("Detecting faces...")
    with torch.no_grad():
        annotations = model.predict_jsons(image)
    if not annotations[0]["bbox"]:
        st.write("No faces detected")
    else:
        visualized_image = vis_annotations(image, annotations)
        st.image(visualized_image, caption="After", use_column_width=True)
setup.sh — 该文件可以直接使用,不需要更改。
Procfile — 你需要使用应用程序修改文件的路径。
heroku login
heroku create
git push heroku master
研究问题是什么?
你是如何解决这个问题的?
项目:https://www.kaggle.com/c/sp-society-camera-model-identification
博客:http://ternaus.blog/machine_learning/2018/12/05/Forensic-Deep-Learning-Kaggle-Camera-Model-Identification-Challenge.html

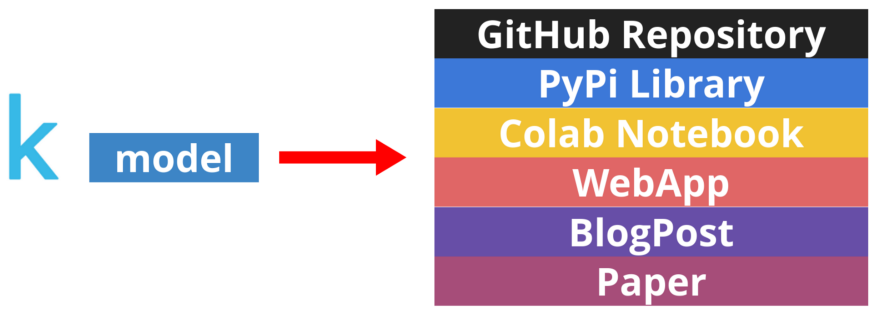
GitHub 存储库,里面有整洁的代码和良好的 readme 文件。
非机器学习人员能够使用的库。
允许在浏览器中用你的模型进行快速实验的 Colab notebook。
吸引非技术受众的 WebApp。
用人类语言讲故事的博客文章。
推荐阅读
如有收获,欢迎三连👇
评论
