
如何在 Flutter 中构建增强现实应用

英文 | https://blog.logrocket.com/build-augmented-reality-app-flutter/
翻译 | 杨小爱
什么是 ARCore?
什么是 ARKit?
什么是 ar_flutter_plugin
如何使用上述插件?
IOS系统,需要苹果手机的系统在iOS 11.0 或更高版本上。
Android 系统,需要安卓手机设备的系统在 Android 7.0 或更高版本的 Android 系统。
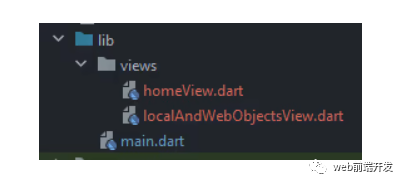
main.dart – 整个应用程序的入口点
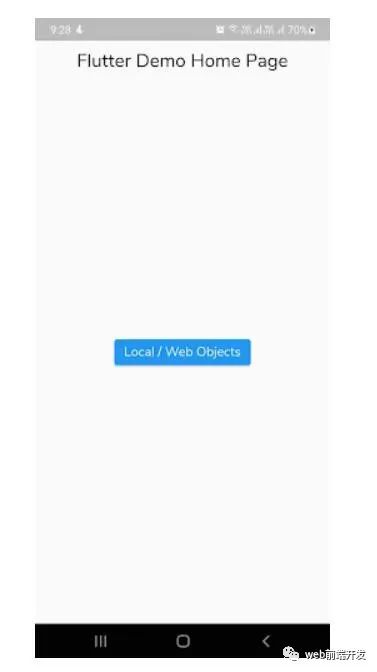
homeView.dart - 这包含主视图,有一个导航到 AR 视图屏幕的按钮
localAndWebObjectsView.dart - 屏幕显示从本地和 Web 获取 3D 对象的用法
...dependencies:flutter:sdk: flutterar_flutter_plugin: ^0.6.2...
02)、安卓配置
更新应用级 build.gradle 文件中的 minSdkVersion:
android {defaultConfig {...minSdkVersion 24}}
或者在 Android 目录下的 local.properties 文件中添加 minSdkVersion:
flutter.minSdkVersion=24并更新应用级 build.gradle 文件:
android {defaultConfig {...minSdkVersion localProperties.getProperty('flutter.minSdkVersion')}}
03)、iOS 配置
如果您在 iOS 中遇到权限问题,请在您的 iOS 目录中添加以下 Podfile:
post_install do |installer|installer.pods_project.targets.each do |target|flutter_additional_ios_build_settings(target)target.build_configurations.each do |config|# Additional configuration options could already be set here# BEGINNING OF WHAT YOU SHOULD ADDconfig.build_settings['GCC_PREPROCESSOR_DEFINITIONS'] ||= ['$(inherited)',## dart: PermissionGroup.camera'PERMISSION_CAMERA=1',## dart: PermissionGroup.photos'PERMISSION_PHOTOS=1',## dart: [PermissionGroup.location, PermissionGroup.locationAlways, PermissionGroup.locationWhenInUse]'PERMISSION_LOCATION=1',## dart: PermissionGroup.sensors'PERMISSION_SENSORS=1',## dart: PermissionGroup.bluetooth'PERMISSION_BLUETOOTH=1',´# add additional permission groups if required]# END OF WHAT YOU SHOULD ADDendendend
用法
在继续之前,您需要了解以下 API:
ARView:使用 PlatformARView 创建与平台相关的相机视图
ARSessionManager:管理 ARView 的会话配置、参数和事件
ARObjectManager:管理一个 ARView 的所有节点相关的动作
ARAnchorManager:管理锚功能,如下载处理程序和上传处理程序
ARLocationManager:提供获取和更新设备当前位置的能力
ARNode:节点对象的模型类
您可以从以下地址处了解更多 API。https://pub.dev/documentation/ar_flutter_plugin/latest/
使用本地或远程对象
最基本的用途之一是将 3D 对象从资产或网络放置到屏幕上。
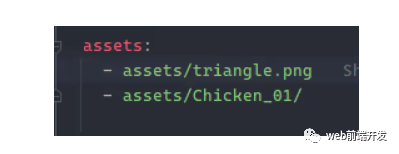
为此,您需要在 pubspec 文件中提供 .gltf 或 .glb 文件,如下所示:
什么是 glTF 或 GLB 文件?
glTF 是 3D 模型和场景的图形语言传输格式。它有两个扩展:
.gltf:以 JSON/ASCII 格式存储场景描述,包括节点层次结构、相机和材质
.glb:以二进制格式存储模型描述
您可以从此地址(https://en.wikipedia.org/wiki/GlTF)处了解有关 glTF 的更多信息。
现在,转到 localAndWebObjectsView.dart 文件并创建以下变量:
late ARSessionManager arSessionManager;late ARObjectManager arObjectManager;//String localObjectReference;ARNode? localObjectNode;//String webObjectReference;ARNode? webObjectNode;
接下来,使用 ARView 小部件更新空容器,如下所示:
ARView(onARViewCreated: onARViewCreated,)
在这里,您将 onARViewCreated 方法用于小部件的 onARViewCreated 属性:
void onARViewCreated(ARSessionManager arSessionManager,ARObjectManager arObjectManager,ARAnchorManager arAnchorManager,ARLocationManager arLocationManager) {// 1this.arSessionManager = arSessionManager;this.arObjectManager = arObjectManager;// 2this.arSessionManager.onInitialize(showFeaturePoints: false,showPlanes: true,customPlaneTexturePath: "triangle.png",showWorldOrigin: true,handleTaps: false,);// 3this.arObjectManager.onInitialize();}
在上面的代码中,您正在执行以下操作:
定义 arSessionManager 和 arObjectManager 变量
使用 ARSessionManager 的 onInitialize 方法设置会话属性
这些设置用于可视化特征点、平面、世界坐标系等。在这里,您使用 customPlaneTexturePath 来引用您的 pubspec 中定义的资产。
另外,使用 ARObjectManager 的 onInitialize 来设置管理器
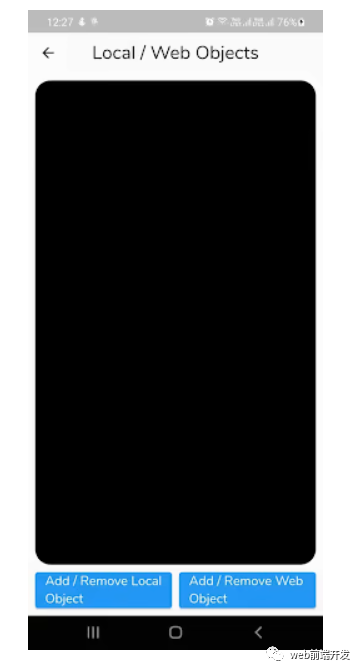
构建并运行您的应用程序。你会看到这样的 ARView:
创建和删除本地对象
现在,我们需要使用“添加/删除本地对象”按钮使用 onLocalObjectButtonPressed 回调创建或删除 localObjectNode,如下所示:
Future<void> onLocalObjectButtonPressed() async {// 1if (localObjectNode != null) {arObjectManager.removeNode(localObjectNode!);localObjectNode = null;} else {// 2var newNode = ARNode(type: NodeType.localGLTF2,uri: "assets/Chicken_01/Chicken_01.gltf",scale: Vector3(0.2, 0.2, 0.2),position: Vector3(0.0, 0.0, 0.0),rotation: Vector4(1.0, 0.0, 0.0, 0.0));// 3bool? didAddLocalNode = await arObjectManager.addNode(newNode);localObjectNode = (didAddLocalNode!) ? newNode : null;}}
在这里,我们完成了以下操作:
检查localObjectNode是否为null,如果不为null则删除本地对象。
通过提供本地 glTF 文件路径和类型以及包含节点的位置、旋转和其他变换的坐标系来创建一个新的 ARNode 对象。
将 newNode 添加到 ARView 的顶层(如 Stack)并将其分配给 localObjectNode。
NodeType 是一个枚举,用于设置插件支持的节点类型,包括 localGLTF2、webGLB、fileSystemAppFolderGLB 和 fileSystemAppFolderGLTF2。
构建并运行应用程序,然后单击添加/删除本地对象按钮:
添加远程对象
接下来,您需要使用带有 onWebObjectAtButtonPressed 回调的 Add / Remove Web Object 按钮,如下所示:
Future<void> onWebObjectAtButtonPressed() async {if (webObjectNode != null) {arObjectManager.removeNode(webObjectNode!);webObjectNode = null;} else {var newNode = ARNode(type: NodeType.webGLB,uri:"https://github.com/KhronosGroup/glTF-Sample-Models/raw/master/2.0/Duck/glTF-Binary/Duck.glb",scale: Vector3(0.2, 0.2, 0.2));bool? didAddWebNode = await arObjectManager.addNode(newNode);webObjectNode = (didAddWebNode!) ? newNode : null;}}
上述方法与 onLocalObjectButtonPressed 方法类似,只是 URL 有所不同。在这里,URL 以来自网络的 GLB 文件为目标。
构建并运行应用程序,然后单击添加/删除 Web 对象按钮:
如果要跟踪 3D 对象的位置或姿势变化,则需要为此定义锚点。锚点描述或检测现实世界中的特征点和平面,并简单地让您在世界中放置 3D 对象。
注意,特征点是图像中的独特位置。例如,角落、路口等。
即使环境随时间发生变化并影响应用程序的用户体验,这也可确保对象保持在其放置的位置。
最后,使用 dispose 方法对管理人员进行处置,以释放资源。
结论
最终的项目地址:https://github.com/himanshusharma89/arcore_example
在今天的文章中,我们了解了如何使用 Flutter 构建增强现实应用程序。对于下一步,您可以尝试使用手势旋转或转换对象,或者使用 Google Cloud Anchor API 或外部数据库获取 3D 对象。
我希望今天的内容对你有用,如果你喜欢今天的内容,记得点赞我,关注我,并分享给你身边做开发的朋友,也许能够帮助到他。
最后感谢你的阅读,祝编程快乐!
学习更多技能
请点击下方公众号
![]()
