分享一些二次重写个人网站的感悟

这个是首页截图,当封面,接下来我简单的说明一下我制作这个网站的全部过程 。如果你也想写自己的个人主页,希望这篇文章可以给你一些灵感。
这个是个人主页地址www.zpzpup.com/[1]2.0版本
以前的1.0版本地址www.zpzpup.com/blog[2]
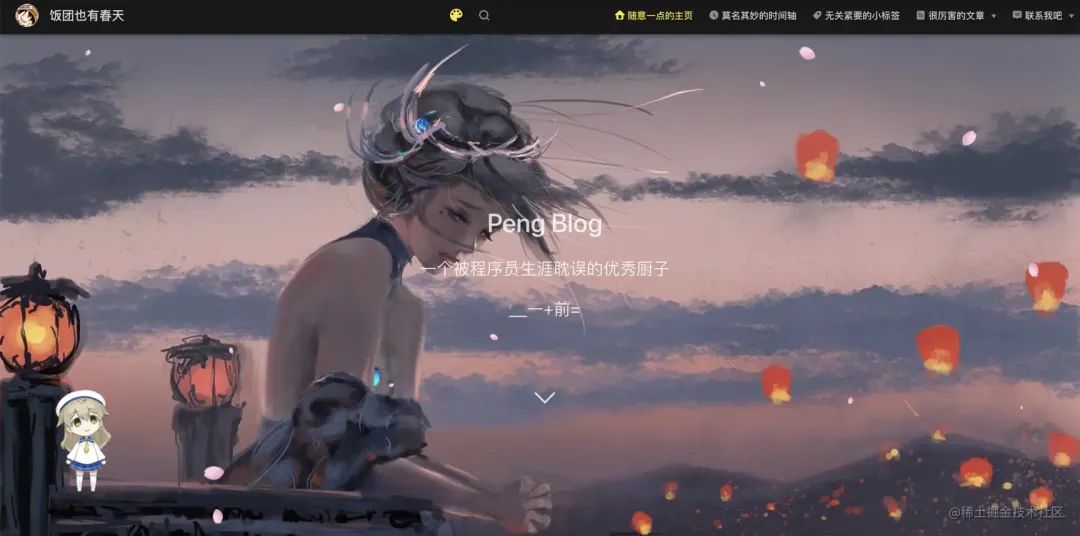
1. 确定整个个人页板块组合
例如我个人页的板块就分为了4个大的板块 首页 关于 项目 找我,功能我就不一一写了, 大家可以直接去网站主页看看
2. 构思整体的风格
这里大家可以去dribbble[3]找找灵感
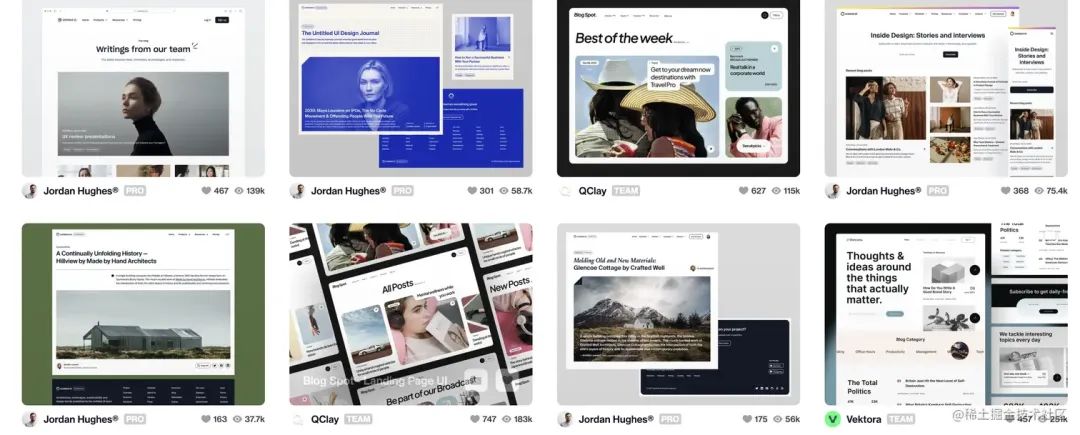
一开始我本来打算把blog页进行重构,但是发现各种各样写blog的地方实在是不少,想了一下,还是算了 所以最终就决定做一个一屏展示页
我借鉴了这个设计图
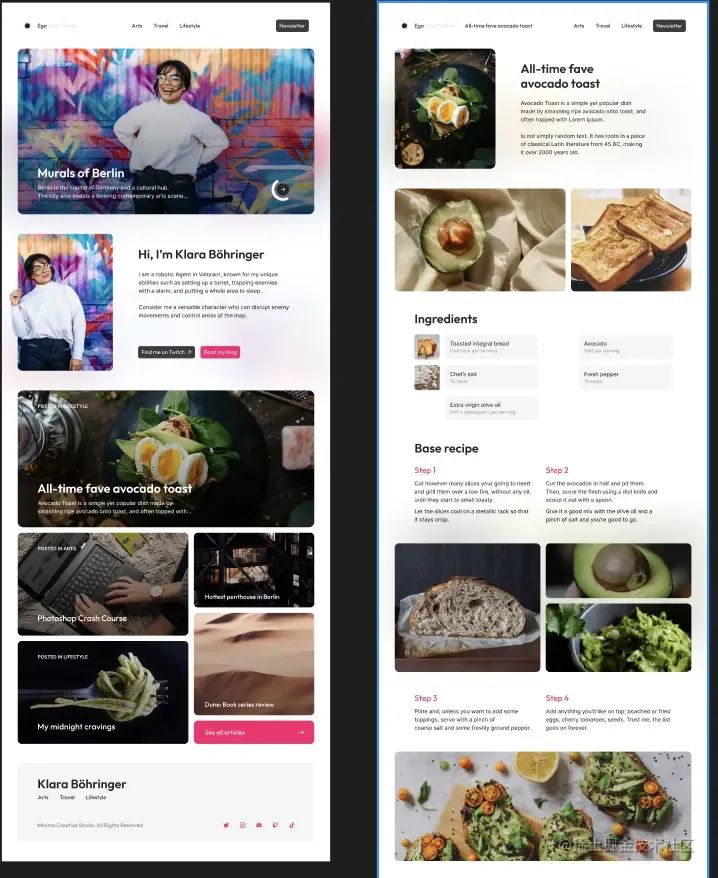
大家可以自己搜索一下 不会设计还不简单 借鉴就完了 哈哈哈哈哈
3. 头部跟尾部
最开始网站确认的是头跟尾部
头部

这里加入了2个小动画 一个是波纹动画
.round {
  width: 28px;
  height: 28px;
  background-color: rgba(74, 130, 216, .2);
  border-radius: 50%;
  display: inline-block;
  transition: all 1s;
  position: relative;
  &::before {
     content: "";
     position: absolute; // 定位到同元素上
     top: -3px;
     left: -3px;
     width: 100%;
     height: 100%;
     border: 3px solid rgba(74, 130, 216, .2); // 波纹
     border-radius: 50%; // 变圆
     background: transparent; // 不要背景颜色
     animation: pulse 2s cubic-bezier(.57, .06, .27, .84) infinite; // pulse 动画
     z-index: 1; // 放在原来元素之上
  }
}
@keyframes pulse {
 0% {
   transform: scale(1);
   border-color: rgba(74, 130, 216, .2);
 }
 100% {
   transform: scale(1.2); // 放大
   border-color: transparent; // 透明
 }
}
还有就是一个简单的位移动画 这里就不贴代码了 有兴趣的可以去自己看github[4]喜欢可以给个star 🌟

导航切换这里我用了一个slider元素进行过度
<div className={styles.slider} style={{ left }}></div>
&:nth-child(1):hover~.slider {
  left: 0px;
}
&:nth-child(2):hover~.slider {
  left: 75px;
}
&:nth-child(3):hover~.slider {
  left: 150px;
}
&:nth-child(4):hover~.slider {
  left: 225px;
}
尾部

尾部这里分成了2块
 左边用了一个简单的
关于方块的动画,它并不是一个 Gif 图片,而是 Lottie 动画。这是 Airbnb 开源的一套跨平台的完整的动画效果解决方案。说人话:就是高级版的 Gif。动画内容是通过 JSON 文件来驱动的,可以在 \[Lottie 官网\][5]
下面使用了提示有木有很熟 用的antd Tooltip😂
右边板块就更简单了

添加了wobble,中文名是 摆动的动画。
@keyframes wobble {
  0% {
    transform: translateY(0%);
  }

  15% {
    transform: translateY(-25%);
  }

  30% {
    transform: translateY(20%);
  }

  45% {
    transform: translateY(-15%);
  }

  60% {
    transform: translateY(10%);
  }

  75% {
    transform: translateY(-5%);
  }

  100% {
    transform: translateY(0%);
  }
}
4. home板块
当初设计这里,弄了很久 一直没弄满意 ,做了一版又一版总有不满意的地方,不过没事 古话说得好 只要功夫深,铁杵磨成针

左边打字板块使用的打字效果 可以使用 typed.js[6] 这个小库,用起来非常简单,这是官方的小 Demo:
// Can also be included with a regular script tag
import Typed from 'typed.js';
var options = {
strings: ['<i>First</i> sentence.', '& a second sentence.'],
typeSpeed: 40
};
var typed = new Typed('.element', options);
这里封装成了hooks
import { useEffect, useRef } from "react";
import Typed, { TypedOptions } from "typed.js";
const useTyped = (strings: string[], extra?: TypedOptions) => {
 const el = useRef<HTMLElement | null>(null);
 const typed = useRef<Typed | null>(null);
 useEffect(() => {
 const options = {
 strings,
 typeSpeed: 100,
 backSpeed: 60,
 ...extra,
 };
 typed.current = new Typed(el.current || "", options);
 return () => typed.current?.destroy();
 }, [strings]);
 return el;
};
export default useTyped;
使用:
const el = useTyped(strings, { loop: true });
<Col span={24} md={12} className={styles.intro}>
 <p>我是Jabin,</p>
 <p>
 一个 前端工程师,写{" "}
 <span className={styles.react}>React/Vue</span> 的。
 </p>
 <p>喜欢简约设计 🛀,</p>
 <p>
 偶尔
 <span className={styles.sometime} ref={el} />
 </p>
 </Col>
 右边火箭推进器 后面的火也是使用了Lottie动画, 这个我也封装一个hook直接使用
import { useEffect, useRef } from "react";
import lottie, { AnimationConfigWithData } from "lottie-web";

const useLottie = (path: string, extra?: AnimationConfigWithData) => {
  let lottieRef = useRef<HTMLDivElement | null>(null);

  useEffect(() => {
    if (lottieRef.current) {
      lottie.loadAnimation({
        container: lottieRef.current,
        path,
        renderer: "svg",
        loop: true,
        autoplay: true,
        ...extra,
      });
    }
    return () => {
      lottieRef.current = null
    }
  }, []);

  return lottieRef;
};

export default useLottie;
//使用:
const fireRef = useLottie(fireLottie);

<div className={styles.fire} ref={fireRef}></div>
相信到这 大家一看就懂。
5. about 板块
3D图片 大家可以去dribbble[7]上找 相信总有你满意的 哈哈哈哈哈哈
这个板块就没啥特别好介绍的 大家一开就懂
6. project 板块
这里用了grid布局,hover效果大家可以去一些大网站白嫖 或者自己在box-shadow generator调整一个自己满意的阴影。
这个板块因为图片比较多,并且图片质量相对较高,做了对应的图片优化
-
把图片转换成了webp格式,这里推荐大家一个网站进行图片转换cloudconvert[8]
-
做了对应的图片懒加载,大家可以参考这篇文章juejin.cn/post/684490…[9]
7. contact 板块
这个板块就是底部了 上面介绍了 就不重复说明了
8. 最后
写到这基本上就差不多了,写这个个人网站总体时间断断续续 大概2周左右,中间设计构思花了挺多时间到,大家可以多去参考一下别人的网站,发现一些好玩的效果都可以借鉴过来。
构思网站真的是一个挺麻烦的事情,既要花里胡哨又不能太花里胡哨的感觉 ,大家明白吧😂
然后整个网站主要使用技术栈Reactantdscssvitetypescript
优化方面主要是
-
组件用了lazy -
图片转换webp -
图片懒加载 -
字体库使用了fontmin[10]进行了压缩,压缩下来只有9k 还是挺满意的 毕竟只用了几个字,引入整个字体就不太划算了 -
然后就是加载用Suspense做了个svg动画loading
其实可以做优化的地方还挺多,比如图片走cdn,甚至css js都可以走cdn ,嗯反正是想到哪就写到哪
最后喜欢的话就在 我的 github[11] 上点个 Star 🌟 吧,欢迎 fork 和魔改
参考资料
https://www.zpzpup.com/
[2]https://www.zpzpup.com/blog
[3]https://dribbble.com/
[4]https://github.com/JabinPeng/pengBlog
[5]https://lottiefiles.com/featured
[6]https://link.zhihu.com/?target=https%3A//github.com/mattboldt/typed.js/
[7]https://dribbble.com/
[8]https://cloudconvert.com/png-to-webp
[9]https://juejin.cn/post/6844904147746029581
[10]https://link.zhihu.com/?target=https%3A//github.com/ecomfe/fontmin
[11]https://github.com/JabinPeng/pengBlog
