开发App新选择:使用 Vue Native 构建移动应用

Vue Native 是一个 JavaScript 框架,旨在使用 JavaScript 构建可以在 Android 和 iOS 上运行的跨平台移动应用程序。通过封装 React Native,开发人员可以使用 Vue Native 使用 Vue.js 构建移动应用程序。
正因为如此,所有可以在 React Native 中完成的事情都可以在 Vue Native 中完成,并且代码被编译为 React Native。通过这种方式,开发人员可以从 Vue 和 React Native 生态系统提供的内容中受益。
在这篇文章中,我们将讨论 Vue Native 的特性以及如何使用 Vue Native 创建移动应用程序。
Vue Native 的特性
在决定使用 Vue.js 构建移动应用程序时,Vue Native 有许多有用的特性需要考虑。
声明式渲染
Vue Native使用声明式编程范式。这意味着我们只需声明我们希望我们的组件和状态如何渲染以获得我们想要的结果。
双向绑定
在我们的Vue Native应用中,我们可以在我们的组件类和其模板之间共享数据。如果我们改变了状态中的数据,它就会自动反映在用户界面中。
我们仍然必须访问 v-model 进行双向数据绑定。这意味着我们可以使用 v-model 将一个 input 元素的值绑定到我们组件的数据属性中。
Vue.js 生态系统的丰富性
Vue 生态系统是 JavaScript 领域最大、发展最快的生态系统之一。使用 Vue Native 构建应用程序提供了更大的 Vue 生态系统的好处。
这意味着我们可以使用诸如 v-if 用于条件渲染,v-model 用于双向数据绑定,v-for 用于列表渲染,以及Vuex用于状态管理等功能。
编译为 React Native
因为 Vue Native 依赖于 React Native,所以熟悉 React Native 生态系统的开发者更容易上手。
我们还可以在 Vue Native 中渲染 React Native 组件,而无需编写一行额外的配置,以便轻松集成并提高生产力。
设置开发环境
开始使用 Vue Native 的最快和最简单的方法是使用 Vue Native CLI[1] 引导移动应用程序。此 CLI 使用 Expo CLI[2] 或 React Native CLI[3] 生成一个简单的单页应用程序。
这意味着我们必须安装任一CLI,根据我们应用程序的需要,来使用Vue Native CLI。
要开始,我们必须安装一些依赖项。首先,运行下面的命令来全局安装Vue Native CLI。
$ npm install --g vue-native-cli
接下来,全局安装 Expo CLI,尽管这可以与 React Native CLI 互换:
$ npm install --g expo-cli
创建一个Vue Native项目
现在 Vue Native 和 Expo CLI 都已全局安装,让我们使用以下命令创建一个 Vue Native 项目:
vue-native init <yourProjectName>
通过在项目的根目录下导航并运行这个命令,启动一个开发服务器:
$ cd <yourProjectName>
$ npm start
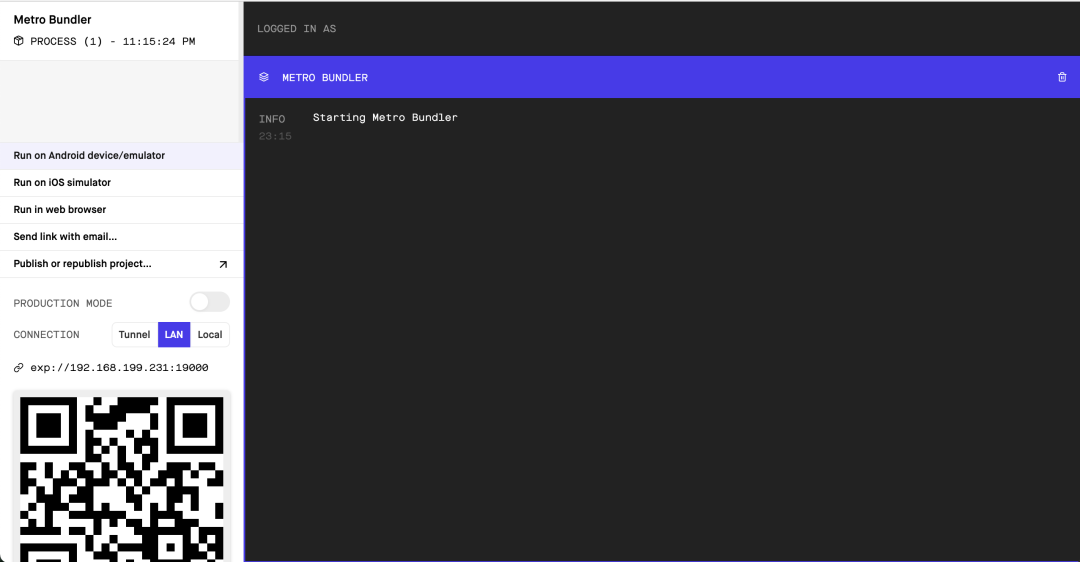
Metro Bundler 在 React Native 中编译 JavaScript 代码,从 http://localhost:19002/ 运行。通过在 Web 浏览器中访问 http://localhost:8080/,将出现以下页面:

若要在物理设备上查看Vue Native应用,请扫描浏览器中的二维码,并在Android或iOS的Expo Go中打开链接。
我们也可以通过点击浏览器中显示的链接,在安卓模拟器或iOS模拟器上打开应用程序,但并不是所有在Expo Go中可用的API都可以在模拟器上使用。
作为选择,我们可以克隆Vue Native核心团队准备的Kitchen Sink演示应用程序。
Vue Native UI组件
Vue Native提供了一些开箱即用的UI组件来构建应用界面,让我们来看看其中最重要的一些组件。
视图组件
view 组件就像我们普通HTML中的 div 标签一样工作。这个组件是在Vue Native中创建用户界面的基本构建模块,就像在React Native中一样。
我们可以在一个 view 组件中拥有多个子组件,比如下面的代码。
<template>
  <view class="container">
    <text>My Awesome Vue Native App</text>
  </view>
</template>
Text组件
要在我们的移动应用程序中输出文本,我们不能使用常规的HTML标签,如 h1 或 p。相反,我们必须使用 <text>...<text> 组件。使用这个组件是非常直接的。
<template>
  <text>Hello World</text>
</template>
Image组件
Image 组件渲染静态图像、网络图像和来自用户设备的图像。
与普通的 img 标签中使用 src 属性不同,这里我们在 image 组件中绑定了 source 属性来动态加载我们的图片。这使得webpack在构建过程中可以捆绑我们的图片资产。
通过添加以下内容,我们可以将图像加载到Vue Native应用中:
<template>
    <!-- Network image -->
  <image
     :style="{ width: 300, height: 150 }"
     :source="{
         uri:'https://images.unsplash.com/photo-1621570074981-ee6a0145c8b5?ixid=MnwxMjA3fDF8MHxwaG90by1wYWdlfHx8fGVufDB8fHx8&ixlib=rb-1.2.1&auto=format&fit=crop&w=750&q=80',
      }"
   />

  <!-- Static image -->
  <image
     :style="{ width: 300, height: 150 }"
     :source="require('./assets/photo.jpg')"
  />

  <!-- Local disk image -->
  <image
     :style="{width: 66, height: 58}"
     :source="{uri: 'data:image/png;base64,iVBORw0KGgoAAAANSUhEUgAAADMAAAAzCAYAAAA6oTAqAAAAEXRFWHRTb2Z0d2FyZQBwbmdjcnVzaEB1SfMAAABQSURBVGje7dSxCQBACARB+2/ab8BEeQNhFi6WSYzYLYudDQYGBgYGBgYGBgYGBgYGBgZmcvDqYGBgmhivGQYGBgYGBgYGBgYGBgYGBgbmQw+P/eMrC5UTVAAAAABJRU5ErkJggg=='}"
   />
</template>
TextInput组件
TextInput 组件通过用户的键盘将文本输入到应用程序中。我们可以使用 v-model 将我们状态中的数据绑定到 TextInput 组件。这允许我们无缝获取和设置 TextInput 的值:
<template>
  <view class="container">
    <text-input
      :style="{
        height: 30,
        width: 250,
        borderColor: '#511281',
        borderWidth: 1,
      }"
      v-model="text"
    />
  </view>
</template>

<script>
export default {
  data() {
    return {
      text: "",
    };
  },
};
</script>
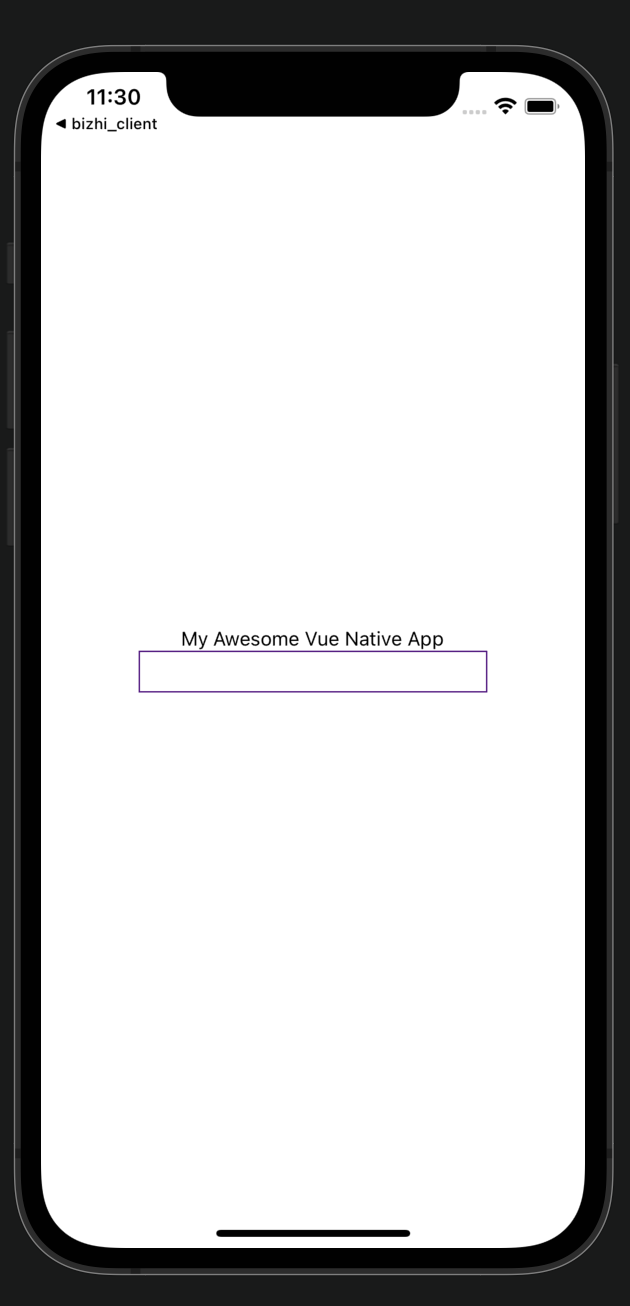
然后,上面的代码在Vue Native应用中输出如下屏幕:

NativeBase UI 组件
要建立一个可以投入生产的移动应用,仅仅使用内置的Vue Native组件可能是不够的。幸运的是,Vue Native带来了React Native和Vue.js两个生态系统的优点,所以我们可以使用NativeBase UI组件。
NativeBase是由GeekyAnts创建的,他们是Vue Native背后的同一个团队。这个UI组件给了我们一个真正原生的外观和感觉,在我们的移动应用中,通过相同的JavaScript代码库,为Android和iOS提供了特定平台的设计。
双向数据绑定
使用 v-model 在我们的 Vue 组件模板和 Vue Native 中的 Vue 状态之间共享数据是轻而易举的。我们可以使用 v-model 指令探索双向数据绑定,如下所示:
<template>
  <view class="container">
    <text-input
      :style="{
        height: 30,
        width: 250,
        borderColor: '#511281',
        borderWidth: 1,
      }"
      v-model="text"
    />
  </view>
</template>

<script>
export default {
  data() {
    return {
      text: "",
    };
  },
};
</script>
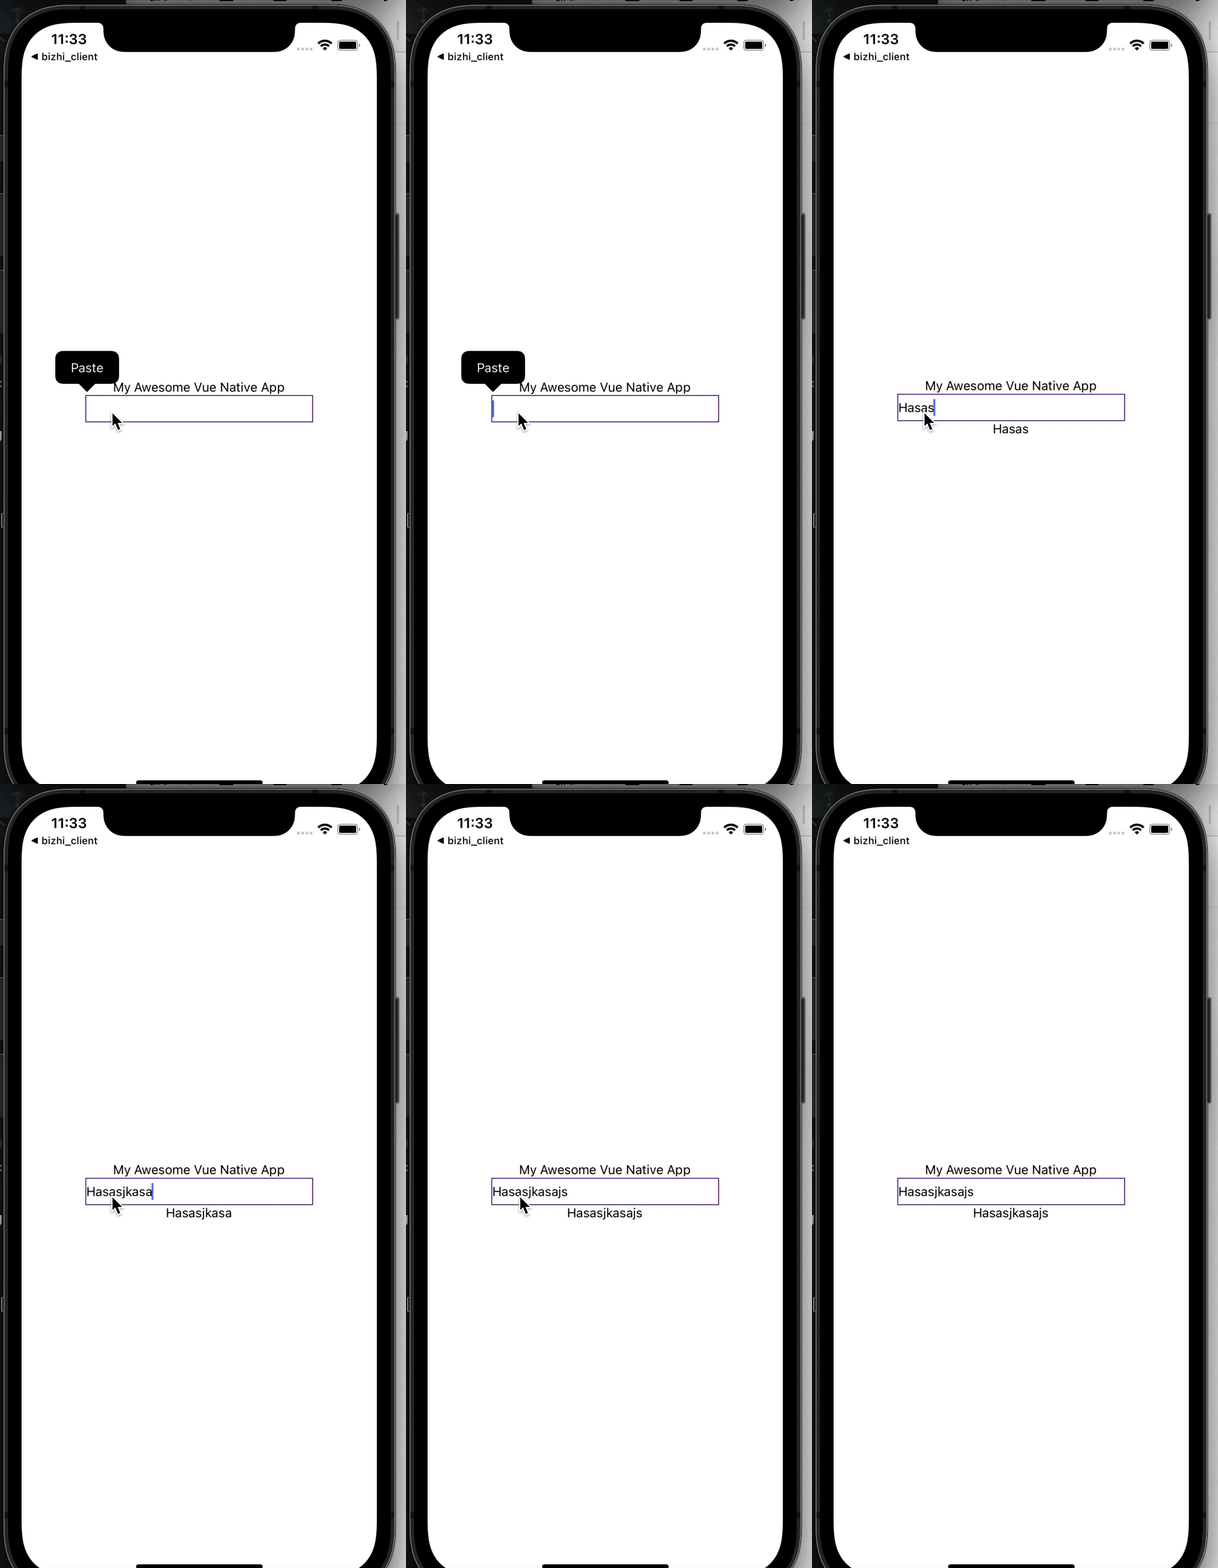
通过将一个带有数据绑定的输入字段从我们的状态输出到输入字段和一个文本组件,我们可以看到以下内容:

导航和路由
Vue Native应用中的导航和路由是通过Vue Native Router[4]库来处理的。在底层,这个库使用了流行的React Navigation[5]包。Vue Native Router和React Navigation都有类似的api,因此安装也类似。
该库没有预装,所以为了在我们的应用程序中开始使用导航,我们必须用以下方式安装它。
npm i vue-native-router
请注意,我们需要安装以下软件包才能使 Vue Native Router 正常工作:
react-native-reanimated[6] react-native-gesture-handler[7] react-native-paper[8]
在项目根目录下运行以下命令来安装这些包:
npm i react-native-reanimated react-native-gesture-handler react-native-paper
Vue Native Router 提供了 StackNavigator 和 DrawerNavigator 来注册用于导航的屏幕:
<script>
import {
  createAppContainer,
  createStackNavigator,
} from "vue-native-router";

import SettingsScreen from "./screens/SettingsScreen.vue";
import HomeScreen from "./screens/HomeScreen.vue";

const StackNavigator = createStackNavigator(
  {
    Settings: SettingsScreen,
    Home: HomeScreen,
  },
  {
    initialRouteName: 'Home',
  }
);

const AppNavigator = createAppContainer(StackNavigator);

export default {
  components: { AppNavigator },
}
</script>
要在屏幕之间导航,请调用 navigation 对象上的 navigate 方法,该方法作为props传递如下:
<script>
export default {
  // navigation is declared as a prop
  props: {
    navigation: {
      type: Object
    }
  },
  methods: {
    navigateToScreen() {
      this.navigation.navigate("Profile");
    }
  }
}
</script>
状态管理
对于Vue Native应用程序中的集中状态管理模式,我们可以使用Vue的官方状态管理库Vuex。
集成Vuex非常简单。首先,使用以下命令之一安装Vuex:
npm i vuex
//or
yarn add vuex
创建一个中央存储文件,并根据应用程序的需要添加 state、getter、mutations 或 actions。为了简单起见,在这里使用 state 对象:
// store/index.js

import Vue from 'vue-native-core';
import Vuex from 'vuex';
Vue.use(Vuex);
const store = new Vuex.Store({
  state: {
    name: 'Ejiro Asiuwhu',
  },
});
export default store;
在我们的store中使用数据和方法与传统的Vue应用程序有很大不同,这里是如何导入和使用我们store中的数据:
<script>
import store from "./store";
export default {
  computed: {
    name() {
      return store.state.name;
    },
  },
};
</script>
请注意,我们没有像通常在 Vue 和 Vuex 应用程序设置中那样使用 this.$store。
访问设备 API
由于React Native丰富的生态系统,在我们的Vue Native应用中访问本地设备的API是可能的。例如,要在我们的应用程序中访问用户的设备地理定位API,我们可以像这样使用expo-location[9]。
<template>
  <view class="container">
 <button
      :on-press="getLocation"
      title="Get Location"
      color="#184d47"
      accessibility-label="Get access to users' location"
    >
    <text>Location Details:</text>
    <text>{{ location }}</text>
    <text>Latitude: {{ latitude }}</text>
    <text>Longitude: {{ longitude }}</text>
    <text class="text-error">{{ errorMessage }}</text>
  </view>
</template>

<script>
import * as Location from "expo-location";

export default {
  data() {
    return {
      location: "",
      latitude: "",
      longitude: "",
      errorMessage: "",
      text: "",
      user: {
        country: "",
      },
    };
  },
  methods: {
    async getLocation() {
      try {
        let { status } = await Location.requestForegroundPermissionsAsync();
        if (status !== "granted") {
          this.errorMessage = "Permission to access location was denied";
          return;
        }
        let location = await Location.getCurrentPositionAsync({});
        this.location = location;
        this.latitude = location.coords.latitude;
        this.longitude = location.coords.longitude;
        this.errorMessage = "";
      } catch (error) {
        this.errorMessage = error;
      }
    },
  },
}
</script>
通过使用 Expo 包,不需要额外的配置或设置,这使得使用 Vue Native 构建移动应用程序变得轻而易举。
总结
使用 Vue Native 构建移动应用程序为使用 JavaScript 构建跨平台移动应用程序开辟了许多可能性。
通过访问 Vue 和 React Native 生态系统的丰富性和优势,开发人员可以编写 .vue 组件并将 Expo 和 React Native 包集成到应用程序中,几乎不需要额外的配置。
本教程中使用的完整代码可在GitHub上找到。
本教程源码:https://github.com/ejirocodes/Vue-Native-Demo
原文:https://blog.logrocket.com/building-mobile-apps-with-vue-native/
作者:Ejiro Asiuwhu
最近文章
5 个可以加速开发的 VueUse 库函数 大厂2个Vue实践总结,效率提升80%! Vue 中使用defineAsyncComponent 延迟加载组件 使用React Native可以开发Window桌面应用了! 黑客说:如何做到 4 天上线一个小程序? Pinia与Vuex的对比:Pinia是Vuex的良好替代品吗? 你可能不知道的强大 HTML 属性 2021年加速App开发的8个最佳跨平台框架
参考资料
Vue Native CLI: https://github.com/GeekyAnts/vue-native-cli
[2]Expo CLI: https://docs.expo.io/workflow/expo-cli/
[3]React Native CLI: https://github.com/react-native-community/cli
[4]Vue Native Router: https://github.com/GeekyAnts/vue-native-router
[5]React Navigation: https://reactnavigation.org/
[6]react-native-reanimated: https://github.com/kmagiera/react-native-reanimated
[7]react-native-gesture-handler: https://github.com/kmagiera/react-native-gesture-handler
[8]react-native-paper: https://github.com/callstack/react-native-paper
[9]expo-location: https://docs.expo.io/versions/latest/sdk/location/
