Vue 2 项目如何快速迁移 Vite 作为开发工具

梁晓莹: 微医前端技术部 一只喜欢读书📚&&游泳🏊🏻的猪猪女孩~🤔
当前版本 vite@2.3.7
一. 适合什么项目迁移
使用 vue2 的系统 内部系统 - 无需大型流量场景:因为 vite 更迭较快,导致系统需要定期改动基础功能,造成不稳定 非 ssr 系统 - ssr 还有很多问题,暂且等社区丰富起来 定期有人维护的系统 对开发有痛点而想要改进:比如打包慢,冷启动慢,HMR 更新慢。。。。 vite 生产环境用 rollup,但是改造成本大,提效不高,风险大,暂不建议使用。【本人愚见,大佬轻喷】
二.迁移步骤
将会以内部系统作为案例改造, 开发用 vite,生产依旧保持 webpack。
简单了解 vite 特性。有问题优先看vite 官网排查是否有更新或解决方案!! npm i vite@2.3.7 vite-plugin-vue2@1.6.2 vite-plugin-html@2.0.7 -D package.json 添加一个 script -- "vite": "NODE_ENV=development vite" 关键在于配置 vite.config.js【默认叫做这个文件名,你可配置成其他的。。】
import { defineConfig } from 'vite';
import path from 'path';
import fs from 'fs';

import { createVuePlugin } from 'vite-plugin-vue2';
import { injectHtml, minifyHtml } from 'vite-plugin-html';
import { cjs2esmVitePlugin } from 'cjs2esmodule'
import dotenv from 'dotenv'
const config = require('./config')

try {
  // 根据环境变量加载环境变量文件
  const file = dotenv.parse(fs.readFileSync(`./config/.env.${process.env.NODE_ENV}`), {
    debug: true
  })
  console.log(file)
  // 根据获取的 key 给对应的环境变量赋值
  for (const key in file) {
    process.env[key] = file[key]
  }
} catch (e) {
  console.error(e)
}
const API_LOCATION = process.env.API_LOCATION || '/api'

function resolve(dir) {
  return path.join(__dirname, './', dir)
}
export default defineConfig({
  root: './', // 项目根目录(index.html 文件所在的位置)可以是一个绝对路径,或者一个相对于该配置文件本身的相对路径。
  publicDir: 'public', // 作为静态资源服务的文件夹.该值可以是文件系统的绝对路径,也可以是相对于项目的根目录的相对路径。
  base: './', // 公共基础路径。改值可以是绝对路径或空字符串
  mode: 'development',
  optimizeDeps: { // 要预构建的第三方依赖
    include: []
  },
  resolve: {
    alias: {
      // 'vue': 'vue/dist/vue.esm.js', // 如果是模板解析的 - 使用这个 vue:内部为正则表达式  vue 结尾的
      'vendor': resolve('src/vendor'),
      '@': resolve('src'),
      '~@': resolve('src'),
      '~component': resolve('src/components'),
      '~config': resolve('config'),
    }
  },
  plugins: [
    cjs2esmVitePlugin(), // 将 commonjs 转化为 es module: 有报错
    createVuePlugin({
      jsx: true,
      jsxOptions: {
        injectH: false,
      },
    }),
    minifyHtml(), // 压缩 HTML
    injectHtml({ // 入口文件 index.html 的模板注入
      injectData: { // 模板注入的数据
        htmlWebpackPlugin: {
          options: {
            isVite: true,
            shotcut: '/static/img/favicon.png',
          }
        },
        title: 'HMO 运营后台',
      },
    }),
  ],
  define: {
    'process.env': process.env
  },
  server: {
    host: 'liang.myweb.com',
    open: true, // 是否自动打开浏览器
    port: process.env.PORT || config.dev.port,
    proxy: {
      [API_LOCATION]: {
        target: 'http://127.0.0.1:8001',
        rewrite: (path) => path.replace(API_LOCATION, '')
      }

    }
  },
});
三.常用问题【踩坑日记😄】
1. vite 目前要求入口文件必须是根目录下的 index.html,如果之前的 webpack 入口文件同名,需要更改。
解决方案:vite.config.js:
import { injectHtml } from 'vite-plugin-html';
export default defineConfig({
  plugins:[
    injectHtml({ // 入口文件 index.html 的模板注入
      injectData: { // 模板注入的数据
        htmlWebpackPlugin: { // 取和 webpack 插件同名的对象 key,即可
          options: {
            isVite: true,
            shotcut: '/static/img/favicon.png',
          }
        },
        title: 'HMO 运营后台'
      },
    })
  ]
})
webpack.xxx.js
new HtmlWebpackPlugin({
  template: 'index.html',
  inject: true,
  isVite: false // 添加标识
})
根目录入口文件 index.html - ejs 模板
      <% if (htmlWebpackPlugin.options.isVite) { %>
      <script type="module" src="/src/main.js"></script>
      <%}%>
2. 新版本报 xx 错:可切换旧版本,如 vite@2.2.3
3.没有导出命名?
Uncaught SyntaxError: The requested module '/config/index.js' does not provide an export named 'default'Uncaught SyntaxError: The requested module '/config/index.js' does not provide an export named 'default'
 错误原因:浏览器仅支持 esm,不支持 cjs
vite.config.js
import { cjs2esmVitePlugin } from 'cjs2esmodule'
export default defineConfig({
  plugins: [
   cjs2esmVitePlugin(), // 将 commonjs 转化为 es module
  ]
})
如果有 require.xx 的按需加载写法还可以修改成 import 的,案例如下:
const subjectList = r => require.ensure( [], () => r(require('@/pages/xxx/subject/list.vue')), 'subject' );

// 改为:Vue 动态组件 component: ()=>import()

const subjectList = () => import(/* webpackChunkName: "subject" */ '@/pages/xxx/subject/list.vue')
const arr = [
  {
    path: '/subject/list',
    name: 'subject/list',
    component: subjectList
    meta: {...}
  }
];
export default arr;
4. proxy 使用 http-proxy。完整选项详见 此处.
案例:
proxy: {
      '/rest': {
        target: 'http://my.web.com/',
        changeOrigin: true,
        bypass: (req, res, proxyOption) => {
          console.log(`当前请求代理:${req.url} -> ${proxyOption.target}`);
        },
      },
    }
5. ts 文件报错?
验证是否配置了 vite 的 ts 处理
"compilerOptions": {
  "types": ["vite/client"]
}
6. 全局环境变量报错?
// const isProd = ENV === 'production'; // webpack - dev 环境变量
// const isProd = import.meta.env.PROD; // vite - dev 环境变量
// 可以避开上面👆🏻的,采用 NODE_ENV 来区分:
const isProd = process.env.NODE_ENV === 'production';

那么我们启动的时候:"dev": "NODE_ENV=development vite"
或者可以探索一下社区的 babel 插件:babel-preset-vite【包含以下两个功能】babel-plugin-transform-vite-meta-envbabel-plugin-transform-vite-meta-glob
7. 看一些打印出来的日志&错误等?
cli --debug,或者 vite.config.js 配置打印相关参数
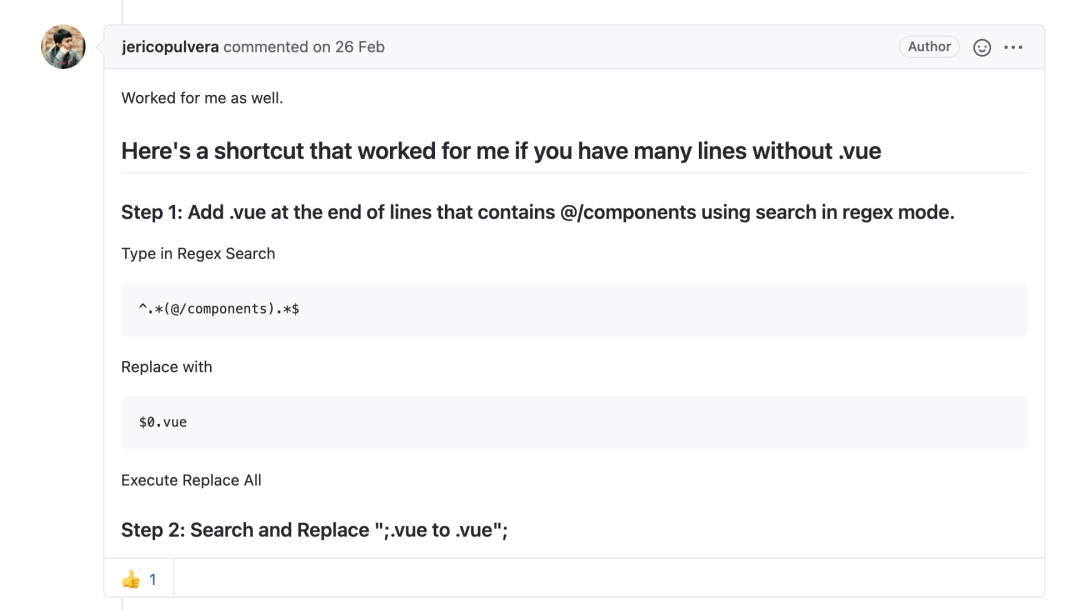
8. 引入文件,比如.vue 的时候,不可以省略扩展名?
是的!!!不是他们不会做,是他们不想做😭,就是这么设计的,具体请戳这里, 尤大佬推特解释然后加上 resolve.extensions: ['.vue'] 直接在控制台报错:所以没用。。。
error: No loader is configured for ".vue"
害!老老实实加上扩展名!【在线🐶】
方便的全局加上扩展名方法如下:链接
9. less 文件找不到?
[vite] Internal server error: '~@/styles/var.less' wasn't found.
(1)确定已经支持 less:npm install -D less(2)别忘了 resolve.alias 也加上一个:'~@': resolve('src')
10. 如何支持 jsx?
vite.config.js
import { createVuePlugin } from 'vite-plugin-vue2';
createVuePlugin({
  jsx: true, // 配置 jsx
  jsxOptions: {
    injectH: false,
  },
})
Vue.component('my-component',{
 render () {
   return (<div>my template</div>)
  }
})
11. 根据环境变量配置代理?
(1)cross-env 来跨平台设置环境变量
1. 安装 cross-env
npm i cross-env -D
(2)加载环境变量文件。它能将环境变量中的变量从 .env 文件加载到 process.env 中
2. 安装 dotenv
npm i dotenv -D
(3)config/.env.development 配置变量
NODE_ENV = development
API_LOCATION = /api
LOGOUT_PC_LOCATION = http://user.myweb.com/login
CRM_ADDRESS = http://crm.myweb.com
(4)配置 vite.config.ts
try {
  // 根据环境变量加载环境变量文件
  const file = dotenv.parse(fs.readFileSync(`./config/.env.${process.env.NODE_ENV}`), {
    debug: true
  })
  console.log(file)
  // 根据获取的 key 给对应的环境变量赋值
  for (const key in file) {
    process.env[key] = file[key]
  }
} catch (e) {
  console.error(e)
}
const API_LOCATION = process.env.API_LOCATION || '/api'
..... 此处省略

export default defineConfig({
  server: {
    proxy: {
      [API_LOCATION]: {
        target: 'http://127.0.0.1:8001',
        rewrite: (path) => path.replace(API_LOCATION, '') // 根据环境变量配置代理
      }

    }
  }
})
(5)package.json 启动 script
"vite": "cross-env NODE_ENV=development vite"
12. 环境变量报错?
原来 webpack 使用的环境变量 process.env,vite 没有这个,所以报错
Uncaught ReferenceError: process is not defined
vite 使用的时候import.meta.env, 但是我们老的代码不想动怎么办?其实 vite 也还是留了口子给我们定义全局变量[类型不能是 function]
export default defineConfig({
  // ...
  define: {
    'process.env': {}
  }
})
13. anything else?
..... bug 无止境,很多都是非通用问题,都是引入 vite 后发现的系统本身的一些问题,这里就不一一举例了。后续会追踪更多通用问题
往期推荐

Vite 太快了,烦死了,是时候该小睡一会了。

如何实现比 setTimeout 快 80 倍的定时器?

万字长文!总结Vue 性能优化方式及原理

90 行代码的 webpack,你确定不学吗?
如果你觉得这篇内容对你挺有启发,我想邀请你帮我三个小忙:
点个「在看」,让更多的人也能看到这篇内容(喜欢不点在看,都是耍流氓 -_-)
欢迎加我微信「huab119」拉你进技术群,长期交流学习...
关注公众号「前端劝退师」,持续为你推送精选好文,也可以加我为好友,随时聊骚。

