自动化运维工具Ansible实战

Ansible描述
官网:https://docs.ansible.com

ansible是新出现的自动化运维工具,基于Python开发,集合了众多运维工具(puppet、cfengine、chef、func、fabric)的优点,实现了批量系统配置、批量程序部署、批量运行命令等功能。
ansible是基于模块工作的,本身没有批量部署的能力。真正具有批量部署的是ansible所运行的模块,ansible只是提供一种框架。
Ansible特点
模块化:调用特定的模块,完成特定任务 有Paramiko,PyYAML,Jinja2(模板语言)三个关键模块 支持自定义模块 基于Python语言实现 部署简单,基于python和SSH(默认已安装),agentless 安全,基于OpenSSH 支持playbook编排任务 幂等性:一个任务执行1遍和执行n遍效果一样,不因重复执行带来意外情况 无需代理不依赖PKI(无需ssl) 可使用任何编程语言写模块 YAML格式,编排任务,支持丰富的数据结构 较强大的多层解决方案
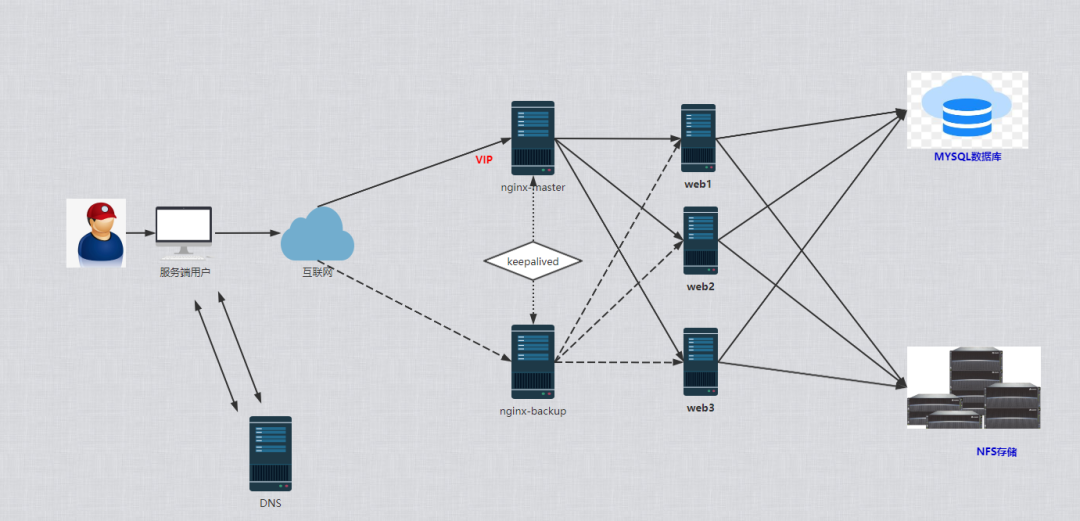
准备实验环境
| 服务器名称 | 服务器ip |
|---|---|
| master | 192.168.1.20 |
| node01 | 192.168.1.21 |
| node02 | 192.168.1.22 |
1.0各节点配置本地hosts
方便后期配置服务
cat    << EOF >> /etc/hosts
192.168.1.20       master
192.168.1.21       node01
192.168.1.22       node02
EOF
2.0 master节点安装ansible并配置
yum -y install ansible
ansible主配置常见说明
cat               /etc/ansible/ansible.cfg
inventory                 = /etc/ansible/host   #ansible主机管理清单
forks                      = 5  #并发数量
sudo_user                 = root  #提权
remote_port               = 22   #操作主机的端口
host_key_checking         = False  #第一次交互目标主机,需要输入yes/no,改成False不用输入
timeout                   = 10    #连接主机的超时时间
log_path = /var/log/ansible.log    #设置日志路径
private_key_file = /root/.ssh/id_rsa  #指定认证密钥的私钥
ansible hosts主机清单配置文件说明
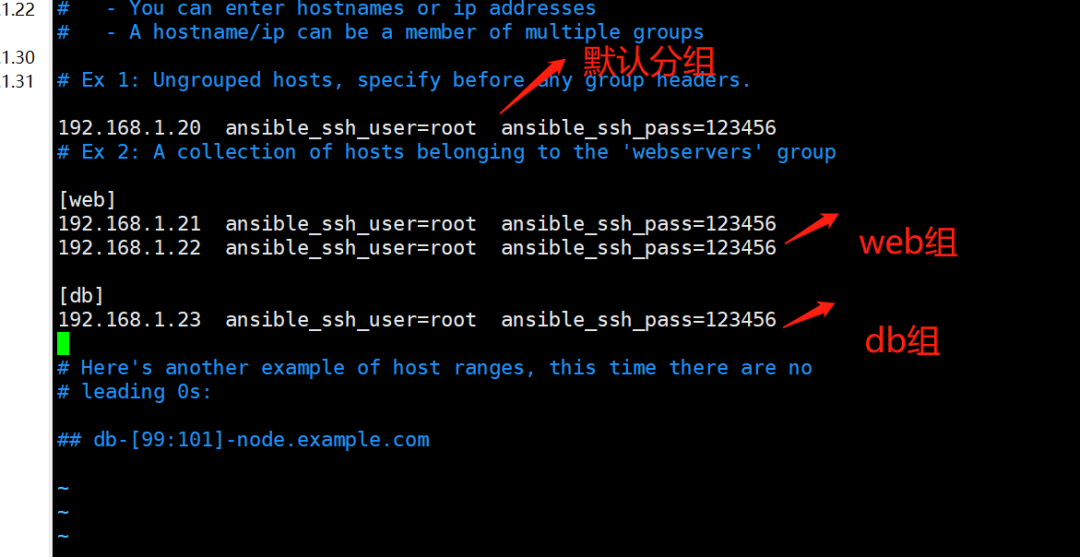
根据不同服务类型可以对主机清单进行分类,例如web/db等
验证ansible对主机的远程操作
2.1 对分组的主机操作
ansible web -a "df -h" #查看web分组磁盘使用情况
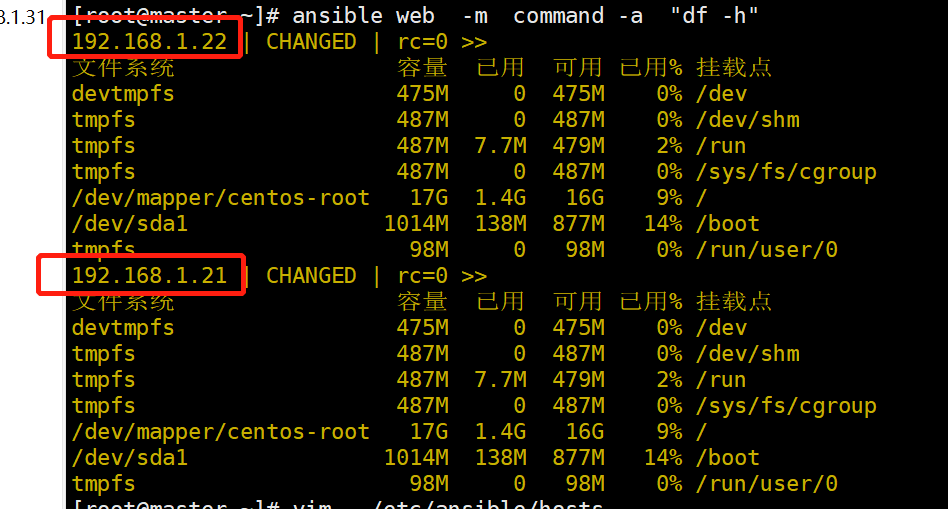
2.2对分组内主机操作,精确匹配
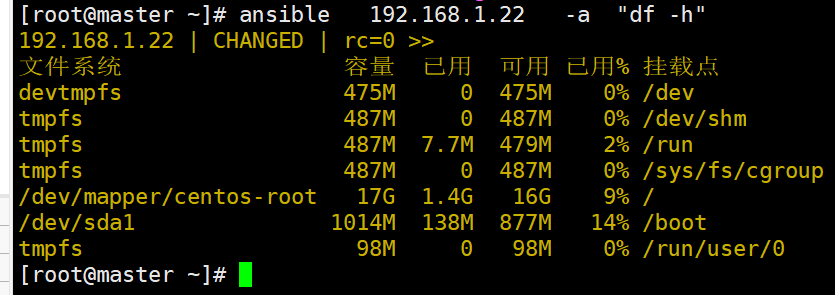
2.3 对所有主机操作all
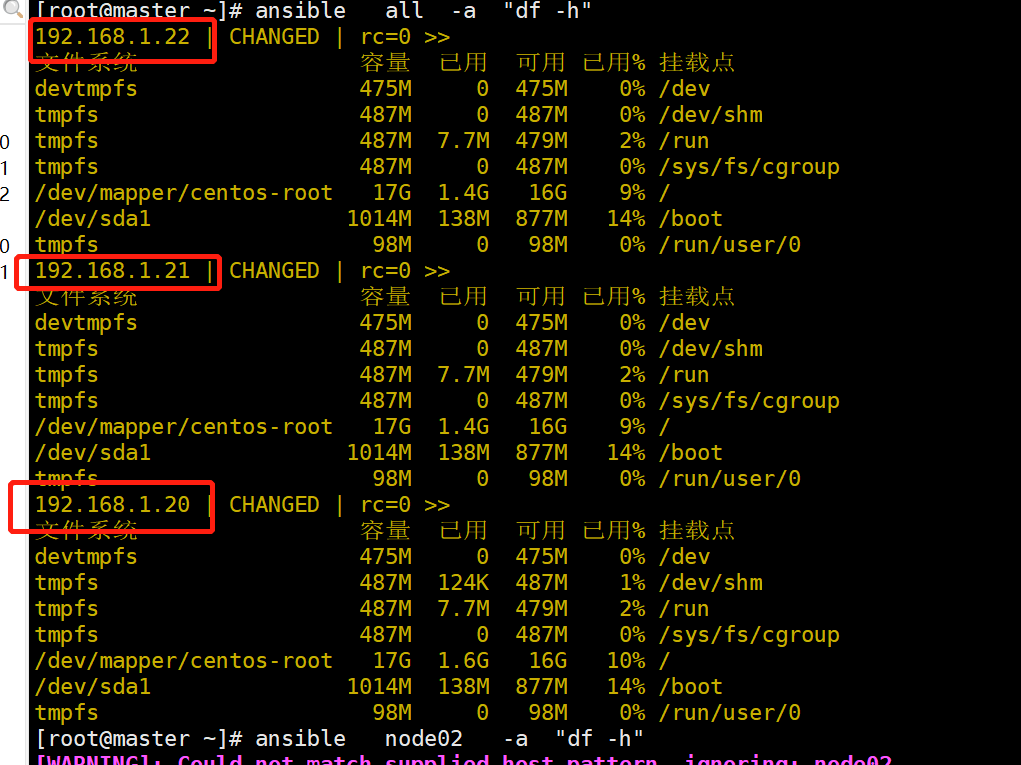
官方文档https://docs.ansible.com/ansible/latest/index.html
2.4 定义变量,并验证
mkdir /etc/ansible/group_vars/
cat  /etc/ansible/group_vars/web.yml #文件命名和组名一致
http_port: 8090
server_name: www.baidu.com
打印变量
ansible web -a "echo {{server_name}}"

ansible 常见的选项
-vvv 打印详细输出
ansible web -vvv -a 'cat  /tmp/123'
-f 指定并发数
ansible web -vvv -a 'cat  /tmp/123'  -f 10
-i 指定别的位置的主机清单hosts
ansible web -a  'cat  /tmp/123'  -i /root/hosts
-m 指定模块
ansible  web   -m  shell -a  'echo hello-zhangfan >>  /tmp/123'
3.0 配置免密登录认证
#生成密钥
ssh-keygen
将密钥发送到目标主机
ssh-copy-id  root@192.168.1.21
ssh-copy-id  root@192.168.1.22
3.1 修改主机清单文件,并测试
cat /etc/ansible/hosts
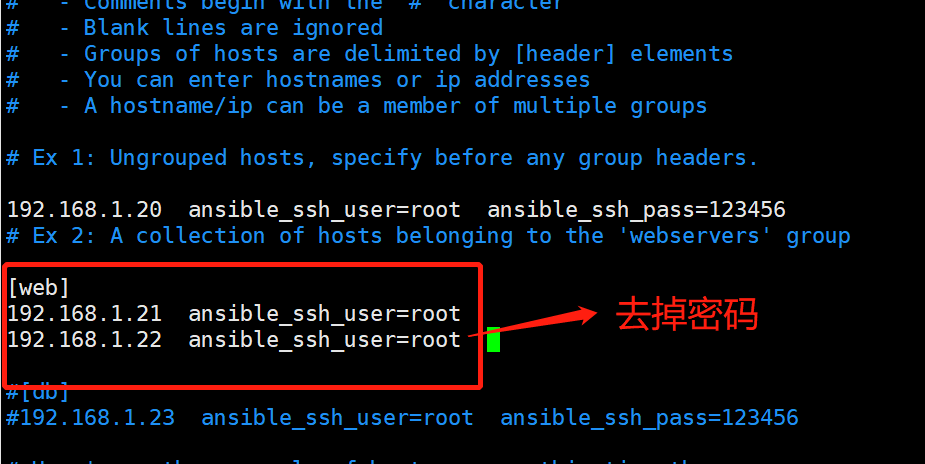
ansible web -a "ls /tmp"
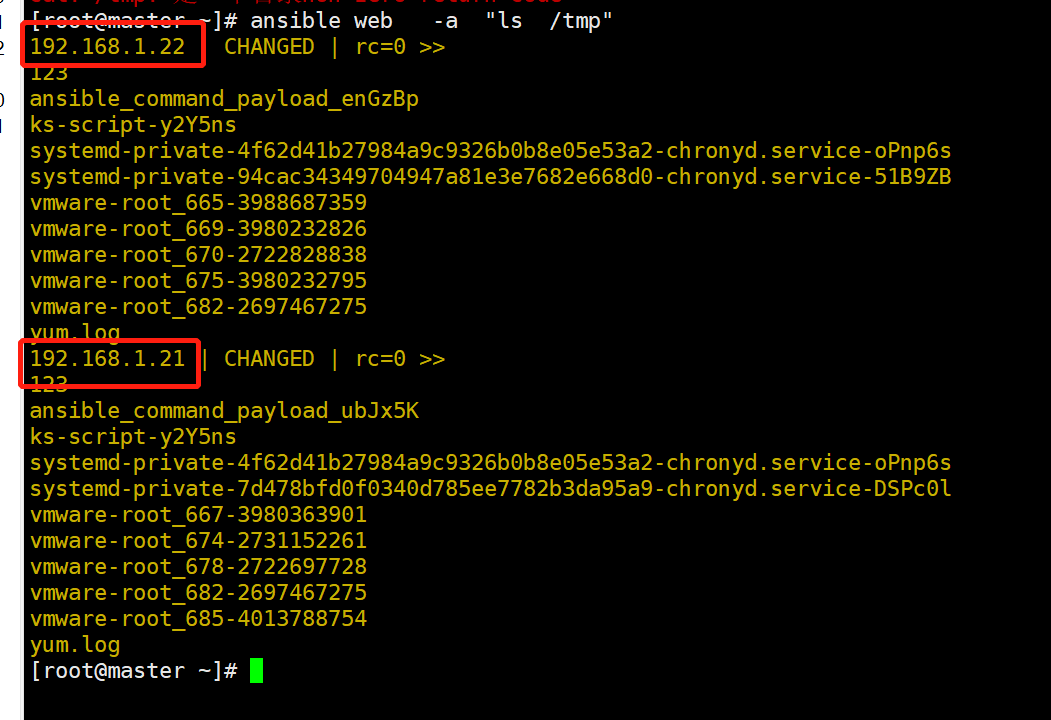
验证成功
4.0 ansible常用的模块
- 执行shell命令  (command和shell)
- 文件传输  (copy和file)
- 管理软件包 (yum )
- 用户和组(user)
- 从源代码管理系统部署(git)
- 管理服务(service)
- 目标主机信息(setup)
4.1 使用shell模块,sudo提权测试
#node01,node02执行
useradd   zhangfan
echo 123456  |passwd --stdin zhangfan
#node02配置sudo权限
vim  /etc/sudoers

node01不配置sudo权限
master测试
ansible web -m shell -a 'ls /root' -u zhangfan -k --become --become-user root -K
ansible web
-m shell \ #指定模块
-a 'ls /root' \ #执行的命令
-u zhangfan -k \ 指定远程连接的用户并输入密码
--become --become-user root \ 提权的用户
-K #sudo提权用户输入的密码
```bash

发现提权的node02节点正常node01权限不足
##### 4.2 使用copy模块
```bash
ansible web -m copy -a "src=/root/nginx-1.12.tar dest=/tmp" -u root
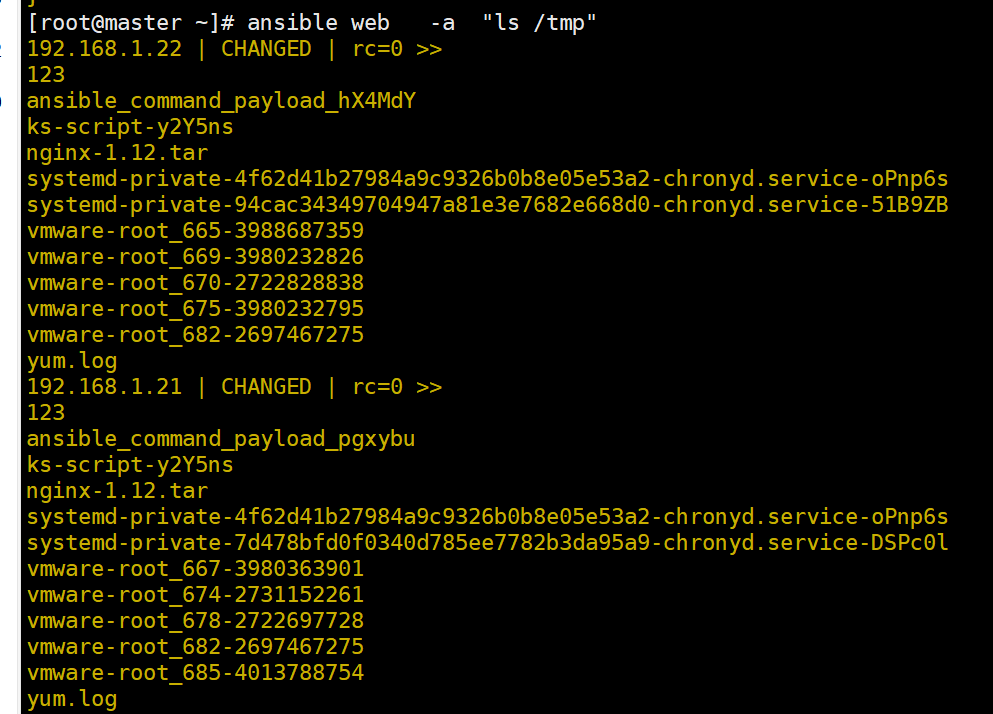
4.2 使用file模块
ansible web -m file -a "dest=/opt/hello mode=600 state=directory" -u root
文件状态
absent          #卸载/删除
directory       #目录
file,           #文件
hard            #硬连接
link            #软连接
touch           #空文件

说明创建目录成功
删除目录
ansible web -m file -a "dest=/opt/hello state=absent"
创建一个文件
ansible web -m file -a "dest=/opt/hello mode=755 state=touch"
4.3 Yum模块
状态
absent  #卸载
present  #安装
ansible web   -m yum  -a  'name=memcached  state=present'
ansible web   -m yum  -a  'name=memcached  state=absent'
4.4 创建用户模块
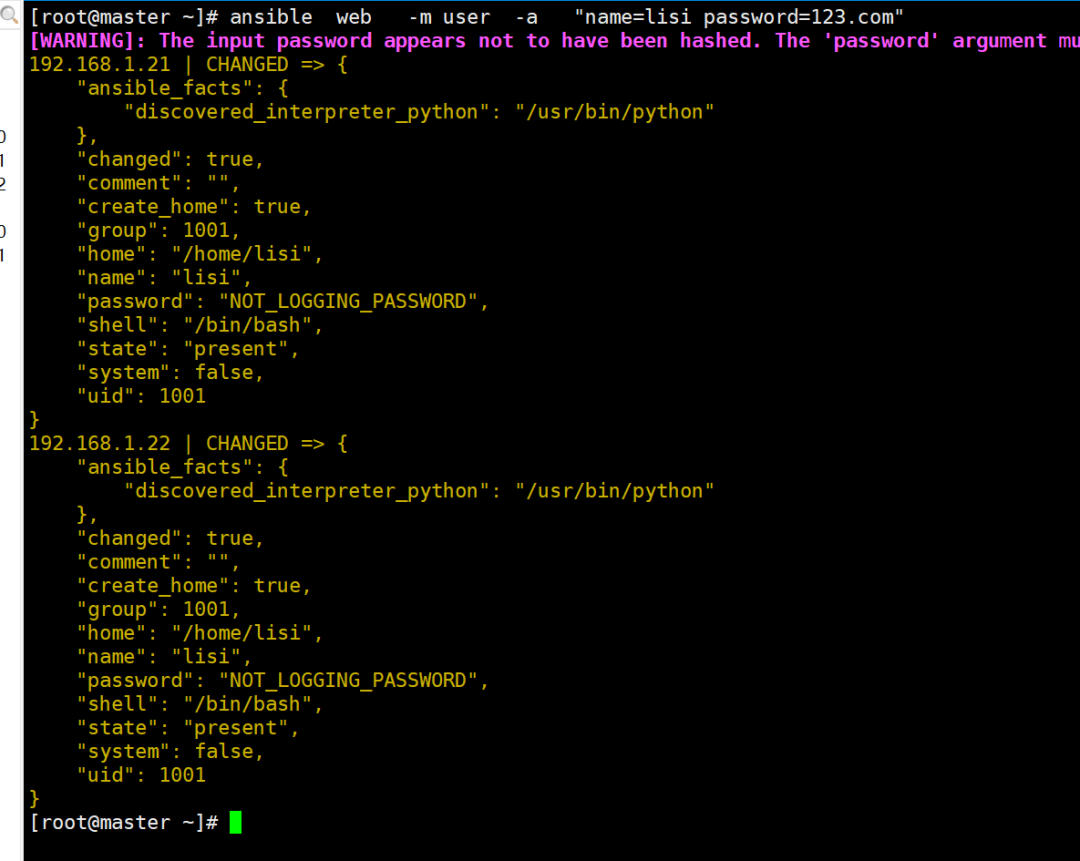
 ansible  web   -m user  -a   "name=lisi password=123.com"
 ansible  web   -m user  -a   "name=php password=123456  shell=/sbin/nologin"  #指定shell创建
删除用户
ansible web -m user -a "name=lisi state=absent"
4.5 git 模块
需要提前创建一个空目录
ansible web -m git -a "repo=https://github.com/ansible/ansible.git dest=/mnt/ansible"
4.6 service模块
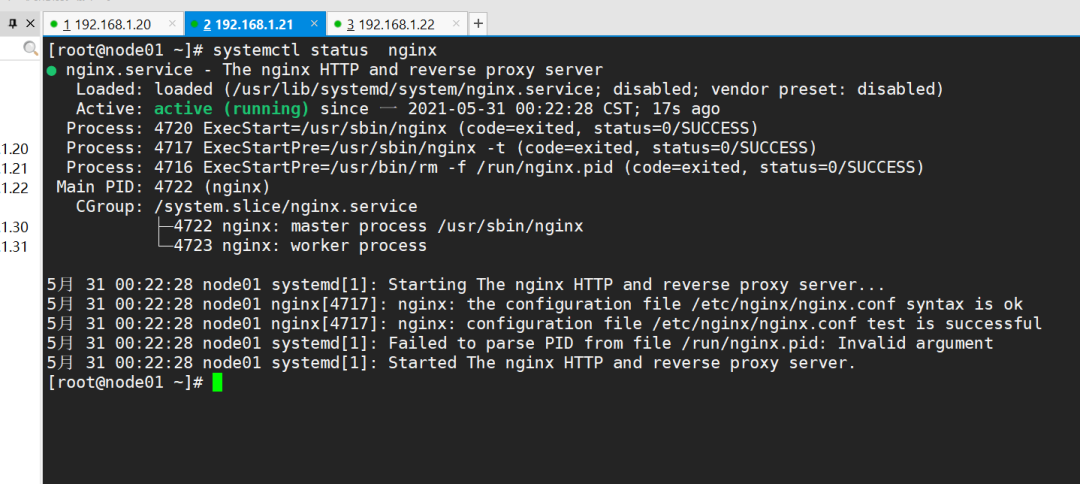
启动nginx服务
ansible web -m service -a "name=nginx state=started"
加入开机自启
ansible web -m service -a "name=nginx enabled=true"
4.7 setup模块获取相应模块信息
打印所有信息
ansible web -m setup
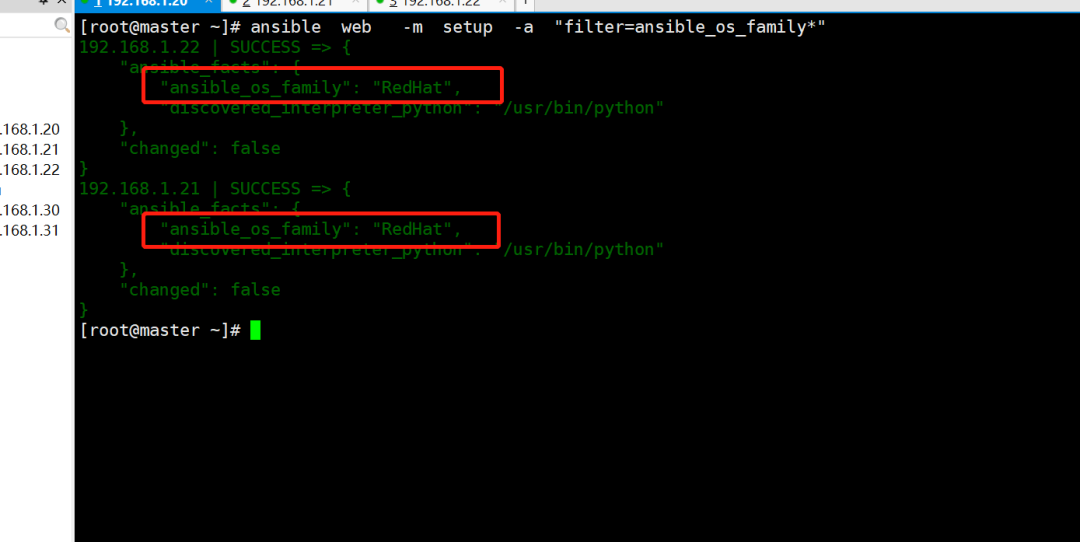
获取系统版本
ansible web -m setup -a "filter=ansible_os_family*"
获取内存信息
ansible web -m setup -a "filter=ansible_*_mb"
文章来自原创,转载请授权
(版权归原作者所有,侵删)
![]()

点击下方“阅读原文”查看更多
评论
