
给 Strapi 应用添加健康检查端点
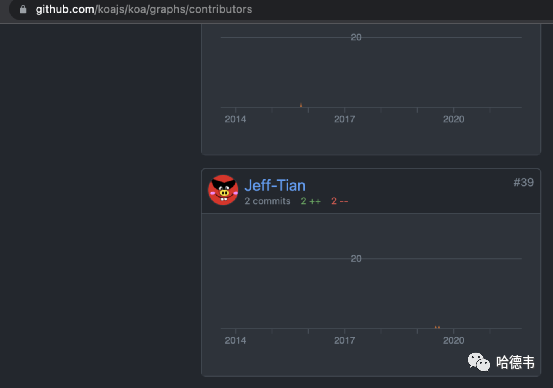
今天继续上周的主题,给 k8s 集群里的服务添加健康检查探针。上一篇《给 SpringBoot 服务添加健康检查》是针对 Java 服务的。除了 java 服务,公司还有一个 CMS 系统部署在 k8s 集群中,基于 Strapi 开发,是一个 nodejs 项目。粗看了一下 Strapi,感觉它的理念和 Koa 很像,仔细看它果然依赖 koa,并且文档中也提到了 Koa。这让我比较激动,毕竟,我也是 Koa 项目的 Contributor(尽管只有一丢丢贡献):
先追求有,再追求好
如同上一篇给 SpringBoot 服务添加健康检查路由一样,本篇介绍只追求有,即添加最简单的实现。要完美的话,还需要写一些额外的代码,以便在一些外部依赖(比如数据库)发生问题时得到通知,并让健康检查端点返回错误。
测试
如同上一篇一样,仍然是在写实现代码前,先把测试写好,即把最终效果写下来,这是一种以终为始的思维方式,有助于避免掉进软件开发的焦油坑:《我是如何从焦油坑里爬出来的》。
添加测试工具
由于项目里没有引入测试工具,先补上:
yarn add --dev jest supertest sqlite3jest 是 Facebook(现在叫 Meta?)开发的测试框架。supertest 用来测试 Web 服务,而 sqlite3 可以简化测试时的数据库依赖。
测试配置
增加 config/env/test/database.json 指定测试时使用 sqlite:
{"defaultConnection": "default","connections": {"default": {"connector": "bookshelf","settings": {"client": "sqlite","filename": ".tmp/test.db"},"options": {"useNullAsDefault": true,"pool": {"min": 0,"max": 1}}}}}
测试命令
在 package.json 里的 scripts 字段中加入测试相关命令:
+ "test": "jest --forceExit --detectOpenHandles"在 package.json 的最后添加:
"jest": {"testPathIgnorePatterns": ["/node_modules/",".tmp",".cache"],"testEnvironment": "node"}
健康检查测试用例
tests/healthz/index.test.js
const Strapi = require('strapi');const http = require('http');const request = require('supertest')let instance;async function setupStrapi() {if (!instance) {/** the following code in copied from `./node_modules/strapi/lib/Strapi.js` */await Strapi().load();instance = strapi; // strapi is global nowawait instance.app.use(instance.router.routes()) // populate KOA routes.use(instance.router.allowedMethods()); // populate KOA methodsinstance.server = http.createServer(instance.app.callback());}return instance;}jest.setTimeout(20000)describe('Health Check', () => {beforeAll(async () => {await setupStrapi()})it('should live', async () => {await request(strapi.server).get('/healthz/liveness').expect(200).then(data => {expect(data.text).toBe('I\'m alive!')})})it('should ready', async()=>{await request(strapi.server).get('/healthz/readiness').expect(200).then(data => {expect(data.text).toBe('I\'m ready!')})})})
实现路由
首先增加 api/healthz 目录
添加路由配置
api/healthz/config/routes.json
{"routes": [{"method": "GET","path": "/healthz","handler": "Healthz.index"},{"method": "GET","path": "/healthz/liveness","handler": "Healthz.liveness"},{"method": "GET","path": "/healthz/readiness","handler": "Healthz.readiness"}]}
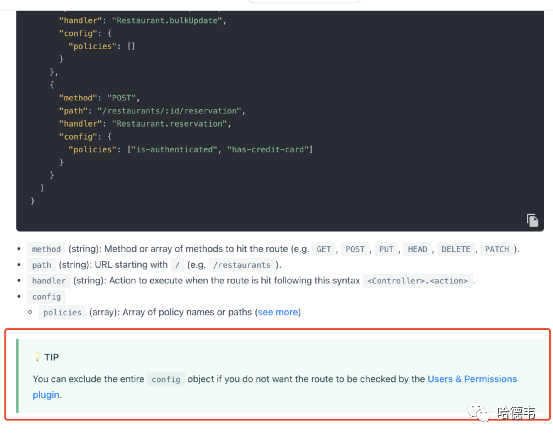
注意,一定不要使用官方的默认示例,不能含有 policies 数组:
{"routes": [{"method": "GET","path": "/healthz","handler": "Healthz.index","config": {"policies": []}}]}
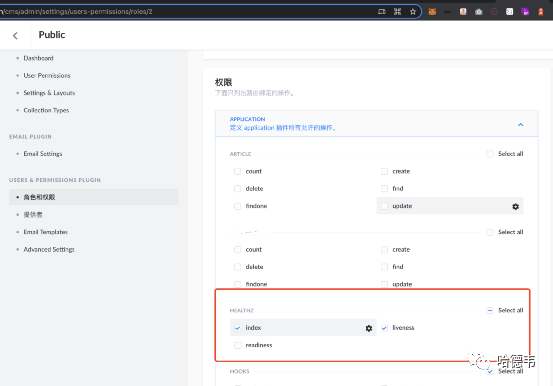
如果这样,运行测试就会得到 403 的错误,原因是它会触发 user permissions 插件的权限检查。尽管你可以通过管理后台配置其权限公开访问:
但是对于健康检查接口,没有必要专门配置权限,直接绕开权限插件即可:
实现路由逻辑
api/healthz/controllers/Healthz.js
module.exports = {// GET /healthzasync index(ctx) {ctx.send('Hello World!')},async readiness(ctx) {ctx.send('I\'m ready!')},async liveness(ctx) {ctx.send('I\'m alive!')},}
运行测试,通过。
添加 deployment 配置
readinessProbe:httpGet:path: /healthz/readinessport: 1337initialDelaySeconds: 30timeoutSeconds: 10livenessProbe:httpGet:path: /healthz/livenessport: 1337initialDelaySeconds: 130timeoutSeconds: 10
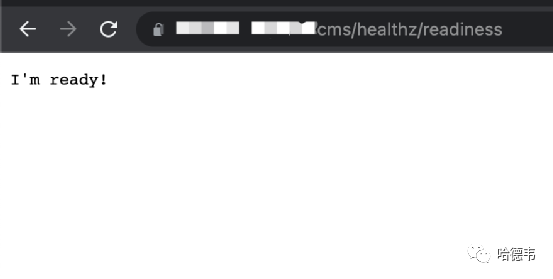
部署后可以验证:
在 k8s 集群里查看是否生效:
kubectl describe pod/your-pod...Containers:cms:Container ID: docker://7245d2d8644d6bcc7c7ff39fdea5e680457c4edf2ff70610a8607c3cef5d3332Image: 13659932xxxx.dkr.ecr.cn-northwest-1.amazonaws.com.cn/cms:cccc1aecImage ID: docker-pullable://13659932xxx.dkr.ecr.cn-northwest-1.amazonaws.com.cn/cms@sha256:bc4317cc2347eb2aed74b8e4e9f39b901b613e4bbc7781e09957e2eb4a0bd0dbPort: 1337/TCPHost Port: 0/TCPState: RunningStarted: Mon, 15 Nov 2021 10:23:42 +0000Ready: TrueRestart Count: 0Limits:cpu: 1memory: 2000MiRequests:cpu: 500mmemory: 1000MiLiveness: http-get http://:1337/healthz/liveness delay=130s timeout=10s period=10s #success=1 #failure=3Readiness: http-get http://:1337/healthz/readiness delay=30s timeout=10s period=10s #success=1 #failure=3Environment Variables from:...
注意以上输出的 Liveness 和 Readiness 部分,小功告成!