Wintun:一款惊艳的 WireGuard 虚拟网卡接口驱动

前一段时间,一直在找寻 windows 操作系统上的虚拟网卡接口,主要是为了搭建隧道使用。但是 windows 操作系统不像 Linux 操作系统,它的代码不开源,导致这方面的资料很少,因此花费了较长时间来寻找相关实现框架,最终找到了两款开源项目的虚拟接口驱动:
Wireguard 项目的 Wintun 接口[1] OpenVPN 的 Tap 接口[2]
这两个项目都是非常出名的搭建隧道的开源 V.P.N 项目。由于目前对 openVPN 项目不太了解,也没有适配 Tap 接口,因此这里重点介绍下 WinTun 接口。此接口实现我是非常非常的喜欢,喜欢到简直不要不要的。
简介
说到 Wintun 项目,就不得不说到它的父亲:WireGuard 项目(以下简称 WG)。Github 传送门[3]
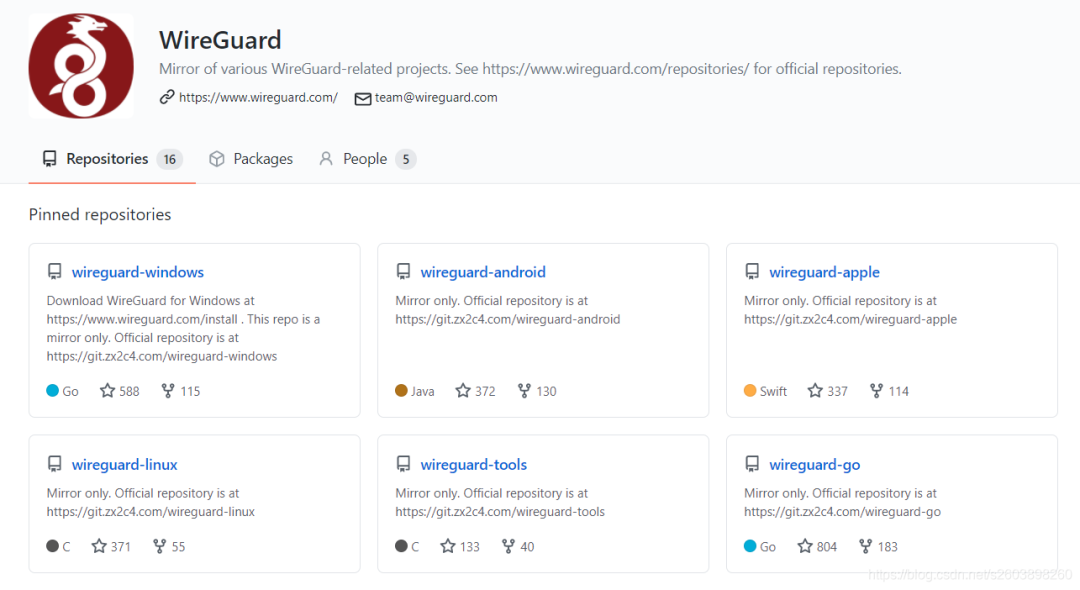
WG 项目作为开源 V.P.N 项目,不同于 OpenVPN, Openswan, Strongswan 等,它的实现非常简介,Linux 内核代码实现不到 4000 行。相对于上述的三个 “按行收费” 的项目(代码 10 万行起步),它简直是太简洁了。故而得到了众多好评,其中就包括 Linux 鼻祖:Linus Torvalds。他的评价如下:
Btw, on an unrelated issue: I see that Jason actually made the pull request to have wireguard included in the kernel.
Can I just once again state my love for it and hope it gets merged soon? Maybe the code isn’t perfect, but I’ve skimmed it, and compared to the horrors that are OpenVPN and IPSec, it’s a work of art.
Linus
简而言之就是:劳资稀罕你,要把你合入我的 Linux 项目中。因此 Linux 内核自 5.6 之后便自带 WG 隧道功能,配置非常的简单。通过几行代码便可以完成一个 WG 隧道:
ip link add dev wg0 type wireguard
ip address add dev wg0 10.0.0.1/24
wg set wg0 listen-port 51820 private-key ./private.key peer NIk5TyDpRDoU9tfIckTTXCsz1eht2aEmdN7l0Q31ow0= allowed-ips 10.0.0.2/32 endpoint 192.168.1.5:51820
ip link set dev wg0 up
配置非常简单。除此之外,还提供了 Windows 客户端,这也是此项目为何包含 Wintun 虚拟网络接口的原因。
客户端页面也是非常简洁,没有多余的东西 (客户端链接[4]):
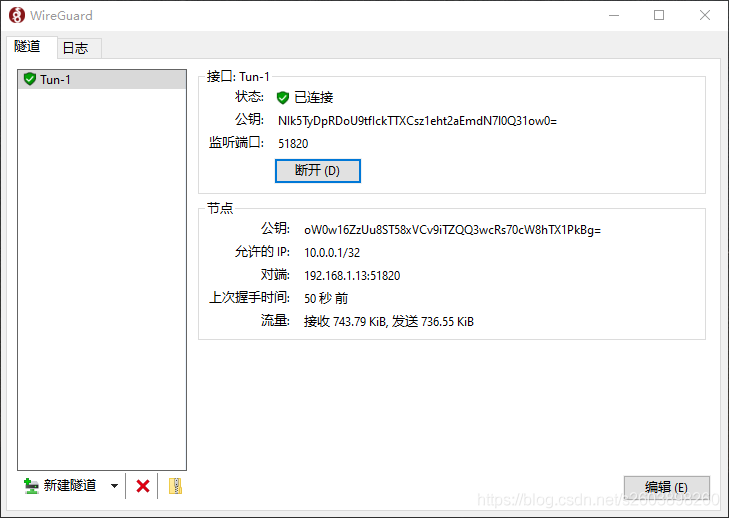
客户端上隧道协商成功之后,会根据隧道名称建立一个虚拟网卡,隧道拆除后接口自动删除。由于我的隧道名称为 Tun-1,因此在 “控制版面” 的“网络连接”中出现了一个 Tun-1 的网络接口:

好了,下面开始介绍此虚拟网络接口。
WinTun 虚拟网络接口

Github 传送门[5]
wintun 官网传送门[6]
常见的 windwos 的接口驱动开发[7]、安装比较复杂。常见的驱动安装包有:.inf 文件、.sys 文件、.cat 文件; 除此之外还涉及驱动程序签名,否则无法安装成功。尤其在开发调试阶段,每次都得签名,太磨叽了。
但是 WinTun 接口用法非常简单高效。非常简单高效。非常简单高效。
引入头文件:wintun.h
加载动态库,解析动态库中的函数指针
它通过动态库中方式来提供接口,我们可以加载此动态库,然后调用动态库中的函数指针来完成虚拟接口的创建、销毁、收发数据包等工作。此外它提供了一个示例供大家学习[8],我便是通过参考开源代码中的示例(example.c),将 Wintun 接口移植到我的工程之中。非常简单,我太喜欢它了。
实例代码就 400 行,其中大部分为 log 信息,供大家查看程序运行状态和报文收发信息。
加载动态库中的函数指针
此函数的作用:
加载动态库,获取到动态库中的函数指针,后面通过函数指针来操作虚拟网卡接口。
static HMODULE
InitializeWintun(void)
{
    HMODULE Wintun =
        LoadLibraryExW(L"wintun.dll", NULL, LOAD_LIBRARY_SEARCH_APPLICATION_DIR | LOAD_LIBRARY_SEARCH_SYSTEM32);
    if (!Wintun)
        return NULL;
#define X(Name, Type) ((Name = (Type)GetProcAddress(Wintun, #Name)) == NULL)
    if (X(WintunCreateAdapter, WINTUN_CREATE_ADAPTER_FUNC) || X(WintunDeleteAdapter, WINTUN_DELETE_ADAPTER_FUNC) ||
        X(WintunDeletePoolDriver, WINTUN_DELETE_POOL_DRIVER_FUNC) || X(WintunEnumAdapters, WINTUN_ENUM_ADAPTERS_FUNC) ||
        X(WintunFreeAdapter, WINTUN_FREE_ADAPTER_FUNC) || X(WintunOpenAdapter, WINTUN_OPEN_ADAPTER_FUNC) ||
        X(WintunGetAdapterLUID, WINTUN_GET_ADAPTER_LUID_FUNC) ||
        X(WintunGetAdapterName, WINTUN_GET_ADAPTER_NAME_FUNC) ||
        X(WintunSetAdapterName, WINTUN_SET_ADAPTER_NAME_FUNC) ||
        X(WintunGetRunningDriverVersion, WINTUN_GET_RUNNING_DRIVER_VERSION_FUNC) ||
        X(WintunSetLogger, WINTUN_SET_LOGGER_FUNC) || X(WintunStartSession, WINTUN_START_SESSION_FUNC) ||
        X(WintunEndSession, WINTUN_END_SESSION_FUNC) || X(WintunGetReadWaitEvent, WINTUN_GET_READ_WAIT_EVENT_FUNC) ||
        X(WintunReceivePacket, WINTUN_RECEIVE_PACKET_FUNC) ||
        X(WintunReleaseReceivePacket, WINTUN_RELEASE_RECEIVE_PACKET_FUNC) ||
        X(WintunAllocateSendPacket, WINTUN_ALLOCATE_SEND_PACKET_FUNC) || X(WintunSendPacket, WINTUN_SEND_PACKET_FUNC))
#undef X
    {
        DWORD LastError = GetLastError();
        FreeLibrary(Wintun);
        SetLastError(LastError);
        return NULL;
    }
    return Wintun;
}
main() 函数
作用:
通过函数指针创建虚拟网卡 创建虚拟网卡的收发线程
int
main(void)
{
    HMODULE Wintun = InitializeWintun();
    if (!Wintun)
        return LogError(L"Failed to initialize Wintun", GetLastError());
    WintunSetLogger(ConsoleLogger);
    Log(WINTUN_LOG_INFO, L"Wintun library loaded");
    WintunEnumAdapters(L"Example", PrintAdapter, 0);

    DWORD LastError;
    HaveQuit = FALSE;
    QuitEvent = CreateEventW(NULL, TRUE, FALSE, NULL);
    if (!QuitEvent)
    {
        LastError = LogError(L"Failed to create event", GetLastError());
        goto cleanupWintun;
    }
    if (!SetConsoleCtrlHandler(CtrlHandler, TRUE))
    {
        LastError = LogError(L"Failed to set console handler", GetLastError());
        goto cleanupQuit;
    }

    GUID ExampleGuid = { 0xdeadbabe, 0xcafe, 0xbeef, { 0x01, 0x23, 0x45, 0x67, 0x89, 0xab, 0xcd, 0xef } };
    WINTUN_ADAPTER_HANDLE Adapter = WintunOpenAdapter(L"Example", L"Demo");
    if (!Adapter)
    {
        Adapter = WintunCreateAdapter(L"Example", L"Demo", &ExampleGuid, NULL);
        if (!Adapter)
        {
            LastError = GetLastError();
            LogError(L"Failed to create adapter", LastError);
            goto cleanupQuit;
        }
    }

    DWORD Version = WintunGetRunningDriverVersion();
    Log(WINTUN_LOG_INFO, L"Wintun v%u.%u loaded", (Version >> 16) & 0xff, (Version >> 0) & 0xff);

    MIB_UNICASTIPADDRESS_ROW AddressRow;
    InitializeUnicastIpAddressEntry(&AddressRow);
    WintunGetAdapterLUID(Adapter, &AddressRow.InterfaceLuid);
    AddressRow.Address.Ipv4.sin_family = AF_INET;
    AddressRow.Address.Ipv4.sin_addr.S_un.S_addr = htonl((10 << 24) | (6 << 16) | (7 << 8) | (7 << 0)); /* 10.6.7.7 */
    AddressRow.OnLinkPrefixLength = 24; /* This is a /24 network */
    LastError = CreateUnicastIpAddressEntry(&AddressRow);
    if (LastError != ERROR_SUCCESS && LastError != ERROR_OBJECT_ALREADY_EXISTS)
    {
        LogError(L"Failed to set IP address", LastError);
        goto cleanupAdapter;
    }

    WINTUN_SESSION_HANDLE Session = WintunStartSession(Adapter, 0x400000);
    if (!Session)
    {
        LastError = LogLastError(L"Failed to create adapter");
        goto cleanupAdapter;
    }

    Log(WINTUN_LOG_INFO, L"Launching threads and mangling packets...");

    HANDLE Workers[] = { CreateThread(NULL, 0, (LPTHREAD_START_ROUTINE)ReceivePackets, (LPVOID)Session, 0, NULL),
                         CreateThread(NULL, 0, (LPTHREAD_START_ROUTINE)SendPackets, (LPVOID)Session, 0, NULL) };
    if (!Workers[0] || !Workers[1])
    {
        LastError = LogError(L"Failed to create threads", GetLastError());
        goto cleanupWorkers;
    }
    WaitForMultipleObjectsEx(_countof(Workers), Workers, TRUE, INFINITE, TRUE);
    LastError = ERROR_SUCCESS;

cleanupWorkers:
    HaveQuit = TRUE;
    SetEvent(QuitEvent);
    for (size_t i = 0; i < _countof(Workers); ++i)
    {
        if (Workers[i])
        {
            WaitForSingleObject(Workers[i], INFINITE);
            CloseHandle(Workers[i]);
        }
    }
    WintunEndSession(Session);
cleanupAdapter:
    WintunDeleteAdapter(Adapter, FALSE, NULL);
    WintunFreeAdapter(Adapter);
cleanupQuit:
    SetConsoleCtrlHandler(CtrlHandler, FALSE);
    CloseHandle(QuitEvent);
cleanupWintun:
    FreeLibrary(Wintun);
    return LastError;
}
收发报文的接口操作也非常简单,但是与 windows 网络协议栈之间的关系仍需要继续摸索。
特别说明
Wintun 接口是严格意义上的 3 层逻辑接口。原文如下:
Wintun is a very simple and minimal TUN driver for the Windows kernel, which provides userspace programs with a simple network adapter for reading and writing packets. It is akin to Linux's /dev/net/tun and BSD's /dev/tun. Originally designed for use in WireGuard, Wintun is meant to be generally useful for a wide variety of layer 3 networking protocols and experiments. The driver is open source, so anybody can inspect and build it. Due to Microsoft's driver signing requirements, we provide precompiled and signed versions that may be distributed with your software. The goal of the project is to be as simple as possible, opting to do things in the most pure and straight-forward way provided by NDIS.
这里出现了一个小小的问题:Wireshark 上无法抓取此接口报文。如果想看封装后的报文信息,则需要单独记录日志而非抓包来完成。
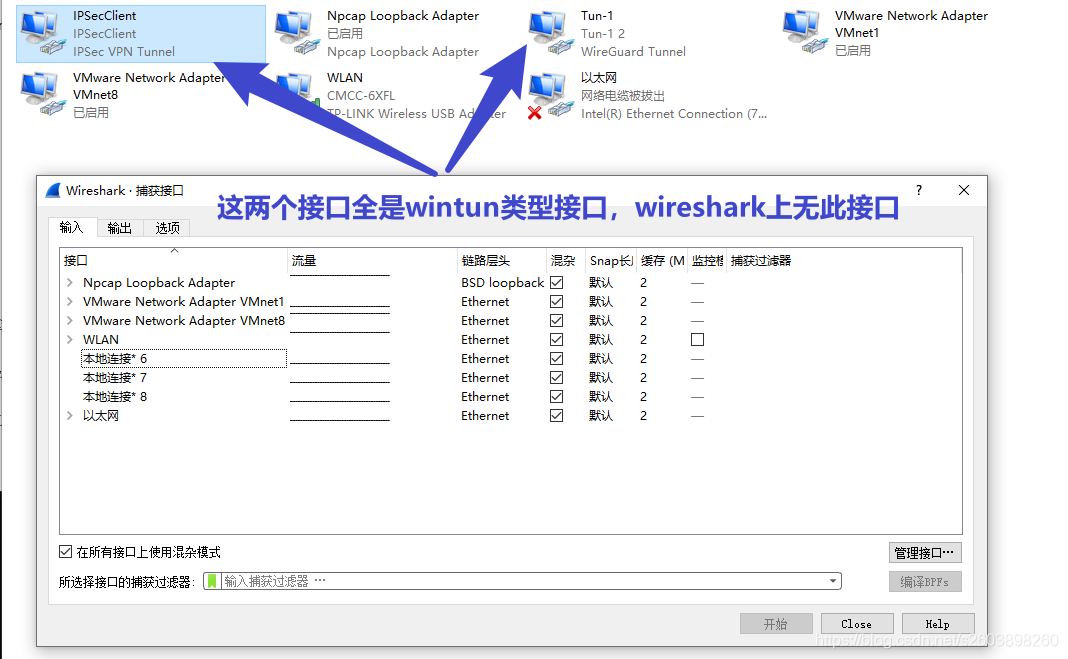
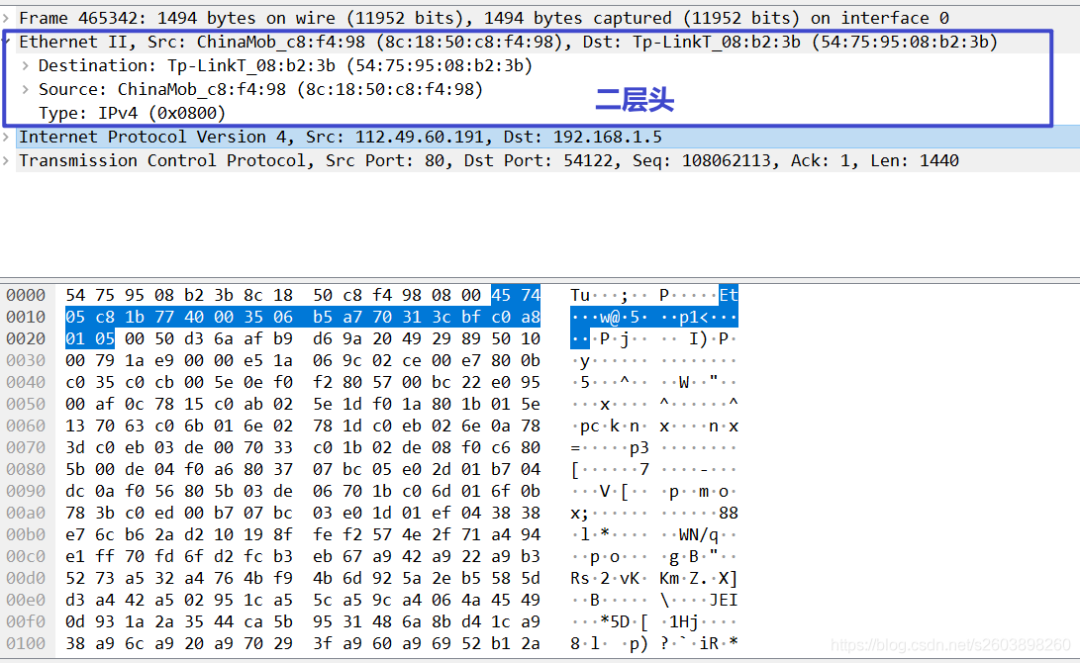
导致这个问题原因没有找到,我认为是:wireshark 抓取的报文是二层报文 (一个完整的以太网帧),而 3 层逻辑接口上的报文尚未封装以太网帧,故无法抓取此接口。这只是个人猜测,根本原因不得而知。
好了,基本介绍完毕,重新表达下我对 WireGuard 和 WinTun 的态度:劳资稀罕你,very 喜欢。
脚注
Wireguard 项目的 Wintun 接口: https://github.com/WireGuard
[2]OpenVPN 的 Tap 接口: https://github.com/Toney-Sun/openvpn
[3]Github 传送门: https://github.com/WireGuard
[4]客户端链接: https://www.wireguard.com/install/
[5]Github 传送门: https://github.com/Toney-Sun/wintun
[6]wintun 官网传送门: https://www.wintun.net/
[7]windwos 的接口驱动开发: https://docs.microsoft.com/zh-cn/windows-hardware/drivers/install/components-of-a-driver-package
[8]它提供了一个示例供大家学习: https://git.zx2c4.com/wintun/tree/example/example.c
原文链接:https://blog.csdn.net/s2603898260/article/details/117389372


你可能还喜欢
点击下方图片即可阅读

云原生是一种信仰 🤘
关注公众号
后台回复◉k8s◉获取史上最方便快捷的 Kubernetes 高可用部署工具,只需一条命令,连 ssh 都不需要!


点击 "阅读原文" 获取更好的阅读体验!
发现朋友圈变“安静”了吗?


