
Node+Redis进行API速率限制的方法介绍
为什么要速率限制?

保障服务和资源不被“淹没”。
缓和暴力攻击
防止分布式拒绝服务(DDOS)攻击
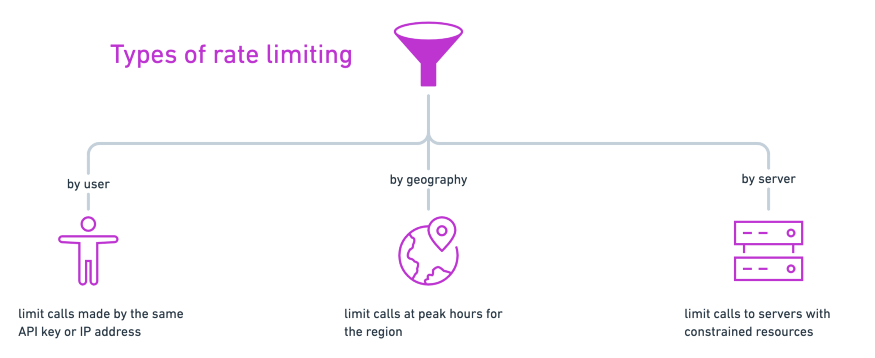
如何实施限速?
按用户:跟踪用户使用API密钥、访问令牌或IP地址进行的调用
按地理区域划分:例如降低每个地理区域在一天的高峰时段的速率限制
按服务器:如果你有多个服务器处理对API的不同调用,你可能会对访问更昂贵的资源实施更严格的速率限制。
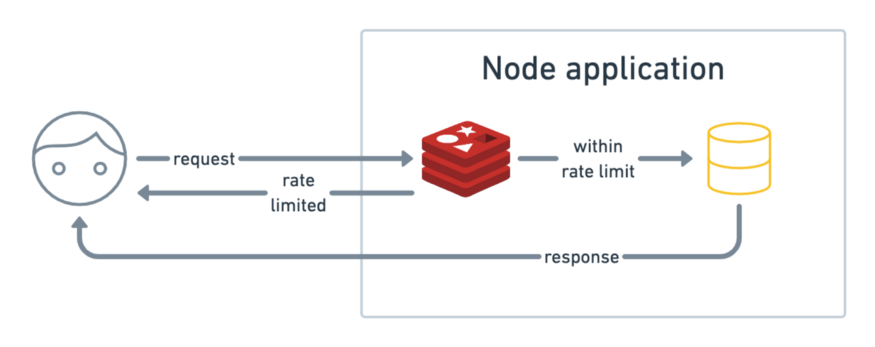
创建一个Node应用
使用Redis添加速率限制器
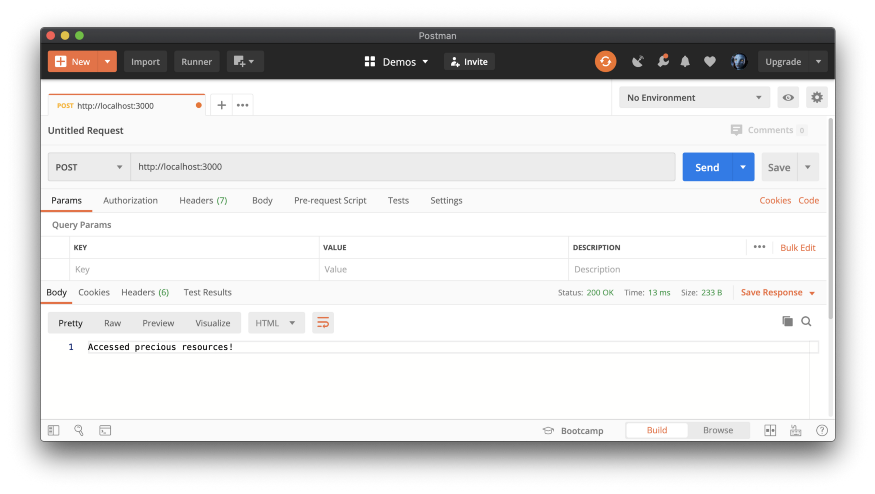
在Postman中测试
步骤1:建立Node应用程序
$ npm init --yes
$ touch index.js
index.js 中初始化服务器。const express = require('express')const app = express()const port = process.env.PORT || 3000app.get('/', (req, res) => res.send('Hello World!'))app.listen(port, () => console.log(`Example app listening at http://localhost:${port}`))
$ node index.js
app.post('/', async (req, res) => {async function isOverLimit(ip) {// to define}// 检查率限制let overLimit = await isOverLimit(req.ip)if (overLimit) {res.status(429).send('Too many requests - try again later')return}// 允许访问资源res.send("Accessed the precious resources!")})
步骤2:使用Redis添加速率限制器
存储一个像用户IP地址一样的key。
增加从该IP发出的调用数量
在指定时间段后使记录过期

npm install ioredis
redis-server
const redis = require('ioredis')const client = redis.createClient({port: process.env.REDIS_PORT || 6379,host: process.env.REDIS_HOST || 'localhost',})client.on('connect', function () {console.log('connected');});
async function isOverLimit(ip) {let restry {res = await client.incr(ip)} catch (err) {console.error('isOverLimit: could not increment key')throw err}console.log(`${ip} has value: ${res}`)if (res > 10) {return true}client.expire(ip, 10)}
步骤3:在Postman中进行测试

关于限速的最终想法
在响应正文或作为 Retry-after 标头中,让用户知道在重试之前应该等待多少时间
记录达到速率限制的请求,以了解用户行为并警告恶意攻击
尝试使用其他速率限制算法或其他中间件
❤️爱心三连击 1.看到这里了就点个在看支持下吧,你的「点赞,在看」是我创作的动力。
2.关注公众号
程序员成长指北,回复「1」加入高级前端交流群!「在这里有好多 前端 开发者,会讨论 前端 Node 知识,互相学习」!3.也可添加微信【ikoala520】,一起成长。
“在看转发”是最大的支持
评论