GitHub Actions 部署 VuePress 文档

GitHub Actions 是 GitHub 的持续集成服务,于2018年10月推出。这些天,我一直在试用,觉得它非常强大,有创意,比 Travis CI 玩法更多。
本文是一个简单教程,演示如何使用 GitHub Actions 自动发布一个 VuePress 应用到 GitHub Pages。
VuePress 文档
官方文档:链接[1]
1.创建并进入一个新目录
mkdir vuepress-starter && cd vuepress-starter2.使用你喜欢的包管理器进行初始化
yarn init # npm init3.将 VuePress 安装为本地依赖
yarn add -D vuepress 4.创建你的第一篇文档
mkdir docs && echo '# Hello VuePress' > docs/README.md5.在 package.json 中添加一些 scripts (opens new window)
{"scripts": {"docs:dev": "vuepress dev docs","docs:build": "vuepress build docs"}}
6.在本地启动服务器
yarn docs:dev # npm run docs:devVuePress 会在 http://localhost:8080 (opens new window) 启动一个热重载的开发服务器。
7.在 docs/.vuepress/config.js 中设置正确的 base。
如果你打算发布到 https://<USERNAME or GROUP>.github.io/,则可以省略这一步,因为 base 默认即是 "/"。
如果你打算发布到 https://<USERNAME or GROUP>.github.io/<REPO>/(也就是说你的仓库在 https://github.com/<USERNAME>/<REPO>),则将 base 设置为 "/<REPO>/"。
创建 GitHub Actions
大家知道,持续集成由很多操作组成,比如抓取代码、运行测试、登录远程服务器,发布到第三方服务等等。GitHub 把这些操作就称为 actions。
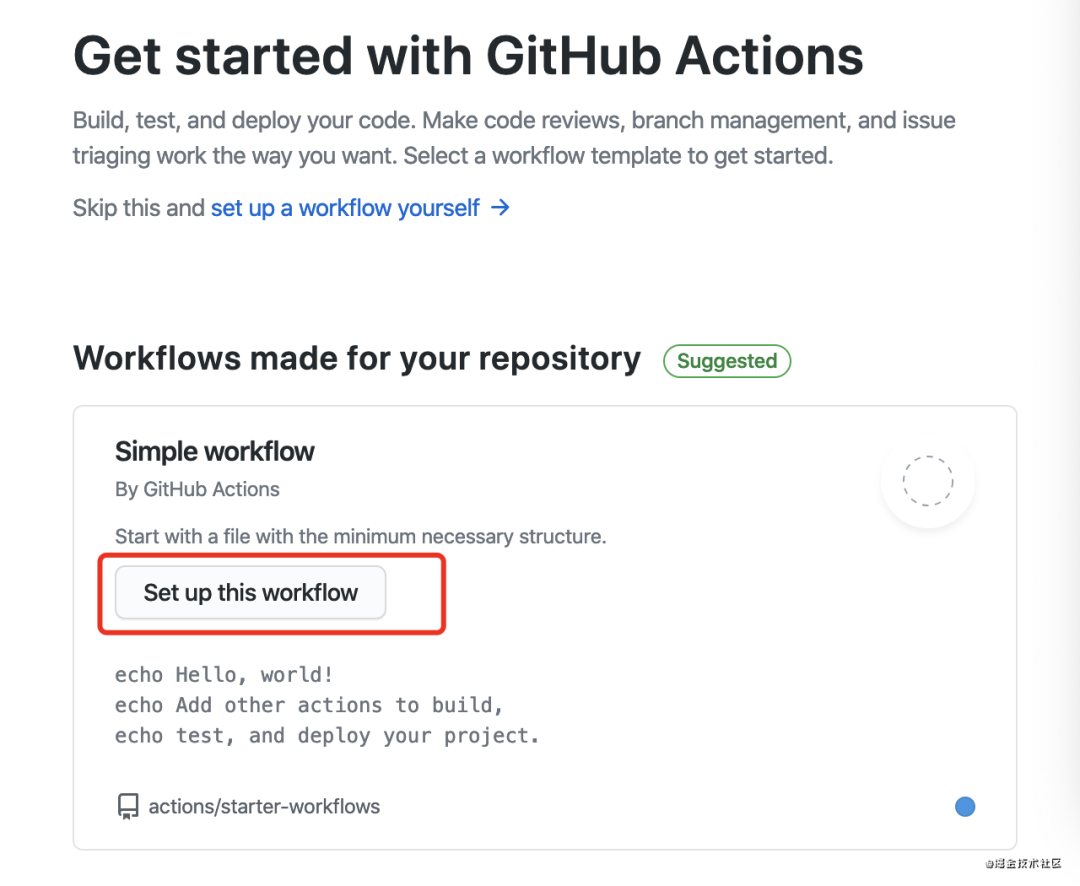
在仓库菜单栏中选择 Actions 进入到创建页面。


简单的修改自己需要执行的命令:
# This is a basic workflow to help you get started with Actionsname: CI# Controls when the action will run.on:# Triggers the workflow on push or pull request events but only for the master branchpush:branches: [ master ]pull_request:branches: [ master ]# Allows you to run this workflow manually from the Actions tabworkflow_dispatch:# A workflow run is made up of one or more jobs that can run sequentially or in paralleljobs:# This workflow contains a single job called "build"build:# The type of runner that the job will run on: ubuntu-latest# Steps represent a sequence of tasks that will be executed as part of the jobsteps:# Checks-out your repository under $GITHUB_WORKSPACE, so your job can access ituses: actions/checkout@v2# Runs a single command using the runners shellname: Run a ci scriptrun: npm ciname: Run a docs scriptenv:TOKEN: ${{secrets.HEXO_DEPLOY_PRIVATE_KEY}}run: npm run docs# Runs a set of commands using the runners shellname: Run a multi-line scriptrun: |echo Add other actions to build,echo test, and deploy your project.
GitHub Actions 的配置文件叫做 workflow 文件,存放在代码仓库的.github/workflows目录。
workflow 文件采用 YAML 格式,文件名可以任意取,但是后缀名统一为 .yml,比如 foo.yml。一个库可以有多个 workflow 文件。GitHub 只要发现 .github/workflows 目录里面有 .yml 文件,就会自动运行该文件。
关于详细的字段介绍可以参考这篇文章:链接[2]。
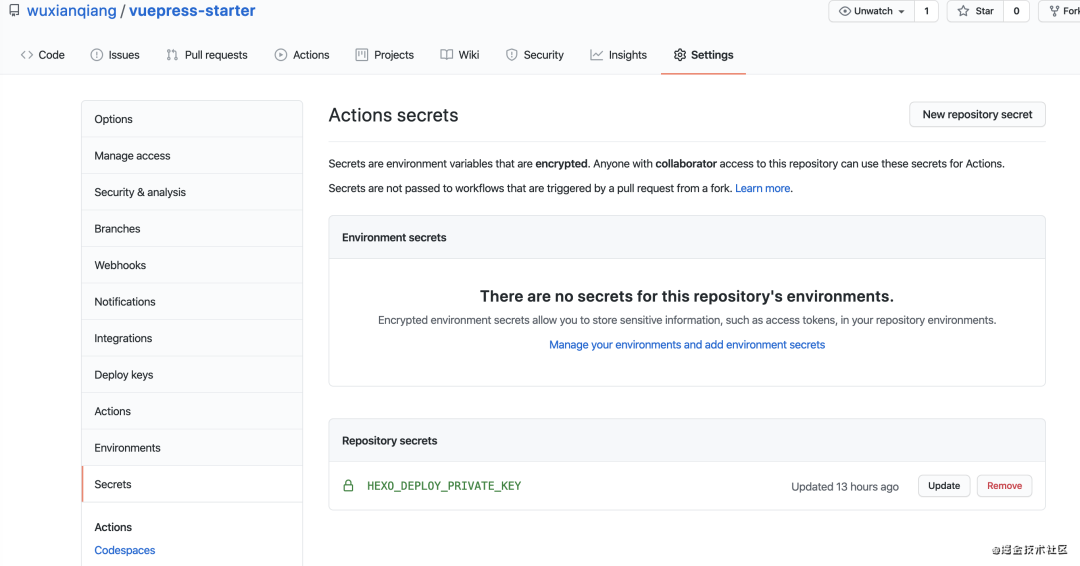
因为代码中定义了一个环境变量 TOKEN: ${{secrets.HEXO_DEPLOY_PRIVATE_KEY}} 用来 git ssh 免密登录的,如果不配置就无法 git push 这些操作。
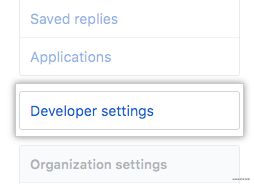
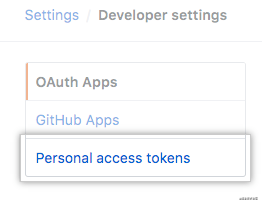
这个示例需要将构建成果发到 GitHub 仓库,因此需要 GitHub 密钥。按照官方文档:链接[3],生成一个密钥。


然后,将这个密钥储存到当前仓库的 Settings/Secrets 里面。

最后创建文件 build/update-docs.sh 用来执行 bash 脚本。
# Preparecd docsrm -rf .vuepress/dist# Buildvuepress build# Publish to GitHub Pagescd .vuepress/distgit initgit config user.name "wuxianqiang"git config user.email "2631640352@qq.com"git add -Agit commit -m "[vuepress] update docs"git push --force "https://${TOKEN}@github.com/wuxianqiang/vuepress-starter.git" "master:gh-pages"# Cleanupcd ../..rm -rf .vuepress/dist
在 package.json 中加一行 scripts 命令。
{"scripts": {"docs:dev": "vuepress dev docs","docs:build": "vuepress build docs","docs": "bash ./build/update-docs.sh"}}
最后提交代码,就会自动执行 Actions 将部署 VuePress 文档到 GitHub Pages。我们就可以访问页面了,而且之后的每一次提交都会自动执行然后去更新文档的内容,这样确实会方便很多。
项目演示地址:链接[4]
References
[1] 链接: https://vuepress.vuejs.org/zh/guide/getting-started.html[2] 链接: http://www.ruanyifeng.com/blog/2019/09/getting-started-with-github-actions.html[3] 链接: https://docs.github.com/en/github/authenticating-to-github/creating-a-personal-access-token[4] 链接: https://github.com/wuxianqiang/vuepress-starter
