骚操作 !IDEA 防止写代码沉迷插件 !
阅读本文大概需要 3.5 分钟。

前言
安装使用教程
安装
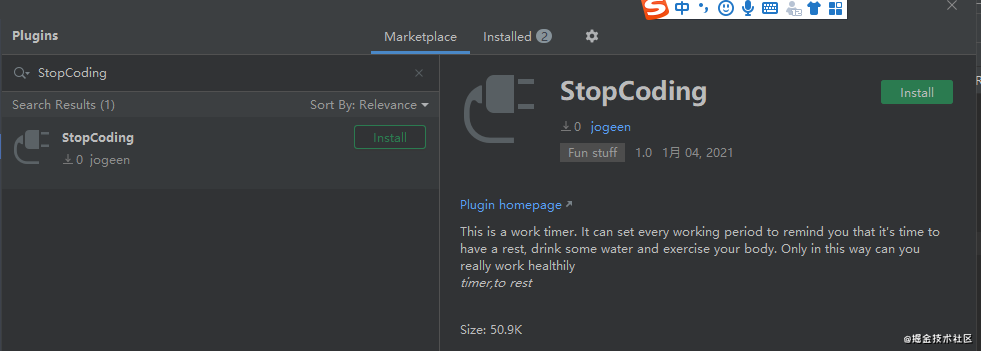
在 IDEA 中直接搜索安装 StopCoding 插件(官方已经审核通过)
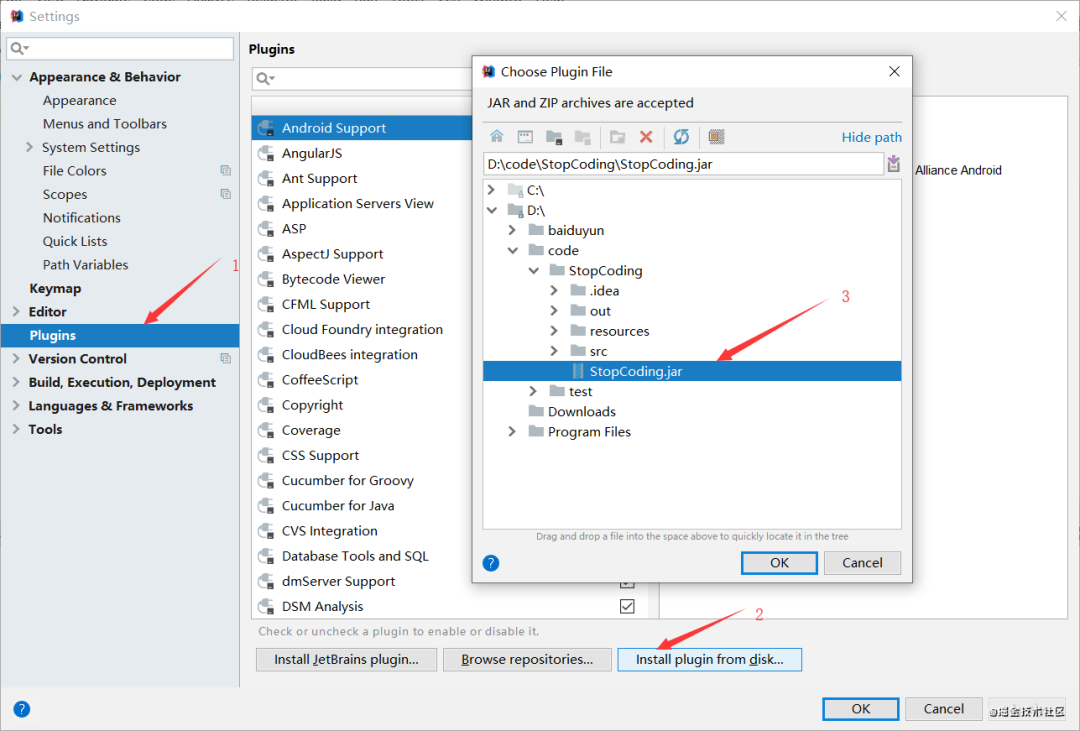
本地安装:
使用
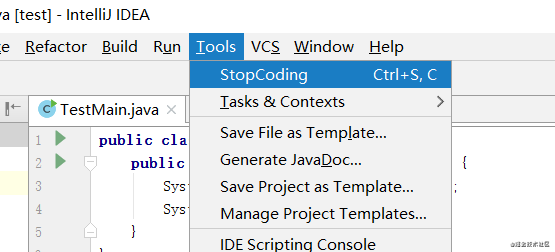
Step1. 然后在菜单栏中 tools->StopCoding
Step2. 设置适合你的参数然后保存。
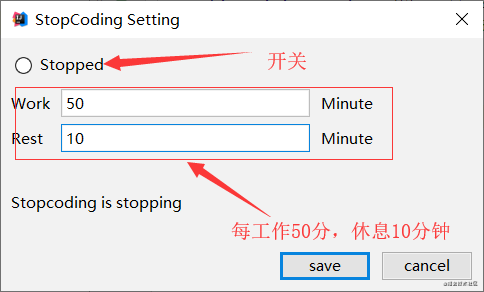
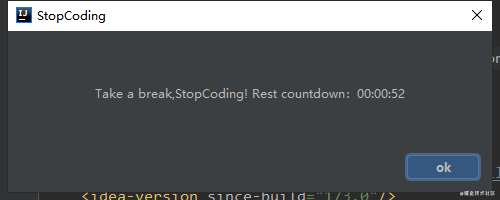
Step3. 然后快乐的 Coding 吧,再不用担心自己会沉迷了。工作时间结束,她会弹出下框进行提醒,当然,这个框是关不掉的.只有你休息了足够的时间它才会自动关闭.
开发教程
技术范围
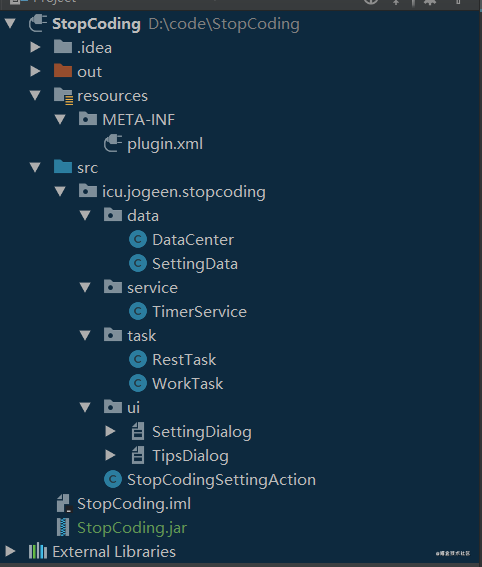
插件工程的基本结构 Swing 主要负责两个对话框的交互 Timer 作为最基本的定时器选择
插件工程结构
plugin.xml
data
SettingData:配置信息对应 modelDataCenter:作为运行时的数据中心,都是些静态的全局变量service
TimerService:这个定时计算的核心代码task
RestTask:休息时的定时任务WorkTask:工作时的定时任务ui
SettingDialog:设置信息的对话框TipsDialog: 休息时提醒的对话框StopCodingSettingAction:启动入口的 action
Swing
创建对话框
Step1
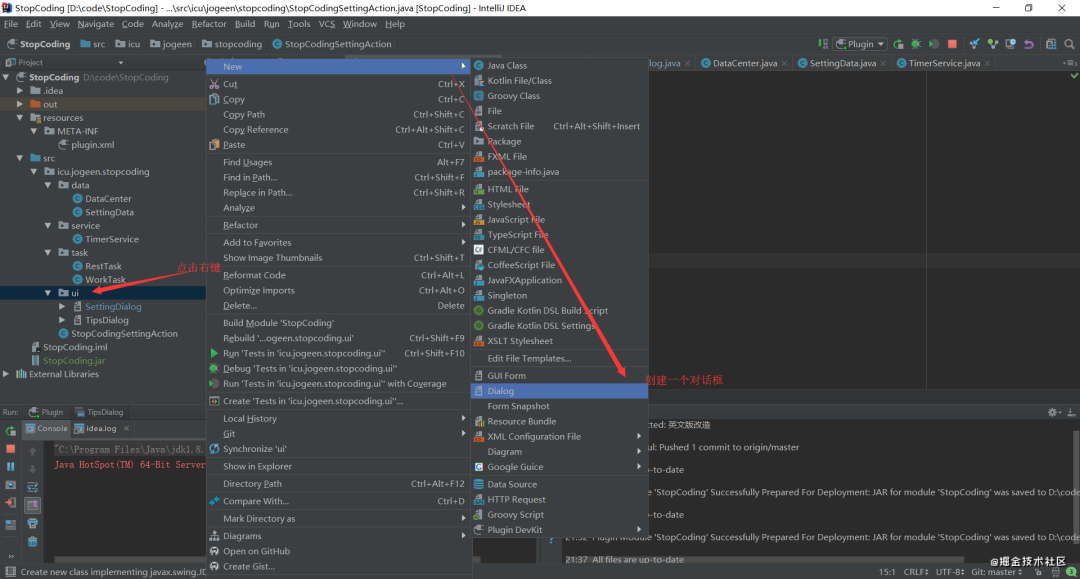
Step2
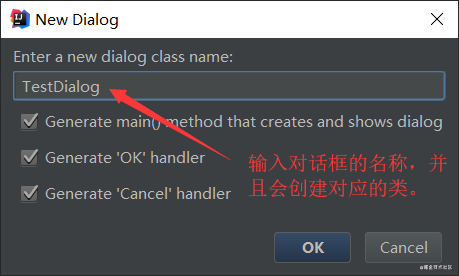
Step3
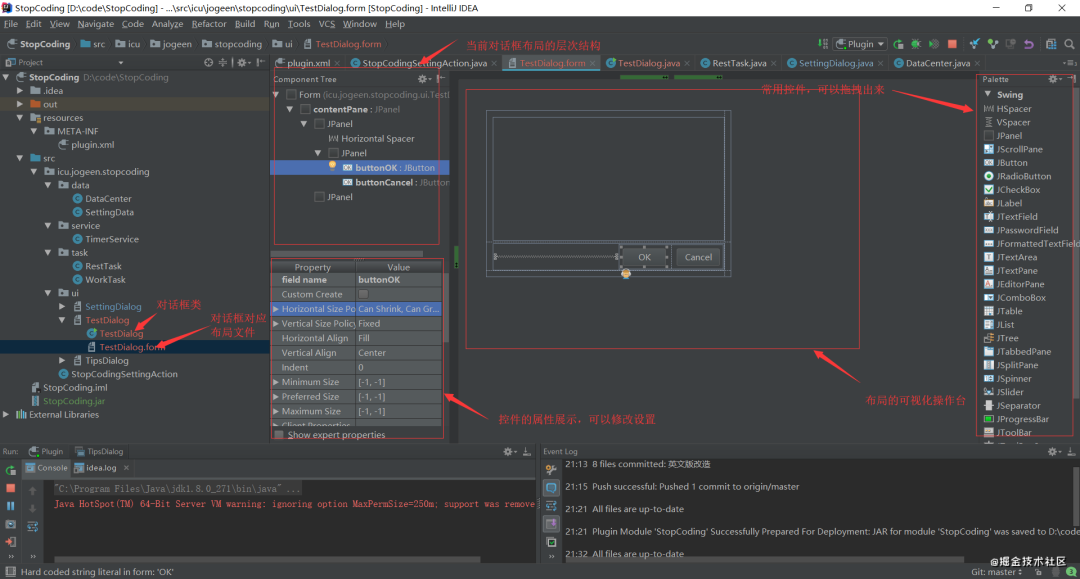
注:这里并没有详细的展开 Swing 的讲解,因为界面的这个东西,需要大家多去自己实践。这里就不做手册式的赘述了。
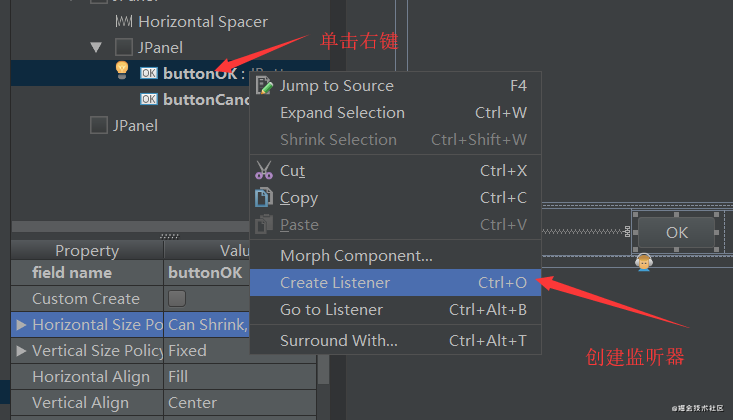
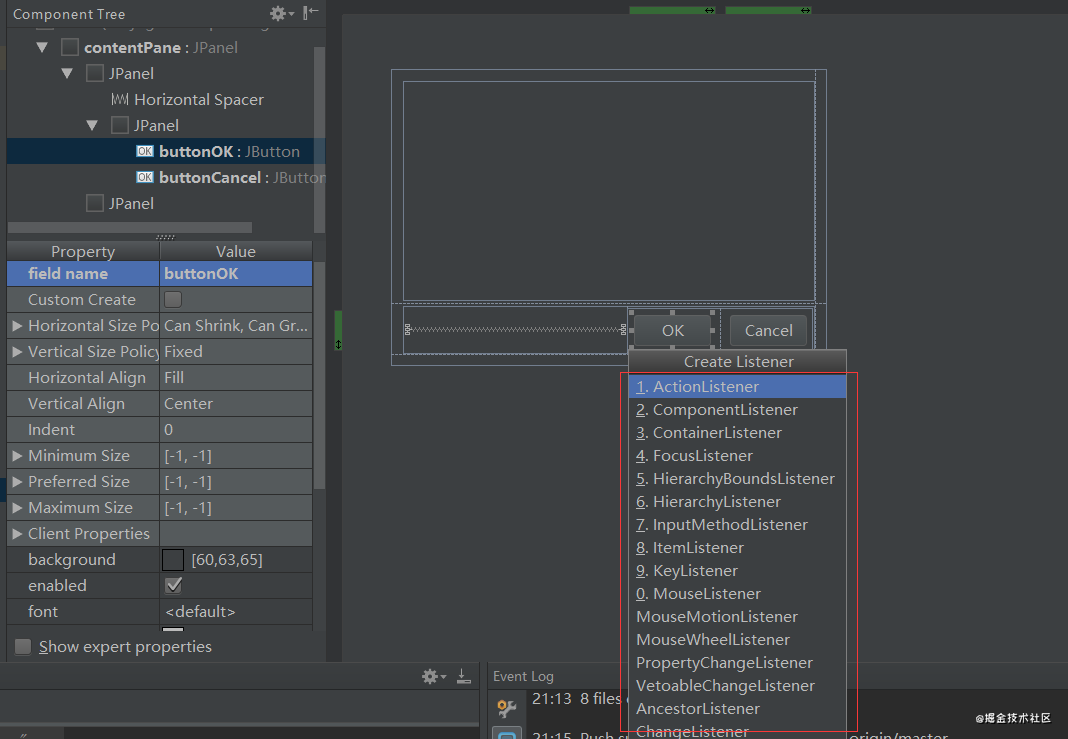
添加事件
public class TestDialog extends JDialog {
    private JPanel contentPane;
    private JButton buttonOK;
    private JButton buttonCancel;

    public TestDialog() {
        setContentPane(contentPane);
        setModal(true);
        getRootPane().setDefaultButton(buttonOK);

        buttonOK.addActionListener(new ActionListener() {
            public void actionPerformed(ActionEvent e) {
                onOK();
            }
        }); //这是给OK按钮绑定点击事件的监听器

        buttonCancel.addActionListener(new ActionListener() {
            public void actionPerformed(ActionEvent e) {
                onCancel();
            }
        });//这是给取消按钮绑定点击事件的监听器
    //其他代码
    }
step1
step2
Timer 定时器
构造方法

成员防范
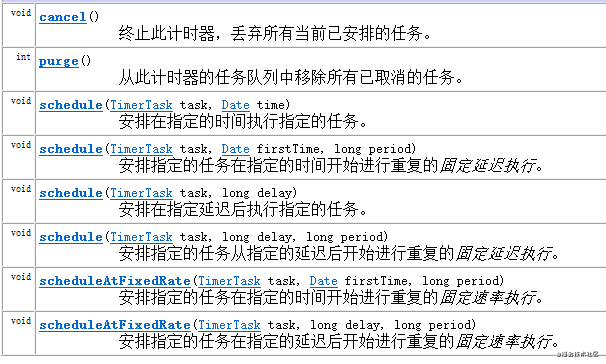
主要是 schedule 去添加一个定时任务,和使用 cancel 去取消任务停止定时器。
最后
推荐阅读:
切记!MySQL中ORDER BY与LIMIT 不要一起用,有大坑
10 分钟使用 Spring Boot + Vue + Antd + US3 搭建自己的图床
微信扫描二维码,关注我的公众号
朕已阅 

