执行webpack发生了什么?

本文主要介绍 webpack 和 webpack-cli 模块的关系和部分源码分析。
webpack4.0 以后,似乎执行方式就发生了改变,不再是 webpack 一波流,而是多了一个 webpack-cli。webpack3 中 webpack-cli 是合在 webpack 中。所以在命令行运行 webpack 命令的同时,会提示让你再装一个 webpack-cli。
执行脚本到打包结束流程
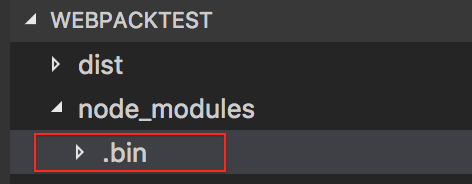
1、当我们安装了webpack 模块后,就会在 node_modules/.bin 目录下生成一个 webpack。

在本地环境下,可执行文件放在 node_modules 下的 .bin 文件夹中,npm 为 scripts 字段中的脚本路径自动添加了 node_modules/.bin 前缀,所以可以直接写。
"scripts": {"start": "webpack"}
而不是
"scripts": {"start": "node_modules/.bin webpack"}
2、执行 node_modules/.bin/webpack 首先会判断是否安装了 webpack-cli 模块,如果没有安装 webpack-cli 模块就会引导用户去安装,如果已经安装了 webpack-cli 模块,就会去执行 node_modules/webpack-cli/bin/cli 文件。
// node_modules/webpack-cli/bin/cliconst runCLI = require('../lib/bootstrap');runCLI(process.argv, originalModuleCompile);
node_modules/webpack-cli/bin/cli 使用了 node_modules/webpack-cli/lib/bootstrap
// node_modules/webpack-cli/lib/bootstrapconst runCLI = async (args, originalModuleCompile) => {try {// Create a new instance of the CLI objectconst cli = new WebpackCLI();cli._originalModuleCompile = originalModuleCompile;await cli.run(args);} catch (error) {utils.logger.error(error);process.exit(2);}};
然后 node_modules/webpack-cli/lib/webpack-cli 会导入 webpack,使用 node_modules/webpack/lib/index 模块,在此模块中会真正创建 compiler 编译对象。
// node_modules/webpack-cli/lib/webpack-cliclass WebpackCLI {constructor() {this.webpack = require('webpack');}async createCompiler(options, callback) {let compiler;try {compiler = this.webpack(config.options,);} catch (error) {if (this.isValidationError(error)) {this.logger.error(error.message);} else {this.logger.error(error);}process.exit(2);}return compiler;}}
执行 node_modules/webpack/lib/index 文件,会再执行 node_modules/webpack/lib/weback 模块。
然后会调用 node_modules/webpack/lib/Compiler 得到一个 Compiler 函数,运行 Compiler 函数,返回一个 compiler 对象,执行 compiler 中的 run 方法,开始编译。
// node_modules/webpack/lib/webackconst Compiler = require("./Compiler");const compiler = new Compiler(options.context);compiler.run((err, stats) => {compiler.close(err2 => {callback(err || err2, stats);});});
